In the field of beauty and portrait photography, the eyes are one of the most important elements. They add depth and expression to your image. In this guide, you will learn how to purposefully emphasize eyes in your pictures to achieve a real wow effect. Through simple but effective steps, you can enhance the eye color and add more contrast.
Key Takeaways
- Use adjustment layers to make precise hue adjustments.
- Keep the colors subtle to maintain a natural look.
- Use masking techniques to apply the effect only to the eyes and leave other areas of the image untouched.
Step-by-Step Guide
To start, open your image in your preferred image editing software. Choose the photo in which you want to emphasize the eyes.
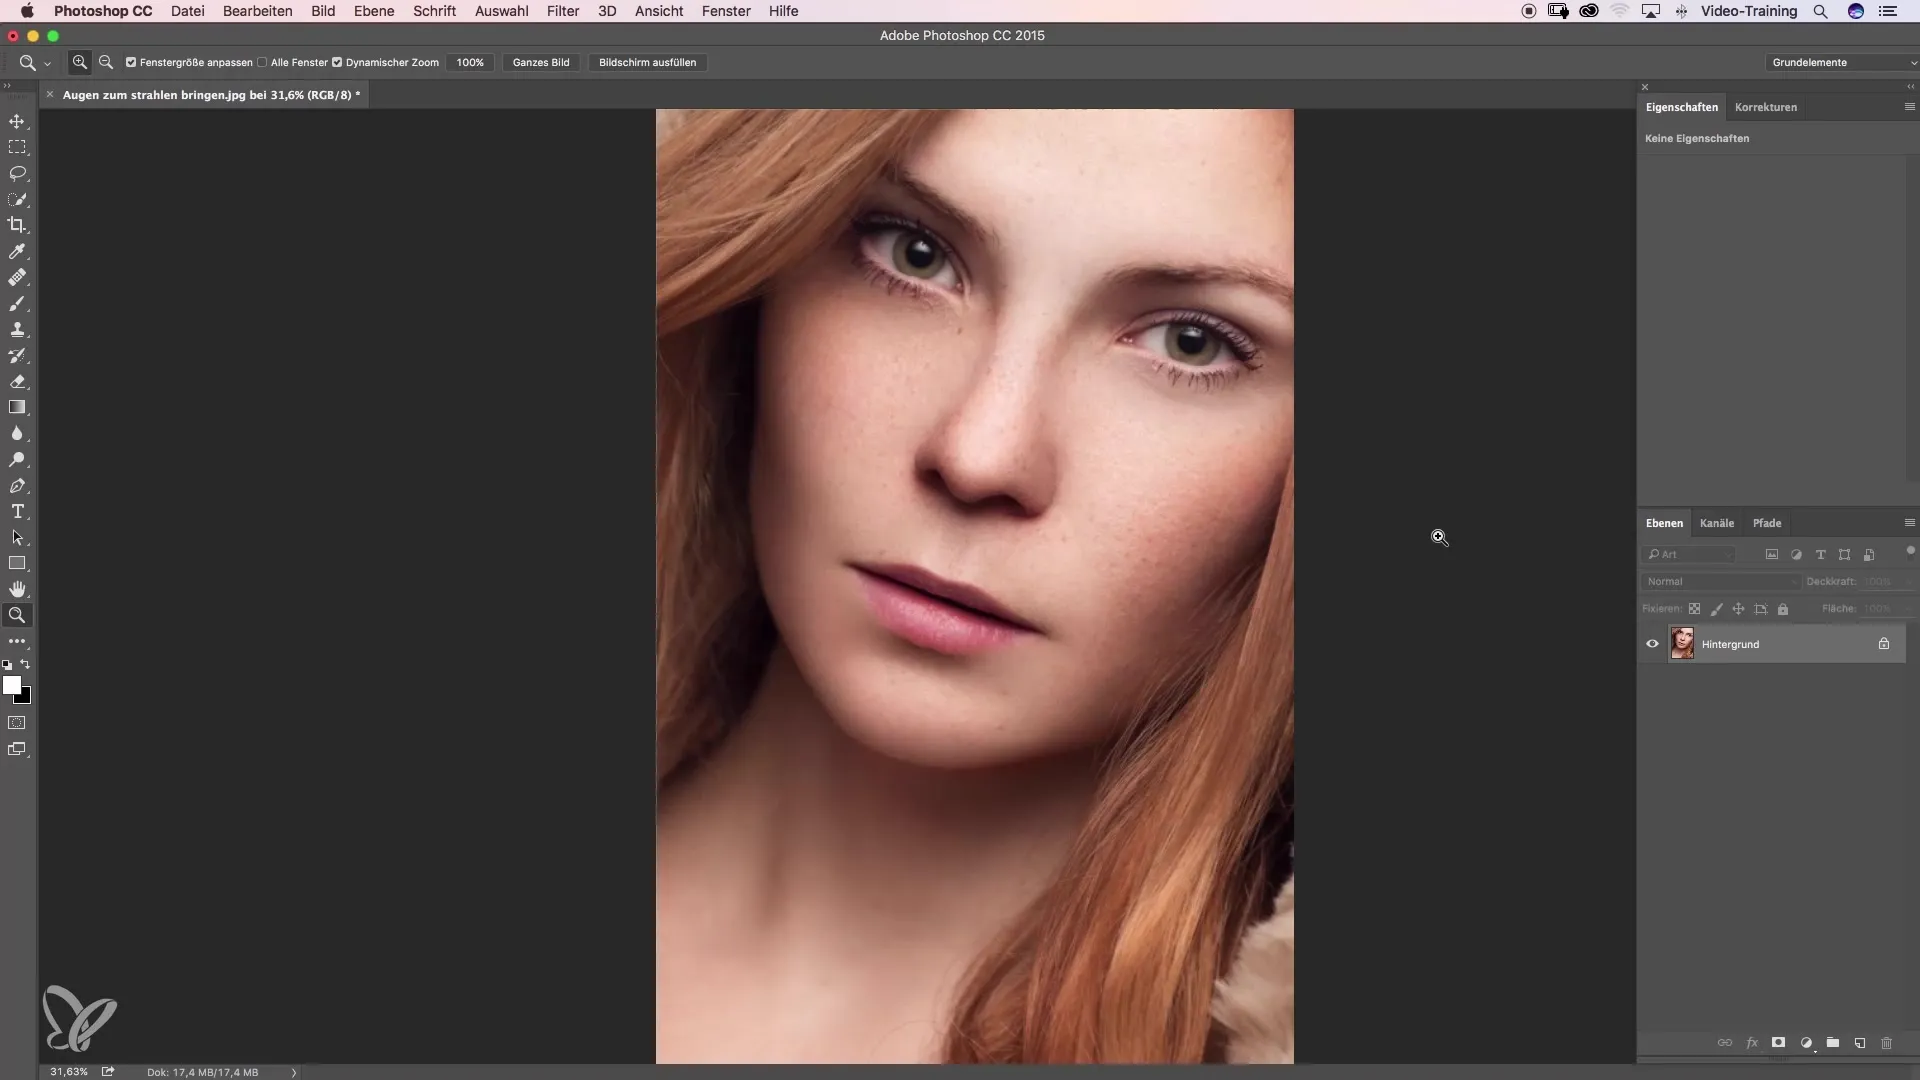
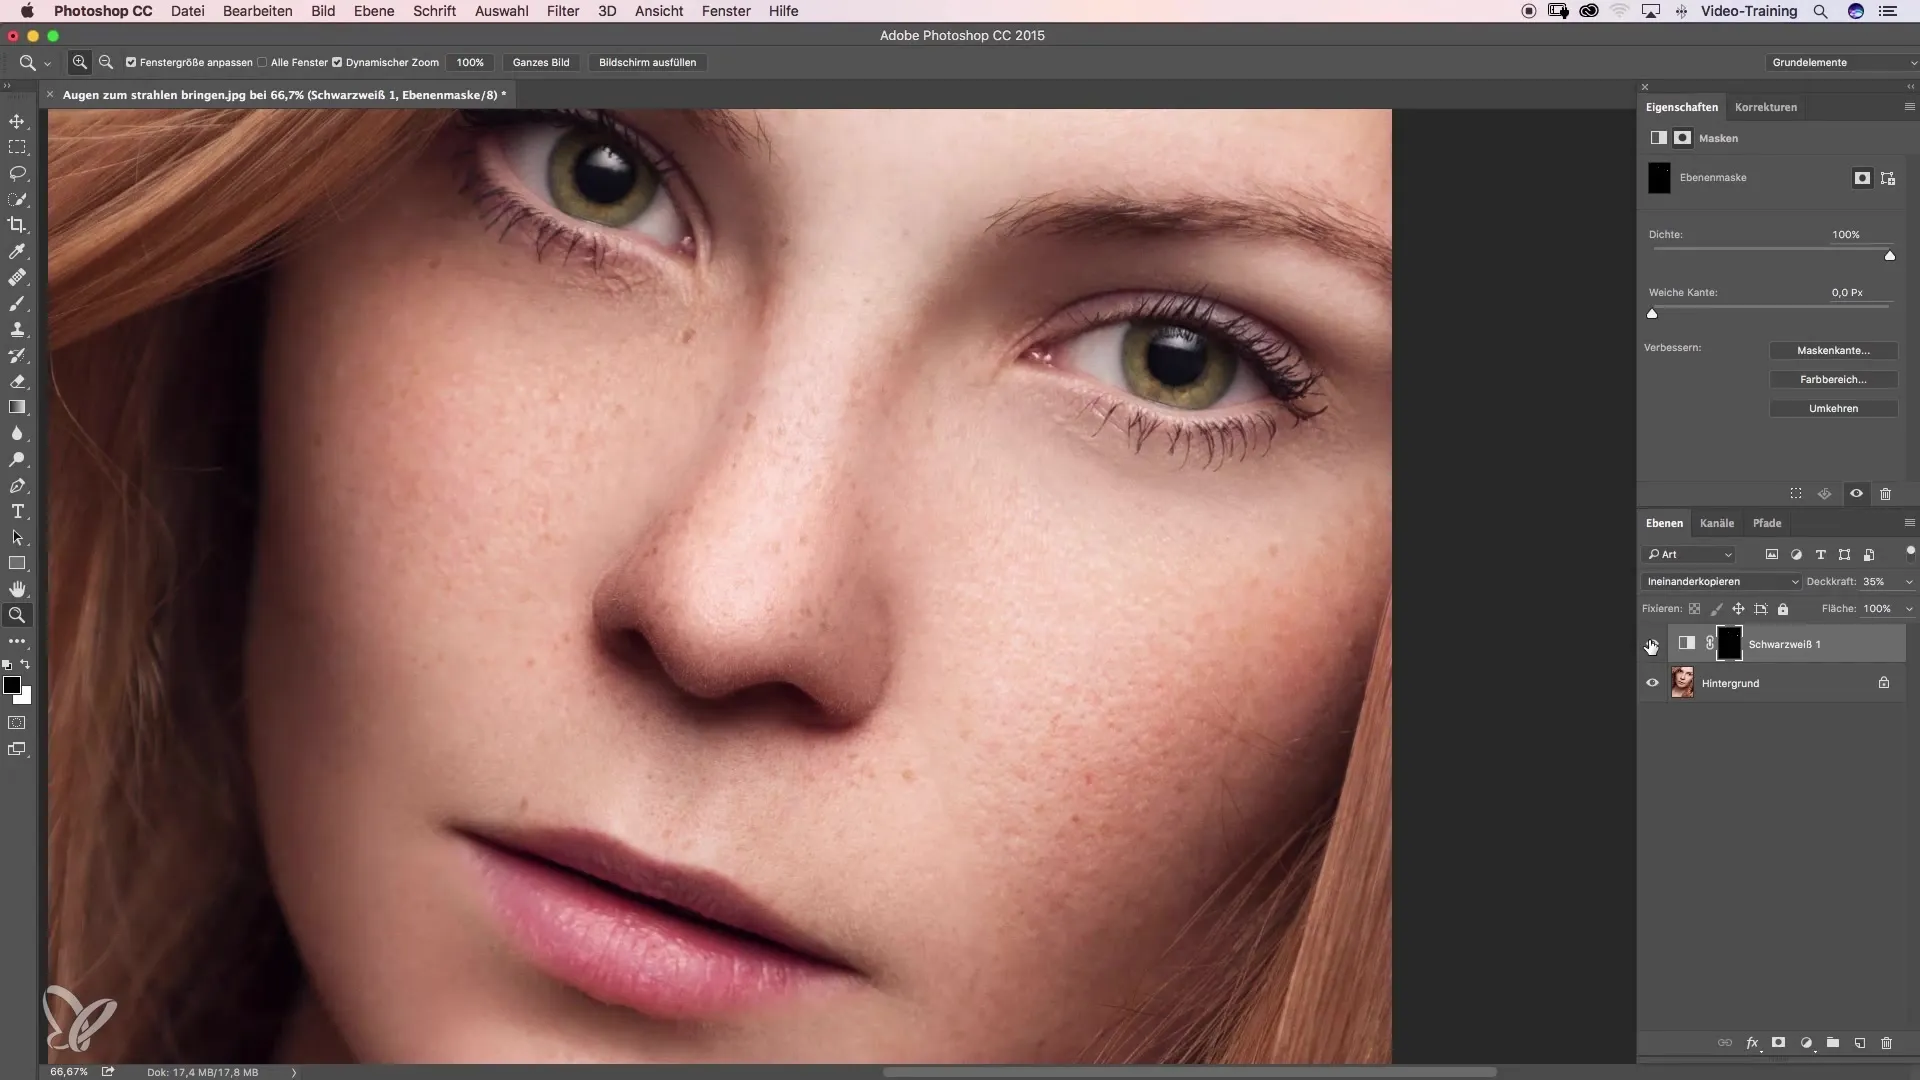
You have already found the model's eye color beautiful, but you notice they are somewhat in shadow. Your goal is to highlight the eyes and improve the contrast. To do this, start by opening a new adjustment layer. Click on the layers icon and select a black-and-white adjustment layer.
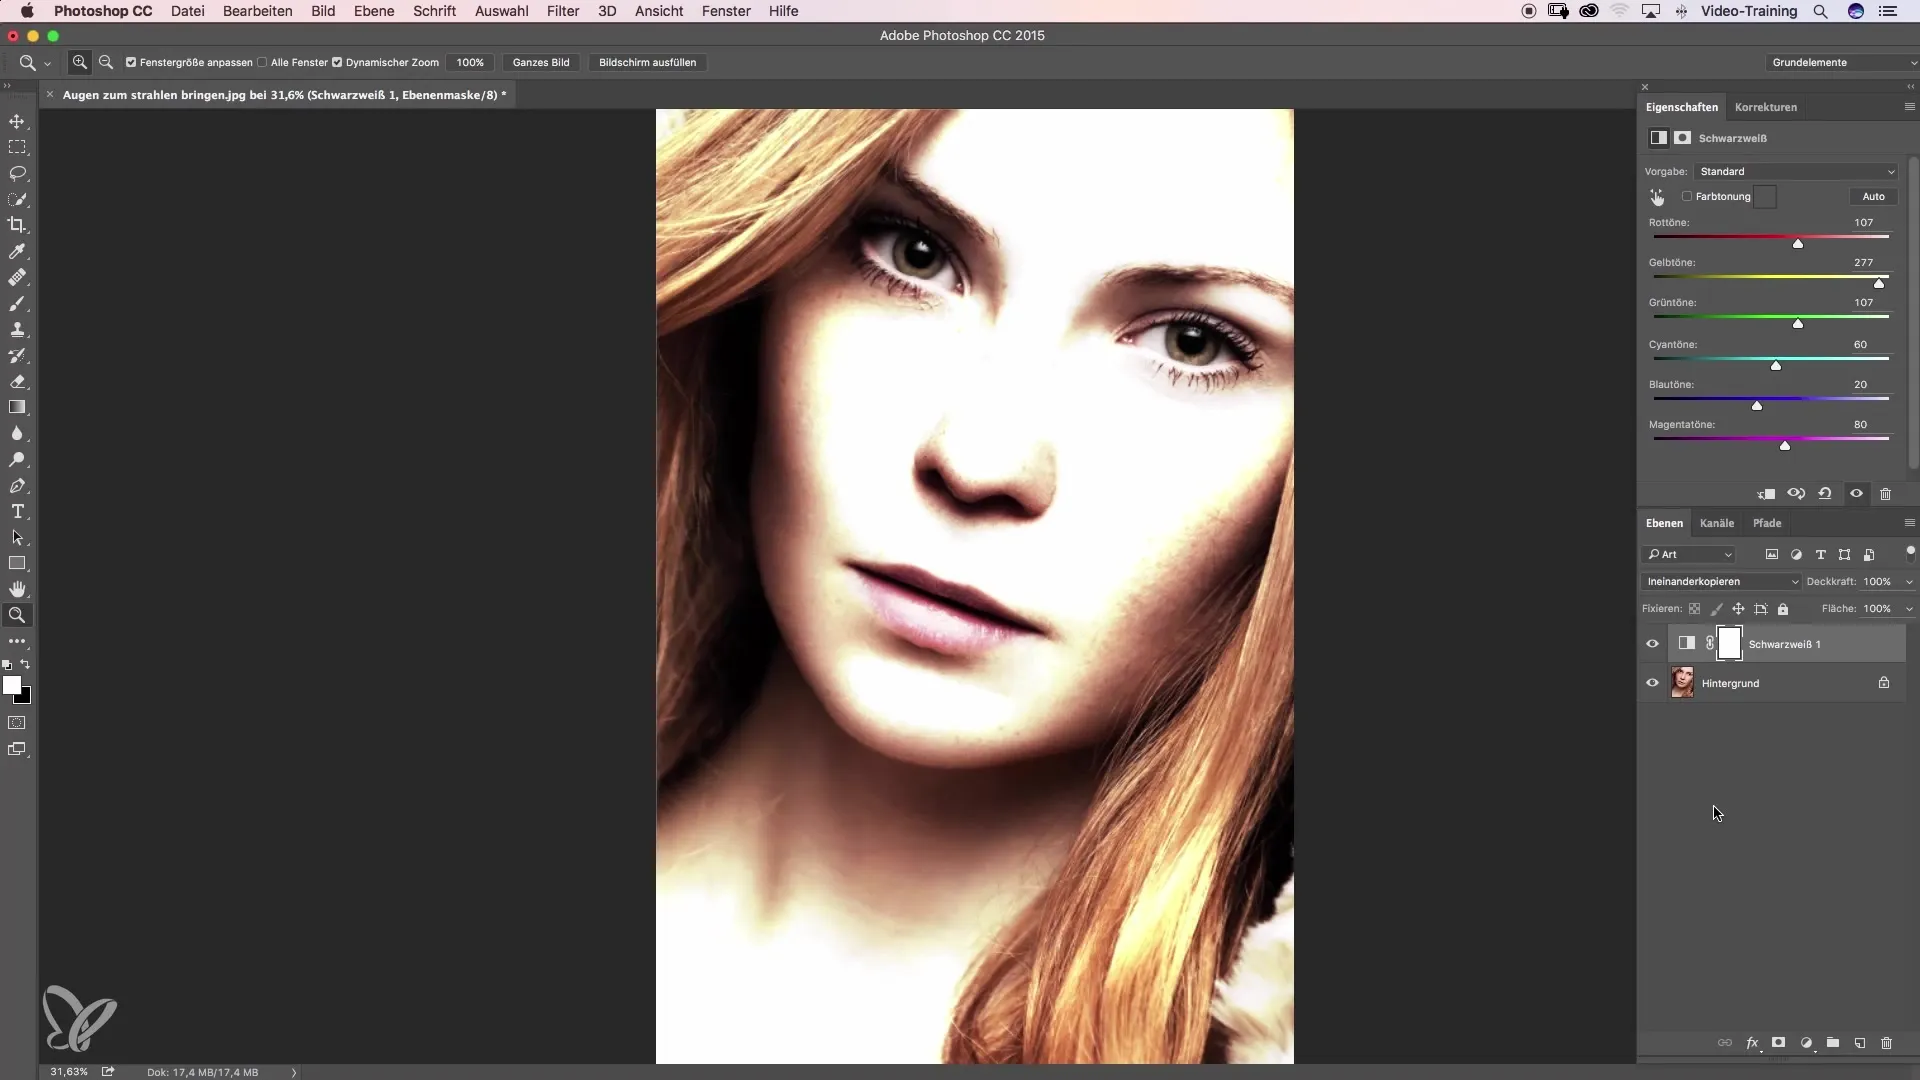
Now you will see the properties of this adjustment layer, where you can see various sliders. It is often assumed that adjusting the green tone is crucial because the model has green eyes. However, in nature, pure green and the corresponding adjustment are very rare, which diminishes the effect. Instead, try working with the yellow tones.
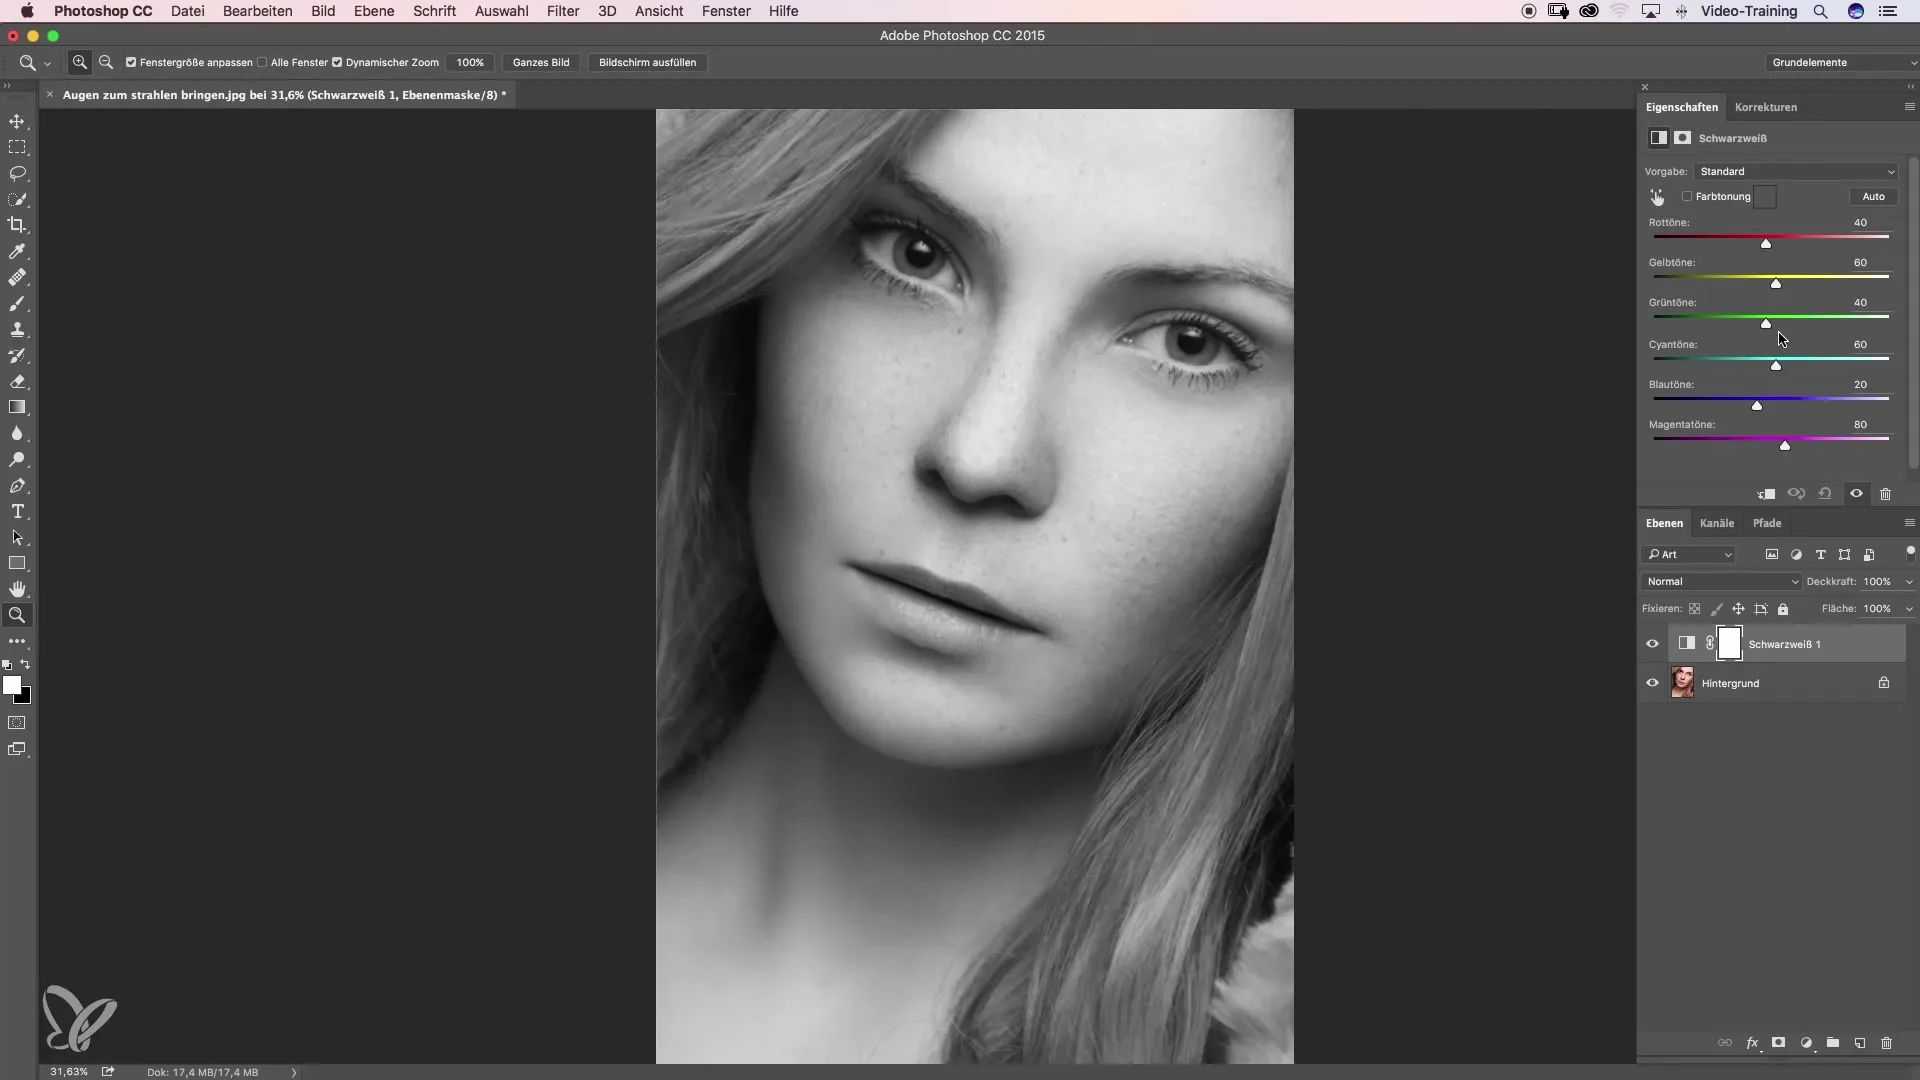
When you pull the yellow slider up, you will quickly notice that the eye color noticeably improves. Keep in mind that the skin will also take on lighter tones, which can be balanced out later. Then transfer this technique to the red tones. It is important to focus your adjustments on the eyes to avoid distorting the overall image.
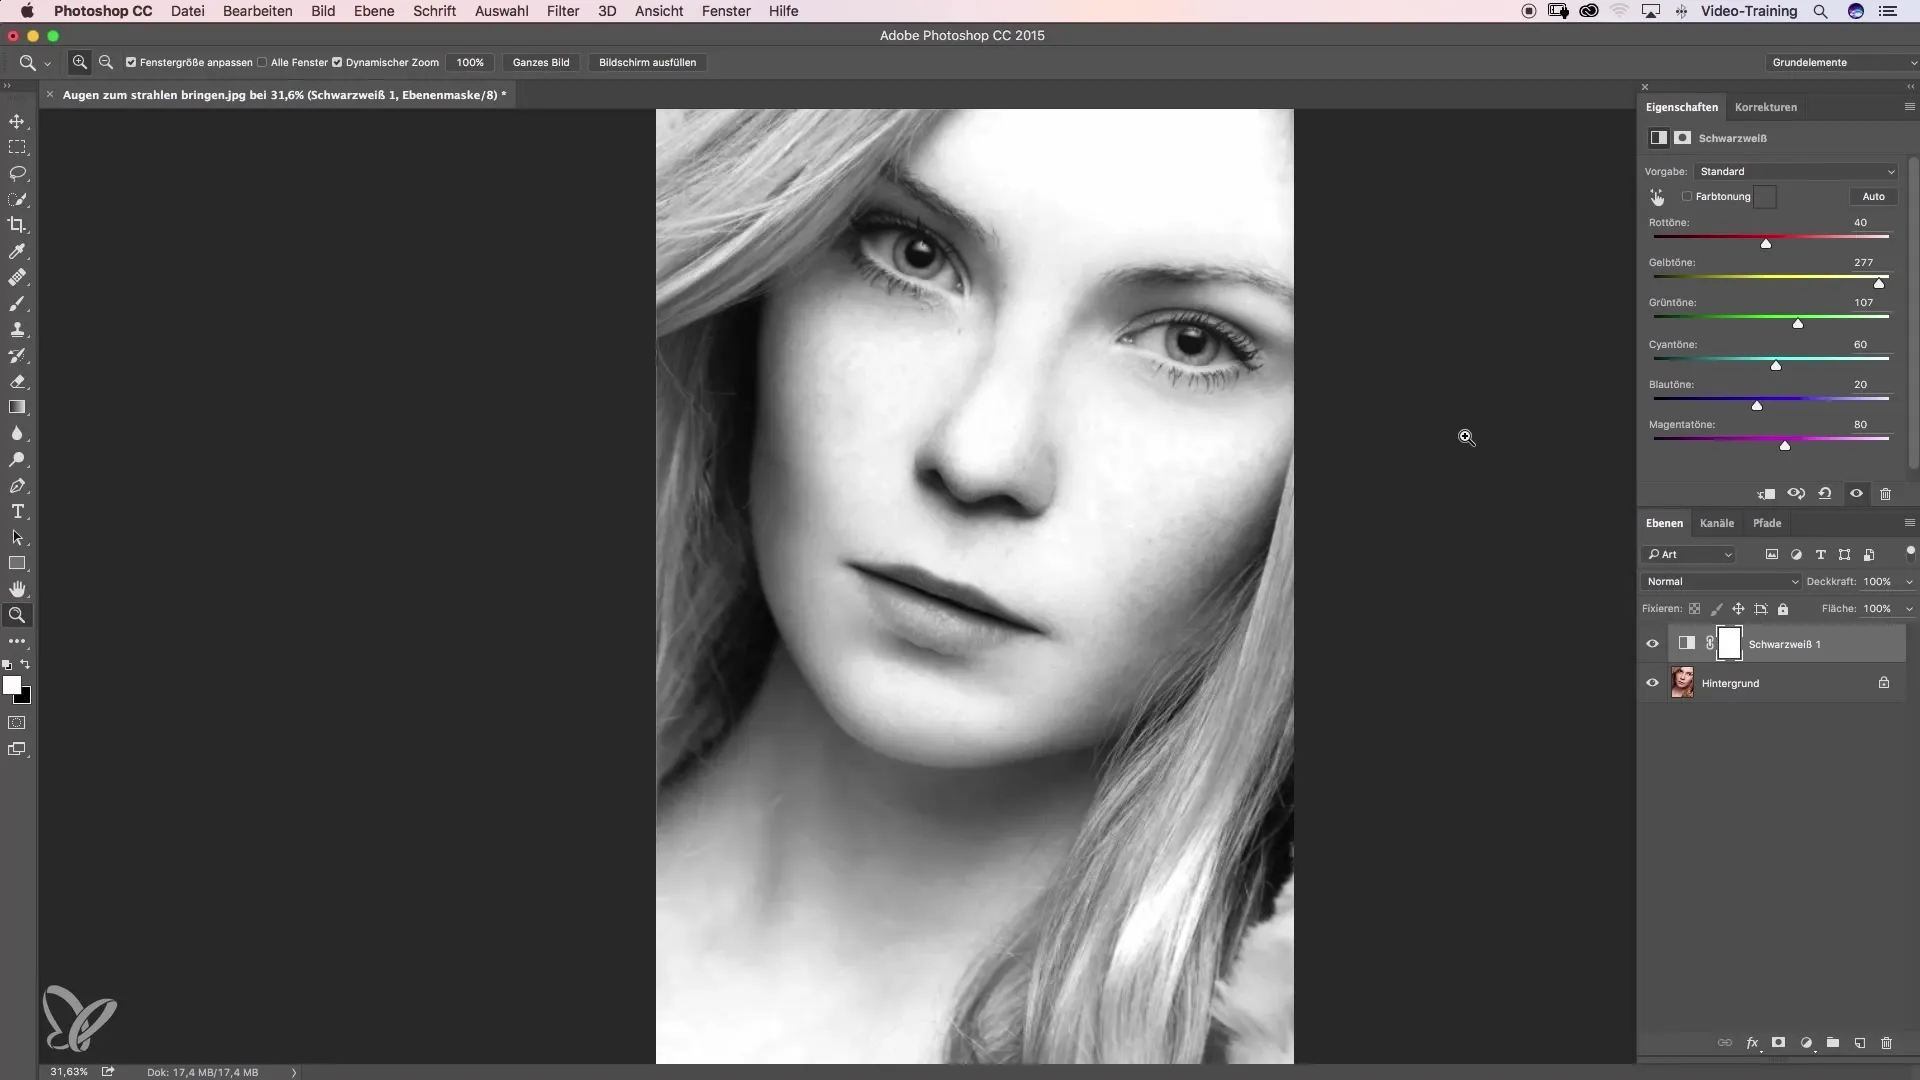
Now you can set the layer mode from Normal to "Overlay." This gives the eyes instant more contrast and depth. If necessary, you can slightly increase the red values to enhance the intensity.
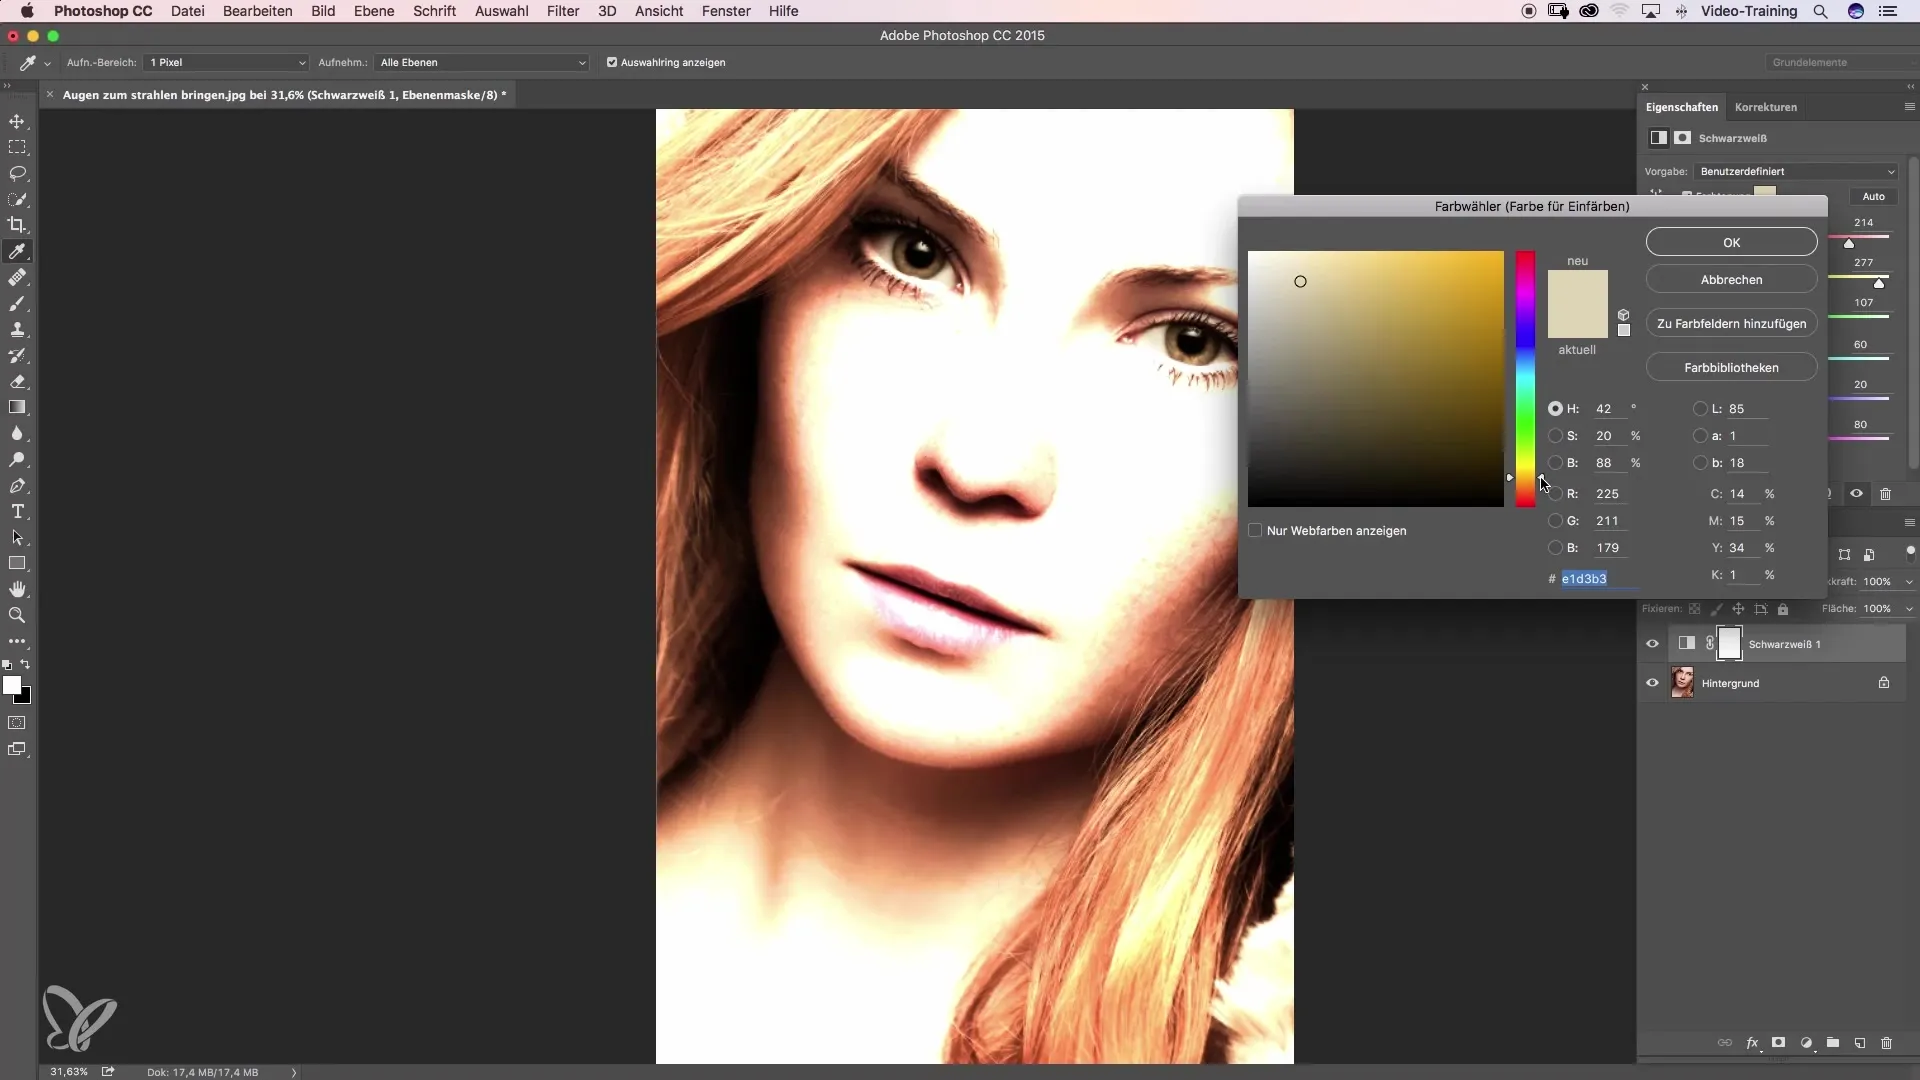
A quick trick to give the eyes an additional nice hue is to add a special hue-saturation adjustment. Check the box and move the slider slightly into the green. Be careful not to overdo the saturation, as this can look unnatural.
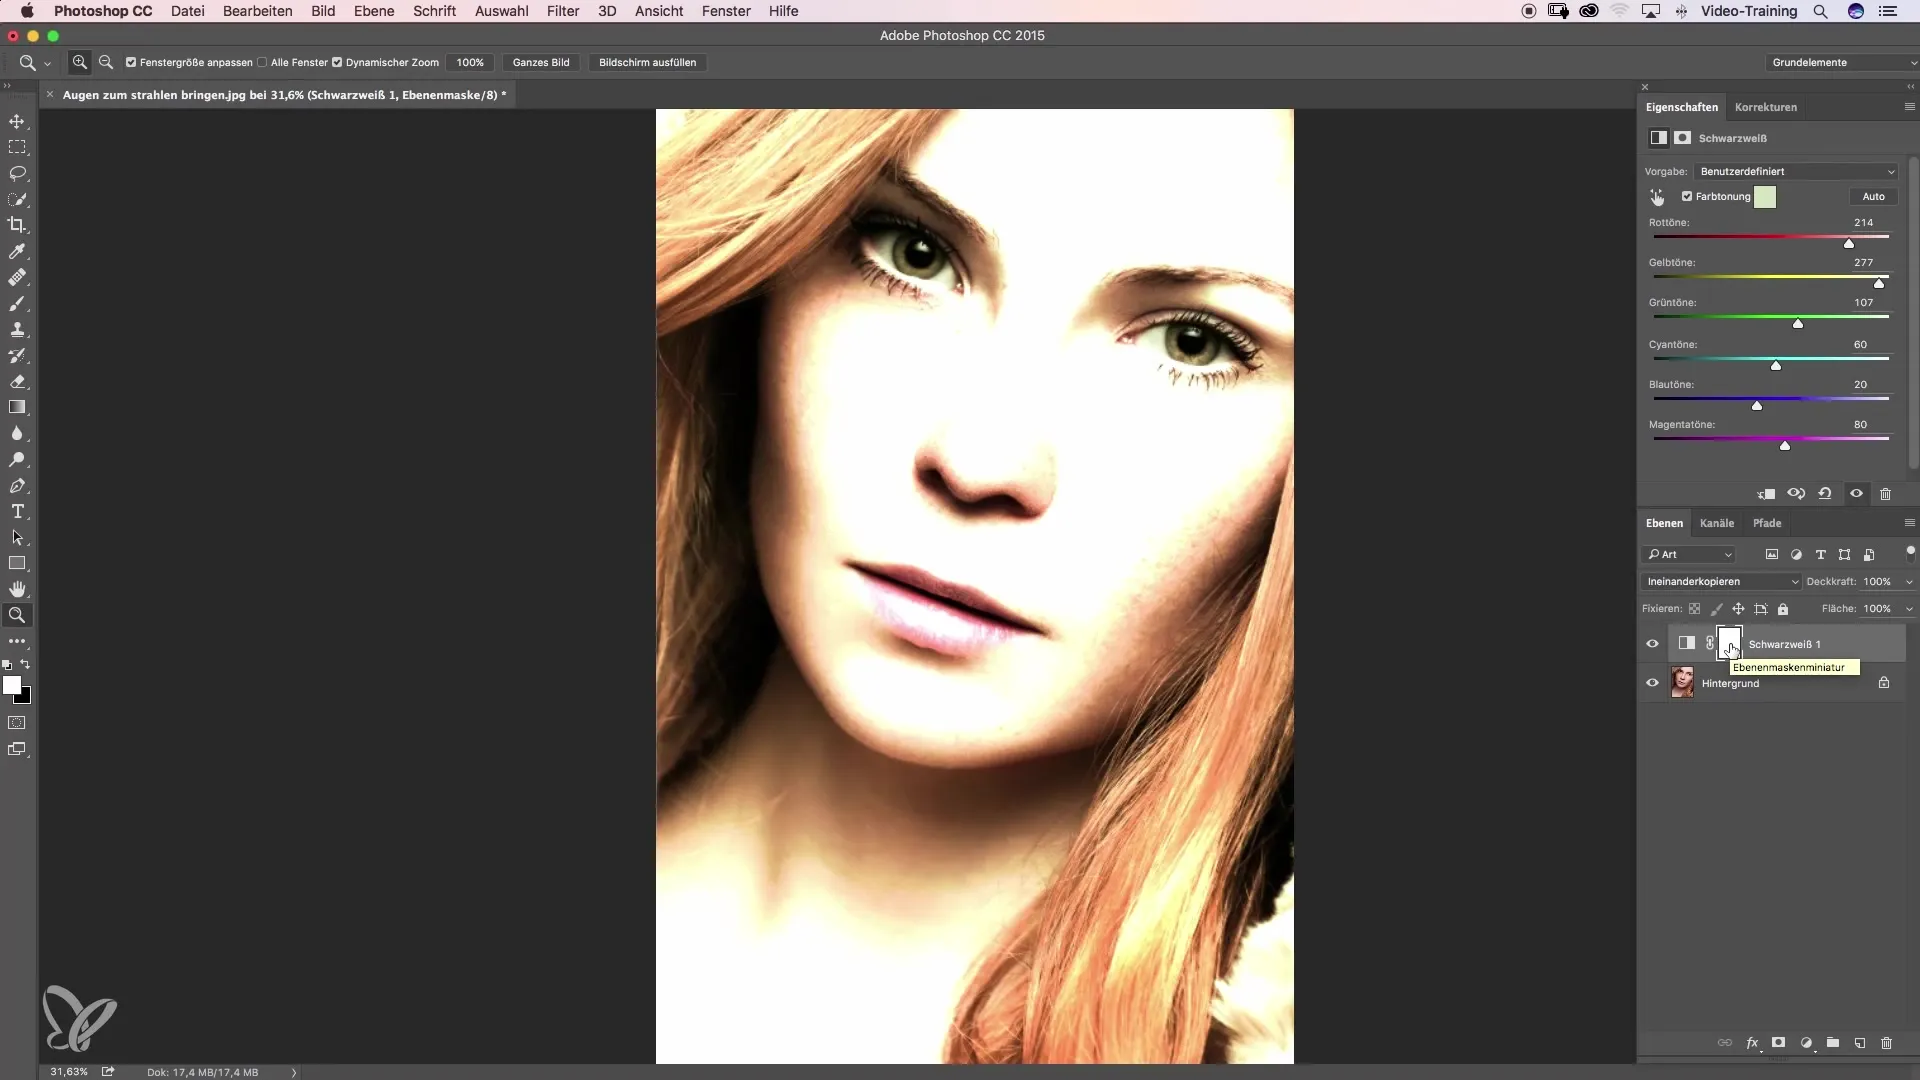
After making the adjustments, first mask out the entire effect to maintain control. Go to the layer mask and press "Command + I" (or "Ctrl + I" for Windows). Now the effect is no longer visible. With the white foreground color, you can selectively re-mask the effect.
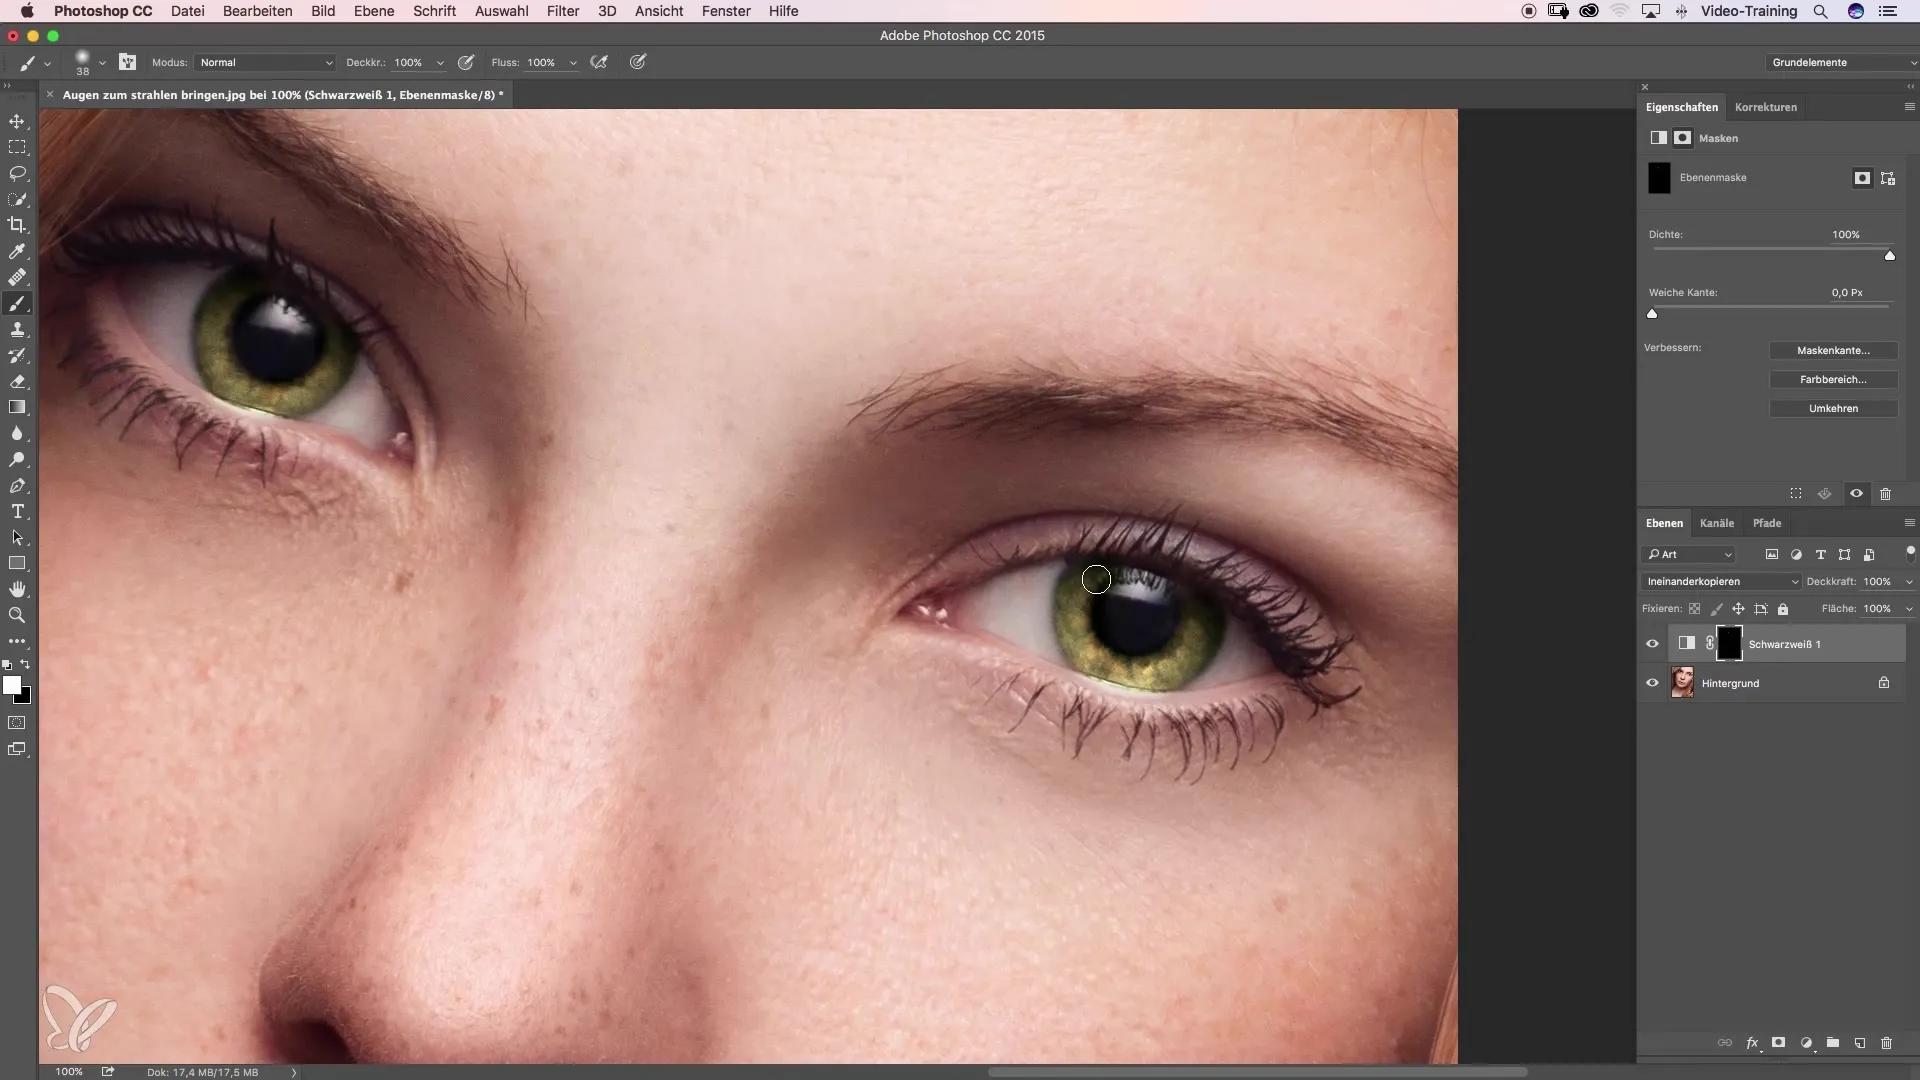
Select the brush tool now and set a very soft edge to allow for a gentle application. Make sure to set the opacity to 100% and the flow also to 100%. Then zoom in on the eye area and start painting only where you want to see the effect.
If you accidentally go over the highlights, simply switch to black to bring the effect back. The masking should be precise so that only the eyes are highlighted and the rest of the image remains unchanged.
Before finalizing the image, review the overall picture. Check if the changes look realistic. Often, it can be helpful to reduce the opacity of the effect to about 20-30% for a natural look.
With a before-and-after comparison, you can see how the eyes now look bright and pronounced in the image. The focus is clearly directed towards the eyes, which enhances the expression of the image.
Summary – Making Eyes Shine: Effective Beauty Retouching with a Clear Guide
The adjusted color and contrast settings of your eyes make them shine and give your image the necessary expression. With the described steps, you can work precisely and efficiently at the same time.
Frequently Asked Questions
How can I change the eye color in an image?Use adjustment layers and adjust the corresponding color sliders to intensify the eye color.
Which sliders should I mainly use for green eyes?Focus on yellow and red tones, as pure green is rarely found in nature.
How do I maintain a natural look after editing?Reduce the opacity of the effect to about 20-30% to avoid over-editing.
What should I do if the colors seem too intense?Use masking to take parts of the effect back and test different opacity settings.
How can I ensure that only the eyes are edited?Use the masking technique and work with a soft brush tip to mask precisely.
