
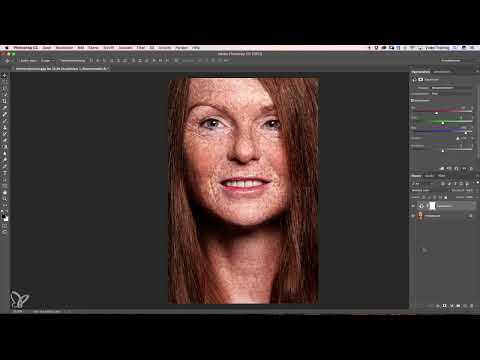
Freckles quickly get lost in a portrait, especially when the skin is fair and the light is flat. This is exactly where this technique comes in: you make the speckles more visible without darkening each one by hand. To do this, you use the Channel Mixer to bring contrast specifically into the dark areas of the skin, and then complement the result with a layer mask that only works where you want it to.
The video is only loaded from YouTube when you play it – data (including your IP address) is then transmitted to YouTube/Google. More in the privacy policy
The tutorial is based on a starting image with a great many fine freckles. You need Photoshop and a portrait in which the speckles are clearly recognizable. The steps can be applied to other subjects, but you should readjust the balance for each image.
Key Takeaways
The most important points at a glance:
- The Channel Mixer shows you which color channel controls which areas of the image. The sliders work with the Red, Green, and Blue channels.
- Using the blue channel and the red channel, you can increase the contrast in the dark areas while light skin tones are pushed back.
- The "Soft Light" layer mode strengthens the effect without distorting the image too much.
- A layer mask lets you paint the effect only onto the freckles, and a soft brush with low opacity lets you dose the effect.
- Reducing saturation via the Vibrance layer prevents the image from looking too orange.
Step-by-Step Guide
Step 1: Create the Channel Mixer as an Adjustment Layer
At the bottom of the Layers panel, click the icon for new adjustment layers, the half-filled circle, and select the Channel Mixer. The Channel Mixer is ideal because it lets you control the color channels separately without changing the original image.

Step 2: Activate Monochrome
In the Channel Mixer, activate the "Monochrome" option. This turns the image black and white. Now you only see brightness values, and the effect of the individual sliders on brightness becomes clearly visible. The sliders initially show random values. Therefore, reset them all to zero before you continue. Then the image is completely black, because no color information is left.


Step 3: Understand the Red Channel
Slowly drag the red slider to the right and observe which areas change. You will notice that it mainly affects the light skin tones, the hair, and the lips. It hardly affects the freckles, however. Afterwards, set the slider back to zero, as it is not suitable for our goal.

Step 4: Check the Green Channel
Next, try out the green slider. Drag it slightly to the right. You notice that the effect shifts more toward the freckles, but the desired contrast is still missing. Here, too, the same applies: make a note of what happens, and then reset the slider if it doesn't produce the desired effect.

Step 5: Use the Blue Channel for Contrast
The decisive step follows with the blue channel. Drag the blue slider a little to the right. The dark areas in the image become noticeably higher in contrast and stand out more. At the same time, the freckles gain depth.
Afterwards, you can move the red slider a bit to the left again. This removes the light skin tones from the foreground, and the image gains contrast. The best way to find the balance is by experimenting. Feel free to try out a few values until you like the result.

Step 6: Keep an Eye on Highlights
When moving the sliders, make sure not to go too far. If you drag the red slider too far to the right, the small highlights on the skin disappear. This quickly looks artificial. The goal is for the skin to remain largely natural and for only the contrast in the freckles to come into its own.

Step 7: Set the Layer Mode to Soft Light
Now set the layer to the "Soft Light" mode in the Layers panel. This blends in the contrast without altering the image drastically. Compare the result with the original by briefly toggling the layer's visibility on and off.

Step 8: Keep an Eye on the Saturation
When comparing, you will notice that the image now looks very orange. This is because the contrast was raised so strongly that the saturation automatically increases with it. We will solve this problem in steps 13 and 14; first we will take care of the masking.
Step 9: Temporarily Hide the Layer
First, hide the Channel Mixer layer completely. To then limit it specifically to the freckles, select the layer and press Command+I on a Mac or Ctrl+I on Windows. This inverts the layer mask, and the effect is completely hidden. Now you can paint it in only where you need it.
Step 10: Set Up the Brush for the Mask
Select the Brush tool and set a soft edge. Set the hardness to 0 percent and the opacity to 100 percent. The foreground color is white. In the mask, white paints the effect visible, which is exactly what you need.
Step 11: Paint Over the Freckles with Moderate Opacity
Set the brush opacity to about 40 percent. This way you are being careful and can build up the strength of the effect gradually. Paint over the freckles once, in one continuous stroke without lifting. This looks more even than if you start repeatedly at the same spot. If it becomes too much, simply go back one step.
Step 12: Fine-Tuning with Low Opacity
Reduce the opacity to around 20 percent and refine in a targeted way. Concentrate on areas where the freckles may be emphasized a bit more, such as the forehead or the lower face area. Avoid the areas that are already dark, as they would otherwise become too heavy. When you are satisfied with the result, compare again with the original.

Step 13: Mask Out Hair and Unwanted Areas
While working, you may have painted over the hair. To fix this, set the foreground color to black, since black hides the effect again in the mask. With 100 percent opacity, go over the affected areas once until the effect has disappeared. Make sure the transitions stay clean.
Step 14: Reduce Saturation with a Vibrance Layer
To tone down the orange color cast, create an adjustment layer of the Vibrance type. Reduce the saturation to about minus 9. This weakens particularly intense colors without making the entire image too pale.
Step 15: Copy the Layer Mask
Of course, the Vibrance layer should also only affect the freckles. The simplest solution is to copy the mask of the Channel Mixer layer. To do so, hold down the Alt key, click the layer mask of the Channel Mixer layer, and drag it onto the Vibrance layer. Confirm that the existing mask should be replaced. Now both layers share the same mask, and the saturation correction works exactly where the freckles are.

Step 16: Check the Final Result
Finally, compare the image before and after. The freckles now stand out clearly, yet the skin still looks natural. You can hide individual layers at any time to check intermediate stages, and make fine corrections via the opacity.
Summary ??? Emphasizing Freckles in a Targeted Way: Channel Mixer and Layer Masks in Photoshop
With the Channel Mixer, you bring out contrast from the dark spots of your portrait, while pushing back the light skin tones via the blue and red channels. The "Soft Light" layer mode gently reinforces the effect. Then you limit the effect to the freckles with a layer mask, work with a soft brush, and dose the strength via the opacity. Finally, you use a Vibrance layer to reduce the saturation that resulted from the higher contrast. You share the mask with the Vibrance layer so that everything works in one place.
FAQ
Do I absolutely need Photoshop for this technique?The tutorial refers to Photoshop, since Channel Mixer, layer masks, and Vibrance are available there as adjustment layers. Similar results are possible in other image editing programs with comparable tools.
Why does the image turn black after the monochrome step?When all sliders of the Channel Mixer are set to zero, there is no color information left in the image. The result is therefore black. This is a normal intermediate state that helps you see the effect of each channel individually.
What happens if I set the opacity too high while painting?Then the effect quickly looks exaggerated, and the skin can look unnaturally dark or blotchy. It is therefore better to work with several light passes instead of one strong brushstroke.
Why is white the right color in the layer mask?In a layer mask, white shows the effect of the layer at the respective spot, while black hides it. So when you paint with white, you bring the effect onto the freckles.
Can I still adjust the mask later?Yes. Since the mask is an independent layer component, you can rework it at any time with a brush in white or black.


