
Hard edges on hair give away every cutout, even when the rest of the image looks clean. After you removed the flyaway hairs in the previous video, an unnaturally sharp line often remains right there. In this tutorial, Merle shows you how to paint individual strands of hair into the image using an empty layer and a fine brush, so that the transition looks softer.
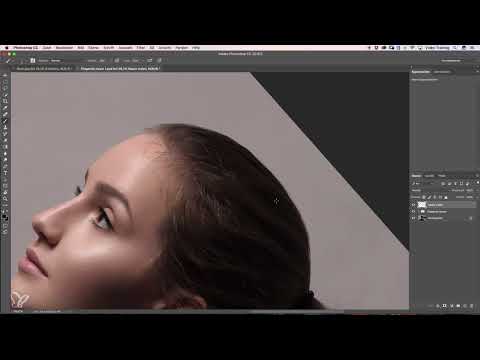
The video is only loaded from YouTube when you play it – data (including your IP address) is then transmitted to YouTube/Google. More in the privacy policy
Don't worry, you don't need to know how to draw for this. What matters are the right brush settings and a feel for the direction of the strokes. The video lasts just under three minutes, and the guide breaks the process down into eight steps.
Key Takeaways
- You paint hair on a separate, empty layer. This way your cutout result stays untouched and you can make corrections at any time.
- A hard brush with a size of about 2 pixels and an opacity of 20 to 30 percent creates fine, natural hair structures.
- Always paint in the direction of hair growth. Going against the grain quickly makes the result look artificial.
- Alternate between color tones, dark and light. A single tone looks flat and fake.
- It's better to work in many small passes than to paint over everything at once.
Step-by-Step Guide
Step 1: Create and name an empty layer
Before you pick up the brush, create a new, empty layer above your cutout image. Your original result remains untouched, and you can hide, move, or delete the painted hair at any time later. Give the layer a clear name right away, for example "Paint hair". The name sounds like artistry, but the process is pure craftsmanship.

Step 2: Set up the brush correctly
Now it's time for the tool settings. Set the brush hardness to 100 percent so that the hair lines stay clean and sharp. Deliberately choose a small size: in the video, Merle uses two pixels. Set the opacity between 20 and 30 percent; in the example it is around 25 percent. With a low opacity, the individual strokes look transparent and blend into the image instead of standing out like blobs of paint.

Step 3: Place a first test hair
Before you work on the actual edge, try out the brush on an empty area. Make a short, slightly curved stroke that looks like a single hair. If it looks too big or too strong, reduce the brush size or lower the opacity a little. This test hair helps you develop a feel for pressure, length, and intensity before you edit the subject.
Step 4: Paint over the edge and mix color tones
Now you place the hairs along the hard edge. The goal is to visually dissolve the line by letting individual strands extend slightly beyond the edge. Make sure to vary things: repeatedly pick different color tones directly from the hair, otherwise a uniform look will result. Don't distribute the strokes too evenly, because real hair is rarely perfectly ordered. Work through the edge section by section, so you keep the density under control.

Step 5: Correct mistakes and mind the stroke direction
A hair that is painted against the natural flow stands out immediately. If you notice this, simply go back a few steps in the history and undo the action. Too much paint can also be corrected by refining with the eraser tool or a black layer mask. It's not a disaster as long as you notice the mistake early. Also check whether individual strokes stand out too conspicuously, and remove them if necessary.
Step 6: Blend gaps and paint hair at the roots
If a larger gap appears in one spot, carefully brush over it to blend it in. Then paint a few strands directly out of the existing hair beyond the hairline, as if you were continuing to work on the hairstyle. This way, the new structure blends organically into the original image. Take your time and work in short movements.

Step 7: Finishing touches with light strands of hair
Finally, you add a few light strands that catch the light. This keeps the hairstyle from looking like a dark mass, and the image gains depth. Keep alternating the color tones as you do this, and work in small steps. Check the result regularly in the overall view, because exaggerations are most noticeable there.
Step 8: Before-and-After Comparison and Zoom Check
To finish, zoom out a little to see the result the way a viewer perceives it. In the before-and-after comparison, you can clearly see how much of the hard edge has disappeared. Merle emphasizes that she only worked on it very briefly. If you take more time and work thoroughly, the result will be even more convincing. From a distance, the image already looks very harmonious.

Summary – Painting Hair for Soft Edges When Cutting Out Subjects
With an empty layer, a small brush with a hard edge, and an opacity of 20 to 30 percent, you can deliberately soften hard cutout edges. What matters are varied color tones, the direction of hair growth, and a sparing way of working. Mistakes can be corrected at any time via the history or a layer mask. If you take your time, you get a realistic result that is convincing both up close and from a distance.
FAQ
What brush size should I use for painting hair?In the video, a brush size of about two pixels is used. This keeps the strokes fine and makes them look like individual hairs.
Why should I paint the hair on a separate layer?On its own layer, your cutout result remains unchanged. You can hide, move, or correct the painted hair at any time.
What happens if I paint against the grain?The hair looks unnatural and is immediately noticeable. Therefore, always paint in the direction of the natural hair flow.
How do I correct too much painted hair?You can go back a few steps in the history or refine it with the eraser tool or a black layer mask.
Why should I use different color tones?A single color tone looks flat and artificial. Alternating dark and light strands create depth and realism.


