
Shiny forehead, noticeable blemishes and skin that looks plastic in the photo? This is exactly what the "powdering skin" technique is for. With it, you reduce impurities and shiny spots without the image ending up looking lifeless. The trick: you first make the skin soft and smooth, then bring the pores back with a blur filter, and apply the effect selectively only where it is needed. Everything happens in Photoshop with layers, a High Pass filter and a layer mask. Merle shows each of these steps in the video, and this tutorial follows exactly that order.
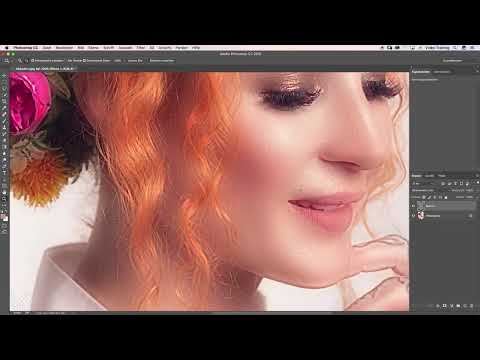
The video is only loaded from YouTube when you play it – data (including your IP address) is then transmitted to YouTube/Google. More in the privacy policy
Key Takeaways
- You work on a copy of the layer, which is set to Linear Light and then inverted.
- The High Pass filter smooths the skin, but also removes the pores in the process.
- A Gaussian Blur with a radius of 4 brings the pores back into the image.
- With an inverted layer mask and a soft white brush at 30% opacity, you control where the effect becomes visible.
- Hairlines, edges and tattoos are left out, and you should not apply the effect at full strength to all of the skin.
Step-by-Step Guide
Step 1: Duplicate the layer and set it to Linear Light
Open your portrait photo in Photoshop. Create a copy of the background layer with the keyboard shortcut Command + J (Ctrl + J on Windows). In the Layers panel, set the blend mode of this new layer to Linear Light. The image now looks significantly higher in contrast and brighter, which may be confusing at first. This is not a mistake, because this layer only serves as a helper for the following steps.

Step 2: Invert the layer
In the menu, go to Image, then Adjustments, and choose Invert; alternatively, use Ctrl + I. The layer thereby becomes a negative. This is the decisive step of the entire technique. On the inverted layer, skin structures such as pores, fine lines and blemishes stand out as subtle differences in brightness. The next filter will react to exactly these differences.

Step 3: Apply the High Pass filter
In the menu, go to Filter, then Other, and choose High Pass. In the dialog box, you use the radius to determine how many details are retained. As a rough guide, Merle says that a third of the value is a good direction. In the video, she opts for a radius of 12. Confirm with OK. Feel free to experiment with the value until you like the result. A radius that is too large leaves unevenness in place, while one that is too small makes the skin too uniform.

Step 4: Review the interim result
Now zoom into the image and look closely at your work. The skin tones look soft, the transitions are pleasantly gentle, and the blemishes have largely disappeared. However, the pores are now completely missing. Where they used to be, only light spots can be seen. You will bring these pores back in the next step so that the skin does not look like a plastic surface.

Step 5: Bring the pores back with the Gaussian Blur
In the menu, choose Filter, then Blur, and click Gaussian Blur. For the radius, you use a value derived from the High Pass value. Merle takes the number 12 from the previous step, divides it by 3 and thus gets a radius of 4. Confirm with OK. This combination of High Pass and blur brings the pores back into the image without completely losing the smooth look of the skin.

Step 6: Check the result with the restored pores
Now look at the image again at magnification. The pores are back, and the small blemishes have blended into the skin without standing out distractingly. Feel free to regularly make a before-and-after comparison by briefly hiding and showing the layer. This way you can see immediately whether the effect looks coherent or whether you should adjust it further.

Step 7: Hide the layer and create an inverted layer mask
First, hide the effect completely by clicking the eye icon of the layer. Then hold down the Alt key and click the layer mask icon at the bottom of the Layers panel. This creates an inverted mask in which the layer remains completely hidden. The effect is therefore invisible again, but you can paint it into the image selectively in a moment.

Step 8: Paint onto the skin with a soft brush
Set the foreground color to white. Choose a very soft brush and reduce the brush opacity to 30%. Enlarge the brush tip a bit so that you can work quickly. Then paint over the skin areas that should receive the effect. Each white stroke makes the effect of the filter visible again at that spot. With the restrained opacity, you can build up the effect step by step.

Step 9: Spare edges and hair areas
Especially at hairlines, edges, and transitions to other areas of the image, skin quickly tends to turn muddy. Therefore, make sure your brush tip is not too soft and that you do not paint beyond these areas. It has proven effective to draw a stroke through without lifting, so that the effect stays even. You should also leave out tattoos, because they quickly lose their contours when the filter is applied over them.
Step 10: Selectively strengthen heavily affected spots
Some areas need more correction than others. Zoom in on these spots and paint over the area several times to strengthen the effect. It is important that you do not rework the skin completely at full strength. A result with 100% effect on all of the skin quickly looks unnatural and artificial. Measured touch-ups on individual spots are the better way.

Step 11: Zoom out of the image and do the fine work
Next, zoom completely out of the image and look at the overall effect. The farther away you are from the image, the smoother the skin appears. This impression arises from how the image looks at a distance. So it is worth reworking, from this perspective, areas that seem too inconsistent to you. You can also add the effect to the lower image area with a few strokes.

Step 12: Carry out a before-and-after comparison
Now compare the original with the edited image. To do this, show and hide the layer several times and look at the differences when zoomed in. Pay particular attention to the edges. In the video, Merle notices that she painted beyond the target in some places. This step serves precisely to discover such mistakes before you finalize the file.

Step 13: Correct painted-over areas with black
To undo over-edited spots, set the brush opacity to 100% and the foreground color to black. If you now paint over the affected areas, the effect disappears there completely. Make sure that in this step you do not go too far into the skin areas where the effect is meant to be retained. After a few strokes, the skin looks even overall, without being washed out at the edges.
Summary ??? Powdering skin: retouching blemishes and shiny spots step by step
With the "powdering skin" technique, you make skin look more even without making it look artificial. You duplicate the layer, set it to Linear Light, and invert it. The High Pass filter smooths the skin, and the Gaussian Blur with a radius of 4 brings the pores back. Using an inverted layer mask and a soft white brush at 30% opacity, you apply the effect selectively. Pay attention to hair, edges, and tattoos, and use the before-and-after comparison to undo over-edited spots with black.
FAQ
Why is the layer set to Linear Light?The blend mode ensures that the inverted copy is combined with the original image in such a way that the skin structures become visible as contrast and the filter can react to them.
Do I absolutely have to use Photoshop?The tutorial refers to Photoshop. Comparable functions also exist in other image editing programs, but the menu items and names may differ there.
Where does the radius of 4 for the Gaussian Blur come from?Merle takes the value 12 from the High Pass filter and divides it by 3. The result is 4. This guideline serves as a point of reference and can be adjusted to your image if needed.
What do I do if the skin still looks too muddy?Reduce the brush opacity or paint the effect only on the spots that are truly affected. A before-and-after comparison helps you assess the result realistically.
Why should I leave out hair and tattoos?Hair and tattoos have clear contours. The blurring effect quickly makes these edges blur, which makes the image look unnatural.


