
Your nuts are nicely arranged, and yet the picture still looks flat, blotchy and a little too bright? This is exactly where this guide comes in. You'll learn how to work with aperture, focus, exposure and white balance, how to steer light with flags and diffusers, and how to build tiny reflectors from craft foil that specifically brighten individual areas.
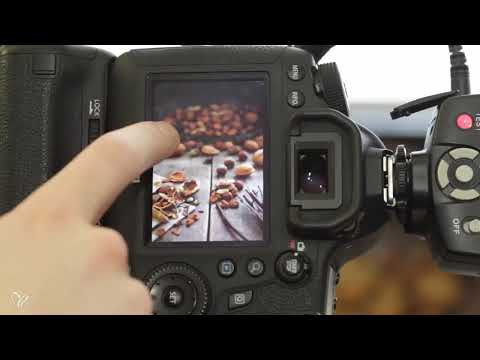
The video is only loaded from YouTube when you play it – data (including your IP address) is then transmitted to YouTube/Google. More in the privacy policy
Key Takeaways
- The aperture determines how much of the subject is in focus. At aperture 4, the picture looks softer and more three-dimensional than at aperture 5.6.
- The focus belongs on the structure of the subject, not on smooth surfaces like the surface of a peanut.
- Slight underexposure creates drama. The flag helps with this by darkening areas without ruining the subject area.
- A diffuser in front of the window makes the light more even and removes harsh shadows.
- In daylight, setting the white balance to "Daylight" is often a better choice than auto, because it makes the nuts look warmer and cozier.
- Tiny reflectors made from craft foil bring light exactly where it is missing.
Step-by-Step Guide
Step 1: Establish the composition before fine-tuning
Before you fine-tune the light and camera, arrange the subject. Distribute the nuts so that they create leading lines and depth. A Brazil nut shell in the front is particularly appealing because of its structure. A walnut in the background can additionally fill out the picture. Make sure you don't have to work all the way to the top, but place the large elements first and then add the small details.


Step 2: Test and set the aperture
Take a test shot to check whether the aperture suits the look you want. At aperture 5.6, the background in the example was too sharp, so the sharpness was distributed too evenly across the picture. Checking in live view helps you before you press the shutter. Still, a test image with a wireless remote release is worthwhile, since the monitor in live view is often deceptive. The result shows you where you need to readjust.

Step 3: Set the focus point precisely
Sharpness is the most important point in food shots. Set the focus point as precisely as possible on the area that matters in the picture. Smooth surfaces like the peanut are difficult for this, because the camera finds hardly any contrast. So it's better to orient yourself on the structure of a nut, for example its top side. Afterwards, do a final focus test and check the result on the image.

Step 4: Eliminate distracting bright spots
In the picture, a bright spot often stands out and distracts the eye. You can cover it either with another nut or a bowl. If that isn't quite enough, the rest can be removed later in image editing, for example by copying an image area in Photoshop. This is often faster than fiddling with the arrangement for a long time. Just make sure the arrangement looks natural in the picture.

Step 5: Adjust the aperture and improve the subject area
Once the composition is set, you move to a wider aperture. At aperture 4, the picture in the example is softer, and the foreground with the nuts draws the eye more strongly. The difference is mainly visible at the bottom edge. In the end, decide on the aperture that best highlights the subject area, even if the difference seems subtle at first.

Step 6: Deliberately lower the exposure
The picture looks nice, but it lacks drama. Nuts have a lot of structure, and contrasts make this structure visible. So first try an exposure compensation of -1 before building any setups. This tones down bright areas such as the cloth, and the light falls more specifically on the nuts. The background may well get darker, since it serves as negative space and shouldn't draw attention.

Since you shoot in RAW format and work with ISO 100, enough image information is retained despite this underexposure. If in doubt, you can brighten the image a little again in post-processing.
Step 7: Adjust the white balance to the light
In daylight, the light quickly looks cool and bluish, which doesn't suit winter food like nuts very well. Therefore, set the white balance manually to "Daylight". The shot immediately becomes warmer and more harmonious. You can also set the white balance in the camera even more intensely, but that often looks exaggerated. The advantage of this step is that you can better assess the finished image on location, and you save yourself a lot of work later in Lightroom.

Step 8: Use a flag against unwanted light
If the light from the left falls too strongly on the cloth, a flag helps. A black surface takes away light because it doesn't reflect. Photo cardboard, a flag with a black surface, or a black cloth on the wall are suitable for this. In the example, the packaging of a pleated backdrop was used, as it is roughly the size of a round reflector. Position the surface so that it shields the light from the side and reduces reflections from the walls.

Note that sunlight can change significantly during the shoot. In A mode, the camera automatically adjusts the exposure time, but the shadows still become stronger. Therefore, check the image again and again.

Step 9: Use a diffuser in front of the window
When the sun shines directly through the window, hard shadows appear under the nuts. A diffuser makes the light softer. Place it between the window and the subject, as close to the window as possible, so that it scatters the light evenly. In the example, a round diffuser was placed behind the basket. This seems counterintuitive at first, but it distributes the light over the entire surface and thus directs more light onto the nuts.

The result is clearly visible in the comparison: The exposure becomes more even, and the hard shadow contrasts disappear. The bright corner at the top of the image may be distracting, but it can easily be removed when cropping or cloning.

Step 10: Build mini reflectors from craft foil
For targeted brightening, you don't need expensive equipment. Keep a roll of silver and gold craft foil ready. It is thicker than aluminum foil, easier to fold, and stands better on its own. Fold a small piece of foil until it has the desired size, and set it up so that it casts light onto the dark spot. In the example, the reflector was placed at the front so that it directs light onto the small pile of nuts. It is important that it stands close enough to the subject and is not too large.

The position is crucial. The reflector must stand at the right height, otherwise it looks too high or too low. Try out different positions until the light arrives exactly where it is lacking.

Step 11: Fine-tune the alignment of the reflector
A reflector often has only a subtle effect, but that is exactly what is intended in the example. Compare images with and without the reflector to see the effect. The peanuts and the shadows on the side of the hazelnuts become brighter. Turn the reflector slightly to make the effect stronger. Also test whether it is visible in the image. If so, push it back a few millimeters. The light yield is then greatest without the reflector itself being noticeable.


Step 12: Take an exposure series
Finally, you secure the exposure. Set the camera so that it takes a series in steps of 0.3 stops. With the 6D, in this example that means seven images covering the range from 0 to -2. That way you can be sure that one image has exactly the exposure you have in mind. Keep in mind that the camera display is often set brighter than your monitor. An image with exposure set to zero, on the other hand, quickly looks too bright, and that is exactly why the series is worthwhile.


Summary ??? Food Photography: Optimizing Light with Reflectors and Flags
You have seen how the interplay of aperture, focus, exposure compensation, and white balance improves the image step by step. Flags remove unwanted light, diffusers make it softer, and even DIY foil reflectors set targeted accents. The key is to test every change and compare it with the previous image. An exposure series and editing on the computer round off the result.
FAQ
Do I need expensive equipment for reflectors?No, a roll of craft foil is completely sufficient to direct light in a targeted way.
Why should I set the white balance manually in daylight?The automatic setting often adjusts to a cool tone, while the daylight setting makes the mood warmer and cozier.
Can I also change the white balance later in post-processing?Yes, with RAW files this is possible without any problem, but in the camera you already get a better idea of the finished image on location.
What is a black flag used for?It removes light from one side, reduces reflections from walls, and creates contrast.
Why does a diffuser in front of the window sometimes seem counterintuitive?It enlarges the light surface and distributes the light more evenly, so more light reaches the subject.
Why shouldn't you focus directly on smooth surfaces?Smooth surfaces offer hardly any contrast, so the autofocus has trouble finding a point. It is better to focus on a textured spot.


