
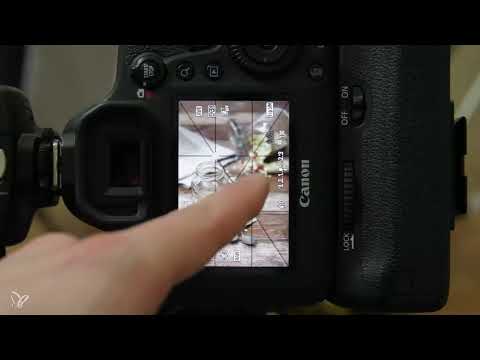
The composition is set, now it's time for the table decoration. This is where it is decided whether your food image looks credible or sterile. In this chapter, you decorate the table and the main objects to match your image idea, pay attention to authenticity and pleasing leading lines, and finally prepare the muesli in a glass. Since the fresh ingredients don't last long, you have to work quickly. Therefore, plan every step in advance and regularly check the result on the display in Live View.
The video is only loaded from YouTube when you play it – data (including your IP address) is then transmitted to YouTube/Google. More in the privacy policy
Key Takeaways
Key Takeaways
- The table decoration is created in Live View. Check the display after every adjustment before you continue.
- Objects such as spoons are deliberately partially covered or cropped so that lines and depth emerge.
- A second surface, such as a cloth, tells a story: ingredients were prepared here.
- Spills, crumbs and scattered fruits look authentic and make the image more natural.
- Deliberately leave empty areas (negative space) for text if the image is to be sold or licensed later.
- When setting up and taking down, make sure you don't move or knock over reflectors.
- Take several shots with different exposures to have room to work with in post-processing.
Step-by-Step Guide
Step 1: Check the Overall Composition in Live View
First, switch back from manual mode to Live View. This way you see the image from the camera's perspective and can assess the composition before you place decoration. Keep the starting situation in mind: the background stays dark, the main subject is in the light, and the lines lead the eye to the glass.

Step 2: Place the Spoon as a Line Element
First place the antique-looking spoon on a trial basis. Lay it on the table so that it forms a diagonal line. Push it a little behind the glass so that it doesn't dominate and the view of the muesli stays clear. A second spoon can cross the first so that the ends almost touch. These intersections create a pleasing structure.

Step 3: Create a Connection Between the Sugar Spoon and the Muesli
The small spoon, actually intended for sugar, goes well with the muesli. Place it against the glass so that it peeks out at the side. Then sprinkle a little muesli right next to it so that a natural connection arises between the spoon, bowl and surface. Check again and again on the display whether the whole thing looks effortless.

Step 4: Define the Surface with a Cloth or Texture
Lay out a cloth or another texture in the back area. This surface signals to the viewer that something is being prepared here. Then place berries, mint or muesli on it so that the area looks like an ingredient station. Test two variants: a narrow towel and a larger linen underlay. Compare both on the display before you decide.

Step 5: Choose the Cloth or Underlay and Protect the Reflectors
In this case the large underlay is too big, whereas the cloth fits perfectly. It looks like a kitchen and preparation and thus tells the better story. Lay it down for good. Be especially careful with the reflectors: don't touch them and don't move anything, otherwise the light will change uncontrollably.

Step 6: Plan Free Space for Text
The upper, blurred and later very dark area should deliberately remain free. Imagine your image were the cover image of a magazine. The title goes there. Leave this negative space empty so that a layout designer can later place text without any problem and without the subject suffering. For sales or licensing, this is an important detail.

Step 7: Filling the muesli into the glass
Filling it is fiddly work. Try not to move the glass, and instead carefully scoop the muesli in. Small spills are normal and can be corrected later or deliberately left as they are. Make sure the muesli is not only lying on the surface, but fills the glass evenly.

Step 8: Building up layers in the glass
Build up the muesli in the glass in layers: first fruit, then yogurt, fruit again, and on top a little yogurt with fruit that peeks out slightly. Place a mint blossom or a nice leaf at the edge. Feel free to let the muesli and the spoon spill over the rim, as that looks lively. The layering is visible because you place the fruit deliberately in the foreground plane.

Step 9: Adding authentic smears and crumbs
Modern food photography can handle mess. Deliberately leave crumbs, smears and small stains. They show the viewer that a real scene has come about here, one that could happen at home just like this. An extremely clean, polished image, on the other hand, looks artificial. This principle applies especially if you want to sell the image later.

Step 10: Distributing blueberries and using the focus gradient
Lay out the blueberries in the background. Dark berries preserve the darkness in the back area. Choose the larger ones and distribute them not in a pile, but loosely across the surface. Pay attention to the focus gradient: the fruits in the foreground are rendered somewhat sharper than those in the back. Walk past carefully so that you don't knock anything over.

If a reflector falls over, gently set it upright again. Afterwards, check on the display whether the light has changed.

Step 11: Placing raspberries and bruised spots
Distribute the raspberries at the front corner so that a separation arises between raspberries in front and blueberries in back. You can place two to three fruits in the blurred area, and a few more to the side so that the spoon stands out clearly. Bruised spots are part of it. Place such fruits where they are hardly noticed, or deliberately put one of them on the spoon.

Step 12: Filling up the glass and decorating the fruit on top
Now fill the glass with the remaining blueberries and a layer of raspberries on top. Place three to four fruits on top as decoration. Make sure the surface is level, and if necessary add another layer of muesli so that the fruits don't immediately sink through.

Step 13: Protecting the surface with muesli and a tip for coarser muesli
Cover the fruit with a layer of muesli. This gives you more time for the photo later, because the yogurt doesn't run through as quickly. A coarse crunchy muesli with larger chunks would, incidentally, have been more sensible here, because it leaves the fruit more visible. It's best to note down such experiences in a list of picture ideas.

Step 14: Yogurt crown, mint and final details
Pour the yogurt from a cup onto the level surface, since no piping bag is available. Some of it will inevitably run over the edge, which doesn't matter. Then insert the mint so that the leaves stand apart and can be recognized. Add a few crumbs on top and check the overall picture once more on the display.


Step 15: Change the exposure and shoot a bracketed series
Turn on the flash, then set the camera to manual and release the shutter. Then take several shots: one with standard exposure, one with higher flash power, and a darker variant. This gives you room to maneuver in post-processing to brighten or darken areas. In the bright areas, watch out for blown-out highlights and decide based on the shots which exposure looks best.


Summary ??? Food Photography: Table Decoration and Composition with Muesli, Fruits, and Authentic Details
You have seen how a basic setup becomes a believable food image. The keys are clear lines created by cutlery, a second surface with a cloth, deliberate mess like crumbs and smudges, and free space for text later. You layer the muesli deliberately in the glass, scatter the fruits loosely, and check the exposure across several shots. This gives you an image that looks real and can be used in many ways.
FAQ
How do I avoid the reflectors slipping while decorating?Move slowly, don't touch the reflectors, and check the display in live view after each step.
Why should I deliberately leave crumbs and smudges in the image?They look authentic, show a real scene, and convey to the viewer that the image could come from everyday life.
What is negative space and why do I need it?Negative space is an empty area without a subject. It offers room for a title or text, for example on magazine covers or sales images.
Which muesli is better suited for food images?Coarse crunchy muesli with larger chunks keeps the fruits better visible on the surface and lets less run through.
Why do I shoot several exposures?Several shots with different brightness levels give you room in post-processing to make areas brighter or darker.
How do I prevent the yogurt from running through too quickly?Cover the fruits with a layer of muesli so that the yogurt above seeps down more slowly.


