

A plate of spaghetti often looks unremarkable on the table. Only the right light shows how fresh the sauce shines and how appetizing the noodles look. In this tutorial, you set up a standard lighting setup with which you can photograph food products one after another without starting from scratch with every dish. You work with a beauty dish, a backlight, a spotlight and a honeycomb grid. In addition, there are small detail tricks that make the plate look fresher.
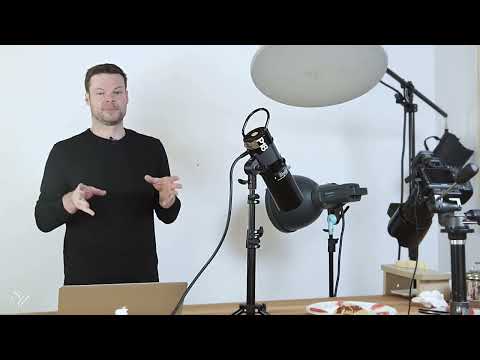
The video is only loaded from YouTube when you play it – data (including your IP address) is then transmitted to YouTube/Google. More in the privacy policy
Key Takeaways
- A round reflector like the beauty dish creates round light reflections that match the shape of plates and dishes.
- The light should point at the product at a similar angle to the camera, so you make optimal use of the power.
- Lights placed behind control contrast and structure, lights placed in front control color.
- A honeycomb grid focuses the light and makes it more directional, but requires significantly more power.
- Food quickly loses its shine. Set up the light first with a stand-in plate and only decorate the final plate afterwards.
- With oil, a brush and patience, you bring out freshness and shine in tomatoes, sauce and noodles.
Step-by-Step Guide
Step 1: Set up the beauty dish as the main light
Start with the main light. In the tutorial, a beauty dish is used, which is a round reflector with a honeycomb structure. The choice of the round reflector is no coincidence: a plate is round, and round reflections on sauce and noodles look more natural than angular light surfaces, such as those a softbox often creates. Inside is a silver surface over which a diffusion cover is stretched. This makes the light softer, which is usually more pleasant for food.
Position the light so that it illuminates the dish from the side and slightly from above. Then do a first test run with the camera. The image often looks dark at first, so increase the power step by step. Make sure that no distracting tools or other accessories in the background protrude into the frame. Move them aside before continuing.

Step 2: Adjust the exposure in small steps
When you increase the power, the image can quickly become too bright. In the video, the result after the first increase is a touch too bright. So you go back a few points and run another test. Work with small changes and check each step on the camera display or on the monitor. This way you keep control over the lighting mood and avoid blown-out areas.

Step 3: Place the backlight from behind
Next, you place a second light from behind, that is, as a backlight. To do this, briefly switch on the modeling light. The modeling light is a continuous light on the lamp with which you can see the spot of light before you trigger the flash. Align the light so that the spot of light lands on the dish. If necessary, move it closer to the wall so that the spot of light becomes tighter. Then increase the power significantly and do another test. The backlight provides contrast and three-dimensional structure in the noodles and in the sauce.

Step 4: Attach a honeycomb grid for directional light
Now you try out an attachment, the honeycomb grid. It is placed on the reflector and focuses the light so that the spread becomes smaller. Switch the light off beforehand, attach the grid and switch it back on. You will see that the light becomes much more focused and more directional. The downside is that the grid swallows a lot of light. In the example, you have to increase the power by several stops; in the video it is three full stops in total. This is normal and not a sign of an error in the setup.

Step 5: Optimally match angle and power
Now it is about the interplay of angle and power. The light is tilted slightly downward so that it points at the product at a similar angle to the camera. This is referred to as the billiard principle: the angle of incidence and the angle of reflection should be as equal as possible. This way the light reaches the product, and you make optimal use of the power. The result shows in the image in the shine of the sauce and in a more centered reflection on the wooden board. When triggering, also pay attention to the sound of the flash. When working indirectly, more power has to arrive, because part of the light is lost at the wall.

Step 6: Shaping Color with a Spotlight from the Front
In the next step, you set up a third light, a small spot, from further forward. The logic behind it is simple: lights from behind and from the side control contrasts and textures, while lights from the front mainly control color. With the spot, you bring brightness and color into the pasta and the sauce. You adjust the cone of light using the modeling light until it lands exactly where it should have an effect. Set the power roughly at first and fine-tune it afterwards. In the end, the pasta becomes more colorful and warmer, and the sauce gets more expression.

Step 7: Finishing the Light Setup with a Stand-in Plate
Once the light is set, the work on the product itself begins. Food changes over time because sauce dries out and surfaces become dull. That's why you shouldn't decorate everything right away. Instead, set up a stand-in plate on which you can adjust the light in peace. Once the light is right, you can prepare the final dish and photograph it. Alternatively, you rebuild the setup once more after the preparation. The advantage is that afterwards you no longer have to worry about the light.

Step 8: Bringing Out Freshness and Shine with Oil and a Brush
For the fine-tuning you need a few simple tools: ordinary oil, tweezers to place tomato slices and ingredients precisely, and a small brush to apply the oil. First, align the tomato slices at the edge of the plate so they look neat. Then use the oil sparingly to give the tomatoes and the sauce a fresh shine. Run a test again and again in between to see how the image changes. If you swap out a tomato that stands steeply and therefore shows little of its surface, the overall image improves noticeably. When oiling, make sure that not too much of it runs onto the plate.

Step 9: Checking Sharpness and Correcting the Cheese
Before the final photo, you should check the sharpness. Zoom into the details in the image, because sharpness easily decreases toward the edge. Then decide whether the focal plane is right. Small imperfections such as unsightly cheese at the edge are removed before you press the shutter. Only when everything is right for you do you take the final image. Give it time: food photography takes patience, and it's normal that you need several tests until the result is right.

Step 10: Using the Setup for an Entire Series
The biggest advantage of this setup shows when you photograph several dishes one after another. The camera stays at the same spot, the light stays set up, and you only swap out the dish. This creates a consistent series, for example for a recipe book or cookbook. You can also show step by step how a meal is built up. A simple light setup is ideal for this because it is reliable and quick to rebuild.

Summary – Food Photography Light Setup: Lighting Spaghetti Correctly Step by Step
You have learned how to start with a beauty dish as the main light and control contrasts and textures with backlight. With a honeycomb grid you focus the light, and with a spotlight from the front you shape the color. After that, you take care of the freshness and shine of the product. With a stand-in plate you set up the light before the final dish is created. The setup is particularly suitable for series because camera and light remain unchanged and you only change the dish.
FAQ
Why does Maik use a round beauty dish instead of a softbox?Round reflections match the shape of plates and look more natural on food than angular light surfaces.
What is the modeling light for?The modeling light is a continuous light on the lamp. With it you see the light spot before you press the shutter and can align the lamp precisely.
What does a honeycomb grid on the reflector do?The honeycomb grid focuses the light and makes it more directional. However, you need significantly more power for it.
When should I decorate the dish?Only decorate once the light is set up. Use a stand-in plate for this, because food becomes dull over time.

