

A watch on white paper looks tidy, but rarely awakens desire. In this guide, I'll show you step by step how to turn a sober product into an image that conveys mood and is suitable for a cover. We'll work with a dark background, deliberately placed light, and consciously used blur. The guide is based on a practical example from the video, in which Maik photographs a high-quality watch in such a way that it looks exciting and full of character.
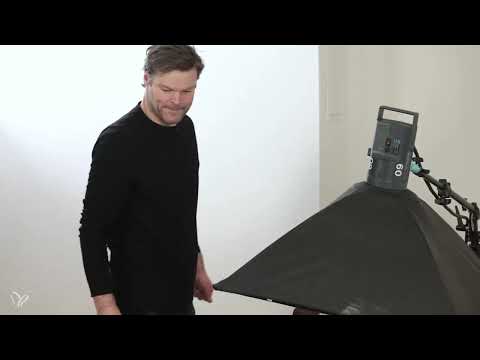
The video is only loaded from YouTube when you play it – data (including your IP address) is then transmitted to YouTube/Google. More in the privacy policy
Key Takeaways
A dark surface creates the atmosphere and brings out the color of the product better than a white background.
The focus should be on the dial, while the rest of the watch gently fades into blur.
Light shapes the product. Highlights on the case and straps show form and material, while backlight creates separation from the background.
High resolution and a large-scale depiction are important because such shots will later appear in magazines, brochures, or on posters.
A clean set with a dust-free product saves a lot of time in retouching later.
Step 1: Define the Concept and Choose the Dark Background
Before you touch the camera, decide on the effect you want the image to have. In the video, Maik deliberately forgoes the classic white background and works with a black surface. This creates a calm, refined atmosphere in which the color of the dial and the materials of the watch stand out. Before setting up, ask yourself what mood the cover should convey: mysterious, sporty, luxurious, or nostalgic. This decision determines all further steps, from the lighting to the focus.

Step 2: Place the Product and Prepare the Set
First, lay the watch roughly on the table, just as you want it to appear in the image later. Make sure it lies stably and its position won't shift when you adjust lamps and frames. Only then do you set up the camera and computer to match the set. A firm position is the foundation for all fine-tuning, because any shift would change the image framing.

Step 3: Capture the Watch Large and in High Resolution
The watch is the highlight of the image and should therefore fill as much of the frame as possible. Fill the image with the product without placing the edges too tightly. Keep in mind that such shots are often printed in magazines, brochures, or as large-format posters. High resolution and sufficient detail are therefore not optional extras but a must. So check even before pressing the shutter whether the sensor delivers enough pixels for the intended later use.

Step 4: Roughly Set the Aperture and Focal Length
Now you set the camera settings. In the video, Maik first chooses an aperture of 5.6 at a focal length of 70 millimeters. These values serve as a starting point and are not yet final. With this setting, the image is still quite flat at the beginning, so the light still needs to be worked out. Consider the values a working basis that you readjust over the course of the shoot.

Step 5: Set the Base Light and Align the Watch
The actual design work begins with the base light. Align the lamp so that light and shadow emphasize the shape of the case. In the video, the watch is slightly rotated for this purpose, and the lamp is tilted downward until the light sits nicely on the product. Move the lamp and product step by step, and check the result on the monitor after each change. Patience pays off at this point, because the base light largely determines how high-quality the final image looks.

Step 6: Choose the Shutter Release Method
You can trigger the shot directly on the camera or via the software on the computer. Software triggering has the advantage that you can immediately check the image at full size without walking away from the camera. Especially for fine corrections to the lighting, this is a big gain in convenience. Choose the option that lets you switch between shooting and checking the fastest.

Step 7: Check the Highlights and Reflections on the Dial
After the first test shots, it becomes clear whether the base lighting works. Pay attention to the highlights from above that give the case structure, and to the reflections on the straps. In the video, the left side of the strap is still too dark, and the right side is only hinted at. This state is a good starting point, but not yet a final result. Make a note of which areas still look too flat before you continue working.

Step 8: Use a Frame as a Light Shaper
To improve the detail on the strap and the dial, Maik places a frame on the left side. This frame is attached to the softbox so that it stands stably and shapes the light in a targeted way. He then compares the shots before and after. The left strap area now shows more detail, and the dial looks more colorful. Always compare your images directly side by side; this is the fastest way to recognize progress.

Step 9: Add Backlight for Depth and Vibrancy
So that the surroundings don't look lifeless, Maik adds another light that works as a backlight from behind. For this, he uses a flash, which he controls via the trigger. Backlight separates the product from the dark background and creates contours that give the image depth. Make sure the lamp doesn't shine too strongly and doesn't protrude into the frame.

Step 10: Correct the Distance and Power of the Light
Not every test immediately leads to the desired result. In the video, Maik notices that the light is visible in the image, and therefore pulls it back further until it is outside the frame. At the same time, he adjusts the power. This step shows how important it is to keep an eye on the entire edge of the image, even when you are concentrating on the product.

Step 11: Check the Sharpness on the Dial
The sharpness must sit exactly where the viewer looks first. So go into detail and check the dial as a whole. Maik notices that the front area is fine, but the upper area needs to be readjusted. He then changes the aperture from 5.6 to 8 to achieve more depth of field. Don't forget: when you change the aperture, you also have to adjust the power of the flashes, otherwise the image will be darker or brighter than planned.

Step 12: Fine-Tune the Sharpness and Trigger Again
After the aperture correction, the fine work follows. Maik moves the focus a little further back until the dial appears clear in the desired area and the rest of the watch fades pleasantly into blur. Then trigger again and compare the result with the previous shot. Only when the sharpness is right do you move on to the next step.

Step 13: Add a Side Lamp with Frosted Foil
For the final accents, Maik sets up another lamp from the side. He uses the frame at the same time with a frosted foil to soften the light selectively. This allows individual areas of the dial to be brightened in a targeted way without overexposing the whole image. Adjust the lamp so that the upper area of the dial gets a bit more color, while the lower area deliberately stays dark. This tension between light and dark creates the mood that distinguishes the image.

Step 14: Clean the Surroundings and Blow Off the Watch
Before the final image is created, the set is made dust-free. The watch itself is also carefully blown off. This work is time-consuming, but it saves you a lot of retouching later. A clean product and a clean environment are the basis for an image that gets by without extensive post-processing. Pay particular attention to small particles on the glass and case, as they are immediately noticeable in large prints.

Step 15: Final Check of the Overall Image
Finally, you look at the image once more as a whole. Is the position of the hand right, is the light balanced, and does the mood feel coherent? Maik thinks the image in this form is suitable for many high-quality purposes. At the same time, he points out that small details can always be improved. What matters is when you can hand over the image with a clear conscience, for example to a client for approval.

Summary ??? Showcasing Watch Photography: From a Simple Product Image to an Emotional Cover
An emotional watch shot doesn't happen by chance, but through deliberate decisions. You begin with a concept and a dark background, bring the watch into the frame large and in high resolution, and use base light, a frame, and backlight to showcase the form and materiality of the product. You place the focus on the dial, while the rest fades softly into blur. With a clean set, controlled apertures, and fine-tuning of the lights, you create an image that conveys mood and is suitable for a cover.
FAQ
Why do you avoid a white background in watch photos?A black background looks more refined and makes colors and highlights stand out more strongly. It also creates an atmosphere that evokes emotions.
Which aperture is suitable for watch photography?In the video, Maik starts with aperture 5.6 and later switches to aperture 8 to get more sharpness in the area of the dial. The right aperture depends on the product and the desired area of sharpness.
Why is high resolution so important?Such shots are often used in magazines, brochures, or as large posters. Without sufficient resolution, details quickly look blurry or pixelated in large prints.
What does backlight do in product photos?Backlight separates the product from the background and emphasizes the contours. This makes the image look more three-dimensional and lively.
Do you also have to adjust the flash power when changing the aperture?Yes. A changed aperture alters the amount of light that reaches the sensor. Therefore, the power of the flashes should be corrected accordingly.
Why should you thoroughly clean the set and the watch before the shoot?Dust and fingerprints are clearly visible in large shots. Clean preparation saves a lot of time in later retouching.

