Imagine you walk into a photo studio, see flash heads, softboxes, umbrellas and tripods, and wonder where to even begin. This is exactly where this introduction to the lighting course comes in. You get an overview of what studio photography is about, how you shape artificial light, and why theory comes before practice.
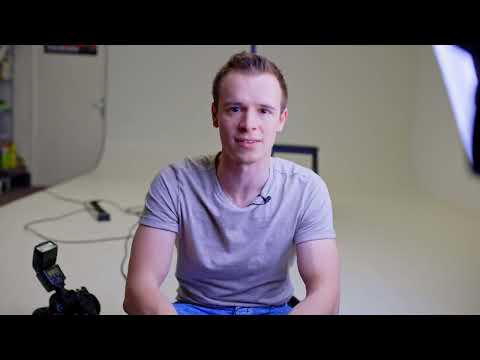
The video is only loaded from YouTube when you play it – data (including your IP address) is then transmitted to YouTube/Google. More in the privacy policy
At just under 49 seconds, the video is very short, but it serves as a signpost for everything else in the course. The short description also announces the comparison between stationary studio flash systems and mobile on-camera flashes. This point is only touched on in this introduction, but it is worth your attention already now, because it determines your choice of equipment.
Key Takeaways
- In the studio, you work with artificial light that you fully control.
- The goal is to shape light, not just use it. Flashes and light modifiers are the most important tools for this.
- Individual flashes and light modifiers only unfold their effect when working together. You should therefore combine them deliberately.
- The course is divided into two parts: first comes the theory, followed by the practical part.
- You learn how to set up flashes and what influence they have on the background.
Step-by-Step Guide
Step 1: Understanding the Location and the Course Framework
The course begins in the photo studio. The speaker welcomes you and places the video as part of a larger lighting course. This is important, because you should not expect to get finished lighting setups in the intro. Consider this video as a foundation on which the following lessons build. While watching, pay attention to the fact that the environment is deliberately controlled: walls, ceiling and floor also influence the light, and it is precisely this control that makes the studio so valuable.

Step 2: Understanding Artificial Light as a Creative Element
The central idea is that you make artificial light work for you. In the studio, you decide where the light comes from, how hard or soft it looks, and how bright it should be. Instead of hoping for available daylight, you design the lighting step by step. Think of a painter who doesn't simply photograph the room, but deliberately sets accents. This understanding forms the basis for everything else.

Step 3: Deliberately Combining Flashes and Light Modifiers
The video emphasizes that many flashes and light modifiers are used simultaneously in the studio. What matters is not setting up as much light as possible, but combining the light sources so that the image looks coherent at the decisive moment. You should consider in advance what role each light source takes on, such as the main light for the shape of the subject or a background light for separation from the background. Test the combination several times and change only one parameter at a time so that you can understand the influence of each source.

Step 4: Understanding the Theory of Flashes
Before you work practically, you should know the theory. The speaker deliberately asks questions that you should also ask yourself: How do you use flashes, how do you set them up, and how does the whole thing work in the first place? Pay particular attention to the background, because it is only indirectly influenced by the flash and can be specifically controlled via the flash settings. Make a note of these relationships, because they will help you with every setting later on.

Step 5: Keeping the Structure of the Course in View
The sequence is clearly structured. A short theory section is followed by a large practical section. This structure makes sense because you should get to know the tools first before applying them in practice. Therefore, plan enough time for both parts when learning and don't work through the theory only superficially. Those who internalize the basics thoroughly find their way around the practical part much faster.

Step 6: Following the Practical Part with a Model
The practical part was already recorded with a model. The chronological sequence is therefore somewhat different from the order in the course. This is not an obstacle, but an opportunity: In the video, you see the finished implementation and can compare the lighting situation directly with the theory. Pay attention to how the light affects the facial features, the shadows and the background brightness. If you later rebuild the setup yourself, start with simple lighting and then expand it step by step.

Step 7: Apply What You've Learned in the Studio
At the end of the introduction lies the prospect of learning a great deal about light in the photo studio. With the basics from this video, you will go into the next lessons well prepared. Start a practice list now, noting which flashes and light modifiers you would like to try out and which questions you want to answer along the way. This turns the intro into a real starting point for your own studio practice.

Summary – Understanding Studio Photography: Shaping Light with Studio Flashes
The intro introduces you to studio photography and shows that light in the studio is deliberately shaped. You learn to combine flashes and light modifiers purposefully, and you gain a theory that makes working with flashes easier. The course follows a clear structure of theory and practice. The short description also hints at the comparison between stationary studio systems and mobile on-camera flashes, which you can explore in more depth in the following lessons.
FAQ
What is the goal of this introduction?The introduction prepares you for working with artificial light in the studio and conveys the theoretical foundations for the practical part of the lighting course.
Do I need any prior knowledge?A basic understanding of photography helps, but it is not mandatory. The video introduces you to the topic of studio lighting.
Why is theory covered before practice?If you know how flashes work and how they relate to the background, you can carry out the practical exercises more purposefully and spot mistakes more quickly.
Why should I combine several light sources?Multiple light sources can be used purposefully to control shape, depth, and separation from the background. A single source is often not enough for this.
What distinguishes studio flashes from on-camera flashes?Studio flash systems are stationary and intended for controlled environments. On-camera flashes are mobile and better suited for use on the go. The exact advantages are explored in more depth in the course.
How can I practice what I've learned right away?Set up a simple setup with one light source, then test a second source and change only one parameter at a time. This way you can see the influence of each setting.


