

Sports shoes quickly look flat in photos, almost as if cut out of cardboard. Yet every model has an interesting shape, a fine sole structure, and a vivid color. You just have to make these details visible with the right light. Maik shows exactly that in his tutorial using a pair of women's running shoes: You'll learn how to prepare the shoes, position them on the set, and shape them with multiple light sources until texture and three-dimensionality come together in the finished image.
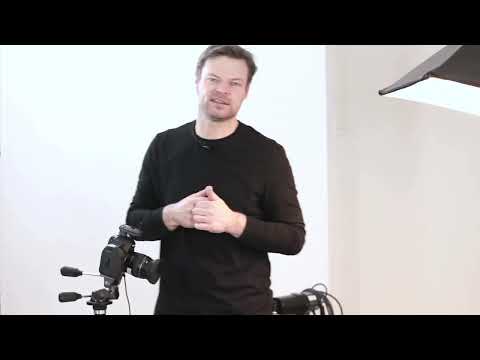
The video is only loaded from YouTube when you play it – data (including your IP address) is then transmitted to YouTube/Google. More in the privacy policy
Key Takeaways
- A shoe must be brought into shape before photographing. Filling material such as paper or stuffing wadding holds the silhouette.
- A base light from above provides even illumination, while a side light creates modeling and relief.
- Raking light brings out texture, while frontal light emphasizes color. The direction of the light therefore largely determines the effect.
- With a small aperture (high f-number), the sharpness often doesn't extend across both shoes. Two shots with different focus can be combined later.
- Oil-free compressed air removes dust and lint without contaminating the product.
Step-by-Step Guide
Step 1: Bring the Shoe into Shape with Filling Material
Start by preparing the shoe cleanly. Stuff it with standard paper, stuffing wadding, or foam. What matters is a material that has volume, is light, and is easy to shape. With a running shoe, you may well need several sheets until the shape is right. Make sure the toe cap and the heel are filled evenly so that the shoe doesn't collapse later.

Step 2: Thread the Shoelaces Invisibly
The logo should be clearly recognizable in the photo, so you have to guide the shoelaces skillfully. Thread the shoelace through the eyelet at the bottom and twist it so that it lies correctly. Then, instead of going from the inside out as usual, you go from the outside in. This way the shoelace disappears into the shoe. Repeat the process on the other side and hide the end inside, and the shoe stays clean and perfectly prepared.

Step 3: Prepare the Set and Place the Shoes
Place the prepared shoe on the set and first position it roughly. In the example, the table was not set up crosswise but far toward the back. This creates a sufficiently large, evenly fading background that requires less retouching later. You place the second shoe in the background, in such a way that its sole is visible. The inside is usually less interesting, whereas the sole offers an additional highlight.

Step 4: Set Up the Camera and Correct the Positions
Once the basic arrangement is in place, you set up the camera. Check the framing and move the shoe with the visible sole a bit further back until you see more of the tread structure. Keep taking test looks through the camera as you do so. Only when the position and framing are right do you move on to the lighting.

Step 5: Set the Base Light from Above
Now switch on the base light. In the tutorial, a softbox from above is used for this, which has proven itself as a base light. Take a test shot to check whether the positions in the image are right and whether the lighting is going in the desired direction. At this point the lighting is not yet perfect, but it shows you where you need to readjust.

Step 6: Evaluate the Test Image and Adjust the Power
Look closely at the test image. In the example, the front shoe was too bright from above, while the sole of the second shoe was still somewhat in the dark. Therefore, reduce the power of the base light step by step until the front shoe is no longer blown out. With a fine adjustment of about half an exposure stop, you can control this well. Then take another photo and check the result on the monitor.

Step 7: Setting Up the Side Light from the Right
Now comes the modeling light. Set up a standard reflector on the right side, at about table height. If you work too much from above, additional shadows appear that make the image look busy. That is why you deliberately keep the light low. This way you reach the side surfaces of the shoe lying down and the modulation of the standing shoe without creating new cast shadows.

Step 8: Dosing the Side Light and Checking the Light Shaper
Take several test shots with the side light. In the example, the light was initially too bright and had to be turned down significantly. Also consider whether to use a light shaper with a honeycomb grid to limit the spread. This can only be found out by trying it. Light that is too broad can quickly make the image look flat, while light that is too focused, on the other hand, emphasizes edges too strongly. So take a series of tests and compare the results directly side by side.

Step 9: Checking the Sharpness and Weighing the Aperture
When checking, zoom into the image to assess the sharpness. In the example, the focus was on the front shoe, but at aperture 16 it was not sufficient for the rear shoe. You now have two options. You can reduce the reproduction ratio, that is, move the camera back a bit. Or you can work with two shots. The decision depends on what the image will be used for, such as an online shop or a large print format.

Step 10: Combining Two Shots with Different Focus
If you decide on the second option, you take one photo with the focus on the front shoe and a second with the focus on the rear shoe. In image editing, you then merge both shots. The result is a higher-quality image with better resolution and significantly more leeway in later post-processing.

Step 11: Adding Frontal Light for Color
To further shape the front shoe, you use another light. It comes from a bit further in front, because frontal light brings out the color more strongly. In the example, the first attempt went wrong, so a second attempt is started. With every attempt, pay attention to how the light position affects the image.

Step 12: Finding the Middle Ground Between Structure and Color
This is about a trade-off. The more raking the light falls, the more structure emerges; the more frontal it is, the stronger the colors appear. So compare several shots. The more three-dimensional version shows the shape more clearly, while the more color-intense version looks more vibrant. Look for the middle ground that combines both. In the example, this produced a photo that is selected for the front area.

Step 13: Cleaning the Shoe with Oil-Free Compressed Air
Before you take the final shots, you remove dust and lint from the shoe. Blow the product off thoroughly with compressed air so that no small particles end up in the image. For on the go, a small can is enough; in the studio, you can use a compressed air generator. Be sure to use oil-free compressed air. Oil splatters on the product can only be removed with difficulty later and can ruin an otherwise good photo.

Step 14: Re-Exposing the Second Shoe
Now turn to the rear shoe and optimize the light specifically for it. Its light differs from the light of the front shoe, so it needs its own exposure. Mark the appropriate test image so that you can find it again later, and take the shot in such a way that you can easily put both results together.

Step 15: Placing the Focus on the Sole
Direct the focus onto the sole and take a photo with the current settings. This quickly shows whether the sharpness is in the right place and whether the tread structure can be clearly seen. A shot with the sole as the focus point gives you valuable information for the final fine-tuning.

Step 16: Adjusting the Light onto the Sole
In the example, the sole of the front shoe was a bit too dark. Therefore, turn the light specifically in that direction. The first version looked too bright and did not match the intended vision. So try more grazing light from the side, so that the light glides slightly across the sole. It is best to check the result by comparing it directly with the previous photo. Then the structure becomes clear and the color comes across well.

Step 17: Combining the Images and Evaluating the Result
In the last step, you combine the shots. This gives you a product photo in which shape, structure, and color are equally convincing. The dark shadow under the shoes also gives the product a firm hold on the surface. An image of this quality speaks for itself and looks like a high-quality product photo, even without elaborate retouching.

Summary ??? Lighting Sports Shoes with Depth: Step by Step in the Studio
You have seen that good shoe photography begins above all with careful preparation. A prepared, well-stuffed shoe with neatly threaded shoelaces forms the foundation. After that, light and positioning determine the result. A base light from above provides the foundation, a side light adds modeling. Frontal light emphasizes the color, grazing light the structure. When it comes to sharpness, you have to weigh whether to adjust the reproduction ratio or work with two shots. Oil-free compressed air and careful checking on the monitor round off the result.
FAQ
Why should I stuff a shoe before photographing it?So that it keeps its shape and does not collapse. Paper or filling wadding gives it volume and makes it look three-dimensional.
Why are the shoelaces threaded from the outside to the inside?That way they disappear into the shoe while the logo remains visible.
Why do I place the table toward the back in the set?This creates a large, fading background that requires less retouching later.
Which light should I set first?Begin with a base light from above, for example a softbox, so that the product is evenly lit.
What is the side light for?It creates modeling and relief, so that the shape of the shoe looks three-dimensional.
Why should the side light be positioned low?With a higher position, additional shadows appear that make the image look busy.
How do I achieve more structure on the sole?With grazing light that runs flat across the surface.
How do I achieve stronger colors?With more frontal light, which makes the color look more intense.
What do I do if the sharpness at aperture 16 is not enough for both shoes?Either you reduce the reproduction ratio or take two shots with different focus and combine them later.
Why must the compressed air be oil-free?Oil can leave fine splatters on the product that are difficult to remove.

