

A metal key on a white background quickly looks flat and lifeless. In this tutorial, I'll show you how to give it depth and structure using a glass plate and targeted light. The result is particularly well suited for cutouts, meaning shots that you later separate from the background on the computer and place on any color you like.
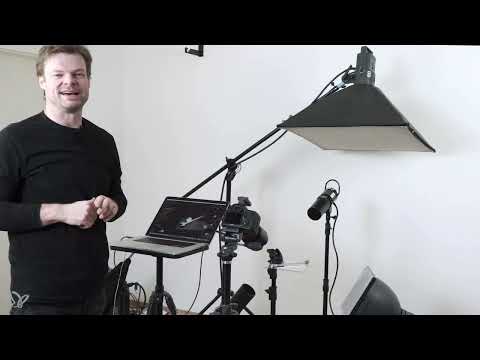
The video is only loaded from YouTube when you play it – data (including your IP address) is then transmitted to YouTube/Google. More in the privacy policy
The setup is straightforward. What matters is the interplay of position, light direction, and power. You have to test each lamp individually and keep adjusting until the contours stand out cleanly. I describe exactly this procedure step by step.
Key Takeaways
- A glass plate allows light from below and therefore targeted illumination of the underside of the product.
- With glass, the background is visible. For cutouts, however, it doesn't matter, because you remove it later.
- You first set the lamps roughly and adjust the power only in small steps.
- Metal reflects strongly. Turn off the modeling light before the final photo to avoid color casts.
- A reflector helps to brighten contours more evenly and bring detail into the surface.
Step-by-Step Guide
Preparing the Glass Plate
First, you need a glass plate. The easiest source is an old picture frame from which you carefully remove the pane. Take care not to cut yourself on the edges. Then you clamp the glass back in place and clean it thoroughly. Fingerprints and dust would later become visible in the photo, especially with light from below.


Positioning the Product on the Glass
Now you place the product on the glass plate. Orient yourself to the perspective you determined beforehand, so you don't have to constantly readjust the composition. Then you go back to the camera and take a first test shot with the current lighting. This way you can see where you need to start.


Understanding the Pros and Cons of the Glass Plate
Before you move lamps, it's worth looking at the difference from the black plate. The great advantage of glass lies in the freedom it gives you in placing the light. You can direct lamps from below through the pane and thus illuminate the product specifically from underneath. The disadvantage is that the background remains visible through the glass. However, you can ignore distracting elements underneath, since you concentrate exclusively on the product. When cutting out, everything that doesn't belong to the subject disappears.

Using the First Lamp from Below
Now the actual lighting work begins. You place a lamp under the glass plate and deliberately light the product from below. Then you take a quick test to see what happens. In this first attempt, the light on the side looks heavily overexposed, but a structure is already emerging in the rear area. This shows you that the key doesn't have a simple contour, but a shape with a fork section and a ring section.


Adjusting the Lamp Power
Since the light is too harsh, you reduce the lamp's power gradually. Be patient and adjust only a little each time so you can follow the effect. Take a new test shot after every change.

Softening the Light with the Picture Frame
If the light still looks too harsh, a simple aid helps. You take the picture frame from earlier and carefully hold it over the lamp to gently dampen the brightness. Proceed cautiously so that the light beam doesn't cut off abruptly.


Setting and balancing the second lamp
Next comes a second lamp, which you also position from below. Align it so that it creates a light reflection in the front part of the key. In the test, this area quickly looks too bright, so you reduce the power here as well. At the same time, you check the position of the light so that the two lights do not overlap each other.


Fine-tuning the top light and side light
Now you add a light from above, for example a softbox. With the power setting, you control how strongly the rear area of the product is brightened. That area initially still looked too dark. Then you slightly correct the angle from the side and test the result again. Here, too, the rule applies: first small changes, then check.


Turning off the modeling light before the photo
An important note concerns the modeling light. Metal reflects strongly, which is why color casts caused by modeling lights can occur. Therefore, turn off the modeling light before the final photo. With materials such as plastic, cardboard or shoes, this problem usually does not occur in this form.


Using a reflector and refining contours
To give the metal an even definition, you use a reflector. Set it up and look for the best position. Sometimes switching to the other side of the product brings significantly better results. Afterwards, you do another test and slightly correct the power of the lamps once more.


Evaluating the result and finishing on the computer
In the end, you look at the image critically. A slight definition appears in the front area, and likewise in the rear area of the key head. The reflection point caused by the backlight won't be a problem later, because you will cut out the product and place it on a dark or colored background. You can use the shots with surroundings or without surroundings, depending on what you want to show. Further editing, that is, cutting out and fine-tuning on the computer, rounds off the workflow.


Summary ??? Dimensional product photos for cutouts with a glass plate and light
With a glass plate and deliberately placed light, you get three-dimensional product photos with a clear structure. You prepare the glass cleanly, position the product, and use lamps from below, from the side, and from above. You test each light source individually and correct the power in small steps. Metal requires additional attention, such as turning off the modeling light. The reflector provides definition, and the later cutout on the computer makes the background unimportant.
FAQ
Why should I use a glass plate instead of a black plate?The glass plate allows light from below. This way you can specifically illuminate the underside of the product, which is not possible with a black plate.
Does the background with the glass plate affect the result?During the shot, the background may be visible. Since you will cut out the product later, however, it plays no role in the final result.
How do I find the right light intensity?Start with a strong setting, take a test shot, and reduce the power step by step. Repeat this process until contours and structure are clearly recognizable without areas becoming overexposed.
Why should I turn off the modeling light for metal?Metal reflects strongly. The modeling light can cause color casts that become visible in the final photo and distort the color appearance of the product.
What is the reflector for?The reflector specifically brightens areas and brings definition to smooth, reflective surfaces. This makes the product look more three-dimensional.
Do I have to photograph the product with or without surroundings?That depends on the goal. With surroundings you show context; without surroundings you get clean cutouts that can easily be placed in different environments.

