
A good headshot rarely happens by chance. Camera and lens play a role, but what matters most are lighting, posture, and the way you guide your subject through the shoot. In the video, you accompany Markus during a shoot with Giovanni, who has applied for a call for applications. You see how Markus sets up the light for men, refines Giovanni's posture step by step, and deliberately directs his facial expression until the portrait is right. This guide shows you the individual steps and explains why they work.
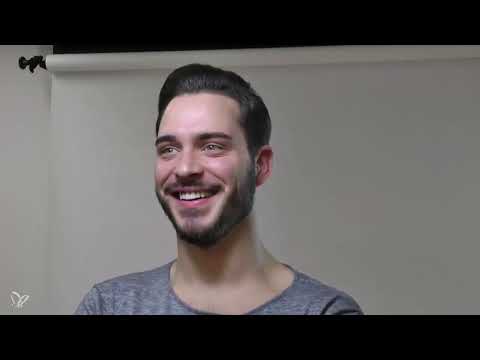
The video is only loaded from YouTube when you play it – data (including your IP address) is then transmitted to YouTube/Google. More in the privacy policy
Key Takeaways
- Portraits of men benefit from a different lighting setup than portraits of women. Two strip boxes with different power create a soft gradient of light across the face.
- A kicker light from behind separates the head from the background and emphasizes the contours of the cheek.
- Slightly squinted eyes look confident, whereas wide eyes quickly look startled.
- The chin line and head posture determine how angular and clear the face looks in the picture.
- You control your expression through three areas: mouth, eyes, and eyebrows.
- Conversation during the shoot loosens up the model and brings out genuine facial expressions.
- Reviewing the pictures together shows what the model likes and helps to fix small distracting factors.
Step-by-Step Guide
Step 1: Setting up the lighting for men
For men, you forgo the four-light set you use for women and instead rely on two light sources. To the left of the camera stand a softbox and a 120-centimeter strip box. On the right, you also place a strip box. The decisive point is the power: you set the right light weaker than the left one. This creates a gradient in the face in which one side appears brighter than the other. This gradient gives the portrait depth and structure. In addition, the setup produces a different light reflection in the eyes, the so-called catchlights, which looks stronger and more striking on men.

Step 2: Placing the kicker light behind the model
Behind the model, you set up a continuous light that falls along the cheek onto the rear area of the face. It creates a bright edge on the silhouette and visually separates the head from the background. Make sure it does not shine directly into the camera. In the video, the kicker light initially stays invisible because Markus first concentrates on the best side. This is a sensible workflow: only once the main side is right do you fine-tune the contours with the kicker light.

Step 3: Using the eyes correctly
Many models open their eyes wide when stepping in front of the camera. This quickly looks surprised or frightened, and that is exactly what you want to avoid in a headshot. Therefore, ask the model to squint the eyes slightly without closing them. In doing so, the lower eyelid rim lifts slightly. This posture conveys self-confidence. However, make sure it does not go too far, because then the gaze quickly looks suspicious or strained. Correct the intensity in small steps and check the result directly on the display.

Step 4: Controlling the chin line and head posture
The chin line is a central design element in the headshot. Stand to the side of the model so that you can see the line between chin and neck precisely. Ask the model to stretch the head slightly forward and a bit outward until a clean chin line emerges. This often feels unfamiliar to the model, but looks much clearer in the picture. After that, the chin lowers slightly again. The head should not look rigid in the process, but be subtly turned. Small adjustments of a few centimeters already change the face noticeably.

Step 5: Finding the best side and correcting body posture
Every person has a side that looks more flattering. Ask your model about it and check it on the picture. In the video, Giovanni states that his left side is his best side, which Markus confirms based on the shots. Align the main side toward the camera and pay attention to the shoulders. Ask the model to let the front shoulder drop a little and to cross the arms loosely or rest them in a relaxed way. Tense shoulders make any head look tense. Also take a small step back to bring the upper body harmoniously into the frame.

Step 6: Deliberately Controlling the Facial Expression
Your expression comes from three areas: the mouth, the eyes, and the eyebrows. Body language can further enhance the nuance, but it is not the main factor. For the eyebrows, there is a muscle in the middle of the forehead. If the model applies slight pressure there, a thoughtful expression results. Too much pressure, on the other hand, looks stressed. A slight smile that shows mainly in the eyes works best. Also ask the model to pull up just one corner of the mouth a little higher or to raise one eyebrow slightly. This creates targeted variations without the entire expression tipping over.

Step 7: Talking with the Model
A headshot should show personality, not an artificial pose. That's why it's worth talking during the shoot. Ask about their job, hobbies, or everyday things. In the video, Giovanni talks, for example, about his training and his work in field sales. Such conversations loosen the mood, and the model forgets the camera for a moment. It is precisely in these moments that natural expressions arise. Watch the facial expression closely and take the photo when the model relaxes.

Step 8: Deliberately Evoking Emotions
With a word game, you can test different expressions. The model looks into the camera and portrays an emotion that you specify, such as surprised, disappointed, annoyed, thoughtful, in love, or confident. This quickly produces expressions that would hardly appear otherwise in a shoot. The method is especially helpful when you need a certain effect for the picture. For a confident portrait, for example, you can guide a combination of slightly squinted eyes, a slightly lowered chin, and a restrained smile. A joke or a funny remark also often brings out a genuine laugh, in which the eyes laugh along too.

Step 9: Reviewing the Pictures Together and Fixing Small Details
In between, you should look through the shots together with the model. That way you find out what they like and what they value. At the same time, the model notices things you might not. In the video, for example, the hair on the left side is addressed, as it forms a distracting bulge. Markus corrects it right away and shoots again. You should also remove distractions such as large earrings that sparkle in the light, or take them into account when selecting, because they draw the eye away from the face.

Step 10: Keeping Post-Processing Under Control
Compared to fashion photos, headshots are only lightly edited. You remove distracting pimples, small redness, or individual hairs that fall across the eye. You may also correct fine details in the eyebrows. However, do not edit the image so heavily that the model is no longer recognizable. Also pay attention to the colors: the preview on the camera display or on a TV does not always show colors exactly. Therefore, rely on a calibrated monitor before you finalize the colors.

Step 11: Selecting the Best Shots
Let the model take part in the selection, because they know their own impression best. Markus picks out his favorites beforehand and then shows the model the selection. If a clear decision can't be made, it helps to ask which shot they like better. In the end, what matters is that the portrait carries the personality and fits what the headshot is needed for.

Summary ??? Headshot Photography for Men: Light and Posing
A convincing portrait of a man is built from several components. The lighting setup with two strip boxes at different power levels creates depth, and the kicker light gives the head a clear contour. Squinted eyes, a clean chin line, and a relaxed shoulder posture create a confident impression. The facial expression arises from the mouth, eyes, and eyebrows, while conversations and reviewing the pictures together loosen up the model. With restrained post-processing, the result stays authentic.
FAQ
Why use a different lighting setup for men than for women?For men, you usually rely on two strip boxes with different power levels, because this creates a gradient of light on the face that produces structure and depth.
How do I find a model's best side?Ask the model directly about their preference and then check the shots. Both sides should be compared in the picture before you commit.
Why should the eyes be slightly squinted?Wide-open eyes quickly look startled or tense. Slightly squinted eyes convey confidence, but should not be overdone.
How can I deliberately change the facial expression?You can control the expression through the mouth, the eyes, and the eyebrows. Posture additionally supports the effect.
What do I do about distracting elements like large earrings?Remove the jewelry if possible, or choose shots where the distraction is less noticeable.
Does a headshot need heavy retouching?No. Usually only small blemishes such as pimples, redness, or individual hairs are removed so that the model stays authentic.


