
A good headshot isn't created in retouching alone. You lay the foundation during RAW development, and if you work cleanly here, you'll save yourself a lot of time later when fine-tuning the skin. In this tutorial, you'll see how I develop a portrait of Helena in Adobe Camera Raw, which settings I apply, and what you should pay attention to. The values are guidelines from my setup. Your lighting, your camera, and your lens may require different results.
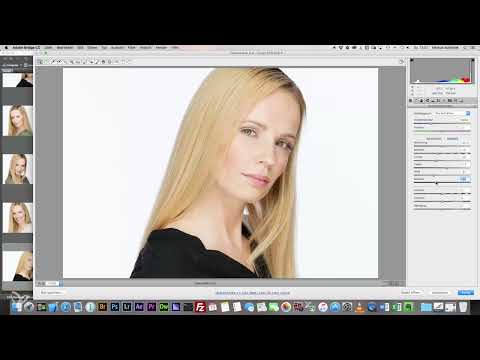
The video is only loaded from YouTube when you play it – data (including your IP address) is then transmitted to YouTube/Google. More in the privacy policy
Key Takeaways
- Lens correction belongs at the beginning of every development, because it forms the basis for all further adjustments.
- The white balance should ideally already be set when shooting. I shoot with a fixed 5000 Kelvin instead of auto.
- Highlights, shadows, white point, and black point determine the mood of the image. Always check them with the magnifier.
- You should rather reduce clarity and vibrance so that the skin texture stays soft and the later retouching becomes easier.
- Compare the results with the histogram and with your eye, because every setting has to suit the particular image.
Step-by-Step Guide
1. Open the Image in Camera Raw
I open my RAW files via Adobe Bridge, because that's where managing images is the clearest and Camera Raw can be launched directly from Bridge. However, you can also load the file directly in Camera Raw. What matters is that you really edit the image as a RAW file, because only then do you have all the reserves for exposure, color, and tonal values available.

2. Enable the Lens Correction
The first step for every headshot is, for me, the lens correction. It compensates for distortions and vignetting caused by the lens. At first glance the difference often seems small, but especially with portraits with tight crops and backgrounds with lines, this correction ensures a clean overall picture. Make sure that the right lens profile is loaded. If none is available, you can adjust the correction manually.

3. Set the Sharpening
For women, I usually set the sharpening amount to 65. Sharpening makes the image more precise without immediately looking artificial. I set the radius to 0.6. These values depend heavily on your camera and your lens. Therefore, test the settings on your own setup before adopting them as a standard. Too much sharpening quickly shows up in hard edges and a restless skin appearance, and that's exactly what you want to avoid in a headshot.

4. Set the White Balance
I've set the color temperature to about 5000 Kelvin for my lighting. I deliberately don't shoot with automatic white balance, but with a fixed value. This keeps the skin tones consistent across multiple shots, and you have to correct less during development. If the value isn't quite right, you can fine-tune it in Camera Raw using the temperature and tint sliders until skin and background look natural.

5. Adjust Exposure and Contrast
With exposure, I proceed only cautiously. I usually pull the slider up very slightly, but leave it at a small correction. I generally reduce the contrast a little, typically in a range between about -10 and -20. A very high-contrast image quickly looks harsh on the skin. A little reduction gives you a calmer base on which you can work later with retouching.

6. Balance Highlights and Shadows
I reduce the highlights slightly so that bright areas such as the forehead or cheeks don't blow out. I raise the shadows a bit so that details in dark areas are preserved. How much you raise the shadows depends on the clothing and the hair color. With dark clothing or dark hair, it can make sense to raise the shadows a little more or to increase the exposure minimally. What's decisive is that in the end everything looks coherent.

7. Check the White and Black Values
This is where it pays to take a close look with the magnifier. I zoom in on bright areas of the image and make sure the white value is around 250 without losing detail. I lower the black value slightly so the image gains depth. These values are not fixed rules. In the end, you decide by looking at the image and the histogram, and often you will need to readjust them after the other adjustments.

8. Use Clarity, Texture and Vibrance Carefully
I reduce the clarity a little. This looks unfamiliar at first glance, but it makes the skin texture softer and makes it easier to retouch later. You can also use texture subtly to emphasize details without overdoing the skin. I take the vibrance back a bit so the colors don't look too strong. Always make sure the image stays natural. If you notice while zooming that the skin looks too rough, reduce the values further.

9. Check the Sharpness at the Eye
Before you continue, check the sharpness in the face, especially at the front eye. Zoom to the maximum and see whether the eye is actually rendered sharp. If that is not the case, it is worth checking the sharpening or the focus of the original image again. A slight blur in the background is normal in portraits, but a blurry eye area is not.

10. Set the Color Space and Bit Depth
For headshots, I usually work with the sRGB color space and a bit depth of 8 bit. This is a standard that is entirely sufficient for the web and most output applications. So far I have not had a use case where I needed a higher bit depth. Still, check what requirements your client or your output medium has.

11. Open the Image as a Smart Object
When opening the image in Photoshop, I choose the option to open the file as a Smart Object. This allows you to adjust the Camera Raw settings again at any time, even if you are already in the retouching stage. This is exactly the advantage over Capture One, where I can no longer return to the raw development after handing over to Photoshop. That is why I prefer to keep working in Camera Raw via Bridge for headshots, even though I occasionally use Capture One for beauty retouching.

Summary – RAW Development for Headshots: Step by Step in Camera Raw
With a clean RAW development, you create the basis for efficient retouching. Begin with the lens correction, match sharpening and white balance to your setup, and then adjust exposure, contrast, highlights, shadows, white and black values carefully. You should take clarity and vibrance back so that the skin stays calm. At the end, check the sharpness at the eye and verify the color space and bit depth. Open the image as a Smart Object so that you can still make changes later. Use the values from this tutorial as a starting point and always adapt them to your own lighting and your camera.
FAQ
Why should the lens correction always be applied first?Because it compensates for distortion and vignetting, which would affect all further adjustments.
Can I adopt the values from the video directly?You can use them as a starting point, but you should adapt them to your camera, your lens and your lighting.
Why do I shoot with a fixed white balance of 5000 Kelvin?This keeps skin tones consistent across multiple shots and makes post-processing easier.
Why do I reduce clarity for headshots?Lower clarity makes the skin softer and makes later retouching easier.
What should I pay attention to with the white value?Check bright areas with the magnifier. The value should be around 250 without losing details.
Why do I open the file as a Smart Object in Photoshop?Smart Objects make it possible to adjust the Camera Raw settings at any time, even after switching to Photoshop.


