
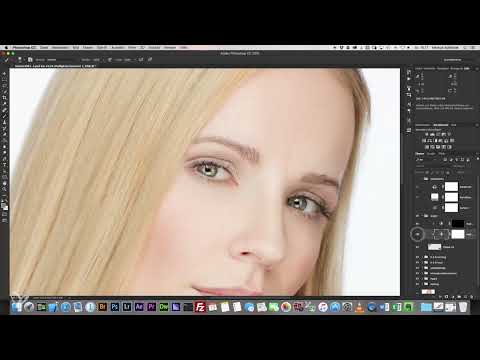
In a headshot, the eyes often decide whether the viewer immediately makes contact with the person portrayed. This is exactly where Markus's tutorial comes in. He shows you how to specifically bring out the eyes without the image looking artificial. For this, you combine Quick Mask, adjustment layers, and sharpening. It also covers catchlights, that is, the light reflections in the eye, which many clients particularly appreciate.
The video is only loaded from YouTube when you play it – data (including your IP address) is then transmitted to YouTube/Google. More in the privacy policy
Key Takeaways
- The eyes contribute significantly to expression and closeness, so targeted editing is worthwhile.
- Work with layers, groups, and adjustment layers so that you can make corrections at any time.
- Brightness/Contrast as a clipping mask, as well as sharpening with equal values for amount and radius, showcase the eyes.
- Catchlights that are too strong can be specifically toned down using a mask.
- Ask clients in advance about their preferences regarding the light reflections.
Step-by-Step Guide
Step 1: Secure the Base on a Separate Layer
Before you work on the eyes, you need a clean working foundation. Press Command + Alt + Shift + E (on Windows Ctrl + Alt + Shift + E). This merges all visible content onto a new layer without changing your original layers. You then edit the eyes on this layer.

Step 2: Mark the Eyes with the Quick Mask
Activate the Quick Mask using the icon in the toolbar or with the Q key. Choose a brush with 100% opacity, 100% flow, and black color. Make sure the mode is set to selected areas. Zoom in close to the eyes and paint over the eye areas. The mask turns red as you do this. This is completely normal in this mode and shows you which areas you are currently editing. Reduce the brush size for the fine edges so that you can work cleanly.

Step 3: Apply the Selection and Isolate the Eyes
Exit the Quick Mask again using the icon. With Command + J (on Windows Ctrl + J), you copy the marked eyes onto their own layer. You can use this layer for checking and then delete it again, because the selection remains in the document for your further work. You don't have to work with one hundred percent precision. Small inaccuracies at the edge are barely noticeable with the soft settings that follow.

Step 4: Work Non-Destructively and Keep an Eye on Memory
Markus emphasizes working as non-destructively as possible. This means you can change or remove settings at any time without permanently altering the pixels. Group your layers into a layer group for the eyes so that you keep an overview. Also pay attention to memory usage. Photoshop displayed 684 MB in the video, and each merged layer uses roughly double the amount of memory. Therefore, work as economically as possible. If you often need recurring steps, you can create an action for them.

Step 5: Control Brightness and Contrast via Adjustment Layers
Create two adjustment layers of the type Brightness/Contrast. For the upper layer, you invert the layer mask with Command + I (on Windows Ctrl + I). This makes the effect invisible at first, and you can later apply it specifically where you need it. Set the brightness value of this layer to about -35 to -40. The exact value depends on the image, so you should experiment a little.

Step 6: Use the Adjustment Layers as a Clipping Mask
So that the settings only affect the eyes, you use the clipping mask. Attach both adjustment layers to the eye layer. For the lower layer, you slightly increase the brightness to a value of about +5 to +6. The reason: contrast makes images somewhat darker overall, and this slight brightening step compensates for that. Compare the result with the original state. If you don't like the effect, you can simply hide or remove the layer.

Step 7: Emphasize the Eyes with Unsharp Mask
Apply the Sharpen filter, Unsharp Mask, to the eye layer. This filter is actually meant to sharpen details. If you set Amount and Radius to the same value, usually 15 and 15, it mainly changes the contrast. As a result, the eyes pop out much more noticeably. Here too, compare before and after. Make sure you don't overprocess the overall image, because the effect should remain subtle.

Step 8: Tone Down Catchlights That Are Too Strong
The light reflections in the eyes often turn out too bright in studio shots, especially when strip lights are involved. For this, Markus created another Brightness/Contrast adjustment layer with about -35. First you paint the mask black, then you take a white brush with 100% opacity and use it to mask the light reflections. Adjust the brush size to the reflections so that you don't catch too much of the surrounding area. This way the catchlights stay visible but no longer look so harsh.
Step 9: Consider Catchlight Variations and Client Wishes
Not every client wants the same lighting situation in the eye. Markus therefore asks before the shoot which catchlights are desired. Most clients want four reflections, some even more. According to Markus, male clients jokingly usually only get two. Alternatively, you can also try a triangle setup, which also looks interesting. Which variation suits best, however, depends heavily on the type of person. So try out different solutions and let the client decide what they like.

Summary – Emphasizing Headshot Eyes: Catchlight and Sharpness in Photoshop
The eyes are the heart of a headshot, and with the right steps they can be showcased in a targeted way. You select the eyes with the Quick Mask, work with adjustment layers in clipping masks and groups, and make the eyes stand out with Unsharp Mask. You can tone down the catchlights using masks, and you should always keep your clients' wishes in mind.
FAQ
Why should I work non-destructively?Because you can adjust or remove settings at any time without permanently changing the original pixels.
Does the eye mask have to be accurate to the millimeter?No, small inaccuracies at the edge usually go unnoticed with the soft settings.
Which brightness value is suitable for the catchlights?A value of about -35 serves as a guideline, but depending on the image it can differ.
What do I do if the eyes look too strong after sharpening?Hide the layer or reduce the opacity, because the effect should remain subtle.
How do I find out which catchlights a client wants?Ask before the shoot which light reflections they prefer, and if in doubt, show them different variations.


