
A good headshot is rarely the result of technique alone. The person in front of your camera usually has doubts about their appearance, feels unphotogenic and secretly expects you to confirm this fear. In this chapter, you will learn how to deal with this insecurity, win the client over from the very first moment and bring them to the point where they forget the camera. Psychology is not an accessory here, but the foundation of every shoot. The technique comes only afterwards.
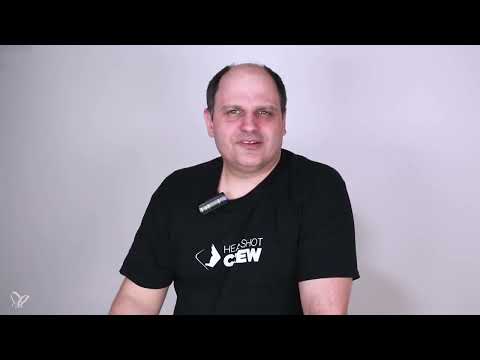
The video is only loaded from YouTube when you play it – data (including your IP address) is then transmitted to YouTube/Google. More in the privacy policy
Key Takeaways
- The headshot begins as soon as the client enters the room.
- Many clients are insecure. Your goal is to make confidence and friendliness visible.
- Adapt your language and demeanor to the client's level, and go slightly beyond it.
- Do research in advance and find common topics of conversation that distract the client.
- Avoid the command "smile." A slight smile looks more natural.
- There is no such thing as a perfect headshot. Purpose and expression decide.
- Not every session succeeds. Practice and honest feedback will help you improve.
- Light is important, but the client's expression is more important.
Step-by-Step Guide
Step 1: Take the Client's Insecurity Seriously
Many clients greet you with a sentence like "I'm so unphotogenic, can you make me look good?" I hear this sentence every day. Most people lack great confidence in front of the camera, and that is exactly what you see later in the pictures. Standard photographers often fail to change that. Your approach should therefore not be to change the person, but to show them as they really are, just in their best version. Take the client's concern seriously, but don't promise miracles.

Step 2: The Shoot Begins at the Door
A common mistake is to start the psychology only at the camera tripod. The shoot begins the moment the client walks through the door. Greet them in a friendly way, ease their tension and show them that they are in good hands here. Someone who feels welcome in the first few minutes will be much more receptive to instructions later. The Headshot Crew has set exactly this goal: to bring out the best in people, from the very first second.

Step 3: Clarify the Intended Use
Before you set up the camera, ask what the image will be used for. An actor applying for a horror film needs a different image than a CEO for their company website. Social media profiles such as Xing or Facebook also each require different expressions. There is no perfect headshot, just as a perfect photo doesn't exist at all. Taste plays a big role, and that is exactly why you should take the intended use as a guideline.

Step 4: Adapt Your Language to the Client's Level
A teenager, a singer, a tradesman and a CEO each need a different approach. Meet the person at their level, and try to be slightly above it. You speak differently with a CEO than with a young guy, and that is completely normal. When you get on the client's level, you can interact with them better. Pay attention to word choice, tone of voice and body language, because they determine whether the client feels understood.

Step 5: Research in Advance
If possible, find out about the client before the appointment. For a CEO, it is worth taking a look online: Which company do they work for, what does it produce, how many employees does it have, is it publicly listed? Such information is quickly found today and gives you topics of conversation right from the start. You don't have to know everything, but a few points of connection help enormously to break the ice.

Step 6: Find Common Topics of Conversation
In conversation, the point is to discover shared interests. With a client who was rather quiet at the beginning, I looked for a topic that excites him and ended up with the topic of cars. With another client, it was playing on the PlayStation. As soon as the client talks about something that brings them joy, they lose the thought of the camera. Then they look completely natural, and that is exactly the expression you want to capture.

Step 7: Making the Client Forget the Camera
The goal is for the client to forget for a brief moment that they are being photographed and simply be themselves. Imagine you are painting pictures in their mind that relax them. At the same time, you distract them so that they don't consciously pose. The camera is only there to capture the optimal moment. Your real task is to distract the client while you wait for the right expression.

Step 8: A Slight Smile Instead of a Command
Never say "Smile" to a client. When you ask people to smile, usually only the mouth smiles, the face stays rigid, and it quickly looks staged. A convincing smile is made up of several elements. The mouth stays closed, the corners of the mouth turn up slightly, and the eyes narrow slightly. Peter Hurley calls this expression "Squinch", a portmanteau of "squint" (to narrow) and "pinch" (to pinch), because the lower eyelids are pulled up slightly.

Step 9: Planning with Multiple Images
Plan a session generously. In my case, at least 120 to 150 images are usually produced, depending on the client. Some clients are satisfied quickly, others need more time. A client at a one on the scale is done quickly, but with a ten client, the session can easily take three hours. Your job is to bring the client step by step from a ten to a one. At the end, the client picks their favorites, because today you often need several profile pictures for different platforms.

Step 10: Dealing with Failures and Persevering
Not every image will succeed, and not every session works. If the chemistry between you and the client isn't right, you will hardly be able to bring out the desired expression. In this case, you should honestly end the session, explain to the client that it isn't a fit, and, if necessary, refund the money. In the beginning, your results often don't look good, and even experienced photographers sometimes miss the mark. What matters is that you practice, practice, and practice again.

Step 11: Using Light as Support
Light is important, but it isn't everything. For headshots, the eye is especially decisive. The pupil should stay small thanks to sufficient light so that the eyes look clear and alive. Many photographers work with continuous light that is bright enough to achieve exactly this. In the beginning, you don't need an expensive studio with lots of strobe heads. A simple light with a reflector is enough for great results. The person's expression ultimately decides the picture, not the light source.

Step 12: Benefiting from Exchange in the Community
It's worth exchanging ideas with other photographers. The Headshot Crew, founded by Peter Hurley, is a worldwide platform with tens of thousands of registered photographers. There you can post images, ask questions, and ask for critique. The tone is matter-of-fact, although communication takes place in English. Every month there is a competition in which Peter Hurley goes through and evaluates the best headshots live. Even if the images aren't yours, you learn an enormous amount, because his trained eye recognizes details that beginners often overlook.

Summary ??? Headshot Photography: Client Psychology for the Perfect Portrait
Psychology determines the success of a headshot. You start the shoot at the door, take the client's insecurity seriously, and adapt your language to their level. Research and shared topics of conversation distract them, so that the camera fades into the background. A slight smile that starts from the eyes is more convincing than any instruction. With patience, practice, and exchange in the community, you will gain confidence step by step and get the best out of every client.
FAQ
How many images should I take during a headshot session?In a session, at least 120 to 150 images are often produced, depending on the client. The client then selects several favorites because they need different images for different platforms.
How do I deal with a client who feels unphotogenic?Take their insecurity seriously, but don't promise miracles. Distract them with a conversation about shared interests so that they forget the camera.
Should I tell the client to smile?No. The command "smile" usually leads to a smile that only reaches the mouth. A slight smile with a closed mouth, slightly raised corners of the mouth, and slightly narrowed eyes is better.
Do I need an expensive lighting setup for good headshots?No, in the beginning a simple light with a reflector is enough. What's important is that the eye is well lit, but the client's expression is more decisive than the light.
What do I do if the chemistry between me and the client isn't right?Honestly end the session, explain to the client that it isn't a fit, and, if necessary, refund the money.


