
After a photo shoot, there are often dozens of images on your hard drive, and you have to decide which of them will become the basis for your final portrait. In this chapter, you'll follow me through the editing of a cat portrait. First you prepare the photo in Adobe Lightroom, then you transfer it to Photoshop and correct dirt, fur patches and distracting reflections there. The techniques are structured so that you can also apply them to your own shots.
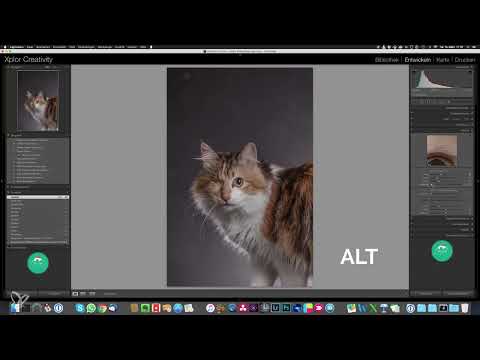
The video is only loaded from YouTube when you play it – data (including your IP address) is then transmitted to YouTube/Google. More in the privacy policy
Key Takeaways
- A single well-exposed and sharp photo is enough to continue working with it.
- In Lightroom, you lay the foundation for the background replacement with exposure, shadows, highlights, clarity and tone curve.
- The lens correction and a basic sharpening with the Alt key held down while masking ensure a clean starting point.
- A Smart Object retains all Lightroom settings, and with a rasterized copy you can retouch safely in Photoshop.
- Spot Healing Brush, Fill and Clone Stamp each fulfill different tasks. Which tool you choose depends on the surroundings of the blemish.
Step 1: Reviewing the photos and selecting the best image
First, import all the shots from the shoot into Lightroom. With flash photography, you don't have to work with dozens of similar photos. If the camera is focused cleanly, the sharpness is usually reliable with flash. What matters is a single image that convincingly captures pose, expression and composition.

So, in the overview, deliberately select the shot you like best. In my example, it is the sitting cat Raja with her tongue sticking out, since this pose supports the composition the most.

Step 2: Understanding the target look
Before you get started, take a look at the before-and-after example. The original photo looks too dark overall. With the editing, you brighten the photo, let the background turn gray and bring out the fine contrasts in the fur. Exactly this look should later be the same across all images in the series.

The look is no coincidence, but the result of several small adjustments. If you understand why you move a slider, you can reproduce the look later with every new photo.
Step 3: Choosing Lightroom or Camera Raw
You don't strictly need Lightroom to follow this method. Camera Raw in Photoshop offers nearly identical functions and just looks slightly different. All the settings I show you here can be transferred there one to one. I work in Lightroom because there I can calmly lay the foundation for the later background adjustment.

Step 4: Adjusting exposure, shadows and highlights
In the Develop module, open the basic settings. Since the photo is quite dark, you raise the exposure considerably, to about plus 1. Brightness can be used well later, so you can be generous here.
At the same time, you pull the shadows up strongly, ideally to the maximum. This makes the background a nice gray. You reduce the highlights somewhat to prevent blown-out, too-white areas from appearing in the light fur.

This combination of raised exposure, strong shadows and reduced highlights is a sensible starting point for almost every photo, because it prepares the background well for the later replacement.

Step 5: Using clarity for fine fur textures
The contrasts in the fur are created not by the Contrast slider alone, but above all by Clarity. For this look, 50 to 60 is unobtrusive and delivers a good result. With fine fur like that of the cat Trudi, you can go further. Here I chose 70, until the micro-contrasts show clearly without looking exaggerated.

We will use Clarity once more at the end, but even now it is the prerequisite for the look.
Step 6: Slightly Reduce the Saturation
Reduce the saturation minimally to about minus 10. More is not necessary. The purpose is that later, when matching the cat and the new background, you have more room for color adjustments.
Step 7: Brighten the Background Using the Tone Curve
In the tone curve, you can raise the dark midtones so that the background becomes even brighter. However, make sure to also pull back the light midtones. Otherwise too much light hits the fur, which could blind or blow it out.

You don't add extra contrast at this point yet. Photoshop offers a better technique for that later, with more control over the color channels. In Lightroom, it is only about a bright background.
Step 8: Activate the Lens Correction
Lightroom can automatically correct distortions and vignetting of the lens. If this step wasn't already done during import, activate the checkboxes for the profile. For cameras from Canon, Nikon, Fuji or Sony, Lightroom usually finds the matching camera profile and lens profile on its own.

Step 9: Basic Sharpening and Masking
In the Detail panel, you give the image basic sharpening, for example with an Amount of 50 and a Radius of 1. The Detail stays at 25. The final sharpening follows later in Photoshop with a special technique that does not emphasize artifacts.

The Masking slider is interesting. Hold down the Alt key while dragging (also Alt on Windows). The image then appears white, and dark areas show where no sharpening is applied. Drag the slider to the right until only the cat is sharpened and the background stays black. For me, this value was between 57 and 58.

Step 10: Hand Over the Photo to Photoshop as a Smart Object
Go back to the Library module, right-click the photo and choose "Edit In", then "Open as Smart Object in Photoshop". Photoshop starts automatically, and the image appears as a Smart Object. This means that all Lightroom settings are preserved. You can reopen them at any time via the Camera Raw settings and readjust them.

If a color profile dialog appears, always choose the top option, i.e. the embedded profile. This way as much image information as possible is preserved.

Step 11: Name Layers and Duplicate the Base Layer
Name your layers meaningfully. A double-click on the layer name is enough. I always call the first layer Base Layer. It remains untouched and shows you the state as it came from Lightroom.

Duplicate this layer with Command plus J (on Windows Ctrl plus J). You continue working on the copy. If you discard a change, you can simply delete the copy. I name the copy Basic Retouching.
Step 12: Rasterize the Copy
Since the copy also becomes a Smart Object when duplicated, retouching tools do not work on it. Right-click the layer and choose "Rasterize Layer". Only then can you use all correction tools.

Step 13: Use the Healing Brush and the Zoom Level
For small touch-ups on fur and surfaces, I almost always use the Healing Brush. You find it in the toolbar or quickly via the J key. Zoom into the image with Command plus and Ctrl plus. The zoom level is shown at the bottom of the window. At 100 percent you can see whether the sharpness is right and where dirt or noise is located. Then zoom back out, because most viewers do not see the image at this magnification.

While holding the Alt key, you set a reference point from which the Healing Brush takes texture and color. Then paint over the blemish with short single clicks, not with long strokes. This creates a natural transition, and you keep changing the source point again and again.

Step 14: Changing brush size and hardness blindly
You can set the size and hardness of the brush in the brush menu. However, you only see the actual size once you go back to the canvas. It is much faster with a keyboard shortcut. Hold Control and Alt and drag while holding the left mouse button. Moving left and right changes the size, moving up and down changes the hardness. For most areas, I get along well with a hardness of 40 to 50 percent.

You will need this technique with all brush tools. Practice it once, and you will save a lot of time.
Step 15: Repairing the eye with the Fill function
The reflection of the ceiling lamp in the eye is distracting because it has a different color and shape than the reflection of the softbox that you want to see in the eye. Such areas are often located directly at hard edges. Here the Healing Brush quickly reaches its limits. The Fill function is better suited.
Select the Lasso with the L key and roughly trace around the reflection. Then press Shift plus F5 to open the Fill dialog. For Content, choose "Content-Aware", activate the Color Adaptation option, set Mode to Normal and Opacity to 100 percent. With Command plus D (on Windows Ctrl plus D) you deselect the selection again.

You edit the reflection near the edge in the same way, except that you deliberately drag the selection beyond the edge. Photoshop recognizes hard edges well. However, a small dent usually remains, which you then have to touch up manually.
Step 16: Fine-tuning with the Clone Stamp
The Clone Stamp, which you call up with the S key, is suitable for areas where edges or curves play a role. Make sure that the mode is set to Normal. As with the Healing Brush, you choose a source with Alt and paint over it, this time with a somewhat higher hardness of about 60 percent.
At the curve of the eye, however, there is no area you can copy from. In this case, you open the Clone Source panel via the Window menu. There you can rotate the source via the angle until it fits the curve. Be careful when rotating: afterwards, set the angle back to 0 degrees, otherwise the clone source will move in the wrong direction.

With fine, blurry fur, small irregularities are sufficient. In areas with strong overlaps, you are better off working in small steps from top to bottom. This way the fur structure is preserved.
Step 17: Avoiding distracting elements during the shoot
A tip that will save you a lot of work: you should remove hairs, lint, or other distracting factors during the shoot. Post-processing is possible, but time-consuming. The less you have to retouch here, the cleaner the result will be.

Step 18: Outlook on the background replacement
After these steps, the cat is free of all distracting elements. In the next chapter, you will replace the background and adjust the floor, light, and transitions. You will benefit from the careful preparation in Lightroom and the clean layers in Photoshop.

Summary ??? Editing a cat portrait: Lightroom preparation and retouching in Photoshop
Editing a cat portrait works well when you proceed step by step. Lightroom prepares the photo for the background replacement with exposure, shadows, highlights, clarity, and tone curve. The lens correction and basic sharpening provide a clean foundation. In Photoshop, you work on a rasterized copy of the base layer and choose the suitable tool depending on the blemish: the Healing Brush for areas, Fill for edges, and the Clone Stamp for fine corrections. If you practice the keyboard shortcuts, you will get faster with every image.
FAQ
Do I absolutely have to own Lightroom?No, all settings can be transferred one to one into Camera Raw in Photoshop.
Why should I give the layers meaningful names?Meaningfully named layers help you quickly find the right place later if you want to change something else.
Why do I work on a copy of the base layer?The base layer remains unchanged. If you don't like a retouch, you can simply discard the copy.
Why do I have to rasterize the copy?A smart object cannot be retouched directly. Only after rasterizing do the Healing Brush, Clone Stamp, and Fill tools become available to you.
Which clarity values are suitable for this portrait?Values between 50 and 60 are inconspicuous. With fine fur like Trudi's, you can also go up to about 70.
What do I do if a color profile dialog appears when opening in Photoshop?Always choose the top option, that is, the embedded profile of the image file.


