
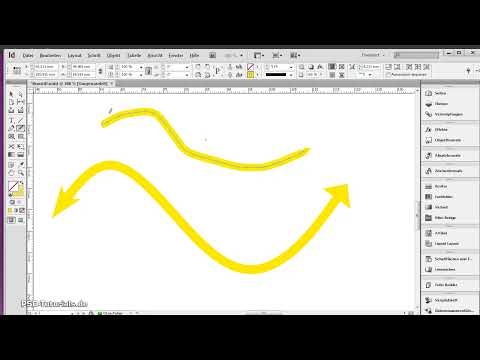
The video is only loaded from YouTube when you play it – data (including your IP address) is then transmitted to YouTube/Google. More in the privacy policy
The colored pencil tools in Adobe InDesign allow you to draw free forms and creative lines. They are ideal for designing hand-drawn elements or creating individual paths in your layouts. Whether for illustrations, decorative lines, or sketches, these tools offer you a variety of creative possibilities. In this guide, I will show you step by step how to effectively use the colored pencil and smoothing tools to refine and personalize your designs. Let's get started and unleash your creativity!
With the colored pencil (shortcut N), you can draw open and closed paths as if with a pen on paper. It is best suited for use with a graphics tablet.
The colored pencil is great for quick sketches that are meant to look like they were drawn by hand.
When drawing, anchor points are automatically placed, their position depending on the length and complexity of the path. For the colored pencil, the currently set stroke style (solid, dashed, hatched line, etc.), stroke weight, and color for the stroke and fill are taken as default.

This means that if you change something in these settings after drawing, the attribute of the currently active path changes. When you draw a new path, it will revert to the previous default setting.
To change this default setting, you need to first use another tool. If you then change a setting such as stroke weight or color and then reselect the colored pencil, the newly changed settings will be the standard for the new path.
Essentially, the lines drawn with the pen tool consist only of a stroke with a certain weight. However, you can color not only the stroke but also the enclosed area as desired.
For closed paths, this area is logically inside the stroke, while for open paths, InDesign connects the starting and ending points of the path when coloring, filling the areas between this line and the stroke.
Slight fluctuations during freehand drawing lead to the creation of many anchor points. These result in a correspondingly uneven appearance of the drawn shape. To improve this, there is now the smoothing tool. When you drag it over the path with the mouse button pressed, anchor points are moved or deleted.
The fewer anchor points remain, the smoother the shape becomes. You can also use the delete anchor point tool from the pen tool palette to specifically delete certain anchor points.
To modify the shape, you can also use the direct selection tool (A) to grab an anchor point and change the path's direction by dragging it.
If you want to erase part of the drawn path, select the eraser from the colored pencil menu. By moving it over anchor points with the mouse button pressed, they will simply be deleted.
Drawn shapes can be horizontally or vertically scaled as desired by dragging the corner points with the selection tool.
If you slightly move the selection tool next to one of the corner points, you can rotate the object box around its center point by holding down the left mouse button.
By clicking on the Effects button in the control palette, you can apply a drop shadow and other available effects to your shape.
Options for the Colored Pencil
Double-clicking on the colored pencil tool opens a dialog box where various settings for the precision and sensitivity of this tool can be adjusted.
The Accuracy value determines how far the mouse or pen must move before a new anchor point is added to the path. A higher value results in a smoother and less complex path. Lower values make curves follow the cursor movement better, creating sharper angles. Values between 0.5 and 20 can be set.
The Smoothing setting adjusts the degree of smoothing when using the tool. Values range from 0% to 100%. A higher value leads to a smoother path, while a lower value creates more anchor points and retains the line's irregularities.
With Keep selection, you can choose whether the path remains selected after drawing. This option is activated by default.
A checkmark in the Edit selected paths checkbox determines whether a selected path can be edited or connected when you are at a certain distance from it. The measurement is set with the Within: X pixels value.
It determines how close the mouse or pen must be to an existing path for path editing to be possible with the colored pencil tool.


