
Lightroom Classic CC - the great photo editing tutorial

- Lightroom Classic CC tutorial: 9 hours of knowledge gain from photographer Matthias Butz
- The complete Lightroom workflow: import, manage, develop, edit and export photos
- Photo management: Keep an overview at all times with the help of libraries, even with thousands of photos.
- Photo development: Understand functions such as the gradation curve, lens correction and co.
- Local editing: Use tried and tested methods to perfect the appearance of your photos.
- Practice: Learn from your trainer's approach and apply the methods to your photos.
- Lightroom mobile, tips and tricks: How to edit your images effectively on the go.
Better photos. More overview. Work more effectively. This tutorial will get you fully up to speed with Lightroom Classic CC. Watch it now and take your photo workflow to the next level!
66 Videos, 579 minutes
Welcome
Lightroom Classic CC Tutorial: 1.1 | Intro
Welcome to the Lightroom Classic CC tutorial. A brief overview of the contents of the training.
Lightroom Classic CC Tutorial: 1.2 | How does Lightroom work?
Lightroom is a program that works with a catalog. But how exactly does it work and what should you bear in mind?
Lightroom Classic CC Tutorial: 1.3 | Lightroom or Photoshop?
A question that I am often asked: When should you use Lightroom and when should you use Photoshop? I'll show you the differences here.
Lightroom Classic CC-Tutorial: 1.4 | RAW vs. DNG - The advantages of DNG
With DNG, Adobe has created a RAW format that is superior to most in certain respects. I'll show you the advantages and disadvantages.
Lightroom Classic CC Tutorial: 1.5 | Structure & Menu
The structure of the Lightroom menus is divided into different areas of activity. These all perform their own tasks, but you can also freely customize them.
Introduction
Lightroom Classic CC Tutorial: 2.1 | Create Catalog
The catalog comes before working with Lightroom. How do I create the catalog in Lightroom and what should I pay attention to? We explain this in this video.
Lightroom Classic CC Tutorial: 2.2 | The most important settings
Before you start editing images with Lightroom, you should take a closer look at these settings.
Lightroom Classic CC Tutorial: 2.3 | Previews
Previews speed up the display of our photos in Lightroom. However, these should be created first. I have a few tips for you on this.
Library
Lightroom Classic CC Tutorial: 3.1 | Intro to the "Library" chapter
The library is responsible for managing your photos. Filters, markers and metadata - you'll learn everything you need here.
Lightroom Classic CC Tutorial: 3.2 | Import
Lightroom is ready for editing. But how do we get our images now? Importing offers us significantly more options than simply adding the photos.
Lightroom Classic CC Tutorial: 3.3 | Collections
Images can be sorted not only in folders, but also in collections. These offer automatic collection options that you should not ignore.
Lightroom Classic CC Tutorial: 3.4 | Rate & Tag
The Lightroom library allows you to manage your images. Rating and tagging helps you enormously.
Lightroom Classic CC Tutorial: 3.5 | Face Recognition
Lightroom offers you face recognition for quick and easy assignment of your shoots.
Lightroom Classic CC Tutorial: 3.6 | Filter & Search
If the images are marked, we also need to be able to search for them. But Lightroom offers much more than just a simple search ...
Lightroom Classic CC Tutorial: 3.7 | Navigator
When zooming in your photos, there is a great way to find your way around easily: the navigator. I'll show you how it works.
Develop
Lightroom Classic CC Tutorial: 4.1 | Intro to the "Develop" chapter
Now it's time to edit your photos. This section is all about the Develop module in Lightroom and editing your photos.
Lightroom Classic CC Tutorial: 4.2 | Screen Calibration
Not every monitor shows you the colors as they actually are. That's why I'll show you here how and why you should calibrate your monitor.
Lightroom Classic CC Tutorial: 4.3 | Protocol, Snapshot & Presets
The great thing about Lightroom is that all edits are non-destructive. You can create snapshots or go back in the log at any time.
Lightroom Classic CC Tutorial: 4.4 | The Histogram in Lightroom
The histogram is an ingenious tool for determining the brightness of your photo and editing images accurately. Do you understand this tool?
Lightroom Classic CC Tutorial: 4.5 | Basic Settings
The basic settings in Lightroom deal with the most important settings for editing your photos.
Lightroom Classic CC Tutorial: 4.6 | Profiles
Profiles are like presets, only better. You can save and apply effects that are not possible with presets alone.
Lightroom Classic CC Tutorial: 4.7 | Create Profiles (in Photoshop)
In the previous video we talked about profiles and their possibilities, now I'll show you how to create them yourself in Photoshop.
Lightroom Classic CC Tutorial: 4.8 | Gradation Curve
The gradation curve in Lightroom is not easy to use. However, once you have mastered it, it offers you unimagined possibilities in terms of color and contrast.
Lightroom Classic CC Tutorial: 4.9 | HSL
When it comes to color editing and adjustment, there is no way around HSL. With this tool, you can control every single color channel in Lightroom.
Lightroom Classic CC Tutorial: 4.10 | Partial toning
Partial toning is the easiest way to give your photo a color style. Simply select the color and intensity and Lightroom will do the rest.
Lightroom Classic CC Tutorial: 4.11 | Sharpening & Noise
The quality of a photo is often defined by its sharpness. This is why there is a special tool for removing noise and sharpening.
Lightroom Classic CC Tutorial: 4.12 | Lens Correction
Lenses can cause distortions and other optical errors. But don't worry: these can be easily corrected in Lightroom.
Lightroom Classic CC Tutorial: 4.13 | Transform
Do you want a 100% straight photo? Then this tool is perfect for you. You can use the Transform dialog to straighten anything in Lightroom.
Lightroom Classic CC Tutorial: 4.14 | Virtual Copies
Would you like to try out several versions of a photo, perhaps to test a new edit? There are virtual copies for this.
Lightroom Classic CC Tutorial: 4.15 | Synchronize
This video is about synchronizing in Lightroom.
Lightroom Classic CC Tutorial: 4.16 | Effects
What does the Effects tab in the Develop module in Lightroom offer you? Use the effects for your photos.
Lightroom Classic CC Tutorial: 4.17 | Calibration
Calibration in Lightroom is completely unknown to many, but it offers you undreamt-of possibilities in color editing.
Local processing
Lightroom Classic CC Tutorial: 5.1 | Intro to the chapter "Local Adjustments"
Local adjustments are special tools that do not affect the entire image and open up new possibilities for you.
Lightroom Classic CC Tutorial: 5.2 | Crop
Cropping sounds simple, but it's not. Lightroom has a lot to offer in this simple tool.
Lightroom Classic CC Tutorial: 5.3 | Retouching
Yes, retouching is also no problem in Lightroom. With a simple tool, it is not difficult to quickly remove blemishes.
Lightroom Classic CC Tutorial: 5.4 | Graduated Filters
The graduated filter creates a processing gradient that only affects a specific area of the image. You can decide how!
Lightroom Classic CC Tutorial: 5.5 | Radial Filters
The radial filter works in a similar way to the gradient. Local adjustments in a radial gradient for new possibilities in image processing.
Lightroom Classic CC Tutorial: 5.6 | Red Eyes
Do you have red eyes in a portrait? That's no problem at all. This Lightroom tool can remove them with just one click.
Lightroom Classic CC Tutorial: 5.7 | Correction Brushes
You can use the correction brush to paint editing settings onto your image and thus precisely determine where the change is made.
Practice
Lightroom Classic CC Tutorial: 6.1 | Image Editing HDR
In this practical lesson, I'll show you how I edit my HDR photos. In Lightroom, merging is done with just a few clicks.
Lightroom Classic CC Tutorial: 6.2 | Editing Portraits
In this practical lesson, we will work on a portrait together. I'll show you my settings for the right image style.
Lightroom Classic CC Tutorial: 6.3 | Editing Landscapes
In practice, we also edit landscape photos. Let's edit one of my landscape photos together and explore the possibilities of Lightroom.
Lightroom Classic CC Tutorial: 6.4 | Retouching - Practice
In this practical lesson, we will retouch a portrait together. Lightroom offers a lot of retouching options and can easily keep up with other programs.
Lightroom Classic CC Tutorial: 6.5 | Panorama
Creating a panorama is not that difficult. It only takes a few simple clicks in Lightroom.
Lightroom Classic CC Tutorial: 6.6 | Edit High-ISO Portrait
We continue in practice with something challenging. We work together on a portrait that was taken in rather poor conditions.
Export
Lightroom Classic CC Tutorial: 7.1 | Intro to the "Export" chapter
After editing the images in Lightroom, they need to be exported. You can learn about the different options here.
Lightroom Classic CC Tutorial: 7.2 | Export dialog
Now that the images are edited in Lightroom, the question is how we can export them for social media or just to send out.
Lightroom Classic CC Tutorial: 7.3 | Create Books
Want to print your photos in an album? No problem! Lightroom has its own module for this.
Lightroom Classic CC Tutorial: 7.4 | Web
With Lightroom, you can easily and automatically create an online gallery. Lightroom does all the work for you.
Lightroom mobile
Lightroom Classic CC-Tutorial: 8.1 | Intro to the chapter "Lightroom mobile"
Lightroom mobile brings the power and possibilities you know from the desktop app to your smartphone. Easily edit your photos on the go.
Lightroom Classic CC Tutorial: 8.2 | Library
With Lightroom mobile, you always have your photos with you and can sort, rate, mark and, of course, filter them.
Lightroom Classic CC Tutorial: 8.3 | Develop
With your smartphone and Lightroom mobile, you have a fully-fledged editing program in your pocket. Find out how this works in this lesson.
Lightroom Classic CC Tutorial: 8.4 | Import and Export
Import your photos into Lightroom mobile (including RAW files), edit them as you have learned and export them directly for social media, for example.
Lightroom Classic CC Tutorial: 8.5 | Camera
With the camera in Lightroom mobile, you can take photos directly into Lightroom and create HDR images and RAW shots with your smartphone.
Bonus
Lightroom Classic CC Tutorial: 9.1 | Intro to Bonus Chapter
The bonus area is for all the information that is also important but has not found a place elsewhere.
Lightroom Classic CC Tutorial: 9.2 | External Editing
Editing your photos in Lightroom is not always enough. Sometimes you also want to load them into external plug-ins. That's exactly what this is about.
Lightroom Classic CC Tutorial: 9.3 | Editing in Photoshop
Lightroom offers an interface to Photoshop that makes it easier for you to load images into Photoshop. I'll show you how this works and which settings you should make beforehand.
Lightroom Classic CC Tutorial: 9.4 | Cards
Do you want to assign your pictures to the different locations on a trip? Then use the map module and get an overview.
Lightroom Classic CC Tutorial: 9.5 | Accelerate Performance
Is your Lightroom too slow? Then I have the right tips for more performance and faster editing in this video.
Lightroom Classic CC Tutorial: 9.6 | Archive images, export catalog
Lightroom offers several ways to archive your photos for the long term.
Lightroom Classic CC Tutorial: 9.7 | Back Up Catalog
The catalog is the heart of Lightroom. This is where everything you change in your images is stored. That's why a proper backup is important.
Lightroom Classic CC-Tutorial: 9.8 | CMYK vs. RGB
CMYK or RGB? Which color mode should I use and when? I'll show you the differences.
Lightroom Classic CC-Tutorial: 9.9 | Which bit depth is the right one?
There is more than just the resolution of a photo. The bit depth can result in completely different images.
Lightroom Classic CC Tutorial: 9.10 | What color spaces are available?
Which color space should I use for my photos? A frequently asked question, which I answer in this video.
Update
Lightroom Classic CC Tutorial: 10.1 | Lightroom 8.4 - What's new?
A lot has changed in Lightroom with the update to version 8.4. A huge performance boost and some new features, which I show you in this video!
Lightroom Classic CC Tutorial: 10.2 | Lightroom CC Classic 9.0 + CC & App
It's that time again. There's a new Lightroom version. In this video, you can find out what effects this has on the app, the CC version and the Classic CC version.
Examples of use
-
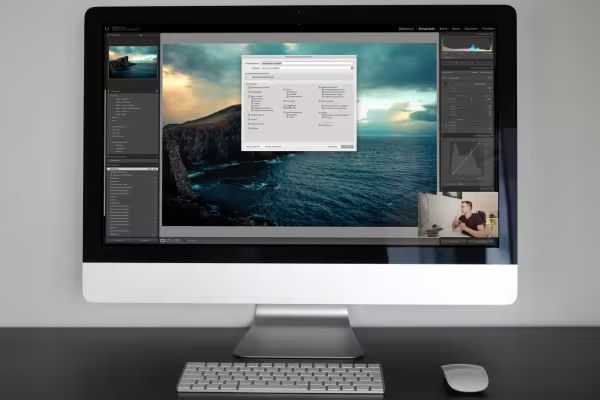 Learn how to use Lightroom Classic CC from importing to exporting your photos.
 -
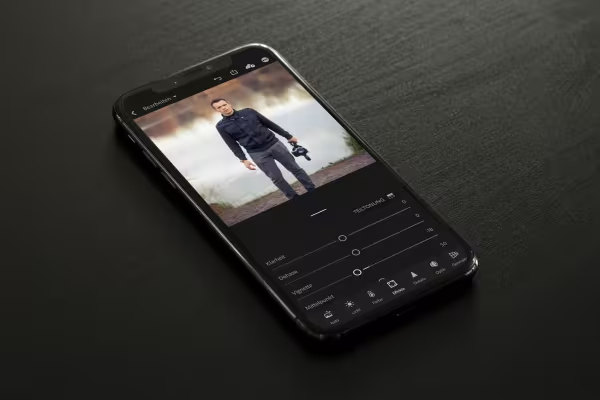 Learn how to use Lightroom mobile to edit your images without a computer.
You might also like

More style, more power, more templates!

Save time with artificial intelligence

Full power, more inspirations, maximum WOW effect!

Photo editing & image composition
Comment now „Lightroom Classic CC - the great photo editing tutorial“