
Adobe Premiere Pro CC Tutorial: Video editing from cut to export

- Over 7-hour tutorial on video editing with Adobe Premiere Pro CC by Matthias Butz
- Easy to get started: Get to know the program interface and customize it.
- Skillful editing: How to edit your videos effectively and create transitions.
- Color grading and correction: Optimize the colors and look of your films.
- The right sound: Adjust the volume and remove the noise in voice recordings.
- Animations: Insert texts, create credits and use great picture-in-picture effects.
- Bonus: Video raw material and exercises for practicing, important technical terms explained
Whether it's clips for social media or a stunning product or image film: start this tutorial - and get started in video editing with Adobe Premiere Pro CC!
54 Videos, 459 minutes
Intro to the video training
What you can expect in the video training "Video editing with Adobe Premiere Pro CC: Editing, grading and effects"
You can expect video training on all the important basics of video editing.
What you can expect in the video training "Video editing with Adobe Premiere Pro CC: Editing, grading and effects"
2 min OpenIntroduction
Premiere Pro CC Tutorial: 1.1 | What you'll learn
Find out what you'll learn in the Premiere Pro CC course.
Premiere Pro CC Tutorial: 1.2 | Who am I?
My name is Matthias. I am a trainer for photography, image editing and video. In this course I offer you my experience from hundreds of hours of video production.
Premiere Pro CC Tutorial: 1.3 | Tasks - Adobe Premiere Video Course
This video course has a few tasks for you to put what you have learned into practice. This is the best way to learn!
Premiere Pro CC Tutorial: 1.4 | How do I download the raw material?
Videos are extremely large. That's why there's something special about this raw download. Don't worry: I'll explain in detail how you can use the videos.
The start with Premiere
Premiere Pro CC Tutorial: 2.1 | Intro to the chapter "Getting started with Premiere"
In this section, we explain everything you need to know to get started editing your videos with Adobe Premiere Pro CC.
Premiere Pro CC Tutorial: 2.2 | Create project
We start at the beginning by creating a project. The most important settings for your start in editing.
Premiere Pro CC Tutorial: 2.3 | Interface
Premiere Pro CC has a very flexible interface that can be adapted to suit all needs. With a few tips and a little familiarization, it's very easy to edit your videos with it.
Premiere Pro CC Tutorial: 2.4 | Folder Structure & Import
Depending on how complex your video project is, you should adopt a certain structure so that you don't lose track.
Premiere Pro CC Tutorial: 2.5 | Performance & Security
There are a few settings that you should definitely set before you get started in order to be able to cut and straighten faster and more reliably.
Premiere Pro CC Tutorial: 2.1 | Intro to the chapter "Getting started with Premiere"
1 min OpenCut in Premiere
Premiere Pro CC Tutorial: 3.1 | Intro to the chapter "Editing in Premiere"
Now it's time for the editing. Get to know the different techniques I use when editing my videos.
Premiere Pro CC Tutorial: 3.2 | Interface
Editing, like all other work areas in Premiere, has a special task - editing and tools specially tailored to it.
Premiere Pro CC Tutorial: 3.3 | Synchronize sound
It is not uncommon to use different devices for recording video and recording sound. I'll show you how to put them back together.
Premiere Pro CC Tutorial: 3.4 | Different editing techniques
There are different editing techniques for different videos. Each has its areas of application and you will learn here when you can use each one.
Premiere Pro CC Tutorial: 3.5 | Transitions & Fades
A simple cut will often be the right choice. However, if you want something a little more unusual, I have the right video for you here.
Premiere Pro CC Tutorial: 3.6 | Text
A text overlay in the video? No problem! But there is much more to discover here.
Premiere Pro CC Tutorial: 3.7 | Effects settings and keyframes
Animations in your videos are not rocket science. You can animate effects using keyframes in Adobe Premiere Pro CC.
Premiere Pro CC Tutorial: 3.8 | Stabilize Video
We are becoming more and more advanced and are concerned with movement. This can be stabilized through tracking.
Premiere Pro CC Tutorial: 3.9 | Control time
It is possible to control the time. Here I mean how fast a video is played back and how you create slow motion or timelapse recordings.
Premiere Pro CC Tutorial: 3.10 | Cut faster
I learned this technique to be able to edit hundreds of hours of videos faster. I would like to share it with you here.
Premiere Pro CC Tutorial: 3.11 | Task: Editing
You have now learned a lot about editing videos. Now you can put it all into practice yourself and edit your own video. With this task.
Premiere Pro CC Tutorial: 3.12 | Solution: Cut I
After the video editing task, I'll show you how I did it. You can look over my shoulder live.
Premiere Pro CC Tutorial: 3.13 | Solution: Cut II
We continue with the second part on editing. You can learn a lot here too.
Color Grading/Color Correction in Premiere
Premiere Pro CC Tutorial: 4.1 | Intro to the chapter "Color Grading, Color Correction"
Color grading gives your videos that certain something and the look of your videos. You will learn everything you need in this section.
Premiere Pro CC Tutorial: 4.2 | Basics
The basic settings in Lumetri Color deal with the most important settings for editing your videos.
Premiere Pro CC Tutorial: 4.3 | Video Scopes
Scopes help to identify the color and brightness distribution in a video. This helps us enormously when grading.
Premiere Pro CC Tutorial: 4.4 | White Balance
Does your video have the wrong color? Then this setting might help you to edit it.
Premiere Pro CC Tutorial: 4.6 | Curves
The gradation curve is probably one of the best-known editing tools and should of course not be missing in Premiere. Whether color style or contrast adjustment: there are almost no limits here.
Premiere Pro CC Tutorial: 4.8 | HSL
When it comes to color editing and adjustment, there is no way around HSL. With this tool, you can control every single color channel in Adobe Premiere Pro.
Premiere Pro CC Tutorial: 4.7 | Color wheels and color matching
Adobe Premiere Pro can automatically and easily adapt videos to each other. This works with a simple click. Of course, the color wheel section can do much more ...
Premiere Pro CC Tutorial: 4.9 | Vignette
The vignette is the last point of the Lumetri panel, and although it is very simple, I wouldn't want to miss this effect.
Premiere Pro CC Tutorial: 4.10 | Adjustment Layers
With adjustment layers, you can assign an effect to all your videos in Adobe Premiere Pro at once, e.g. a color style.
Premiere Pro CC Tutorial: 4.11 | Masks
You don't always want to apply an edit to the whole image. You can control this with masks ... even with moving images.
Premiere Pro CC Tutorial: 4.12 | Task: Color Grading
Now it's time to put it into practice. This is the best way to retain what you have learned. I'll give you a video for color grading and you can apply all the techniques you've learned.
Premiere Pro CC Tutorial: 4.13 | Solution: Color Grading A-Roll
After the grading task, I'll now show you how I did it.
Premiere Pro CC Tutorial: 4.14 | Solution: Color Grading B-Roll
We continue with the second part on color grading. Here you can look over my shoulder again.
Premiere Pro CC Tutorial: 4.1 | Intro to the chapter "Color Grading, Color Correction"
2 min OpenSound editing in Premiere
Premiere Pro CC Tutorial: 5.1 | Intro to the "Sound" chapter
The sound is actually more important than the image. That's why in this section you'll learn everything you need to know about editing sound in Adobe Premiere Pro.
Premiere Pro CC Tutorial: 5.2 | Adjusting the volume
You know when a movie is always loud and then much too quiet? That's exactly what we want to avoid. We adjust the volume!
Premiere Pro CC Tutorial: 5.3 | Essential Sound
Essential Sound is an easy way to make your tone sound better. No prior knowledge required and specially designed for beginners.
Premiere Pro CC Tutorial: 5.4 | Remove Noise
Noise on a soundtrack distracts from the voice and sounds unprofessional. So here I'll show you the best way to remove it in Premiere Pro ...
Premiere Pro CC Tutorial: 5.5 | Music and Speech
Music creates the right mood in your videos. However, mixing the whole thing with a voice is not easy, except with Premiere Pro. Here it works almost by itself.
Premiere Pro CC Tutorial: 5.6 | Editing voice recordings
No matter how good the microphone you use is, you can use these techniques to give your voice recordings the finishing touches during editing.
Effects & animations
Premiere Pro CC Tutorial: 6.1 | Intro to "Effects and Animations" chapter
In addition to editing, there are also some animations and effects that we can use in our video. I have created a complete section for this.
Premiere Pro CC Tutorial: 6.2 | Ken Burns
The Ken Burns effect is very popular with filmmakers who want to superimpose a photo in their videos, for example. But there's a lot more you can do here.
Premiere Pro CC Tutorial: 6.3 | Picture in Picture
The picture-in-picture effect is something I use in a lot of videos. Here I'll show you how it works very simply in Premiere.
Premiere Pro CC Tutorial: 6.4 | Create credits
Creating credits for a video is very easy. It only takes a few clicks and I'll show you how.
Premiere Pro CC Tutorial: 6.5 | My favorite effects
Premiere offers countless effects, and it's not easy to keep track of them all ... I'll show you the effects that I use regularly.
Export
Premiere Pro CC Tutorial: 7.1 | Intro to the "Export" chapter
When we're done, it's time to export. Here you can find out everything you need to know, including the correct settings.
Premiere Pro CC Tutorial: 7.2 | The Export dialog
The export dialog in Adobe Premiere Pro offers many options, but can quickly become confusing for beginners. Here you will learn exactly what you can set where to export your videos correctly.
Premiere Pro CC Tutorial: 7.3 | Export for YouTube, Instagram & Facebook
We now know how to export our videos. But which settings do we use here exactly? I'll show you how I export my videos for Instagram, YouTube or Facebook ...
Bonus
Premiere Pro CC Tutorial: 8.1 | Resolution
What does the resolution of a video mean for the quality? The answer to this will be different than you think. We clarify all questions about video resolution in video editing.
Premiere Pro CC Tutorial: 8.2 | Bit Depth
There is more to a video than its resolution. The bit depth can make for completely different recordings.
Premiere Pro CC Tutorial: 8.3 | Using the LOG profile
The LOG profile ensures a low-contrast and desaturated image, but offers you significantly more editing options.
Premiere Pro CC Tutorial: 8.4 | 4k or HD
4k is the current standard for many - or is it? Maybe it's worth filming in HD after all. I'll show you the pros and cons.
Examples of use
-
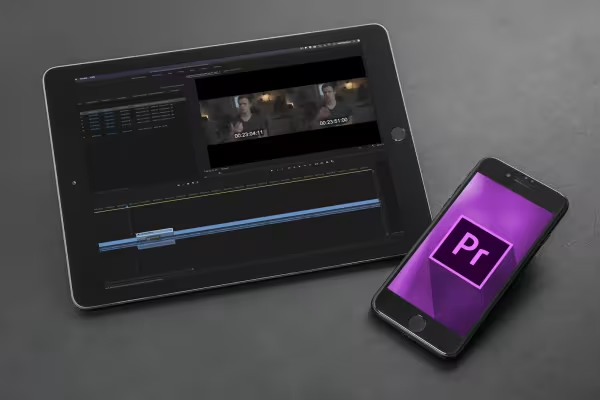 Learn how to use Adobe Premiere Pro CC from editing to exporting your videos.
 -
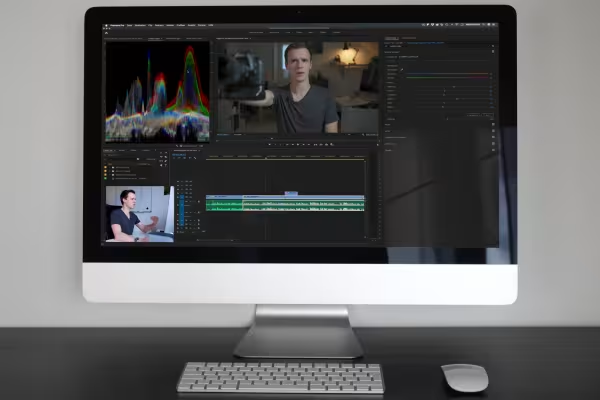 Editing, sound, effects - this tutorial will help you create great videos.
You might also like
Practical applications for companies
Produce high-quality videos
How it works. What options exist.

Edit films, transitions, animations, and more
Comment now „Adobe Premiere Pro CC Tutorial: Video editing from cut to export“