When you produce videos, the visual impression is crucial to the overall experience of your audience. Differences in color and brightness can distract the viewer and disrupt the flow of the video. To achieve truly professional results, it's important that your videos have a harmonious color and lighting mood. In this guide, I'll show you how to use the color wheels in Adobe Premiere Pro to match and adjust the colors of your footage.
Key takeaways
- The color matching tool in Premiere Pro is an effective way to match color styles between different clips.
- You can use the color wheels to adjust shadows, midtones and highlights.
- For maximum effectiveness, you should think about the lighting mood of your material before you start shooting.
Step-by-step guide
Step 1: Access the Lumetri window
Start by opening the Lumetri window. Go to the window options at the top of the menu and select Lumetri Color. The Lumetri panel will appear where you can make all color corrections.
Step 2: Activate comparison view
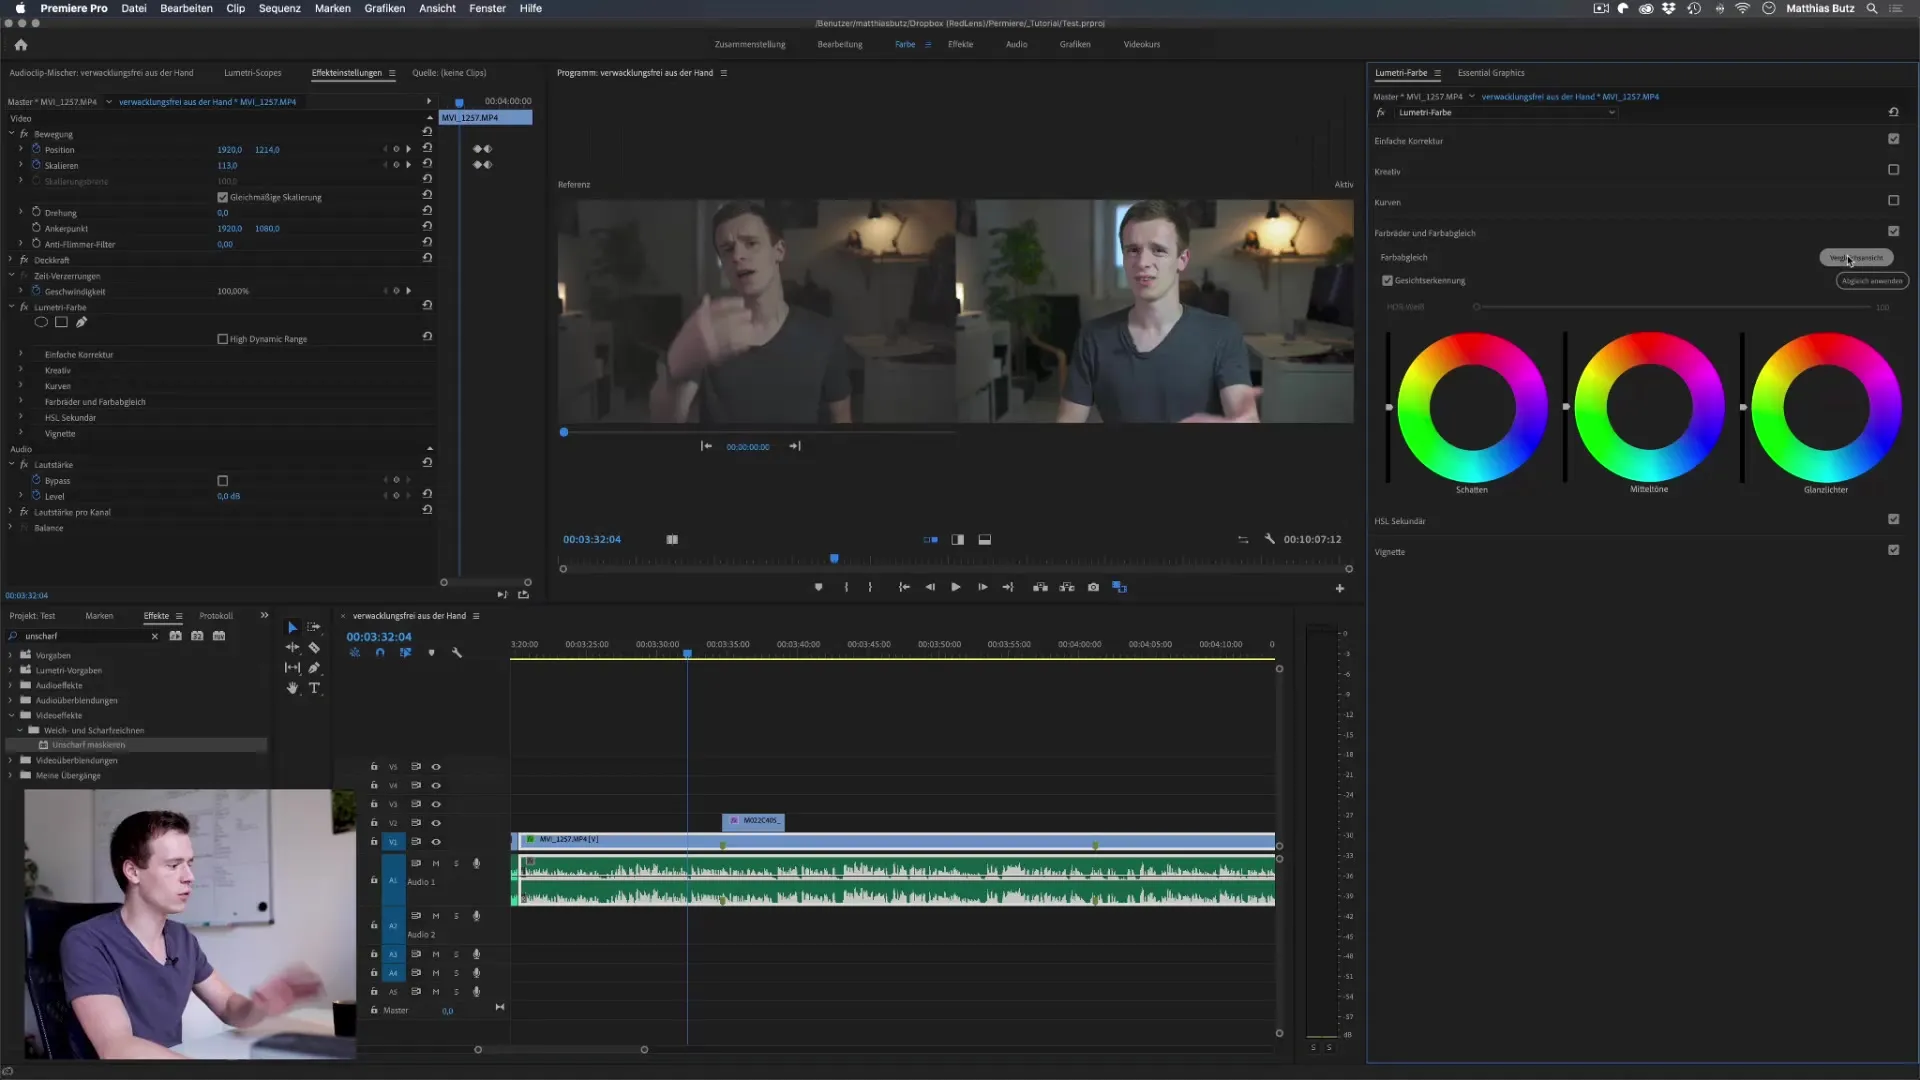
Activate the comparison view to have a reference for your color matching. Click on the Comparison view button in the panel to change the view. Here you should use an already edited video as a reference to make the adjustments.

Step 3: Set reference video
Select your reference video by navigating to the clip in question and providing it as the source. This is done by copying the clip and pasting it into the Lumetri window. Make sure that the reference is well pre-graded so that the changes on the other clip are clearer.
Step 4: Select clip for matching
Now click on the clip you want to adjust. By selecting a clip that differs in mood and color tone, you can start the matching process. The more similar the clips are in their basic mood, the easier the matching will be.
Step 5: Apply matching
Click on the "Apply matching" button in the Lumetri panel. Premiere Pro will now analyze the selected video and adjust the colors, contrast and brightness to make the video as similar as possible to the reference.
Step 6: Check the results
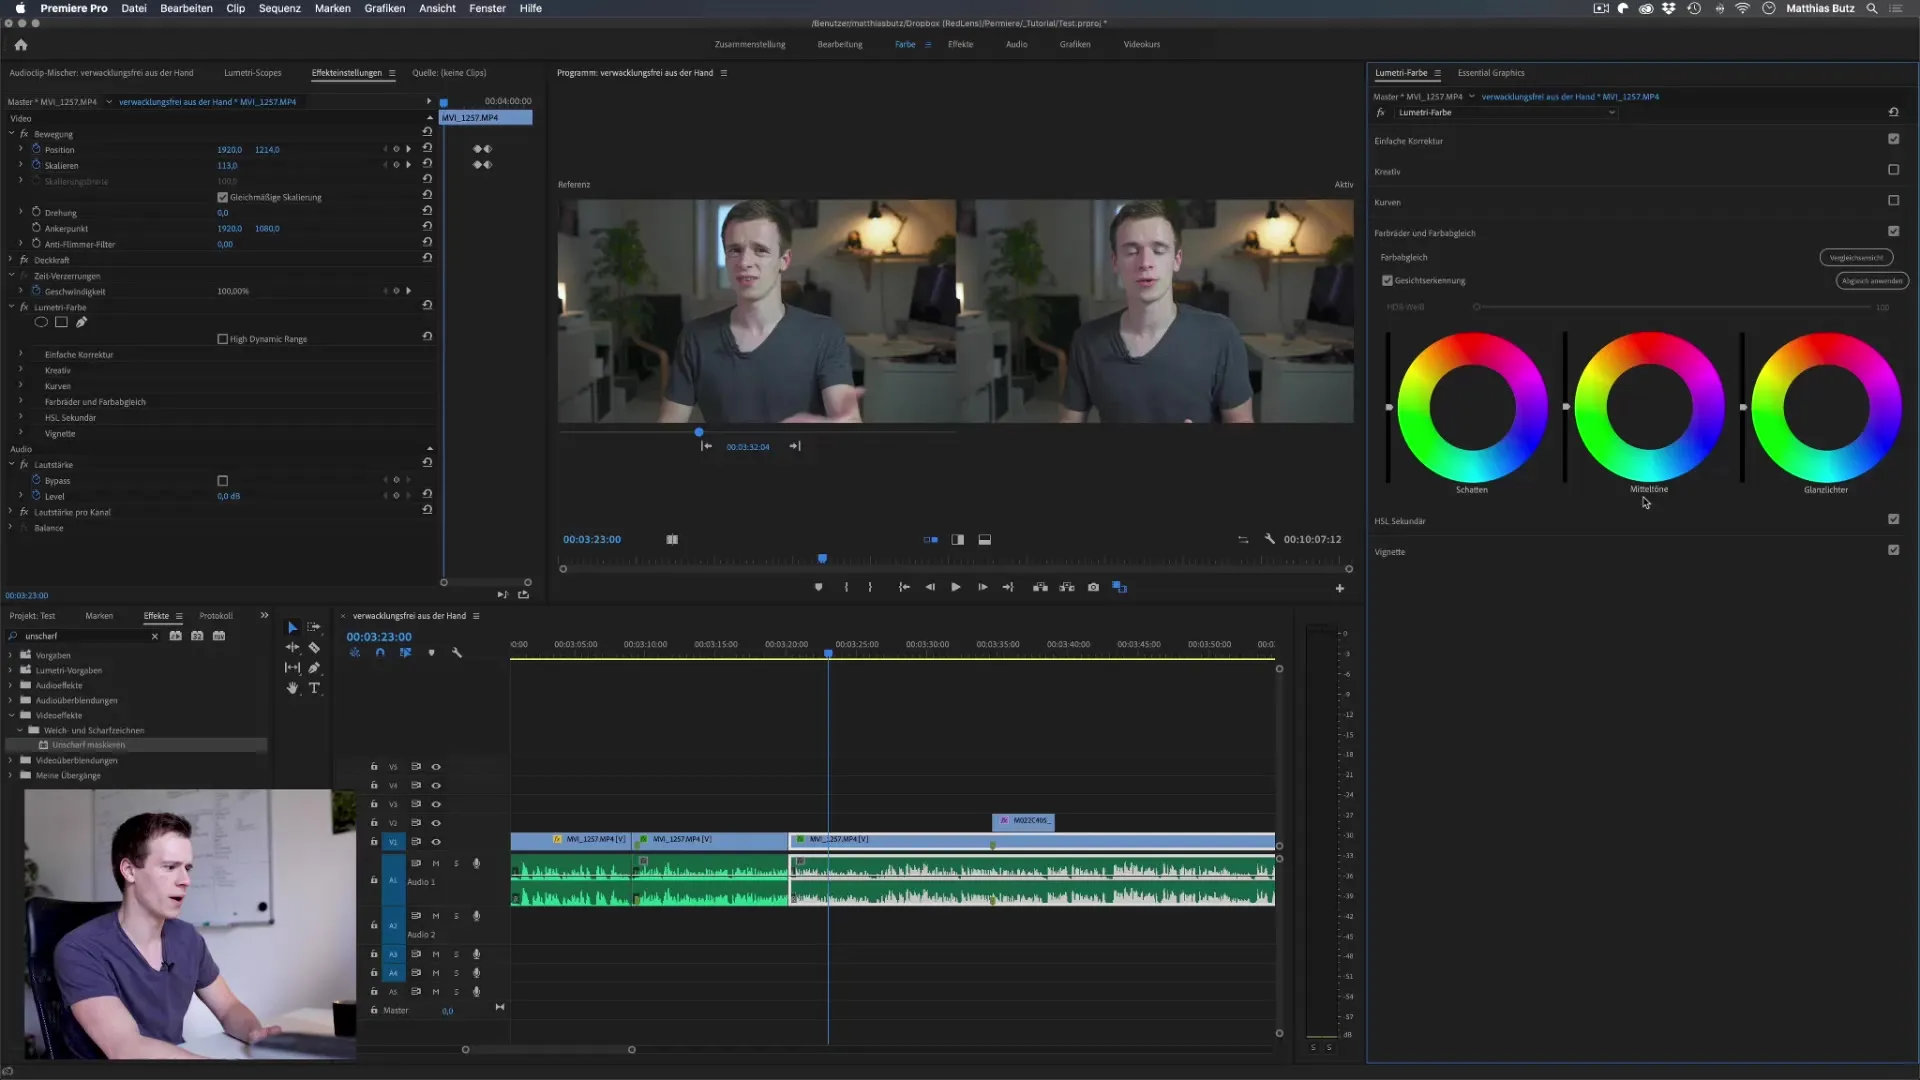
Take a look at the result to see how well the adjustment worked. Check how the contrast, colors and brightness were applied. In most cases, you will already see a noticeable difference.
Step 7: Make manual adjustments
If Premiere Pro's automatic adjustments are not entirely satisfactory, you can make manual adjustments. You can use the sliders for shadows, midtones and highlights to do this. Make adjustments to further refine the image.

Step 8: Use the color wheels
Use the color wheels for more precise adjustments. You can selectively colour shadows, midtones and highlights to create a specific mood or achieve harmonizing effects between clips. Drag the sliders in the desired direction to change the color.

Step 9: Preview the changes
Use the comparison view to see the differences between the original and the edited video. It can be helpful to check the changes several times to make sure everything looks good and fits.
Step 10: Save adjustments
Once you are happy with the adjustments, make sure you save your project. This will allow you to revisit the changes you've made at a later date.

Summary - Adobe Premiere Pro color wheels and color grading
Color matching and the use of color wheels in Adobe Premiere Pro are crucial to creating a consistent and engaging visual experience for your audience. Since colors evoke strong emotions, it's important that you take the time to properly match and adjust your clips. The more you practice, the more adept you will become at using these tools.
Frequently asked questions
What are color wheels and how are they used?Color wheels are tools in Premiere Pro that allow you to make precise adjustments to the color and brightness in different areas of the image.
Why is matching between videos important?Consistent color matching ensures that the viewing experience remains harmonious for the audience and avoids distractions caused by different color and lighting moods.
Where can I find the Lumetri window in Premiere Pro?You can find the Lumetri window in the menu under Window > Lumetri Color, where you can make all color corrections.
How does the lighting mood affect the matching process?The lighting mood has a decisive influence on color perception. Different lighting conditions can make matching difficult, so it is important to pay attention to the lighting conditions when taking the photo.
Is there a perfect solution for color matching?There is no 100% guarantee for perfect color matching, as many factors such as light and camera angle have an influence. However, the tools offer good support.


