Anyone dealing with color correction in Adobe Premiere Pro cannot avoid HSL. This powerful tool allows you to precisely control each individual color channel, resulting in impressive visual effects. In this tutorial, you will learn step by step how to specifically adjust the hues, saturations, and luminances of certain areas of your video using HSL. The goal is to elevate the control over the color design of your projects to a new level.
Key Insights
- HSL enables precise control over hue, saturation, and luminance.
- With eyedroppers, you can selectively pick and edit color ranges.
- Changes in brightness or saturation affect the overall impact on the selected colors.
- Preview options help to check and optimize the mask selection.
Step-by-Step Guide
Step 1: Accessing HSL
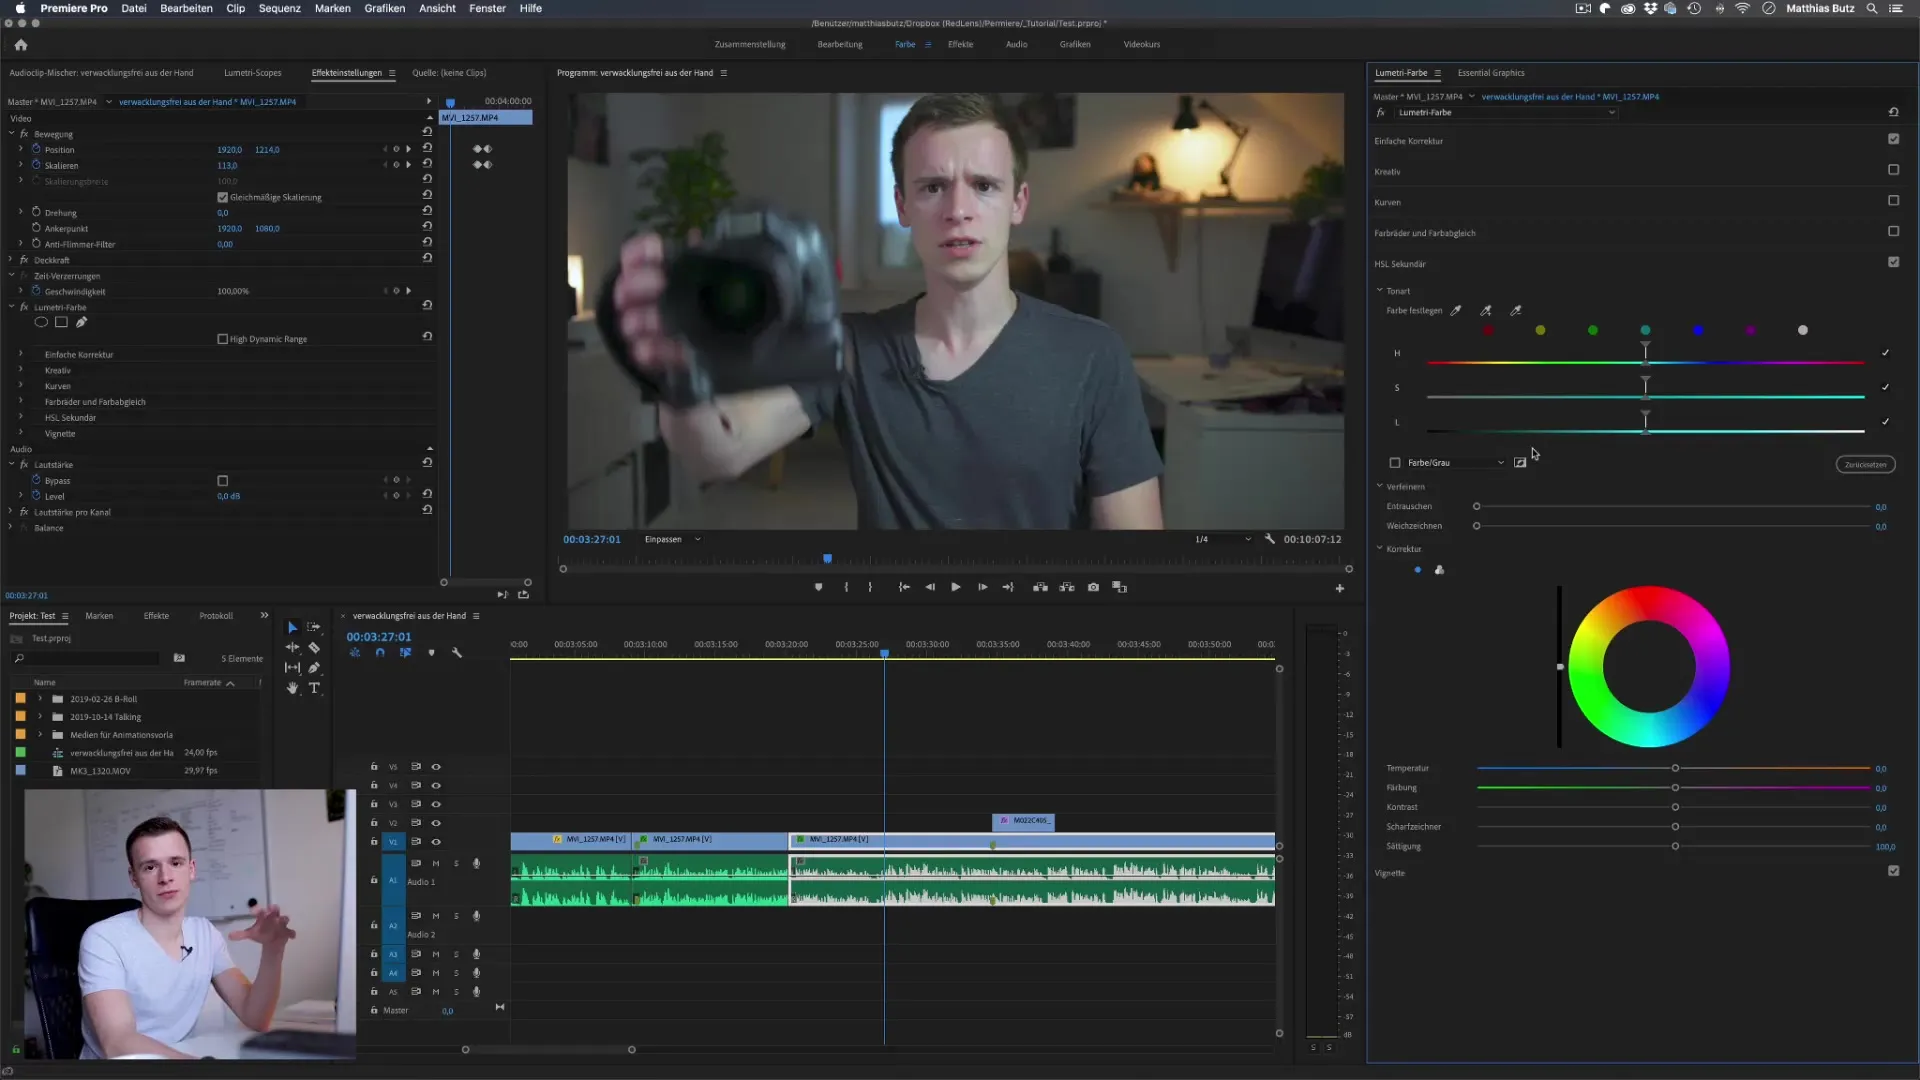
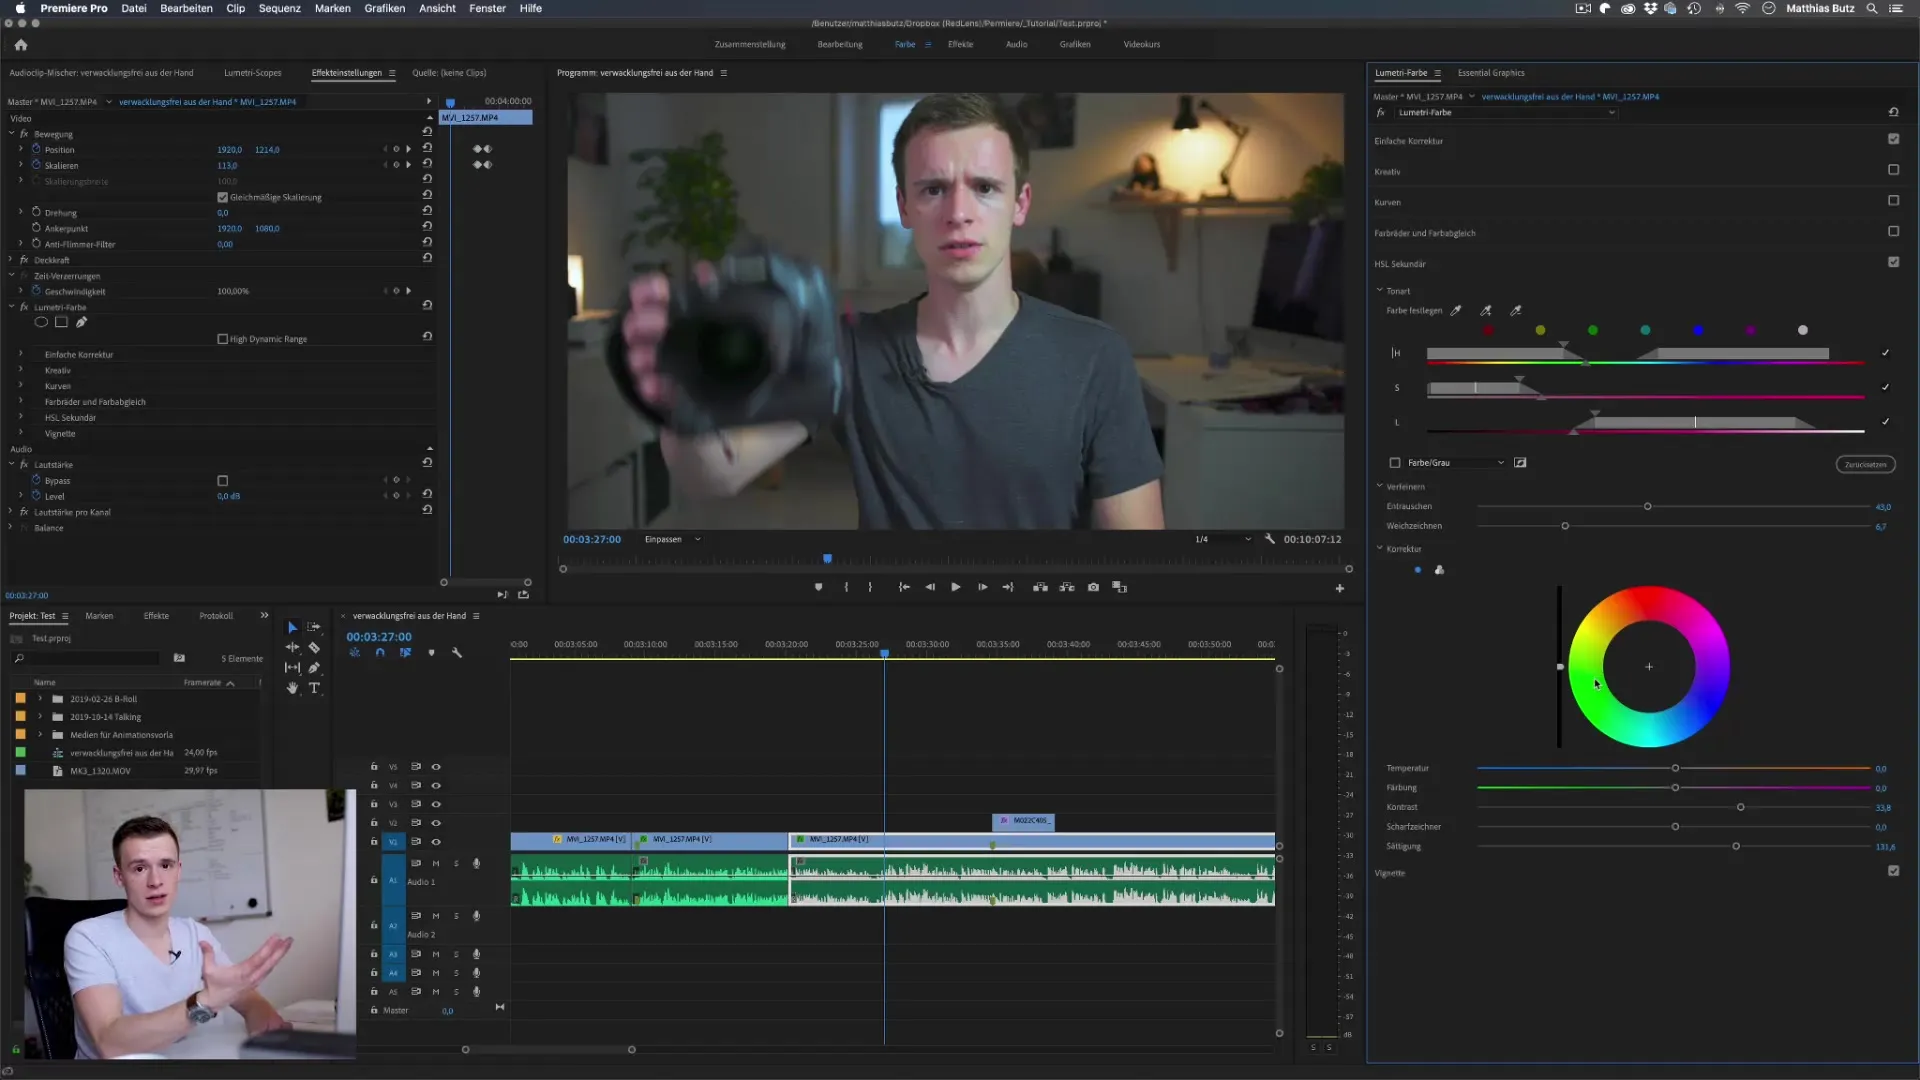
To use HSL in Adobe Premiere Pro, first open the corresponding window for color correction. Go to "Color" and select the "HSL Secondary" option. This is located in your Lumetri window. Here you can adjust the three main parameters: Hue (H), Saturation (S), and Luminance (L), thereby determining the color range you want to influence.

Step 2: Understanding Hue, Saturation, and Luminance
The functionality of HSL is based on three values: Hue, Saturation, and Luminance. Hue indicates which color is displayed, saturation refers to the intensity of the color, while luminance describes brightness. You can use these values to apply the desired color changes precisely. Start by selecting the desired hue by clicking on the correct eyedropper.
Step 3: Selecting a Color Sample
Click on the eyedropper in the HSL area and select a specific hue in your video, for example, skin tones. When you click on the skin color, you will see that this color range is now displayed in the HSL area. You can immediately adjust the values for luminance and saturation and observe the change in real time.
Step 4: Mask for the Selected Hue
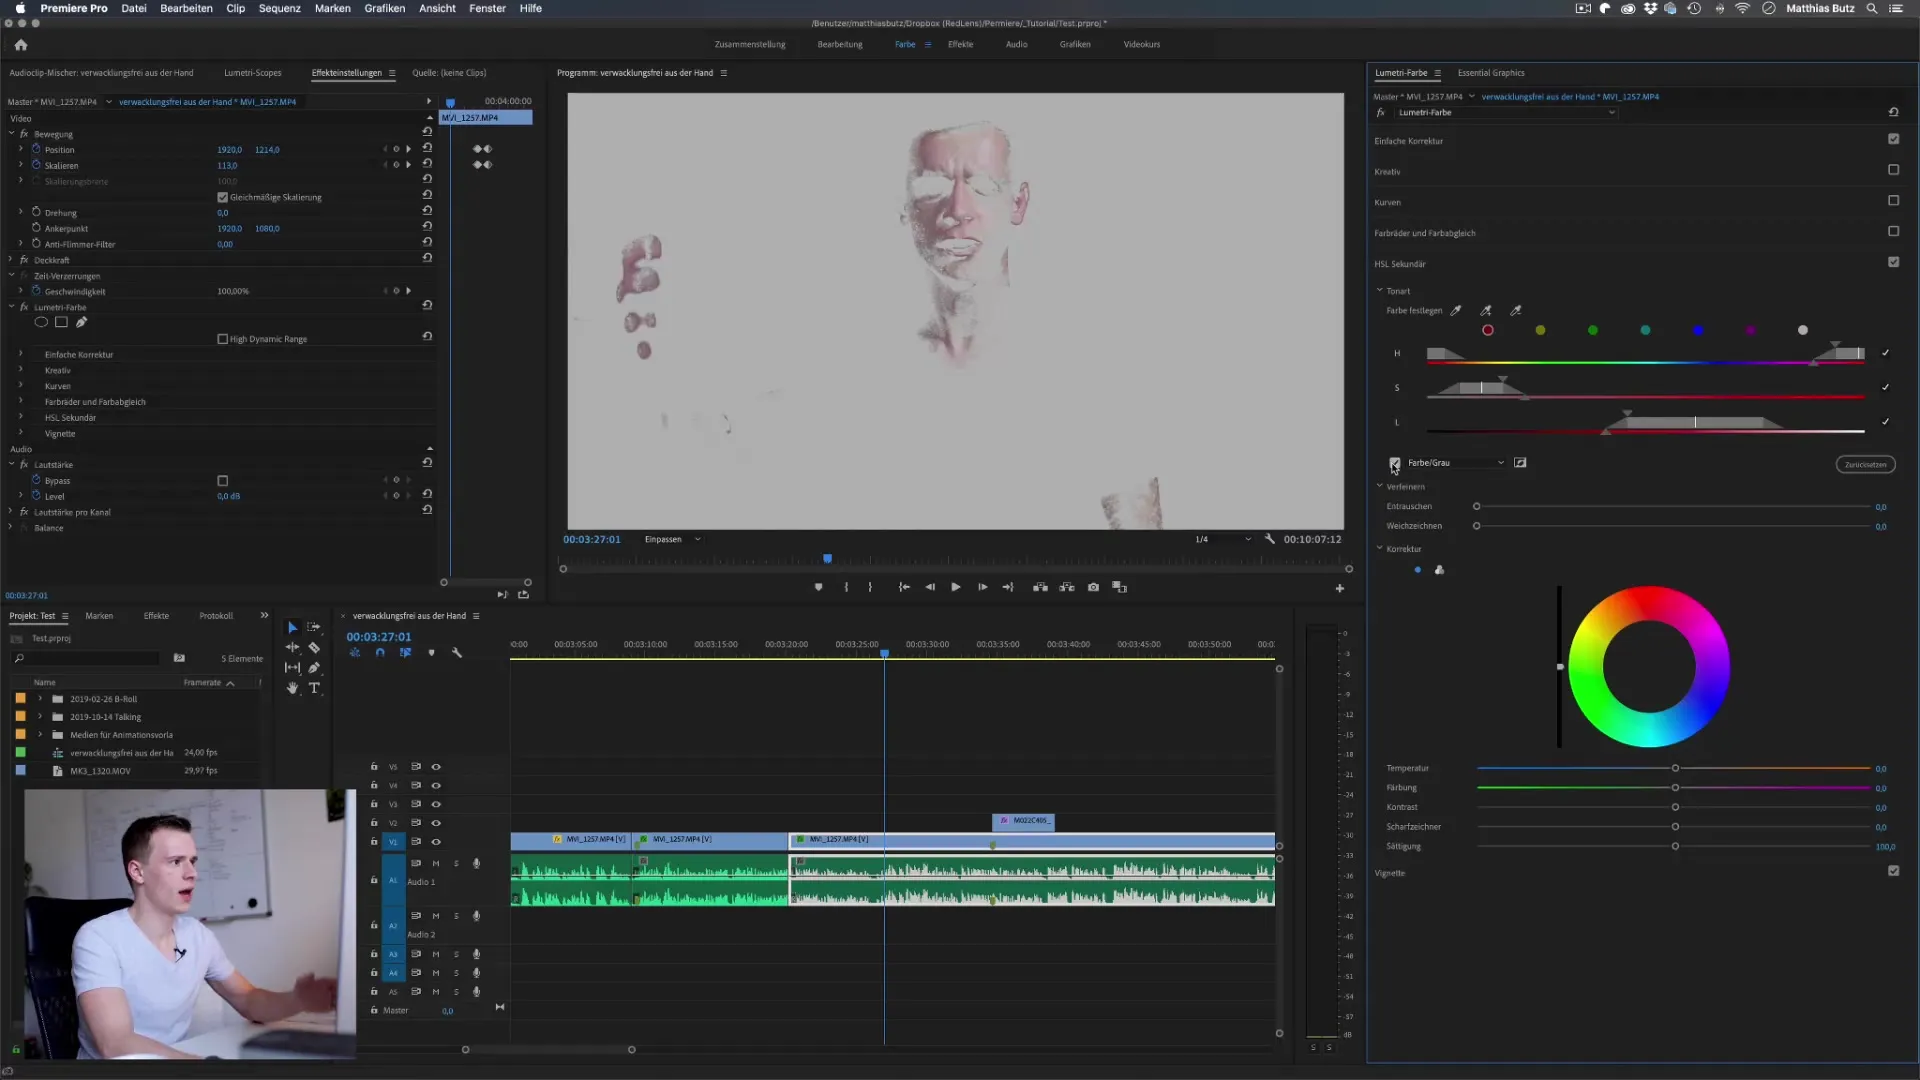
To make more precise adjustments, you can visualize the mask selection. Click on the corresponding checkbox in the HSL area. This highlights the selection so that you can see which areas of your image are affected. This is especially helpful to ensure that you only adjust the desired hues and exclude unnecessary areas.
Step 5: Optimizing Softness and Transitions
Adjust the softness of the edges to optimize the selection. A softer transition ensures that the adjustments appear more natural. Change the softness values in the HSL area until the transitions match your desired result.
Step 6: Expanding the Selection
If necessary, you can expand the selection by adding further color values with the eyedropper to ensure that you cover the desired color palette completely. Make sure to also keep an eye on possible color changes in the background to avoid unwanted effects.
Step 7: Inverting the Selection
If you want to influence not just the specific hues but everything else as well, you can invert the selection. By clicking on the invert symbol in the HSL area, the selection is inverted, allowing you to adjust the inverted color values without affecting the main color.
Step 8: Adjustments and Refinements
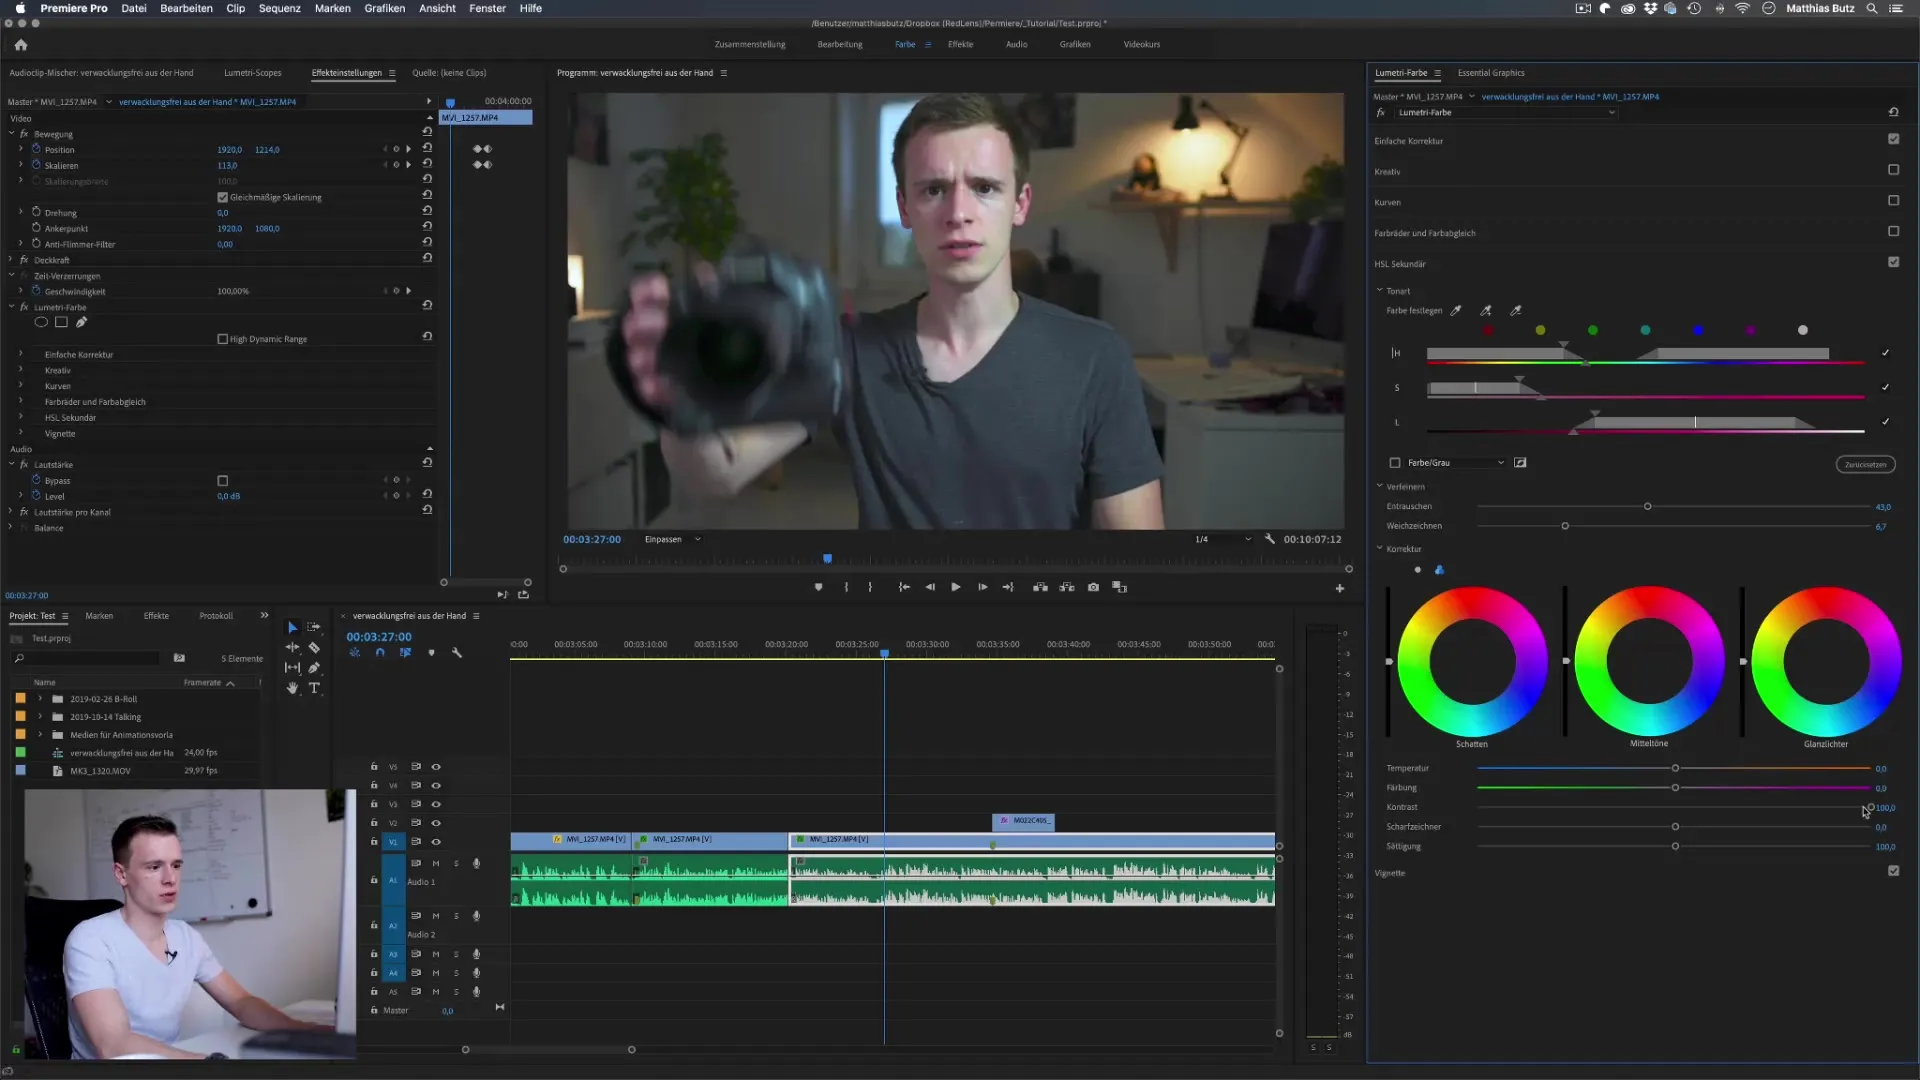
Now you can adjust the parameters for temperature, tint, contrast, and sharpness as desired. These settings help you refine the colors both haptically and visually to achieve the desired result for your project. Positive signs include increasing the saturation for more vibrant colors or decreasing saturation for a more subdued look.
Step 9: Visually Checking Results
After each adjustment, look at the results to ensure that the changes meet your expectations. Check both the areas where you made changes and the adjacent color harmonies to ensure that everything harmonizes well.
Step 10: Final Fine-Tuning
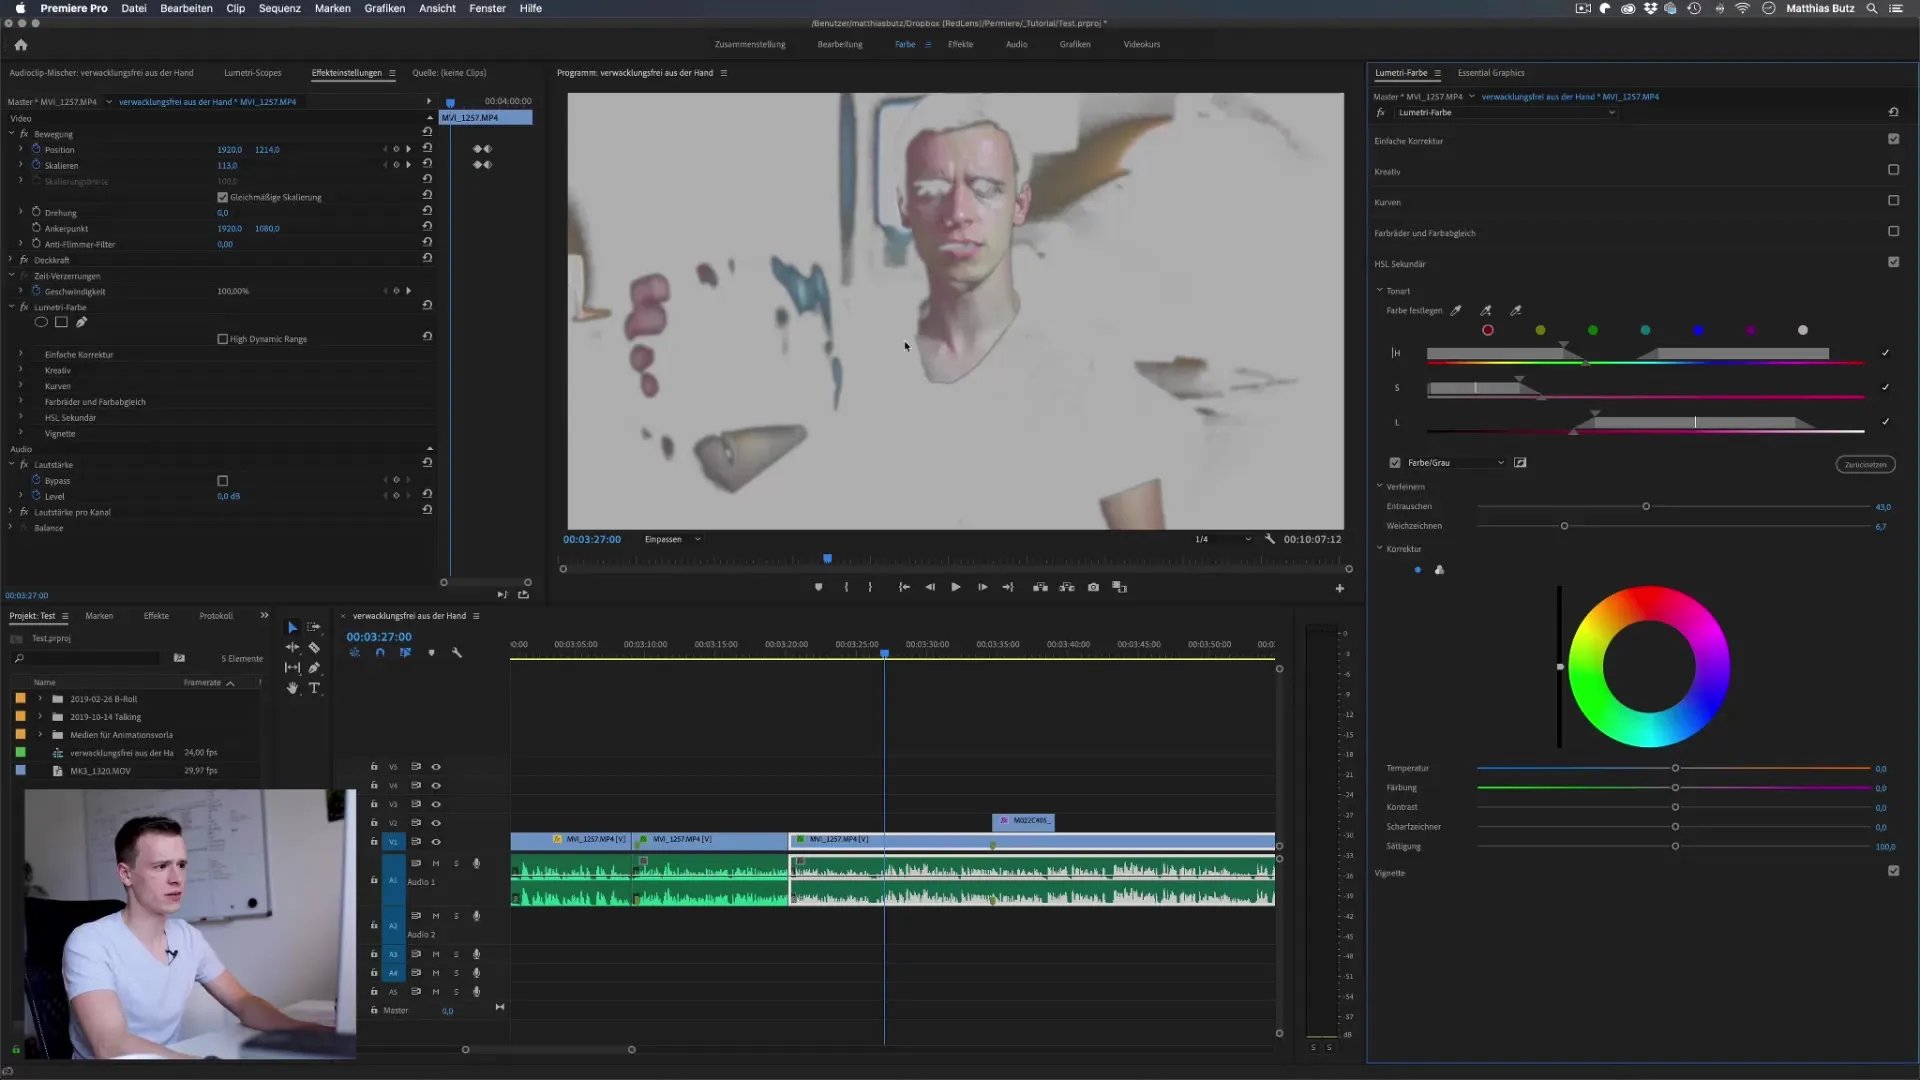
After these adjustments, you should have a rough idea of the desired color palette. Use the opportunity to refine this further with the corresponding HSL sliders to achieve the best possible result for your video.
Summary - HSL in Adobe Premiere Pro: A Comprehensive Guide to Color Correction
With the aforementioned steps, you have learned the basic functions of HSL. You can now specifically adjust hue, saturation, and luminance to create the desired outer or inner color nuances in your videos. Experiment with the individual parameters to gain a deeper understanding of the possibilities that HSL offers you.
Frequently Asked Questions
What is HSL in Premiere Pro?HSL stands for Hue, Saturation, and Luminance and is a tool for precise color correction.
How can I select a specific hue?You can use the eyedropper in the HSL area to select a specific hue directly on your image.
Can I invert the selection?Yes, by clicking on the invert symbol, you can invert the selection and adjust all other areas.
Is it difficult to set the color values accurately?After selecting the colors, you can set the values for luminance, saturation, and hue to make precise adjustments.
How can I adjust the softness of the edges?The softness of the edges can be adjusted directly in the HSL area using the corresponding slider to refine the selection.


