The challenge of video editing, especially with long clips, often lies in effectively sorting out the relevant parts and optimizing the timing. It can be tedious to review every detail of the recording only to end up editing short sections. In this guide, I will share a technique that can help you cut hundreds of hours of video faster. Let's go through the process together to increase your editing speed and efficiency in Premiere Pro CC.
Key Insights
This guide describes an effective method for quickly cutting videos. The key points are using the razor tool during playback and closing gaps with simple commands. After a short practice period, you will be able to achieve significant effects with just a few cuts.
Step-by-Step Guide
Step 1: Preparation and Video Selection
Start by selecting a larger video that you want to edit. It's helpful to use a clip longer than 20 minutes to thoroughly test the technique. Make sure to play the entire video to identify the relevant cuts before making any active changes.
Step 2: Synchronizing the Sound
Especially with tutorials, it is important that the sound is synchronized with the picture. To ensure there are no audio delays, take a moment to synchronize the audio track if necessary. This way, you will have an optimal editing experience and can focus on the content you really need.
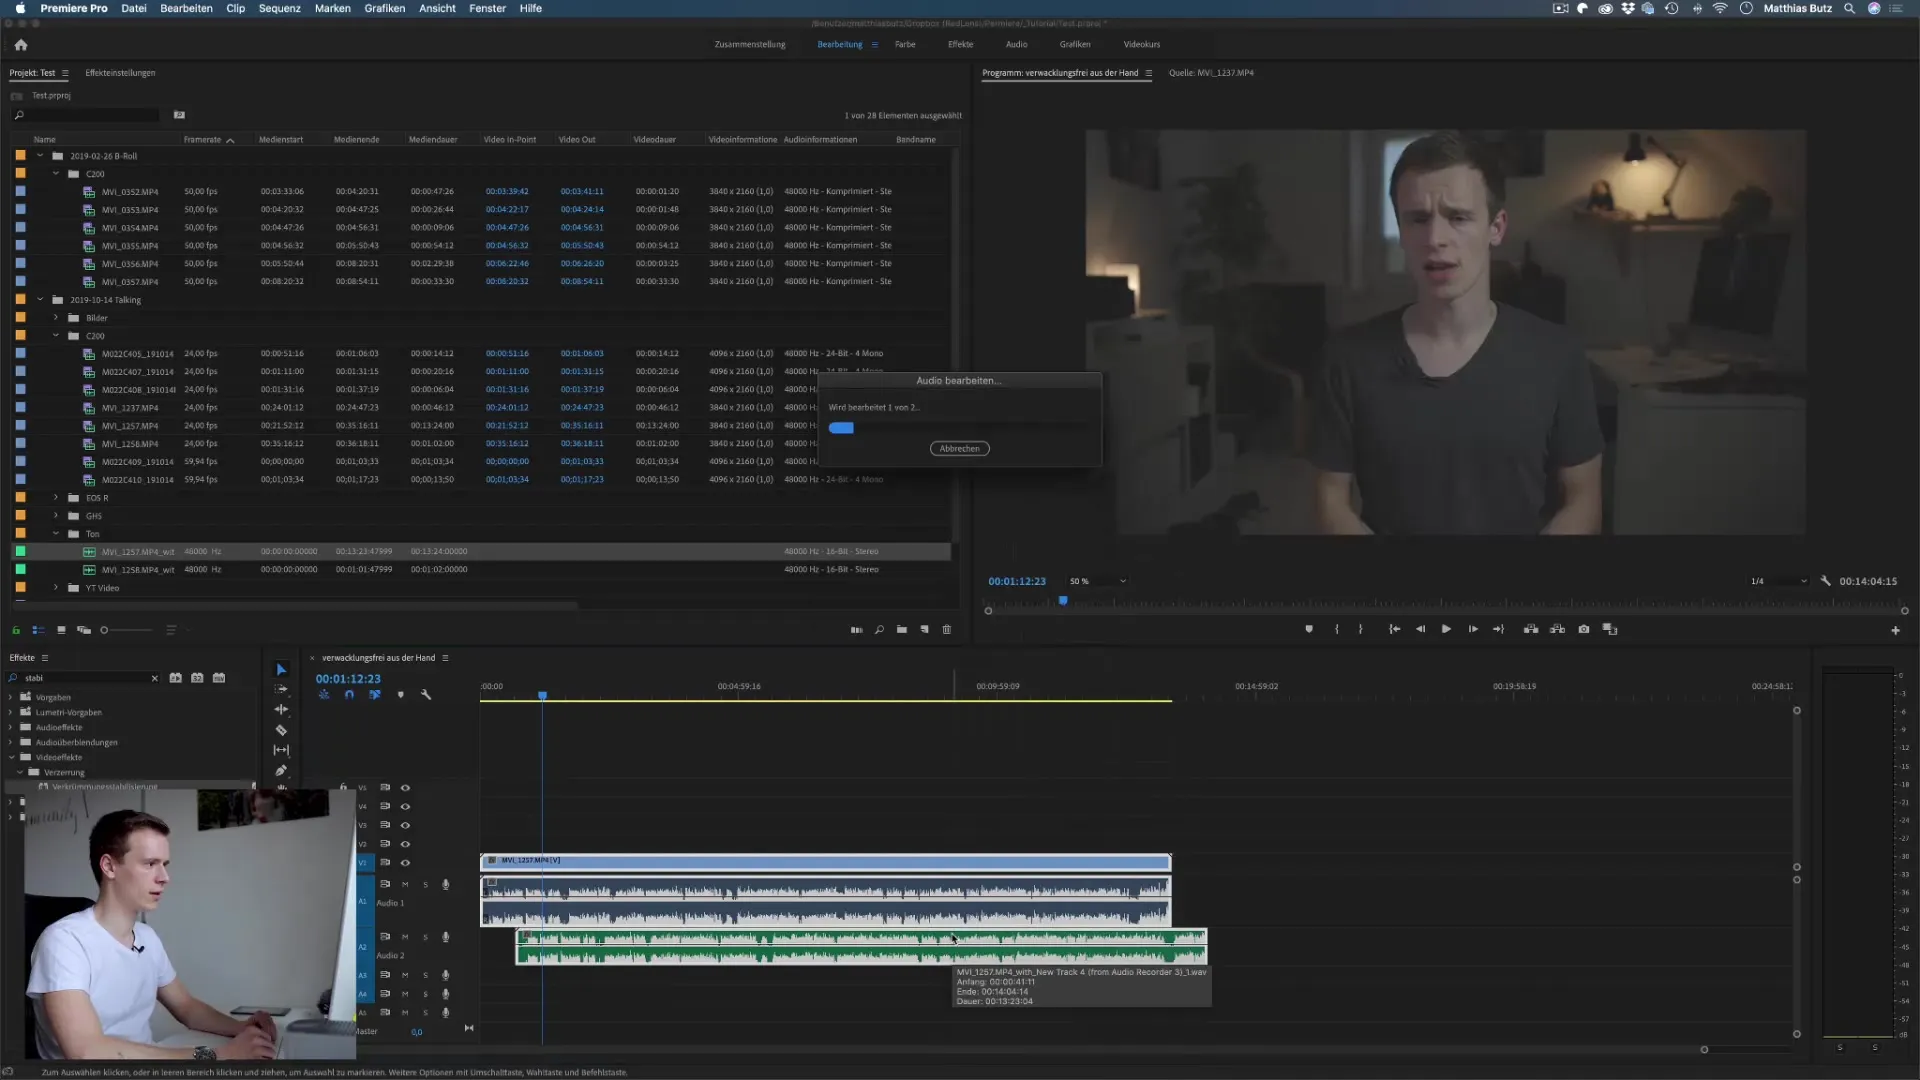
Step 3: Using the Razor Tool
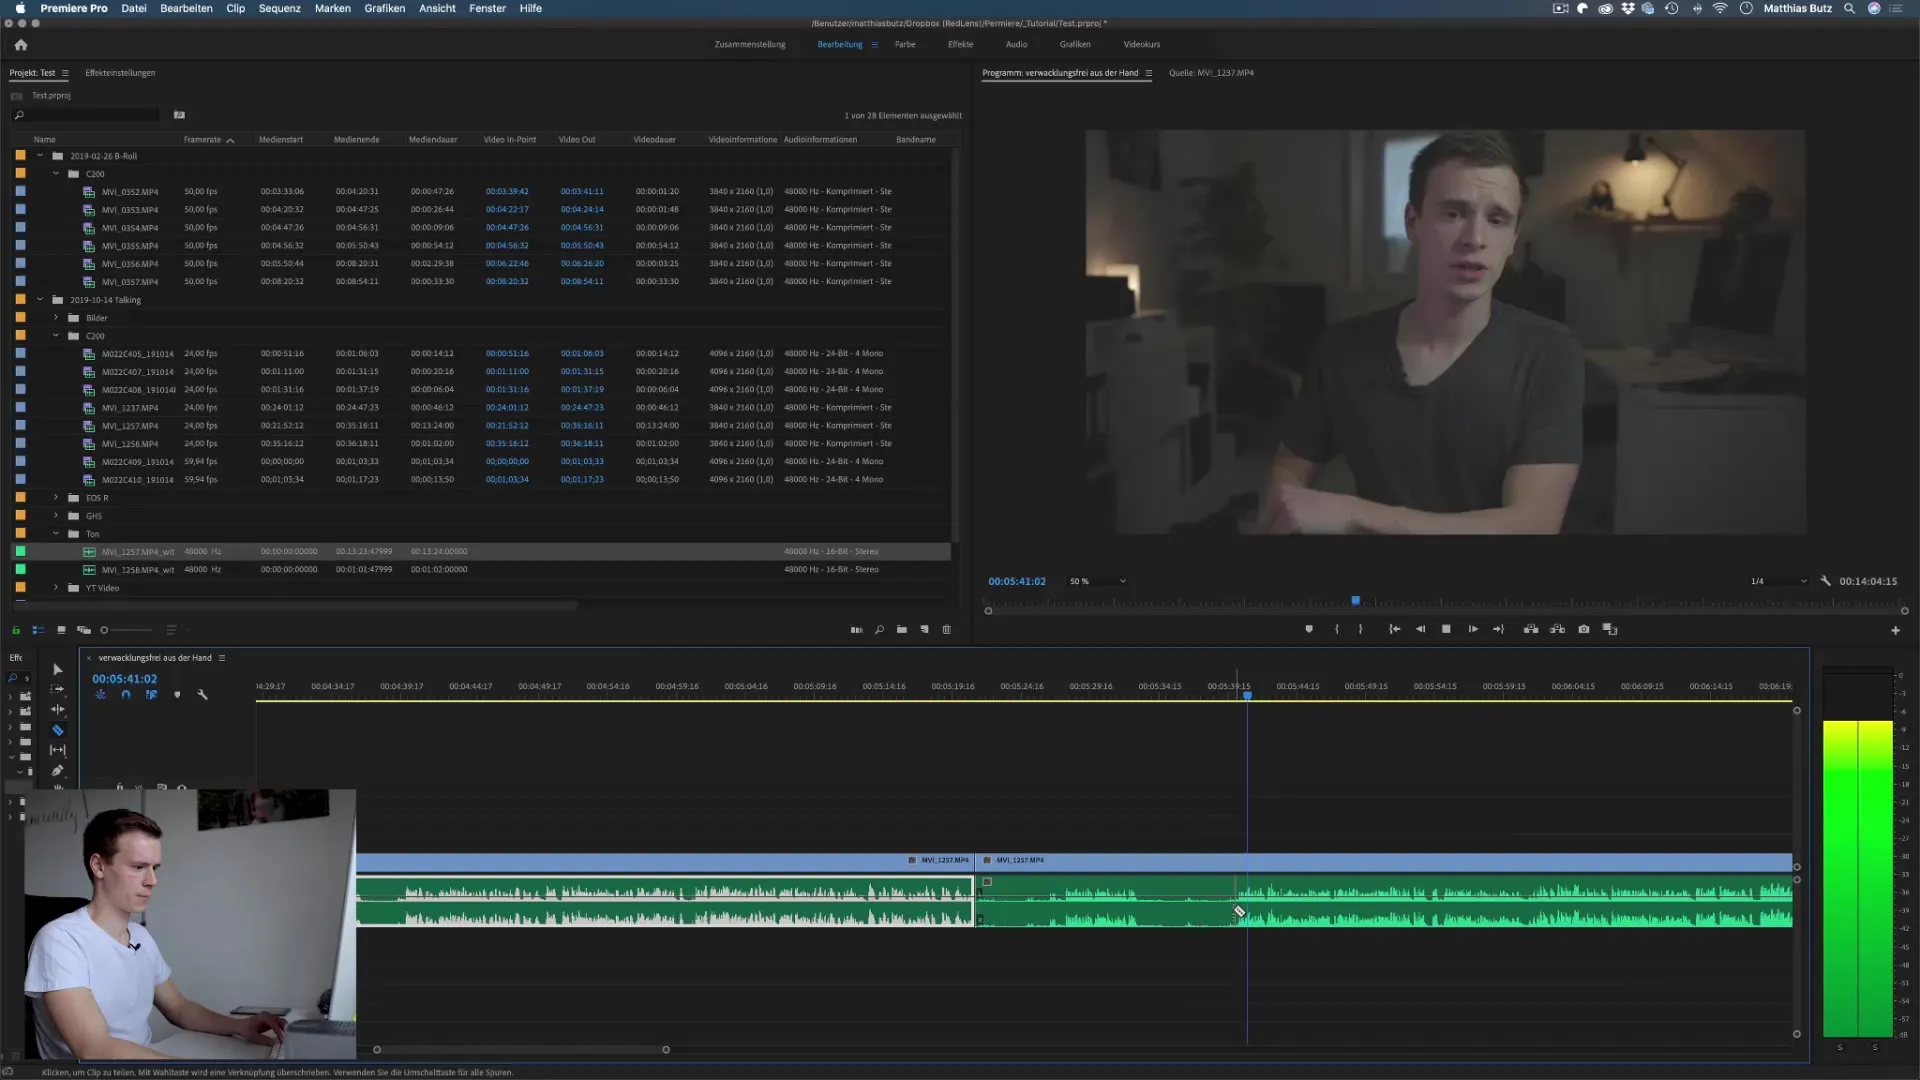
While playing the video, you can use the razor tool at any time to make cuts at the appropriate points. This technique allows you to work in a flow without needing to pause the video.
To optimize the timing while cutting, you should pay attention to maintaining the right distance from the video. It can be challenging at first, but with some practice, you will develop a feel for it.
Step 4: Closing Gaps
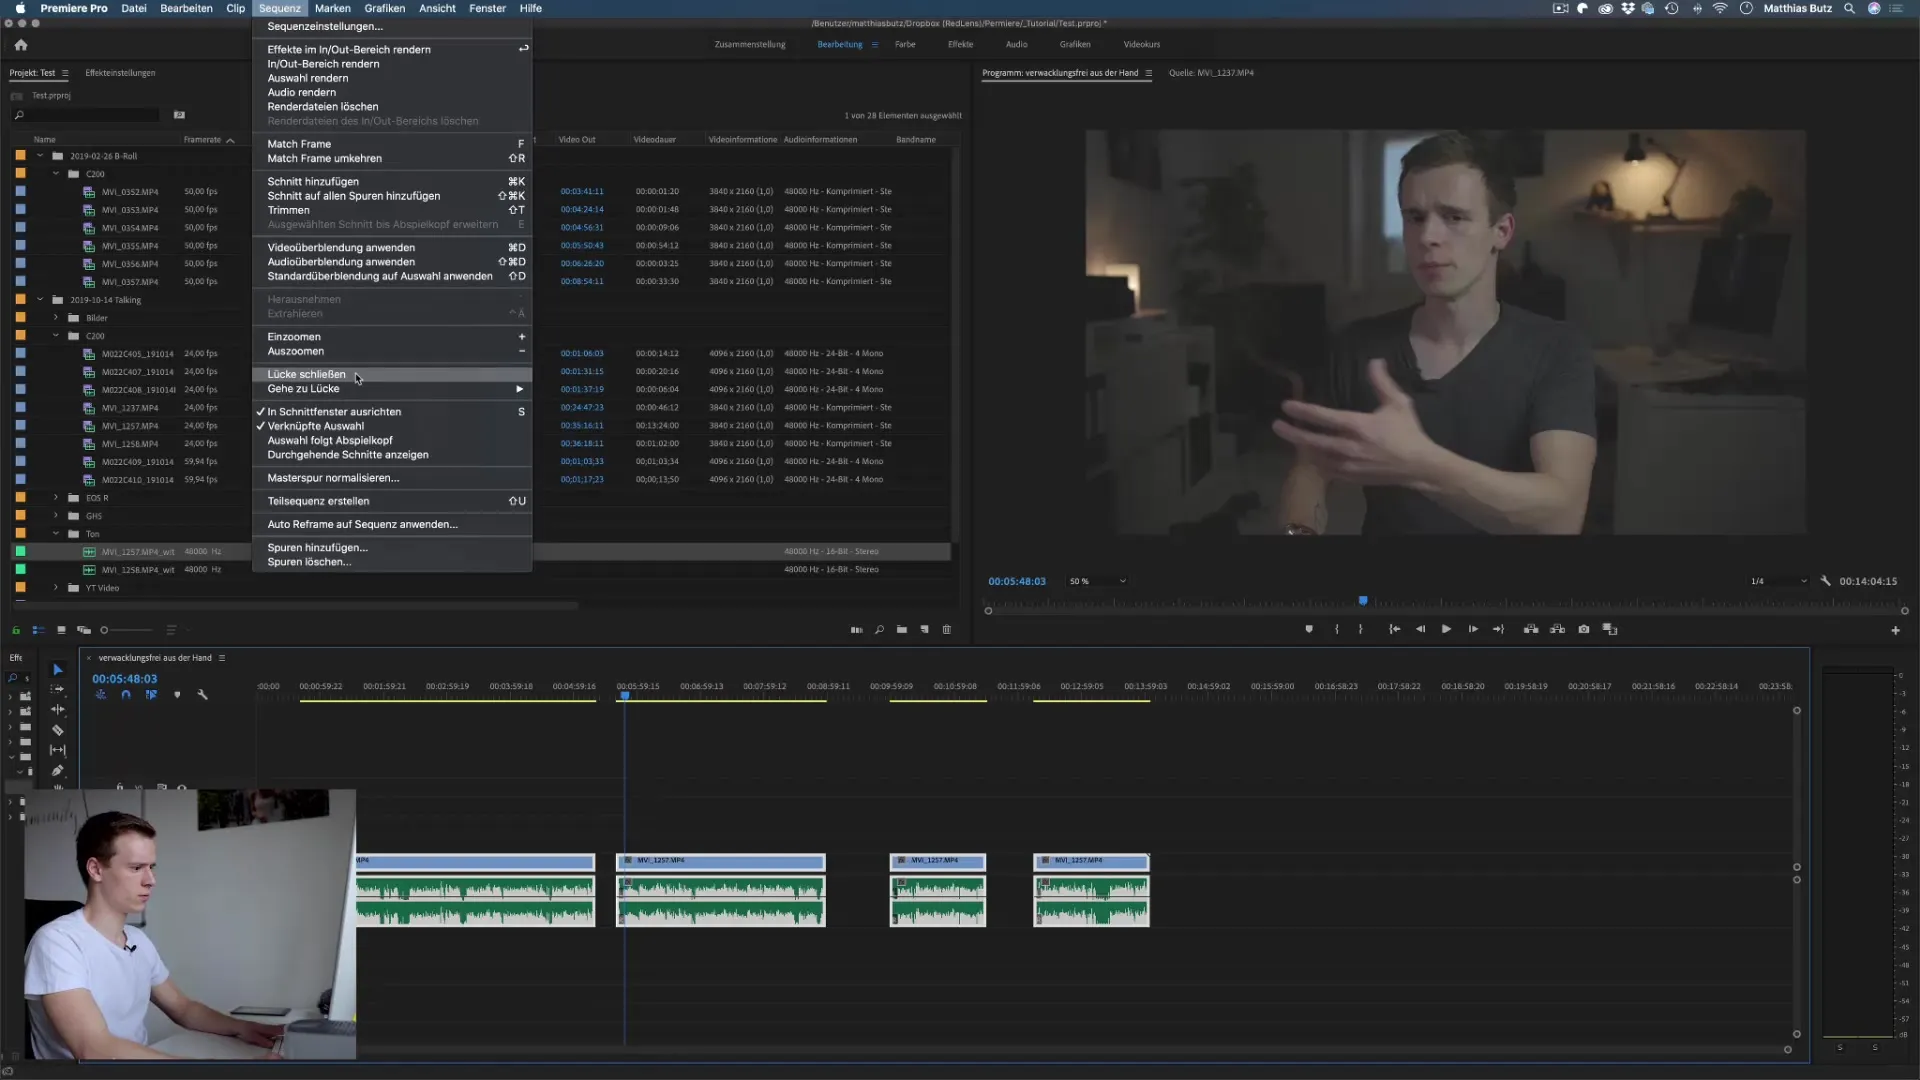
After making all the necessary cuts, there may be a gap in the timeline. To close this, simply select all clips with the shortcut V and click on Sequence and then on Close Gaps. This technique helps you to seamlessly eliminate all missed parts, significantly improving your workflow.
Step 5: Further Adjustments
Now that the basic editing work is done, you can focus on specific detail adjustments. Ensure that all cuts feel natural and that the transitions are smooth. This phase may require some fine-tuning, especially if multiple stutters occurred that need to be fixed.
Step 6: Reviewing the Results
Play the video fully once to ensure that everything is to your satisfaction. Pay attention to the transitions and ensure that there are no content gaps or stutters left that could impair the overall quality of the video.
Summary – Cutting Faster in Premiere Pro CC: A Step-by-Step Guide
By applying this technique, you can significantly speed up the editing process. Once you master the tools and capabilities of Premiere Pro CC, you will be able to create your videos in less time without sacrificing quality.
Frequently Asked Questions
How long does it take to learn the technique?It requires some practice. Generally, after a few attempts, you can start making your cuts effectively.
Can I also cut short clips with this method?Yes, the technique is flexible and can also be applied to shorter clips.
What to do if I miss a cut?If you miss a cut, you can always jump back, play the video again, and set the cut afterwards.
How can I ensure that the sound stays in sync?Make sure to synchronize the audio tracks before cutting and use audio monitoring if necessary to ensure that there are no discrepancies during editing.
