
DaVinci Resolve tutorial: Video editing from the basics to export

- 7-hour tutorial on video editing with DaVinci Resolve by Matthias Butz
- Workflow: Find your way around the program interface quickly
- Video: Everything you need to know about importing, editing, color matching and exporting
- Sound: How to adjust the volume, remove noise and edit voice recordings
- Text: How to add titles and lower thirds to your videos
- Bonus: Video raw material and exercises for practicing, important technical terms explained
Create moving videos with DaVinci Resolve! Learn what you need for your video editing in this practical tutorial. Download now and join in straight away!
47 Videos, 422 minutes
Introduction to the video training
This is what you can expect in the video training "DaVinci Resolve tutorial: video editing from the basics to export"
You will learn how to edit your own clips or even longer films.
This is what you can expect in the video training "DaVinci Resolve tutorial: video editing from the basics to export"
2 min OpenIntroduction
DaVinci Resolve Tutorial: 1.1 | Welcome
Welcome to my video course on DaVinci Resolve. I'll show you everything you can learn in my course.
DaVinci Resolve Tutorial: 1.2 | DaVinci Resolve - free download
DaVinci Resolve can be downloaded completely free of charge. Simply go to the Blackmagic Design website.
DaVinci Resolve Tutorial: 1.3 | Download raw material
I have of course prepared some raw material for you. You can also take part in this course if you don't have your own videos yet.
DaVinci Resolve Tutorial: 1.4 | With this course to success
Editing videos is not easy. In this video, I'll show you how this course can help you succeed and create much better videos.
DaVinci Resolve Tutorial: 1.5 | English - yes, so?
DaVinci Resolve is not available in German. But don't worry. Learning this program is no problem even with the English names. You don't need to know English for this course.
The basics
DaVinci Resolve Tutorial: 2.1 | Intro to the Basics chapter
Let's start with the basics. Here you'll learn the settings and techniques you need to start editing your videos in DaVinci Resolve.
DaVinci Resolve Tutorial: 2.2 | Settings
Before you start editing your videos in DaVinci Resolve, you should definitely take a closer look at these settings.
DaVinci Resolve Tutorial: 2.3 | Import
DaVinci Resolve is ready for editing. But how do we get our videos now? Importing offers us significantly more options than simply adding the recordings.
DaVinci Resolve Tutorial: 2.4 | Interface
DaVinci Resolve has a very simple and rigid interface. But don't worry: with a few tips and a little familiarization, it's very easy to edit your videos with it.
cut
DaVinci Resolve Tutorial: 3.1 | Intro to Editing chapter
Let's move on to the editing chapter.
DaVinci Resolve Tutorial: 3.2 | Create Timeline
Before we can start editing, we first need a timeline. This is the area in which all the clips are put together to form the finished movie.
DaVinci Resolve Tutorial: 3.3 | Insert clips
Inserting clips into the DaVinci Resolve timeline can also be done using drag-and-drop, but there are many more techniques that make editing much easier.
DaVinci Resolve Tutorial: 3.4 | Layers
In video editing, there are layers that allow you to cut videos non-destructively. Here you will learn exactly how this works.
DaVinci Resolve Tutorial: 3.5 | Inspector
The Inspector is probably one of the most frequently used dialogs in DaVinci Resolve. The reason is simple: it offers you all the important settings.
DaVinci Resolve Tutorial: 3.6 | Text, Title & Lower Thirds
A text overlay in the video? No problem! But there is much more to discover here.
DaVinci Resolve Tutorial: 3.7 | Time
It is possible to control the time. By this I mean how quickly a video is played back and how you create slow-motion or timelapse recordings.
DaVinci Resolve Tutorial: 3.8 | Keyframes
Keyframes are essential for animations. They control these animations and provide the movement.
DaVinci Resolve tutorial: 3.9 | Editing task
Now it's time to put it into practice. This is the best way to retain what you have learned. I'll give you a video to edit and you can apply all the techniques you've learned.
DaVinci Resolve Tutorial: 3.10 | Solution to the editing task
After the video editing task, I'll show you how I did it. You can watch me editing live over my shoulder.
Grading
DaVinci Resolve Tutorial: 4.1 | Intro to Grading chapter
Welcome to the Grading chapter.
DaVinci Resolve Tutorial: 4.2 | Nodes
Nodes are the layers in DaVinci Resolve. But they are much more than that. Nodes are a major breakthrough in color grading.
DaVinci Resolve Tutorial: 4.3 | Adjustment Layers
Adjustment layers are a great way to quickly and easily apply an effect to multiple videos.
DaVinci Resolve Tutorial: 4.4 | Scopes
Scopes help us to see how the color and brightness distribution is in our video. This helps us enormously when grading.
DaVinci Resolve Tutorial: 4.5 | Color Match
With Color Match, you can set the color of your video 100 percent correctly. This requires some preparation, but it's worth it.
DaVinci Resolve Tutorial: 4.6 | Color Wheels
The Color Wheels are a versatile editing tool for color grading or color correction in DaVinci Resolve.
DaVinci Resolve Tutorial: 4.7 | Curves - Gradation Curve
As in so many other editing programs, you will also find a gradation curve in DaVinci Resolve, which I will explain to you in more detail in this course.
DaVinci Resolve Tutorial: 4.8 | Qualifier/Pipette
You can also select colors and brightness ranges in videos in order to edit them specifically.
DaVinci Resolve Tutorial: 4.9 | Masks
You don't always want to apply an edit to the entire image. You can control this with masks ... even with moving images.
DaVinci Resolve Tutorial: 4.10 | Stabilize & Track
We are becoming more and more advanced and are concerned with movement. This can be tracked or stabilized through tracking.
DaVinci Resolve Tutorial: 4.11 | Sharpen & Blur
The quality of a video is often defined by its sharpness. This is why there is a special tool for sharpening or blurring.
DaVinci Resolve Tutorial: 4.12 | Stills and LUTs
Stills or LUTs are a way of saving a style once it has been created for future recordings. These can also be downloaded.
DaVinci Resolve Tutorial: 4.13 | Grading task
Now it's up to you. You can now apply what you have learned and grade your own video.
DaVinci Resolve Tutorial: 4.14 | Solution to the grading task
After the grading task, I'll show you how I did it. You can definitely learn something.
Tone
DaVinci Resolve Tutorial: 5.1 | Intro to Sound chapter
Welcome to the chapter on sound.
DaVinci Resolve Tutorial: 5.2 | The right level
Sound is extremely important in a video. Of course, the volume is too. Nobody wants to be startled by loud noises after a quiet voice. In this lesson, we will level the sound of your video.
DaVinci Resolve Tutorial: 5.3 | Remove Noise
Noise on a soundtrack distracts from the voice and sounds unprofessional. So here I'll show you the best way to remove it in DaVinci Resolve ...
DaVinci Resolve Tutorial: 5.4 | Editing voice recordings
No matter how good the microphone you use is, you can use these techniques to add the finishing touches to your voice recordings during editing.
Export
DaVinci Resolve Tutorial: 6.1 | Intro to Export chapter
Welcome to the Export chapter.
DaVinci Resolve Tutorial: 6.2 | Export Window
Exporting videos can quickly become confusing for beginners. That's why I explain the DaVinci Resolve export dialog in detail in this lesson.
DaVinci Resolve Tutorial: 6.3 | The right export settings
When exporting your videos with DaVinci Resolve for upload, you should note a few settings. They should look the way you want them to.
DaVinci Resolve Tutorial: 6.4 | Archiving projects
The video has been created, exported and published. What do I do with the data now? I'll show you how I archive my projects.
Practice
DaVinci Resolve Tutorial: 7 | Practice: How do I edit my videos?
Now it's time for practice. I'll show you how I edit my videos. Look over my shoulder and learn which techniques I use.
Bonus
DaVinci Resolve Tutorial: 8.1 | Video resolution
How important is the resolution of a video and what do I need to record future-proof videos?
DaVinci Resolve Tutorial: 8.2 | Frame rate/images per second
A very frequently asked question is about the right frame rate. Here you can find out exactly when you should use which one.
DaVinci Resolve tutorial: 8.3 | Bit depth of your videos
There is more than just the resolution of a video. The bit depth can make for completely different recordings.
DaVinci Resolve Tutorial: 8.4 | LOG Profile
The LOG profile gives you more options in video editing, but be careful. It is not always easy to control and should not always be used.
Examples of use
-
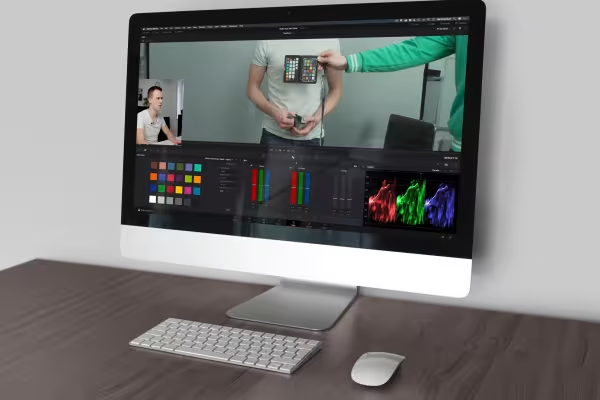 A tutorial for the entire DaVinci Resolve workflow: from import to editing and color adjustment to export.
 -
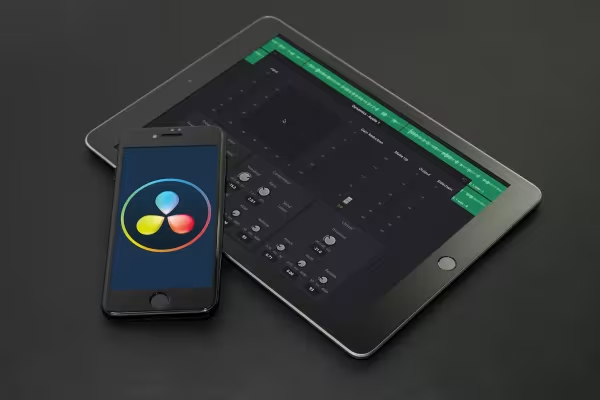 After this tutorial, your videos look good, and the audio sounds just as good!
You might also like
How it works. What options exist.
Produce high-quality videos

Practical applications for companies

Edit films, transitions, animations, and more
Comment now „DaVinci Resolve tutorial: Video editing from the basics to export“