Audio quality plays a crucial role in creating professional videos. Noise in the audio track can significantly impact the clarity of your voice and diminish the overall impression of your production. In this tutorial, you will learn how to effectively remove noise from your audio track using DaVinci Resolve to achieve clearer and more professional results.
Key takeaways
- Noise can be effectively reduced using suitable tools in DaVinci Resolve.
- There are both manual and automatic methods for noise reduction.
- Using high-quality headphones is crucial for precise audio editing.
Step-by-Step Guide
Step 1: Get to know the basics and tools
Before you start reducing noise, it is important to set up your workspace optimally. The Inspector in DaVinci Resolve offers you many tools to work with, including the mixer, which is essential for editing your audio tracks.

Step 2: Use high-quality headphones
To ensure the best sound quality, you should invest in good closed-back headphones. These allow you to hear the audio recording accurately. With good headphones, you can better detect noise and unwanted sounds compared to speakers, as they generally provide a more accurate frequency response.
Step 3: Select audio with noise
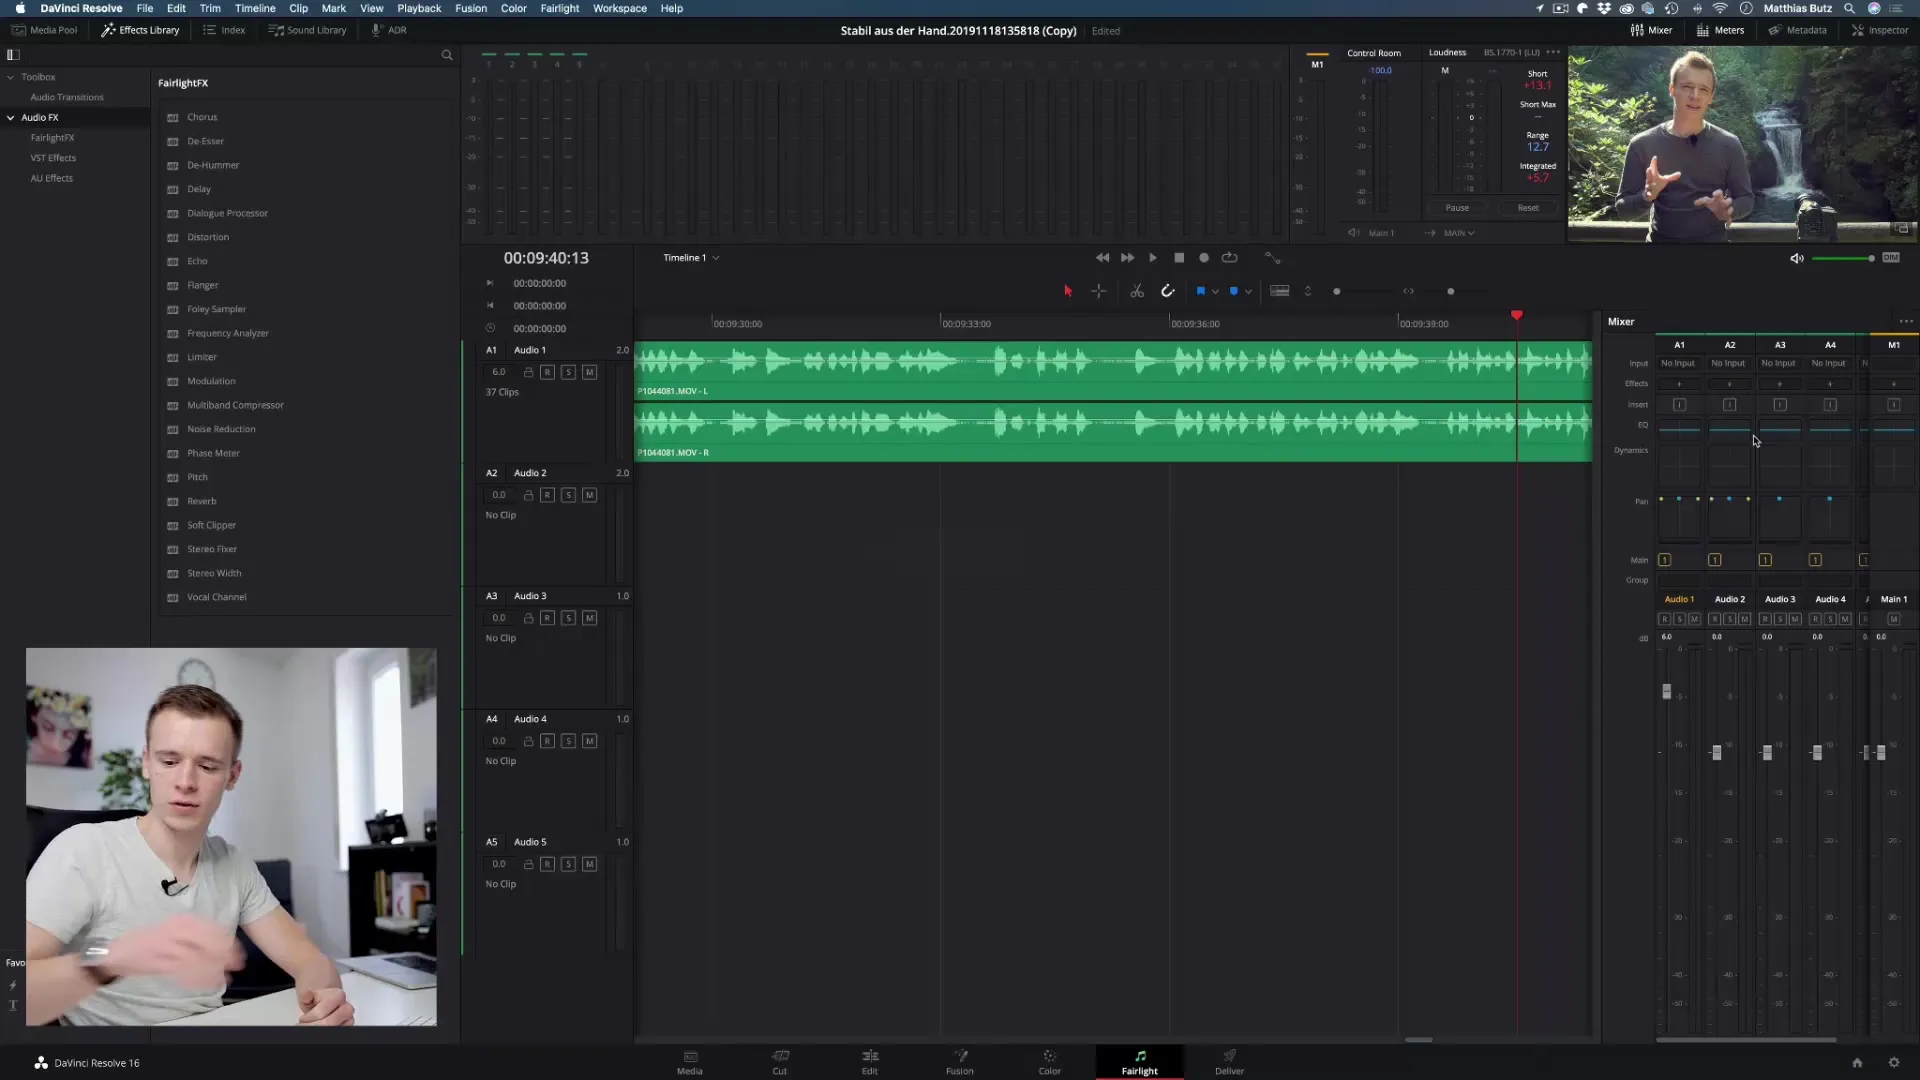
To remove noise from the audio signal, you must first ensure that you have a section that contains only noise. This could be a part where no voice is present.
Step 4: Enable Noise Reduction
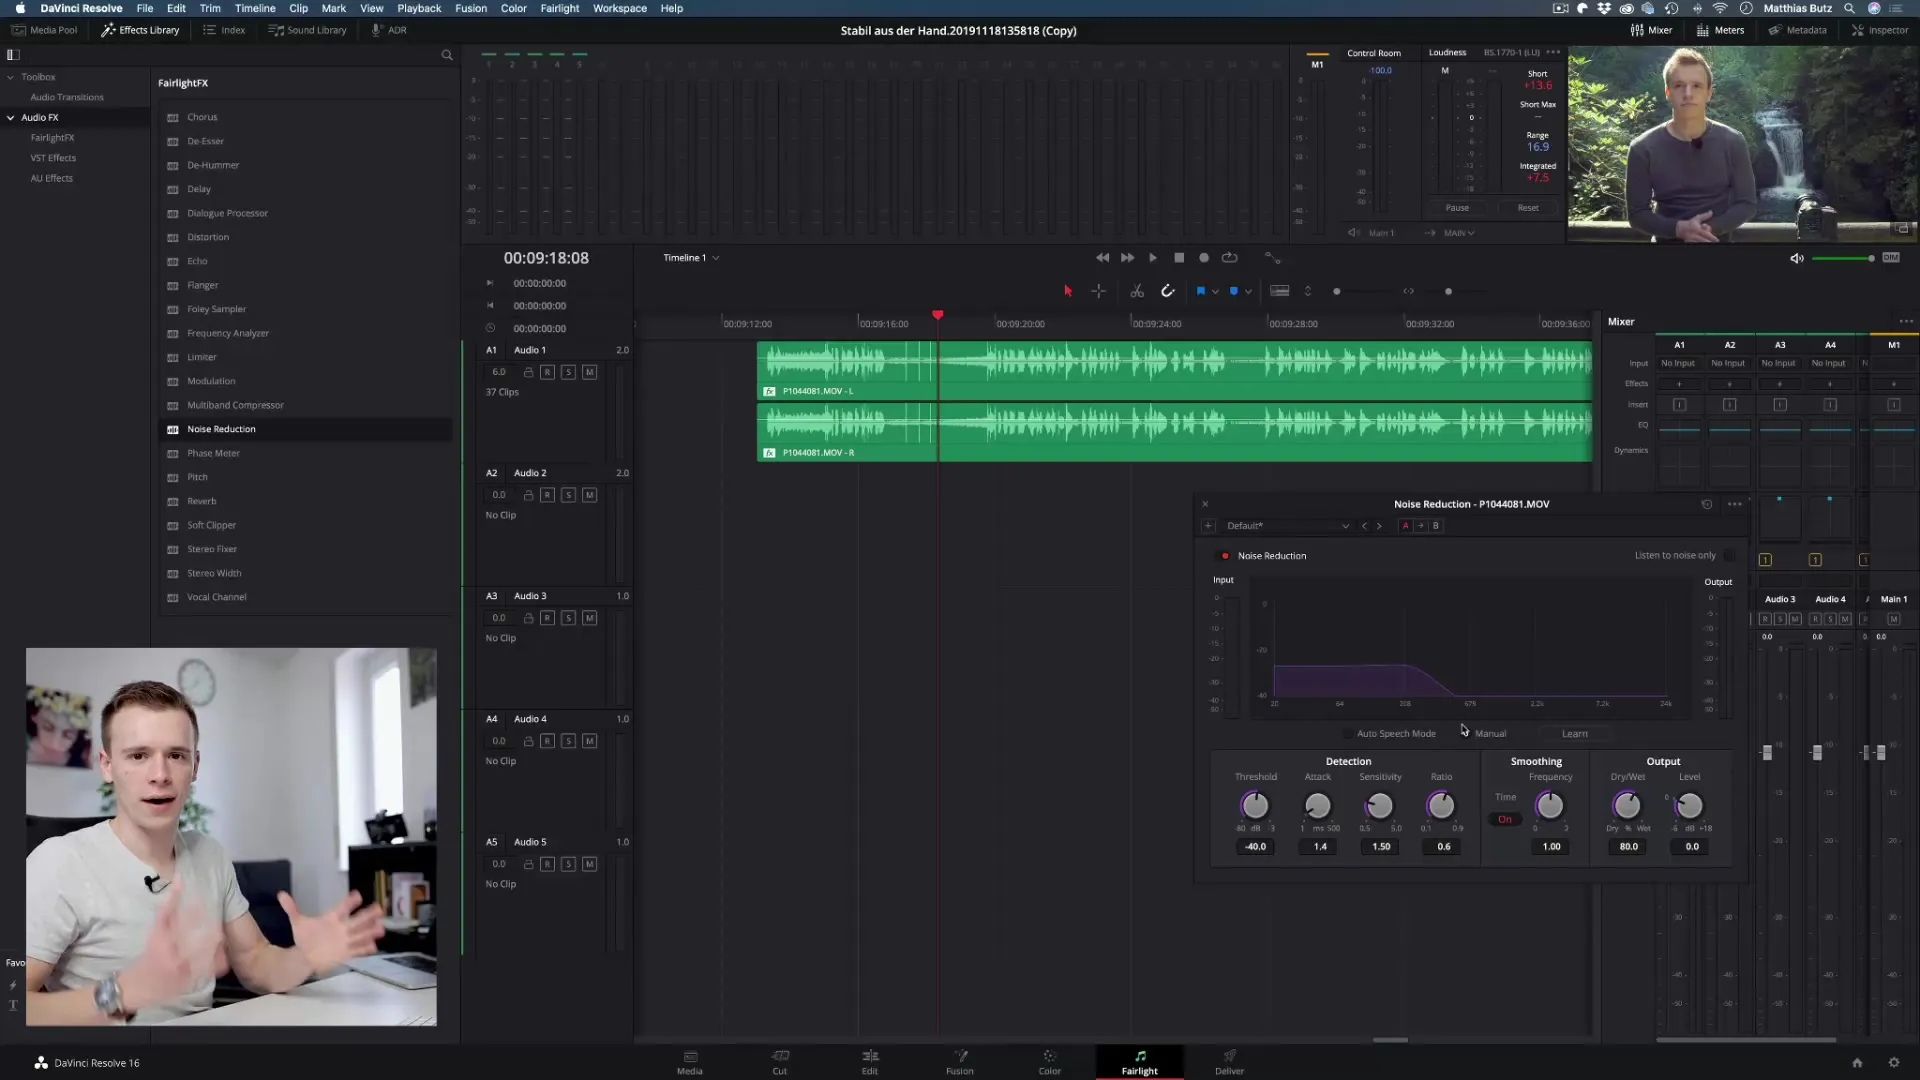
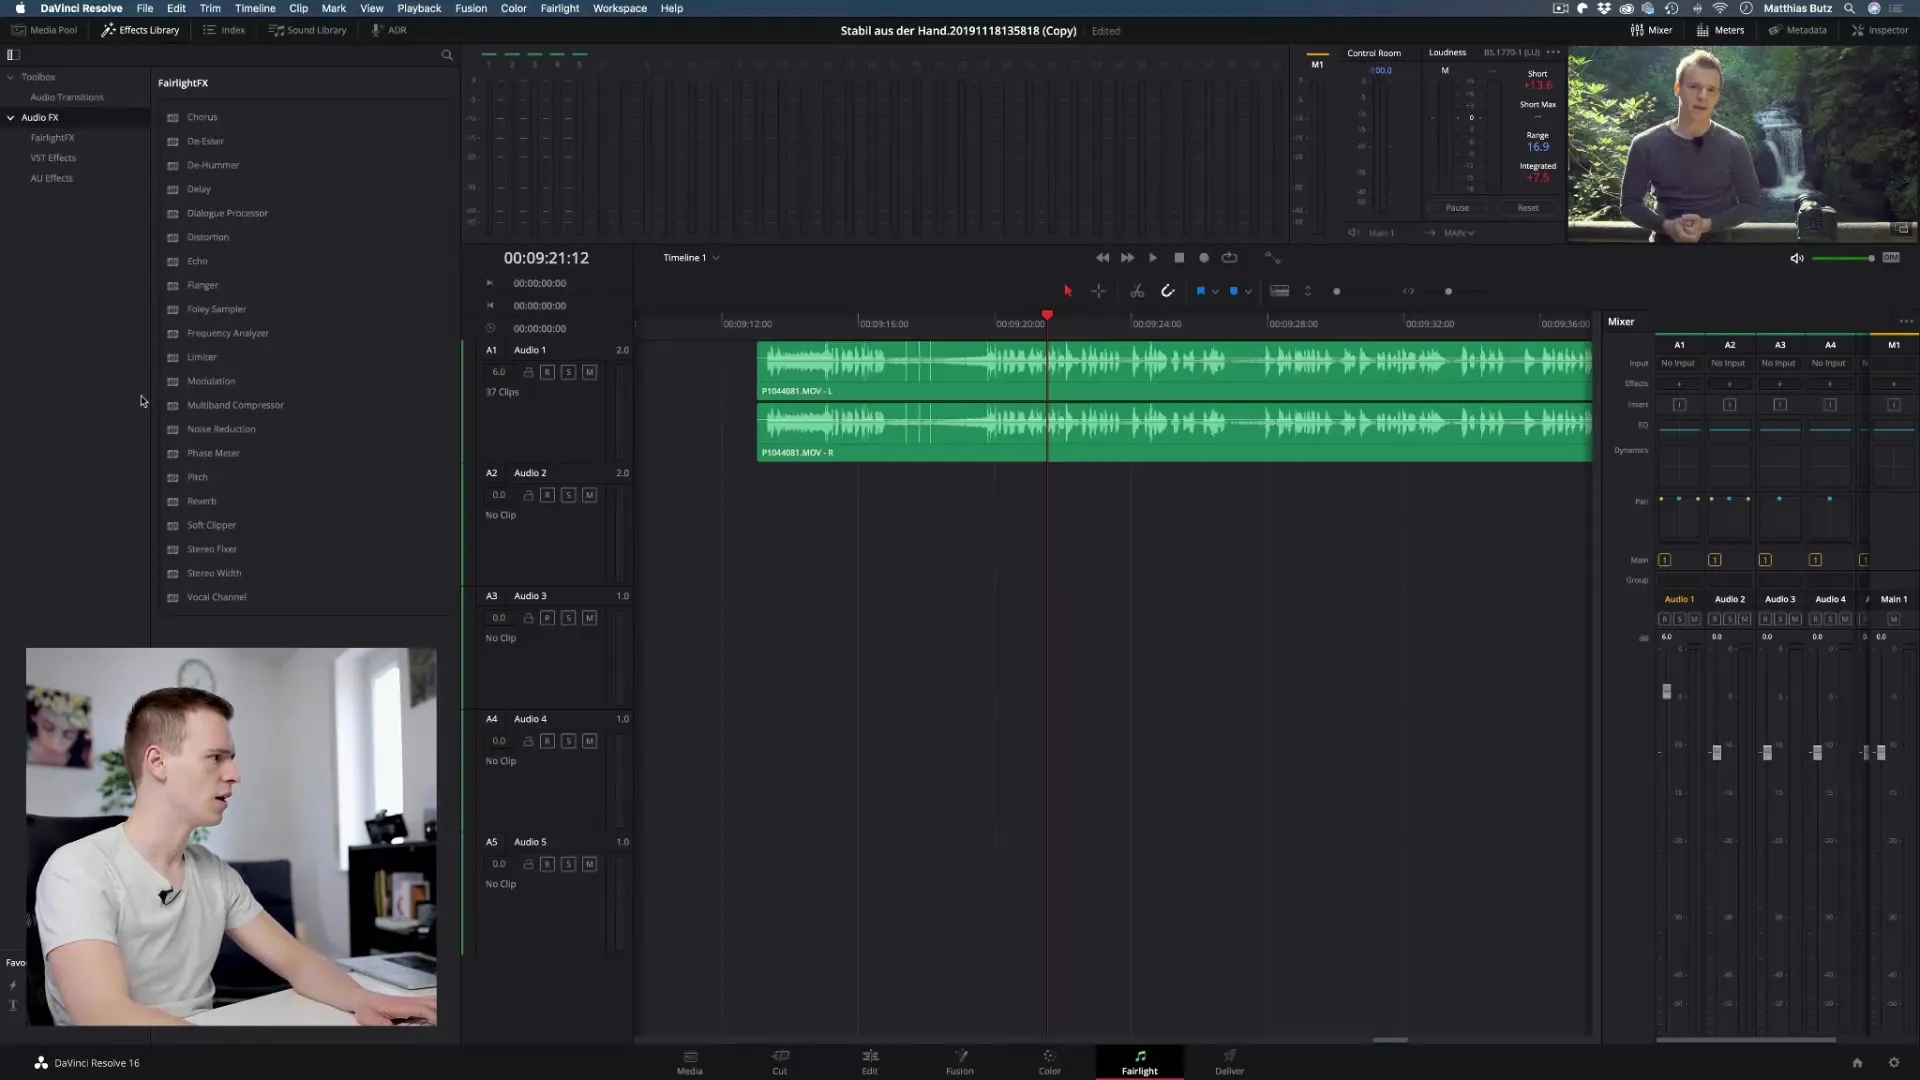
In DaVinci Resolve, there is a special effect called "Noise Reduction." You can apply this either to the entire timeline or directly to the specific part of your audio track that you want to edit.
Step 5: Activate Learning Mode
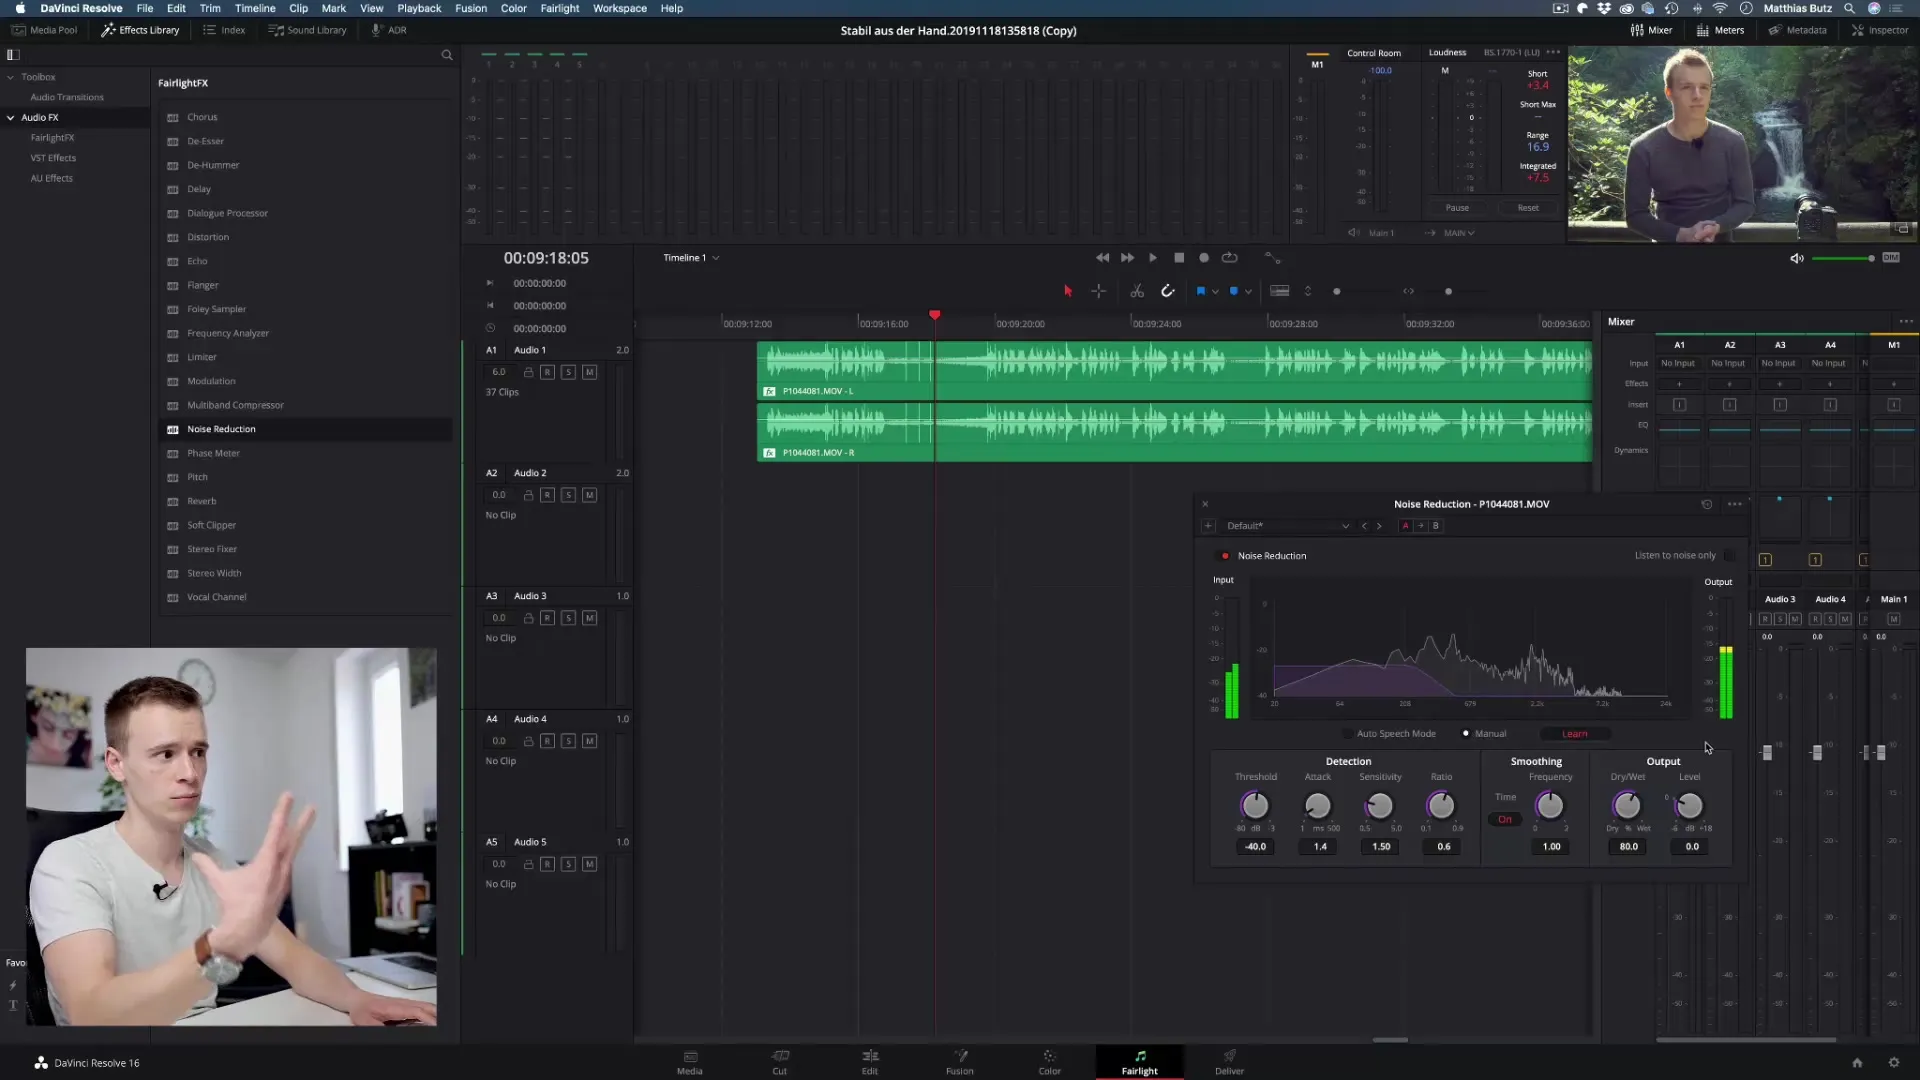
To teach DaVinci Resolve what the unwanted noise is, you should activate the "Learning Mode." Play a passage where there is only noise so that the software can learn to identify it.
Step 6: Perform noise reduction
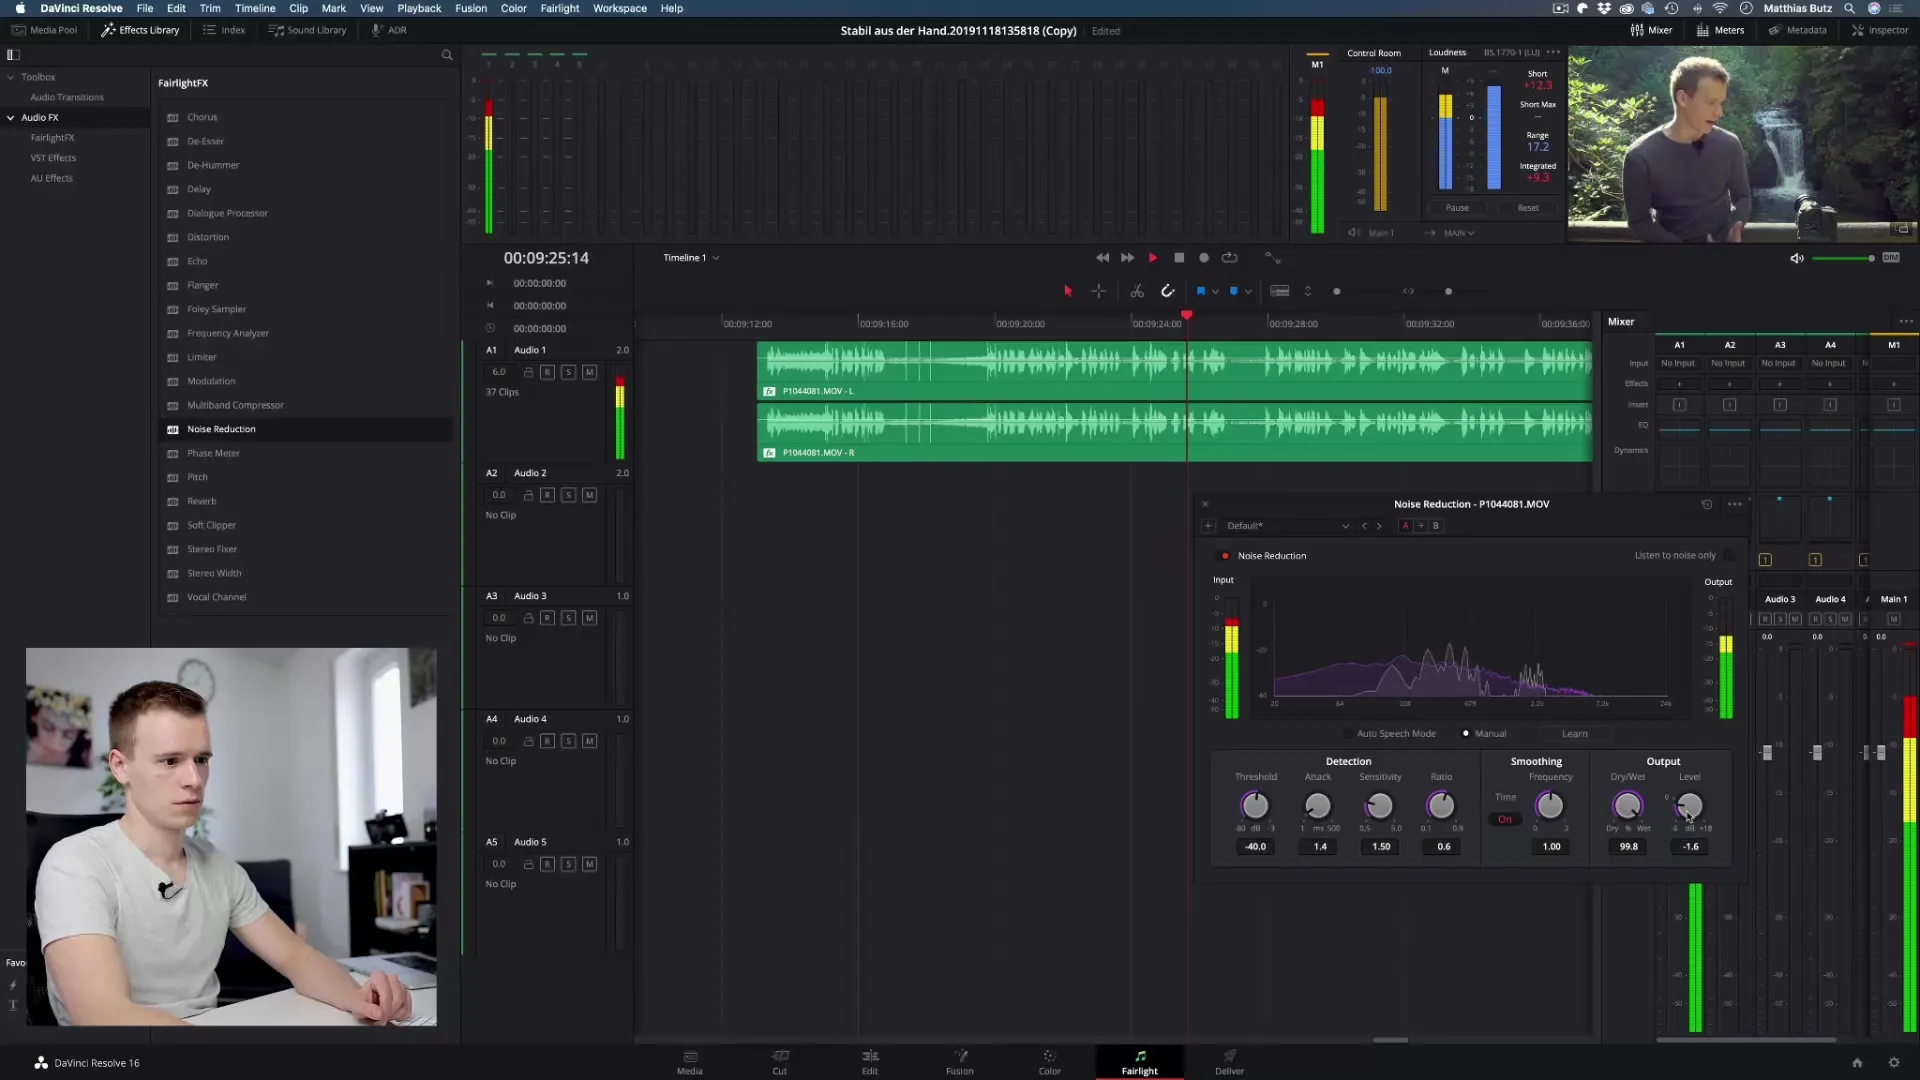
Once the noise has been learned, you can apply the noise reduction to the rest of the recording. This process is mostly automatic: you just need to click a trigger, and DaVinci Resolve takes care of the rest.
Step 7: Fine-tune the settings
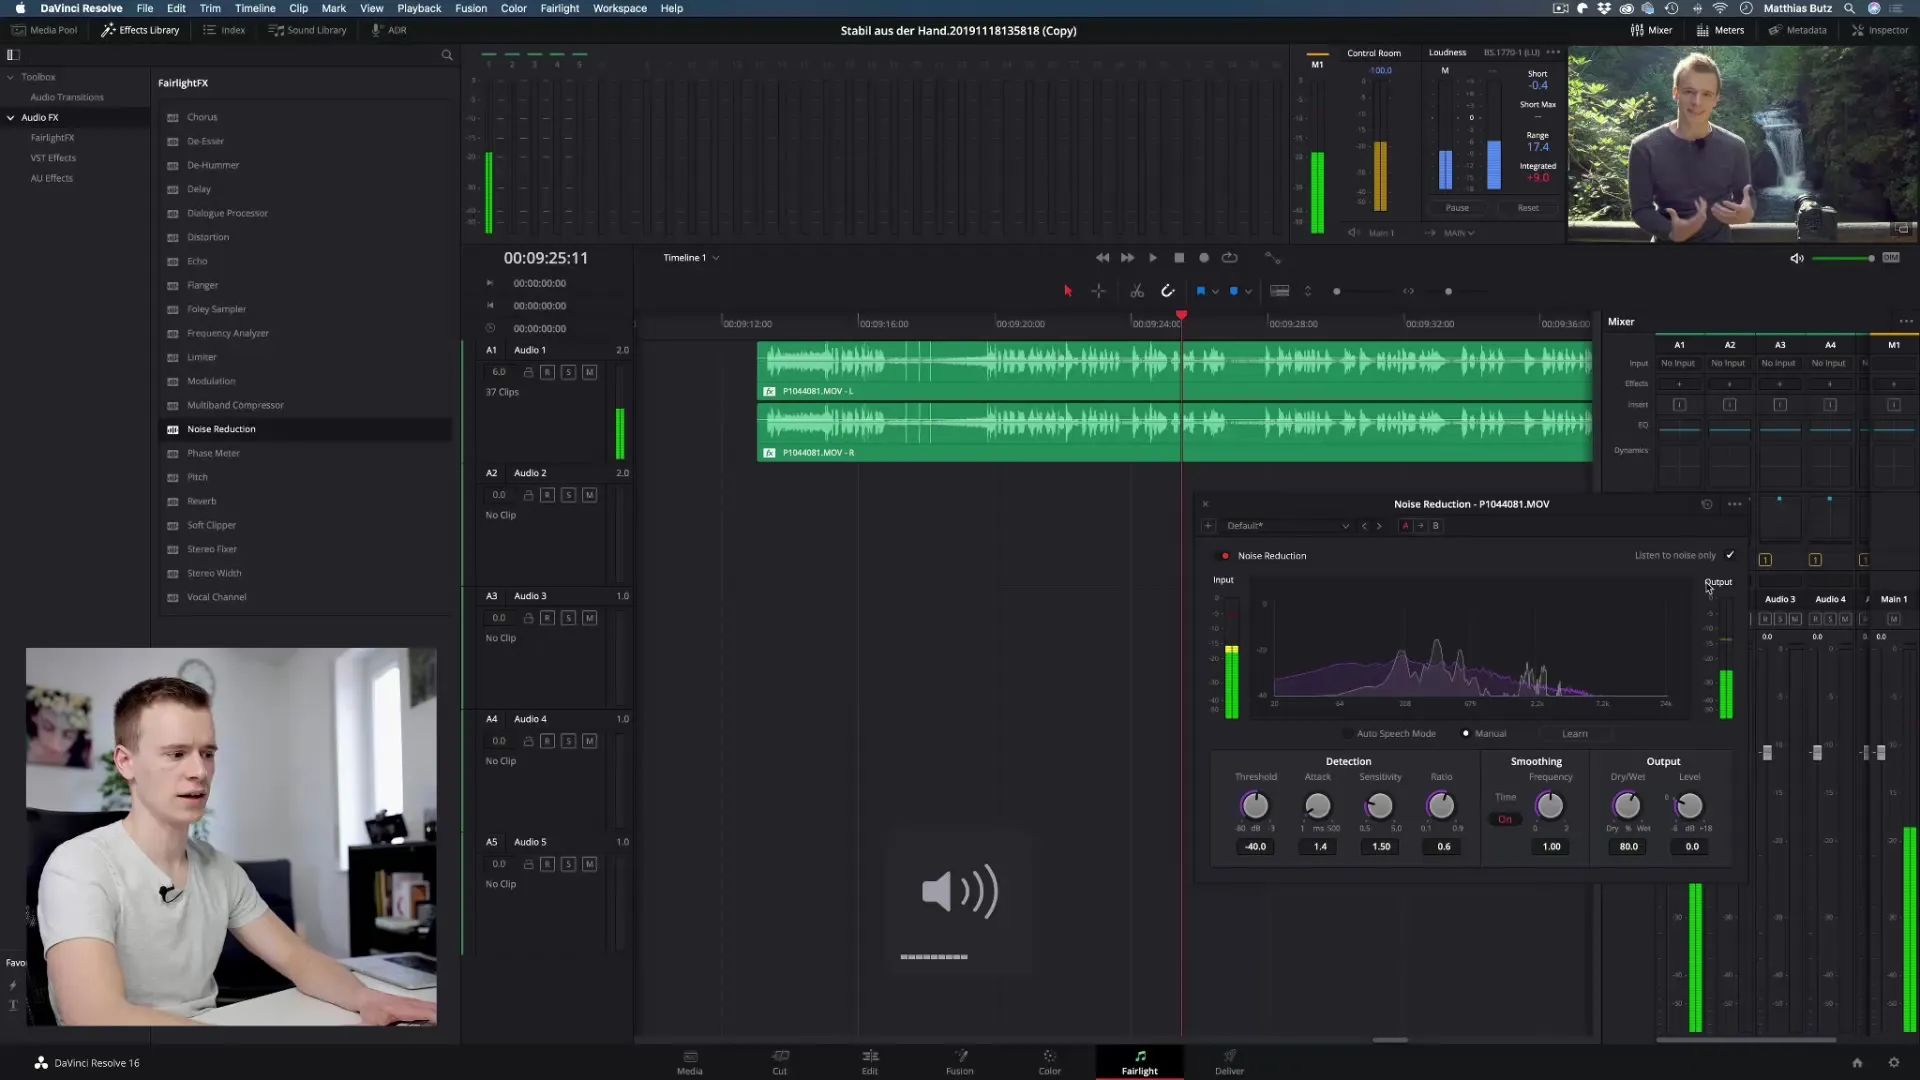
Once the noise reduction is performed, there are two important sliders you can adjust: "Dry/Wet" and "Level." The Dry/Wet slider determines how much noise is suppressed, while the Level slider adjusts the output of your voice.
Step 8: Review and adjust
It is advisable to review the result after noise reduction. Listen to the audio and test different slider settings to achieve the best possible result. Sometimes, it may be necessary to fine-tune the recording multiple times.
Step 9: Use alternative options
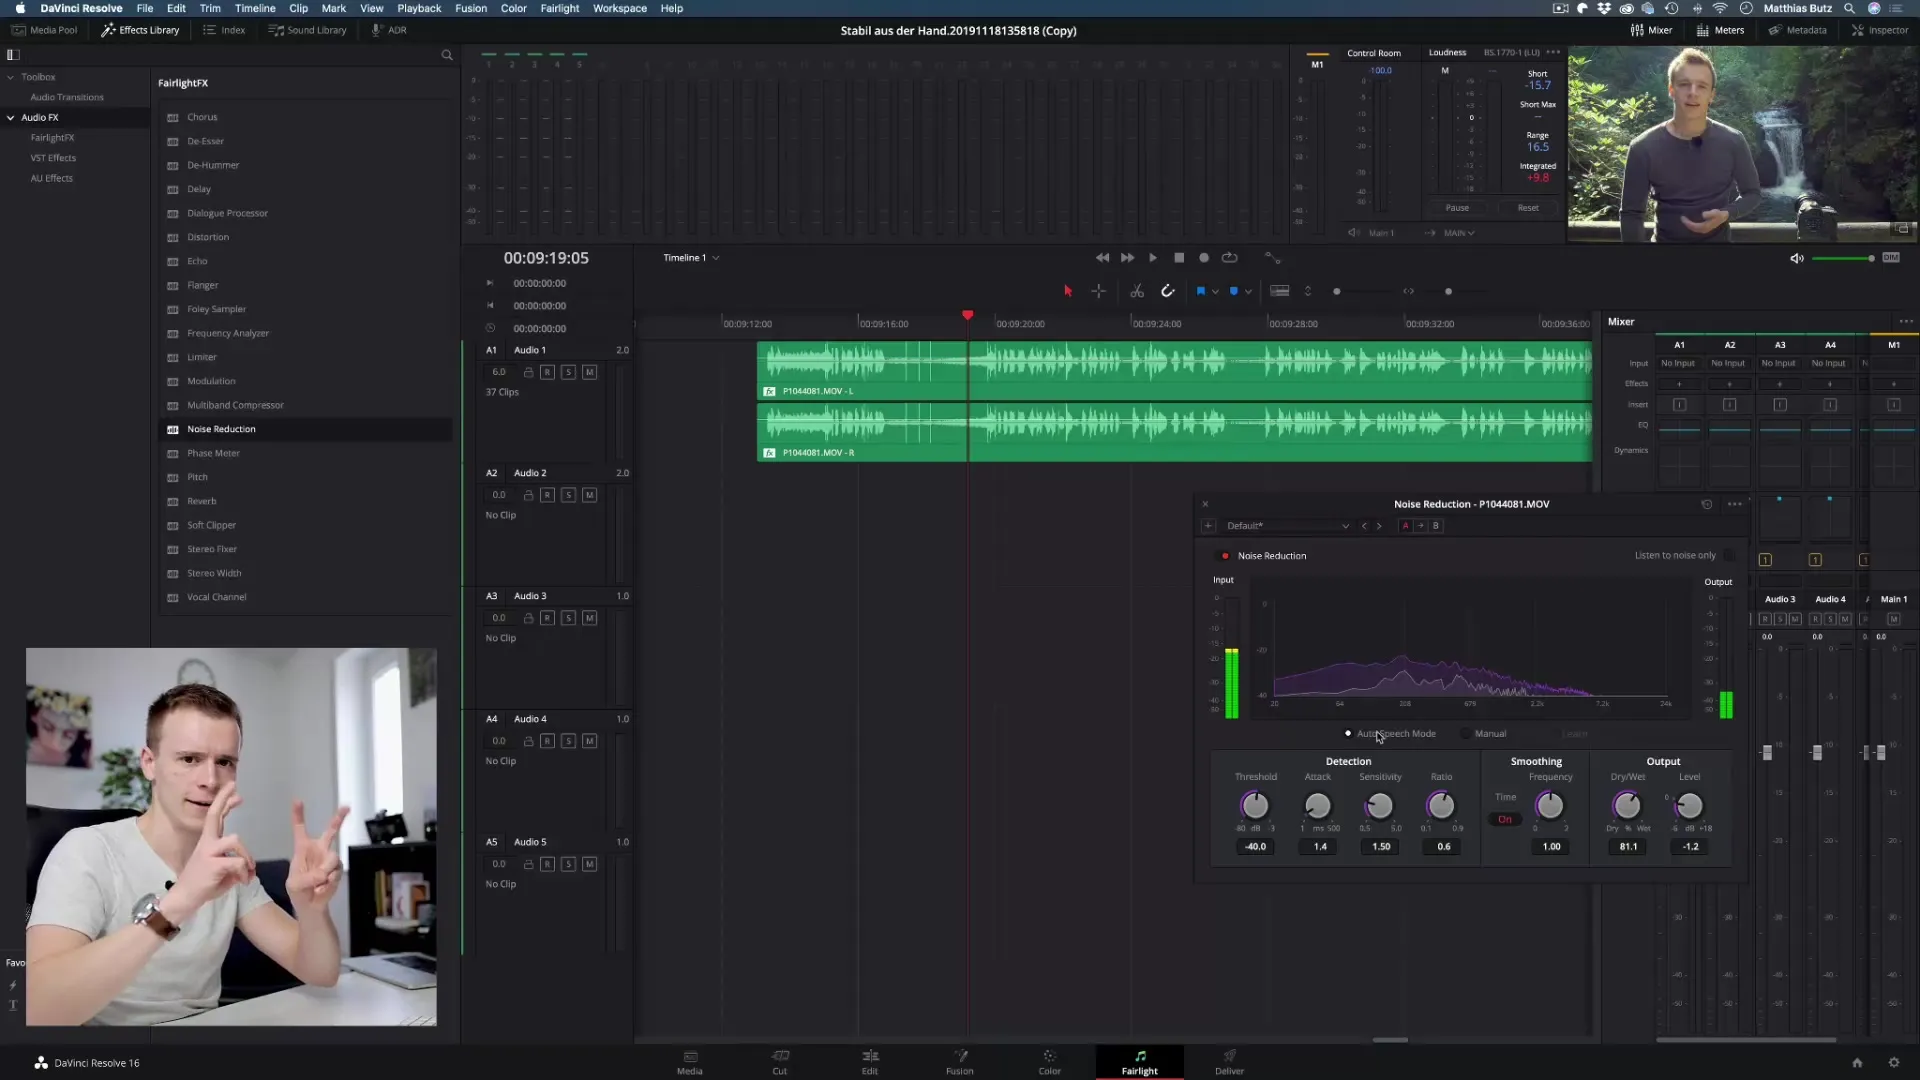
If the manual method does not yield the desired result, automatic modes like "Auto Speech Mode" are available to you. This feature adapts dynamically and can be more effective in various scenarios.
Step 10: Post-processing and final adjustments
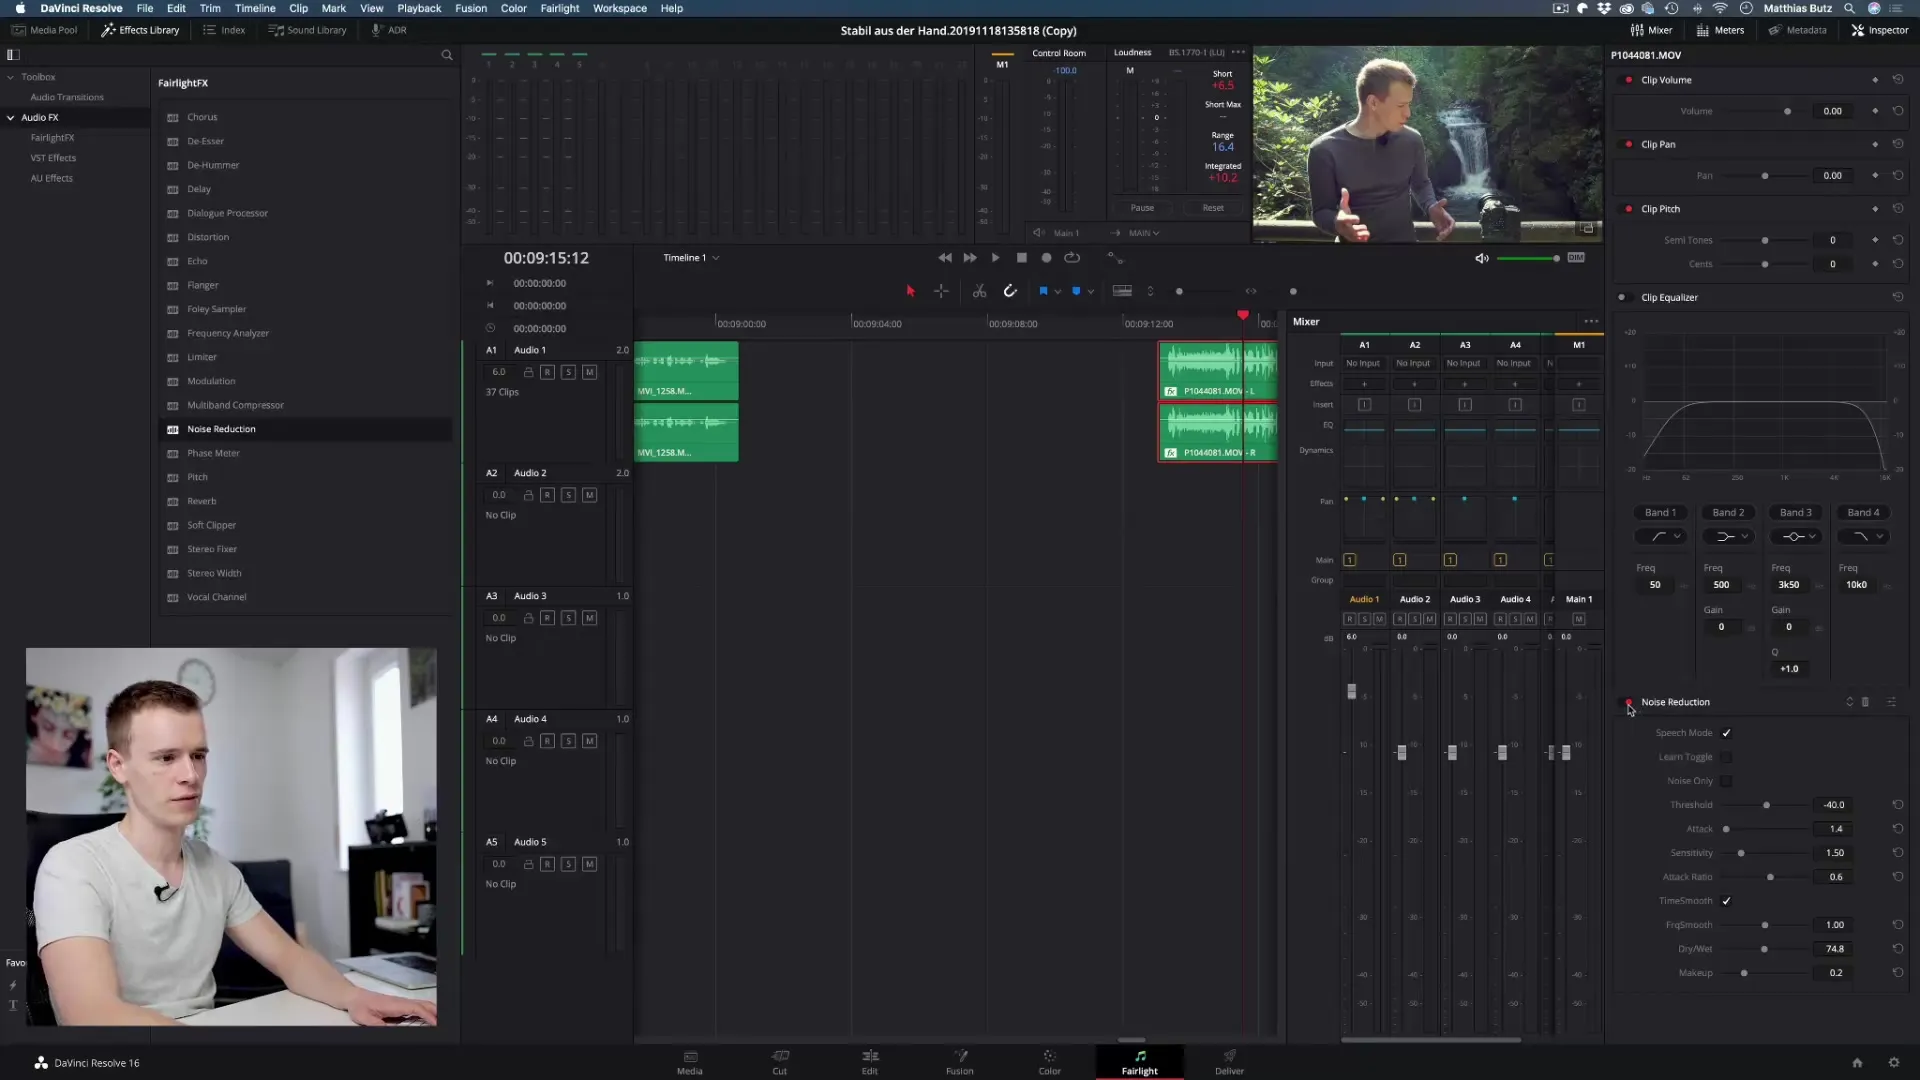
Once your noise is removed, you can continue working with the Inspector to refine settings. Here you will find various options for further editing that can help improve the audio quality to meet your standards.
Summary - Removing noise in DaVinci Resolve with easy instructions
Removing noise in DaVinci Resolve is a crucial step in optimizing the audio quality of your videos. With the right tools and techniques, you can ensure that your voice is clear and audible without unpleasant background noise.
Frequently Asked Questions
How can I remove noise in DaVinci Resolve?You can use the Noise Reduction function to identify and remove noise.
What are the best headphones for audio editing?High-quality, closed-back over-ear headphones are ideal as they substantially better isolate noise.
Does noise reduction always work perfectly?No, results can vary; precise settings are crucial for optimal outcomes.
Should I avoid noise during recording?Yes, the best results are achieved if you try to use noise-free material as much as possible during recording.
Where can I find the Noise Reduction in DaVinci Resolve?In the effects area of your mixer, you can activate and adjust the Noise Reduction.


