No matter what microphone you use, there are always ways to give your voice recordings the finishing touch. In this guide, you will learn how to take your audio editing to the next level with DaVinci Resolve. We will cover the most important tools that can help you optimize the sound quality of your voice recordings.
Key Insights
- Frequency adjustment is crucial to minimize interference and enhance the clarity of your voice.
- By using compressors and limiters, you can control the loudness of your recordings and prevent sounds from clipping.
- Good recording quality from the start reduces the need for extensive post-production.
Step-by-Step Guide to Editing Your Voice Recordings
1. Use an Equalizer
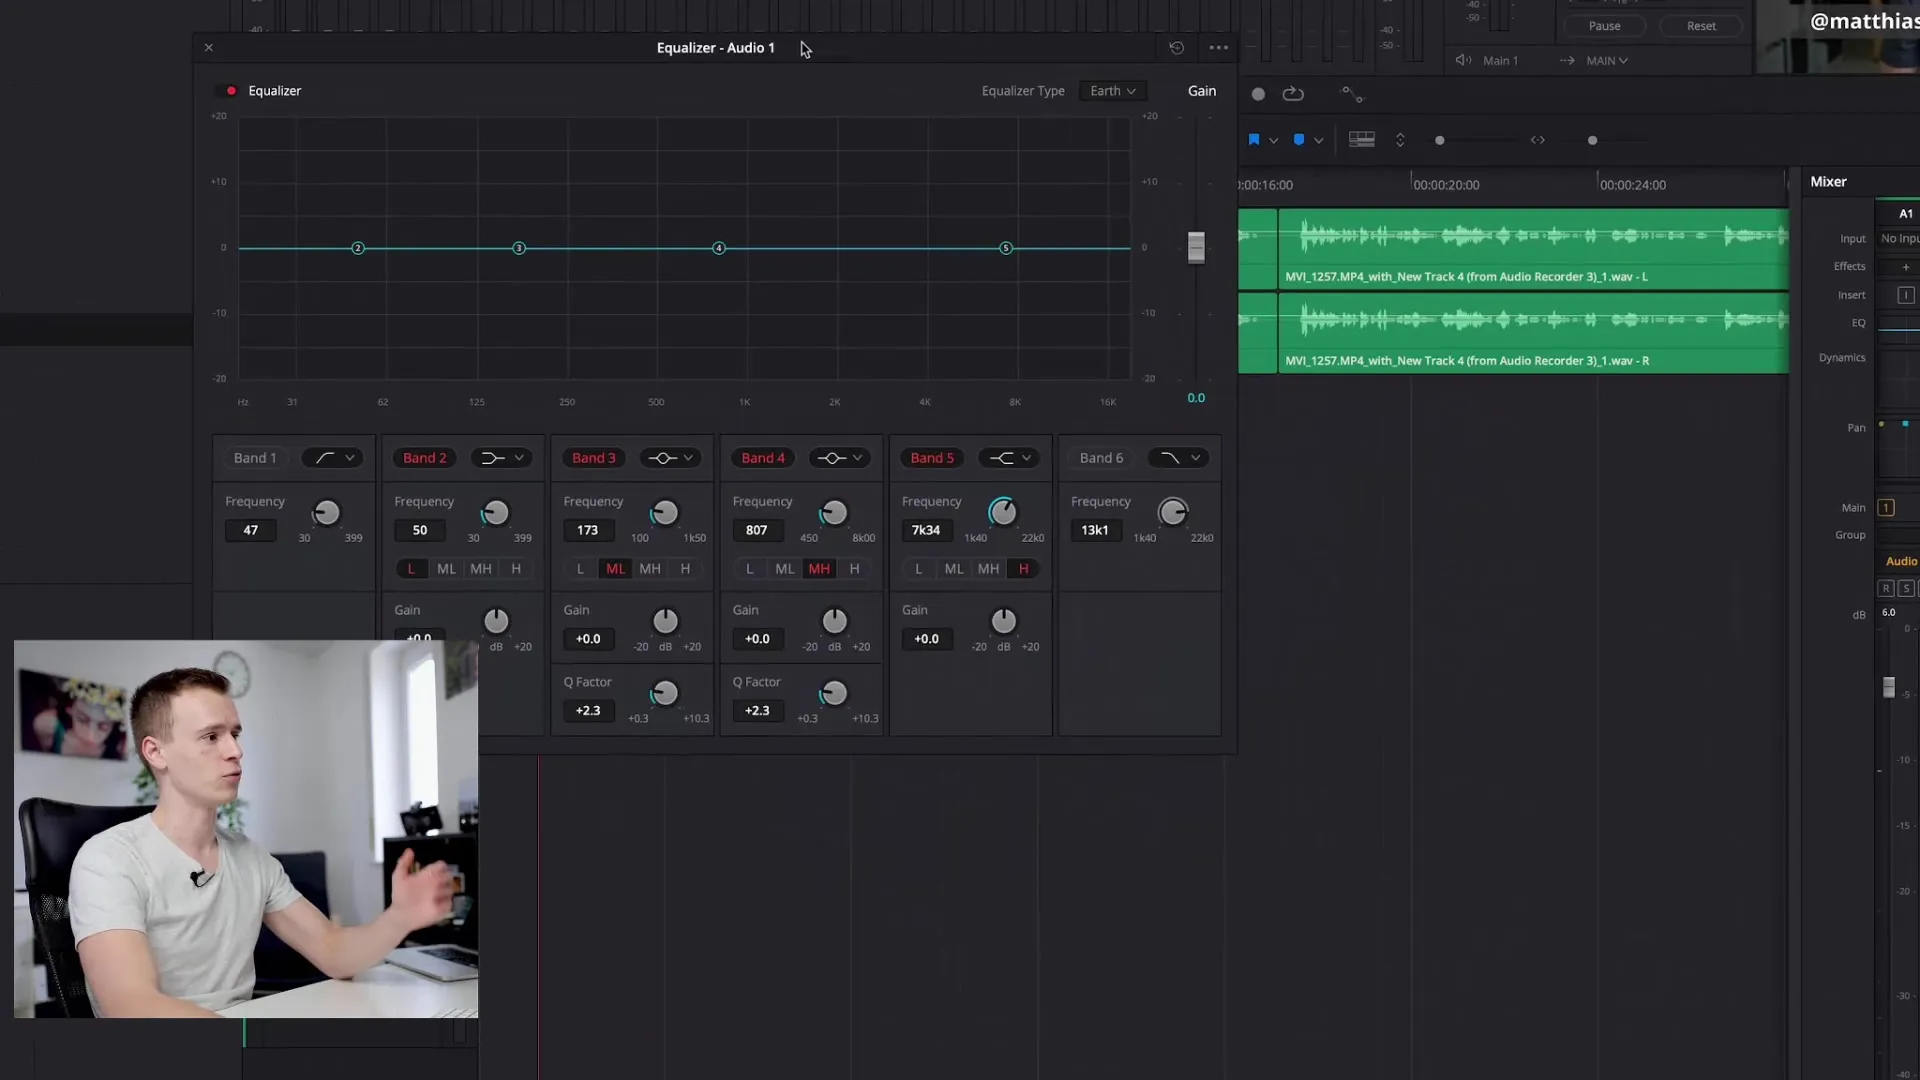
Start editing your voice recording in the equalizer. The equalizer allows you to affect different frequency ranges individually, so you can adjust high and low tones as needed. To achieve the best results, focus on emphasizing the frequencies where the human voice typically resides.

2. Filter Out Frequency Ranges
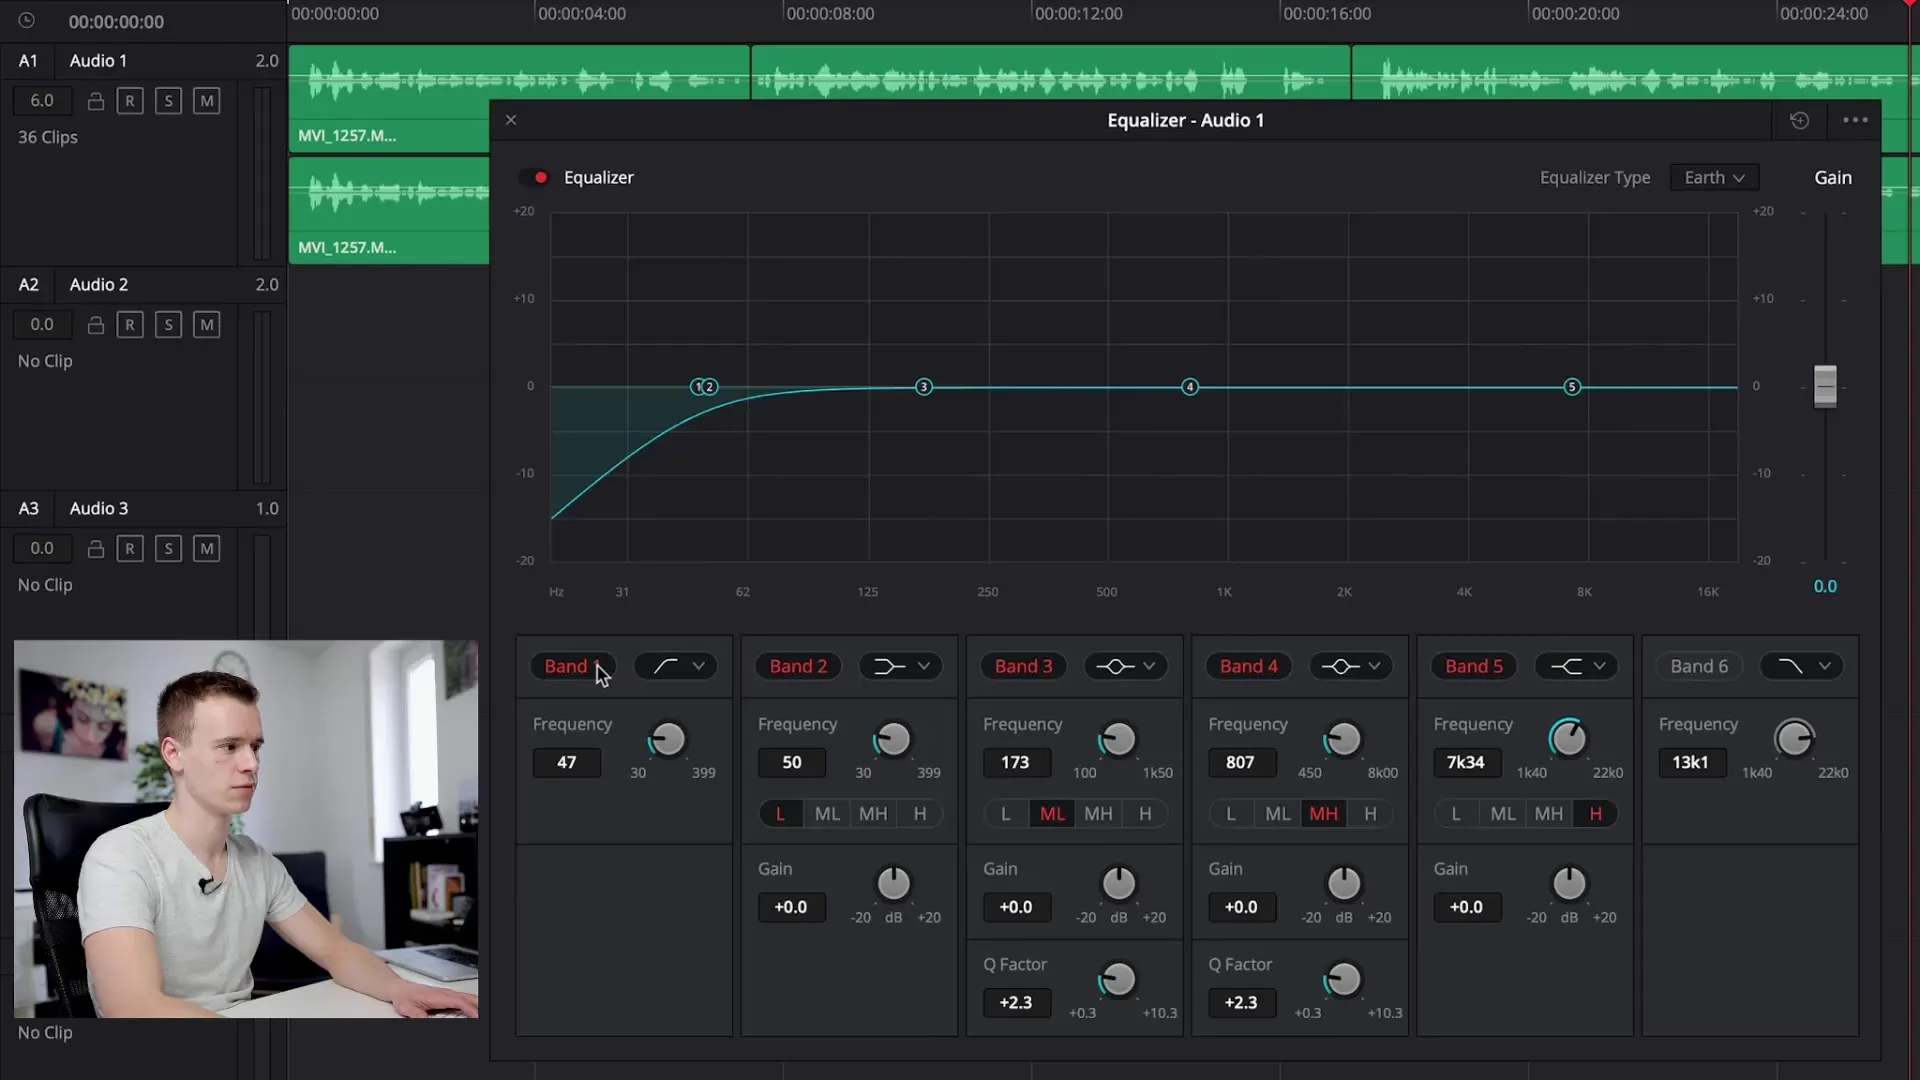
To minimize distracting and unwanted noises, you can filter out frequencies that do not contribute to the speech. A high-pass filter can be used to eliminate low frequencies that often carry noise or other unwanted sounds. Gradually adjust the filter settings to see how the sound changes.

3. Fine-Tune the Frequency Range
Once you have made the coarse adjustments in the equalizer, you can fine-tune specific frequency bands as needed. Experiment with the various bands to achieve the optimum sound. You can also boost some frequencies that suppress low tones without making the voice sound unnatural. Listen to the changes during the process and improve the settings step by step.
4. Control Dynamics with Compressors
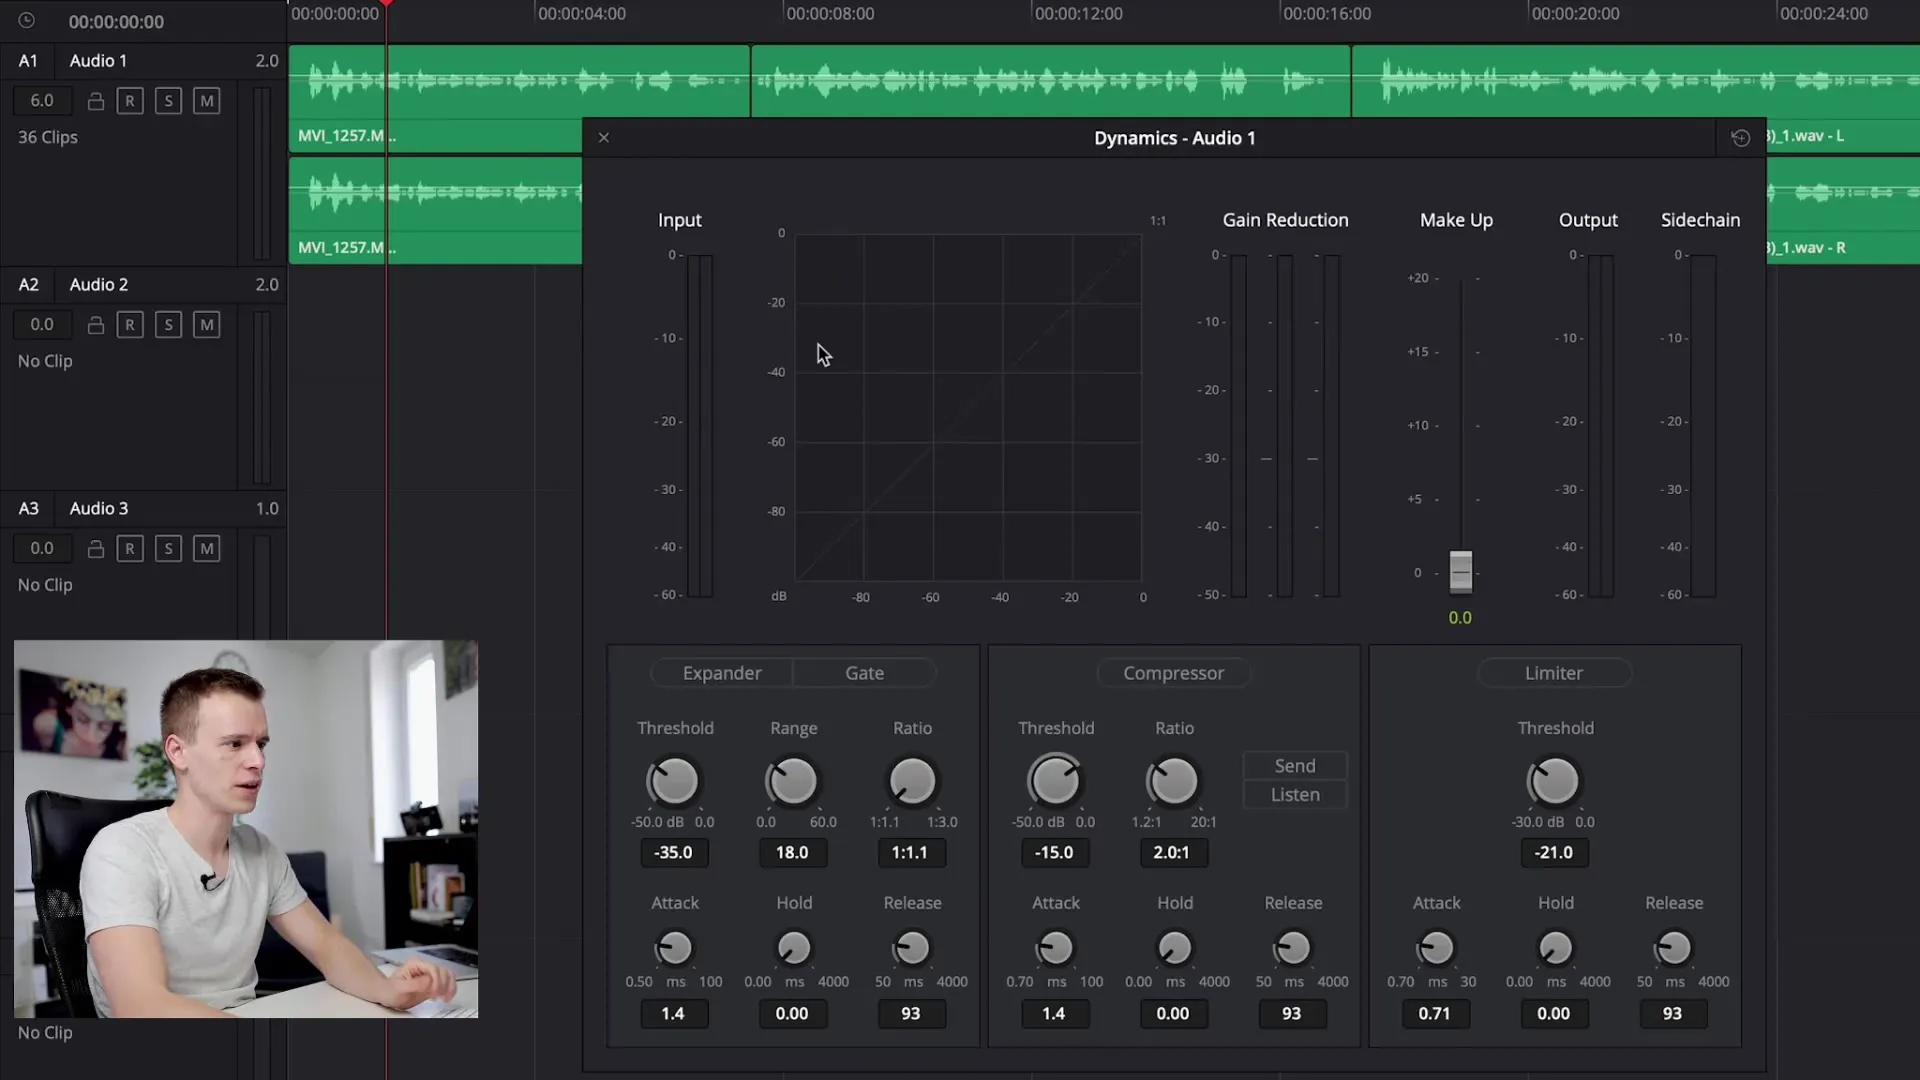
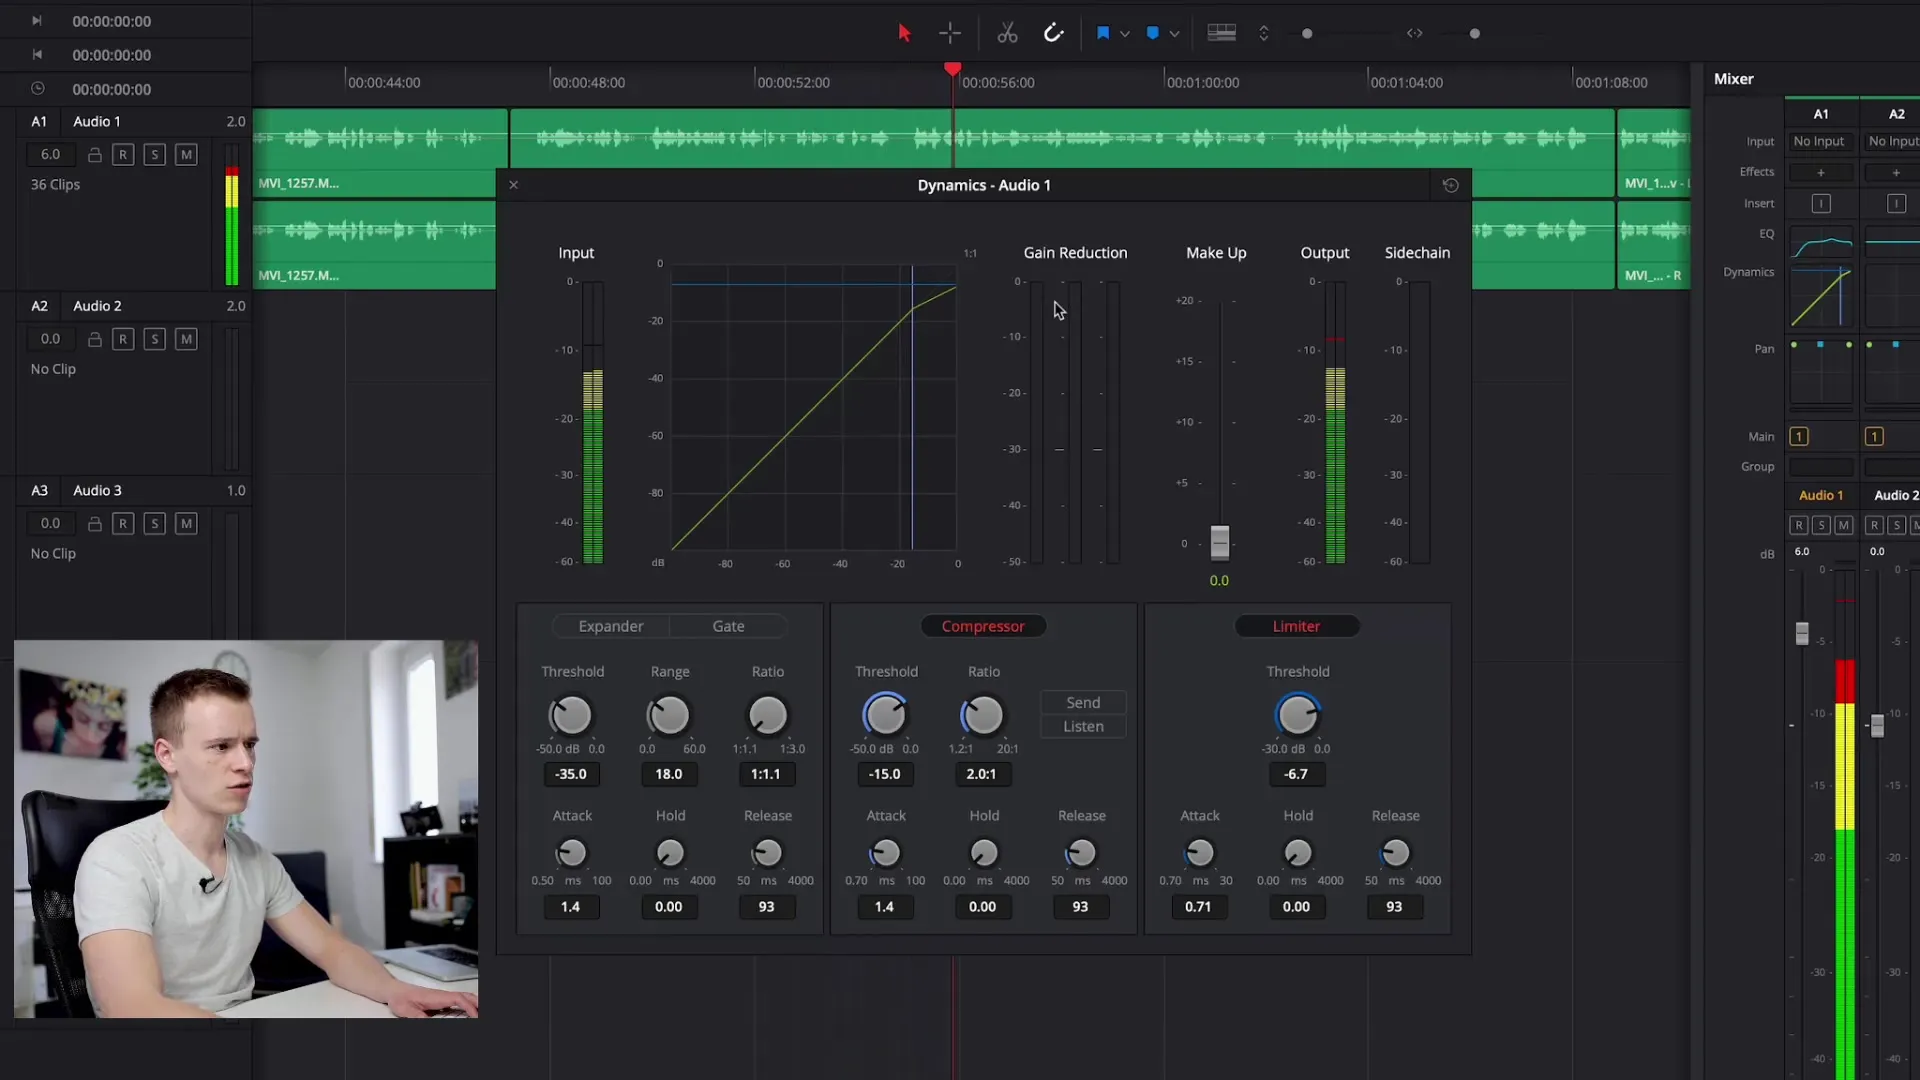
To control volume fluctuations and ensure that no individual sounds are too loud, it is advisable to use a compressor. This lowers the louder parts of your voice recording and ensures a more consistent volume level. Activate the compressor to immediately see how it changes the dynamics of your recording and adjust the settings to achieve the desired loudness.

5. Add a Limiter
In addition to the compressor, a limiter can be used to ensure that the volume does not exceed certain limits. This protects your recordings from distortion that can occur when the signal level is too high. Set the limiter to engage only at a volume above -5 dB to maintain a healthy balance.
6. Hear the Difference
The final step of editing is to listen to the differences. Toggle the edits you’ve made on and off to hear how the sound has changed. Pay attention to the smoothness and clarity of the voice in the audio playback and make any final adjustments as necessary.

Summary - DaVinci Resolve Tutorial: Professionally Edit Voice Recordings
Editing your voice recordings with DaVinci Resolve requires a certain feel for the adjustments that optimally highlight the sound. Use the equalizer to equalize frequencies, apply compressors and limiters sparingly to maintain extreme volume limits. Don’t forget – good recording quality at the beginning makes post-production easier and more effective.
Frequently Asked Questions
How can I ensure that my voice recording sounds clear?Pay attention to clean microphone placement and make sure you record in a quiet room.
What is the advantage of an equalizer?An equalizer allows you to highlight or lower specific frequencies of your voice to improve the sound.
Why do I need a compressor?A compressor controls the dynamics of your recording so that loud tones are quieter and soft sounds are made more audible.
Can I increase the volume of my recording later?Yes, but you should be careful to avoid clipping and distortion by using limiters and other dynamic effects.
Are there external plugins I can use?Yes, there are many external plugins that offer additional customization options, but often the built-in software is sufficient for most applications.


