The targeted editing of colors and brightness ranges in video material allows you to significantly improve the visual impression of your projects. With the Qualifier or the eyedropper in DaVinci Resolve, you have a very powerful tool at your disposal to precisely select and edit color ranges. Whether you want to adjust skin tones or blur the background – the possibilities are almost endless. In this guide, I will explain how to effectively use the Qualifier to make targeted color corrections.
Key Insights
- The Qualifier in DaVinci Resolve allows you to select specific color and brightness ranges.
- Adjustments to the selection can be made using sliders for hue, saturation, and luminance.
- Soft transitions between the selected and unselected areas improve the final result.
- With the masks created, you can make targeted changes in the respective area without affecting the entire composition.
Step-by-Step Guide
Step 1: Prepare Project and Settings
Open DaVinci Resolve and load your project. Before you edit the colors, it is important that the image is in the correct format and color profile. Activate auto-balance to get a base layout to work on.

Step 2: Create a New Node
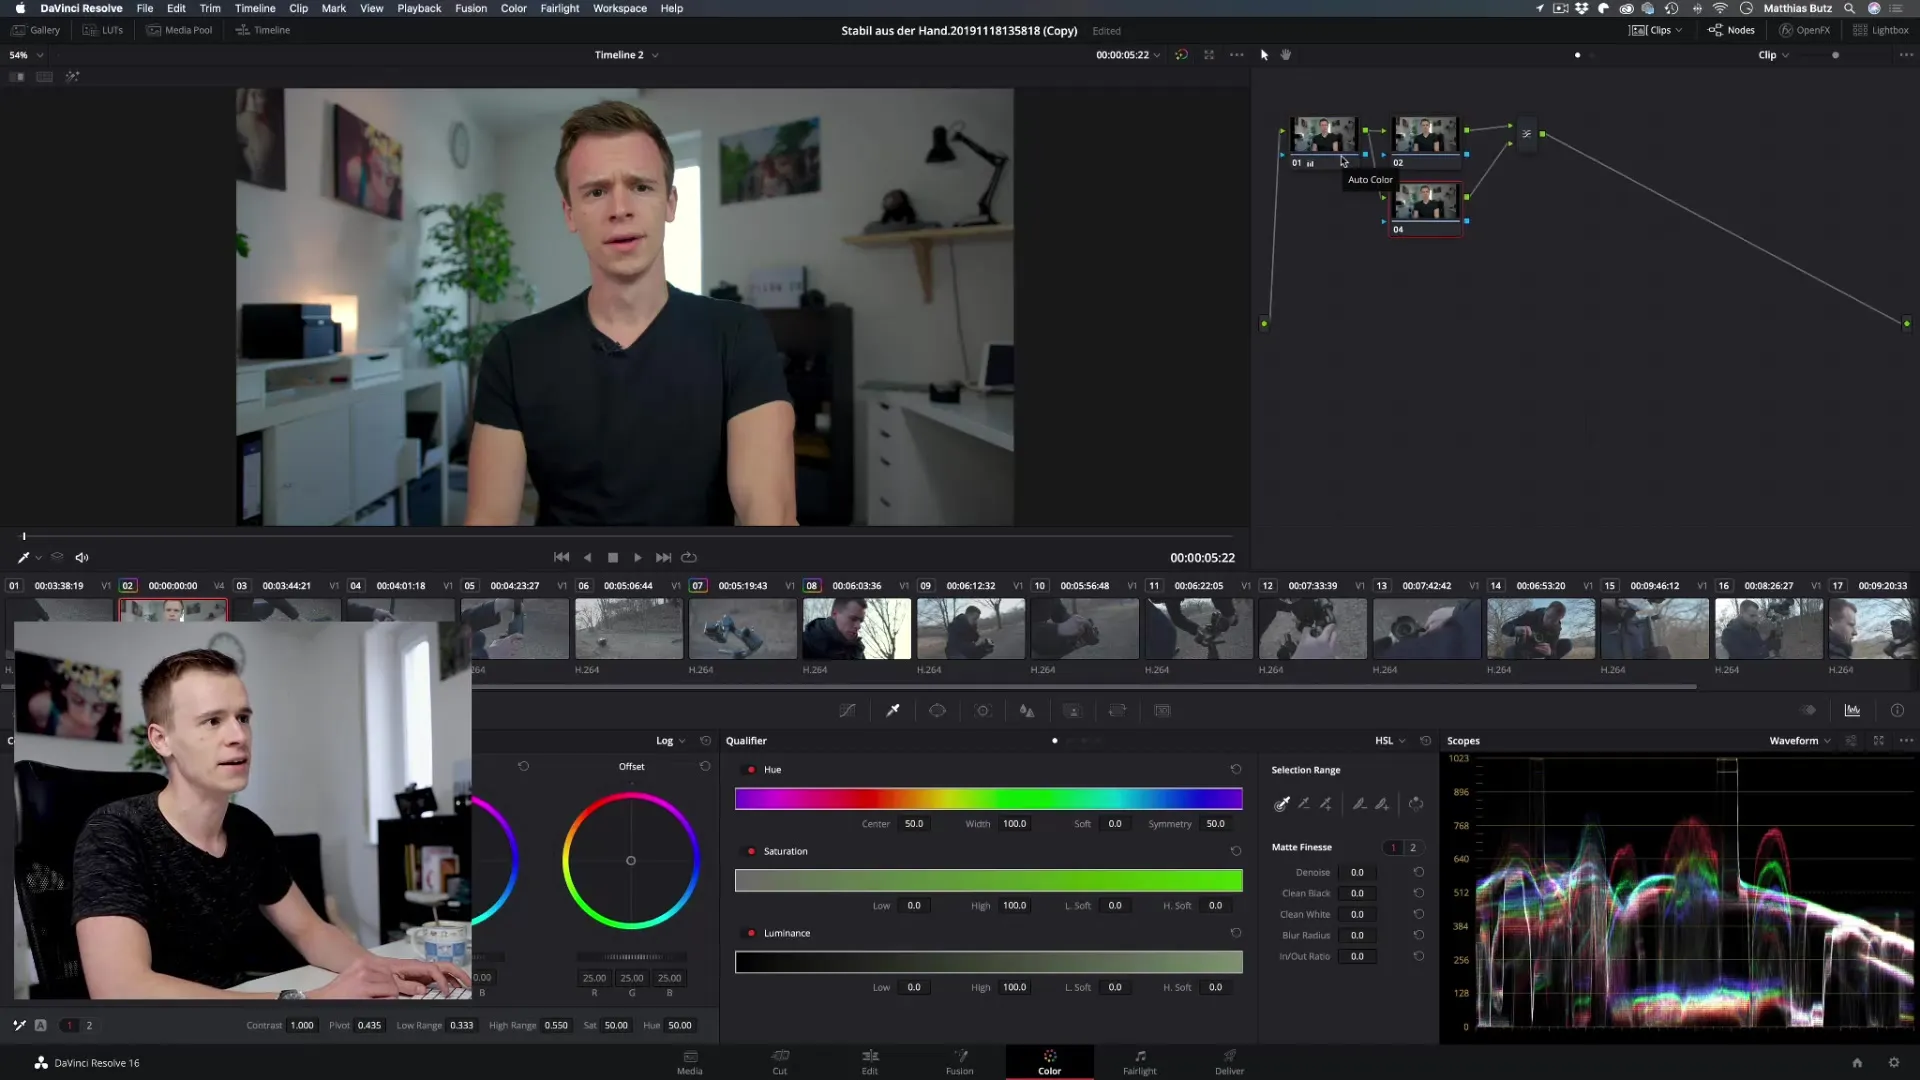
To make a specific adjustment, create a new node. To do this, hold down the Alt + S keys. This ensures that your previous changes are not lost and that you can revert the adjustments anytime.
Step 3: Set Mask with the Qualifier
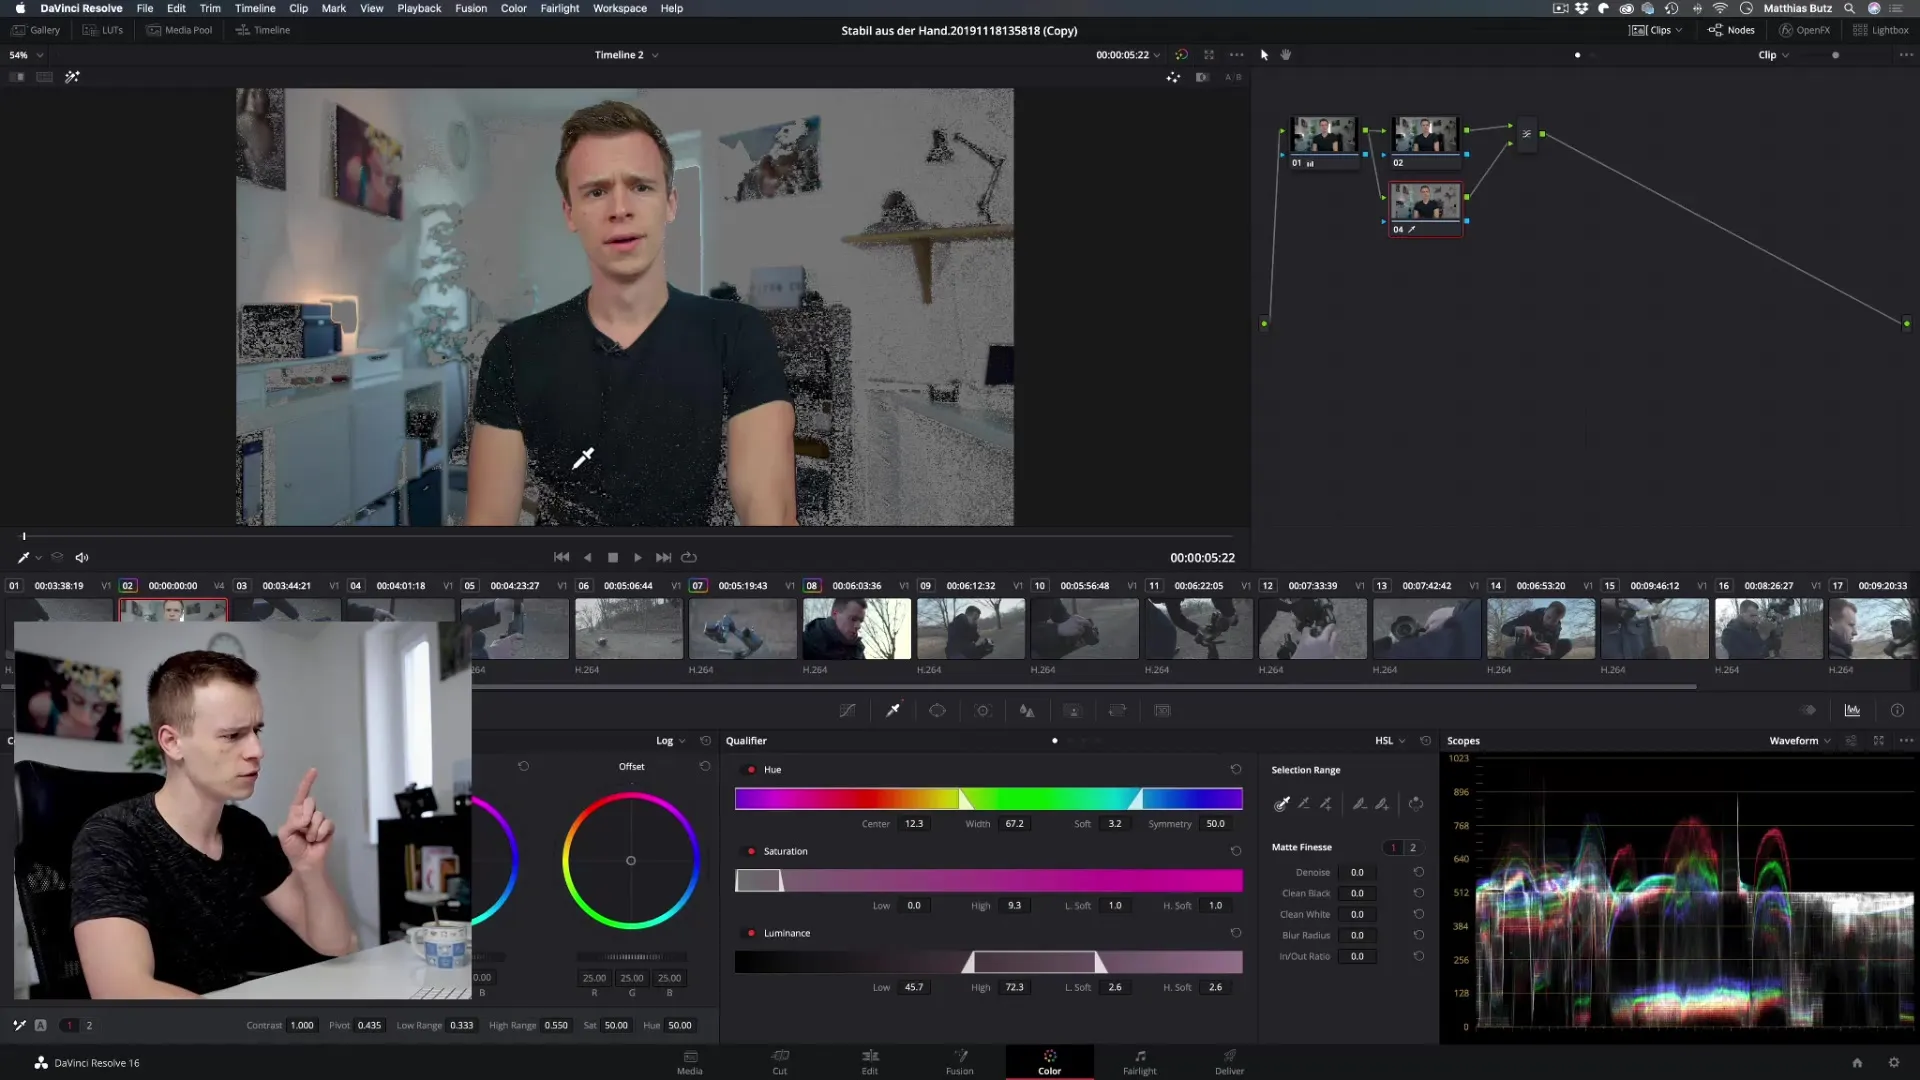
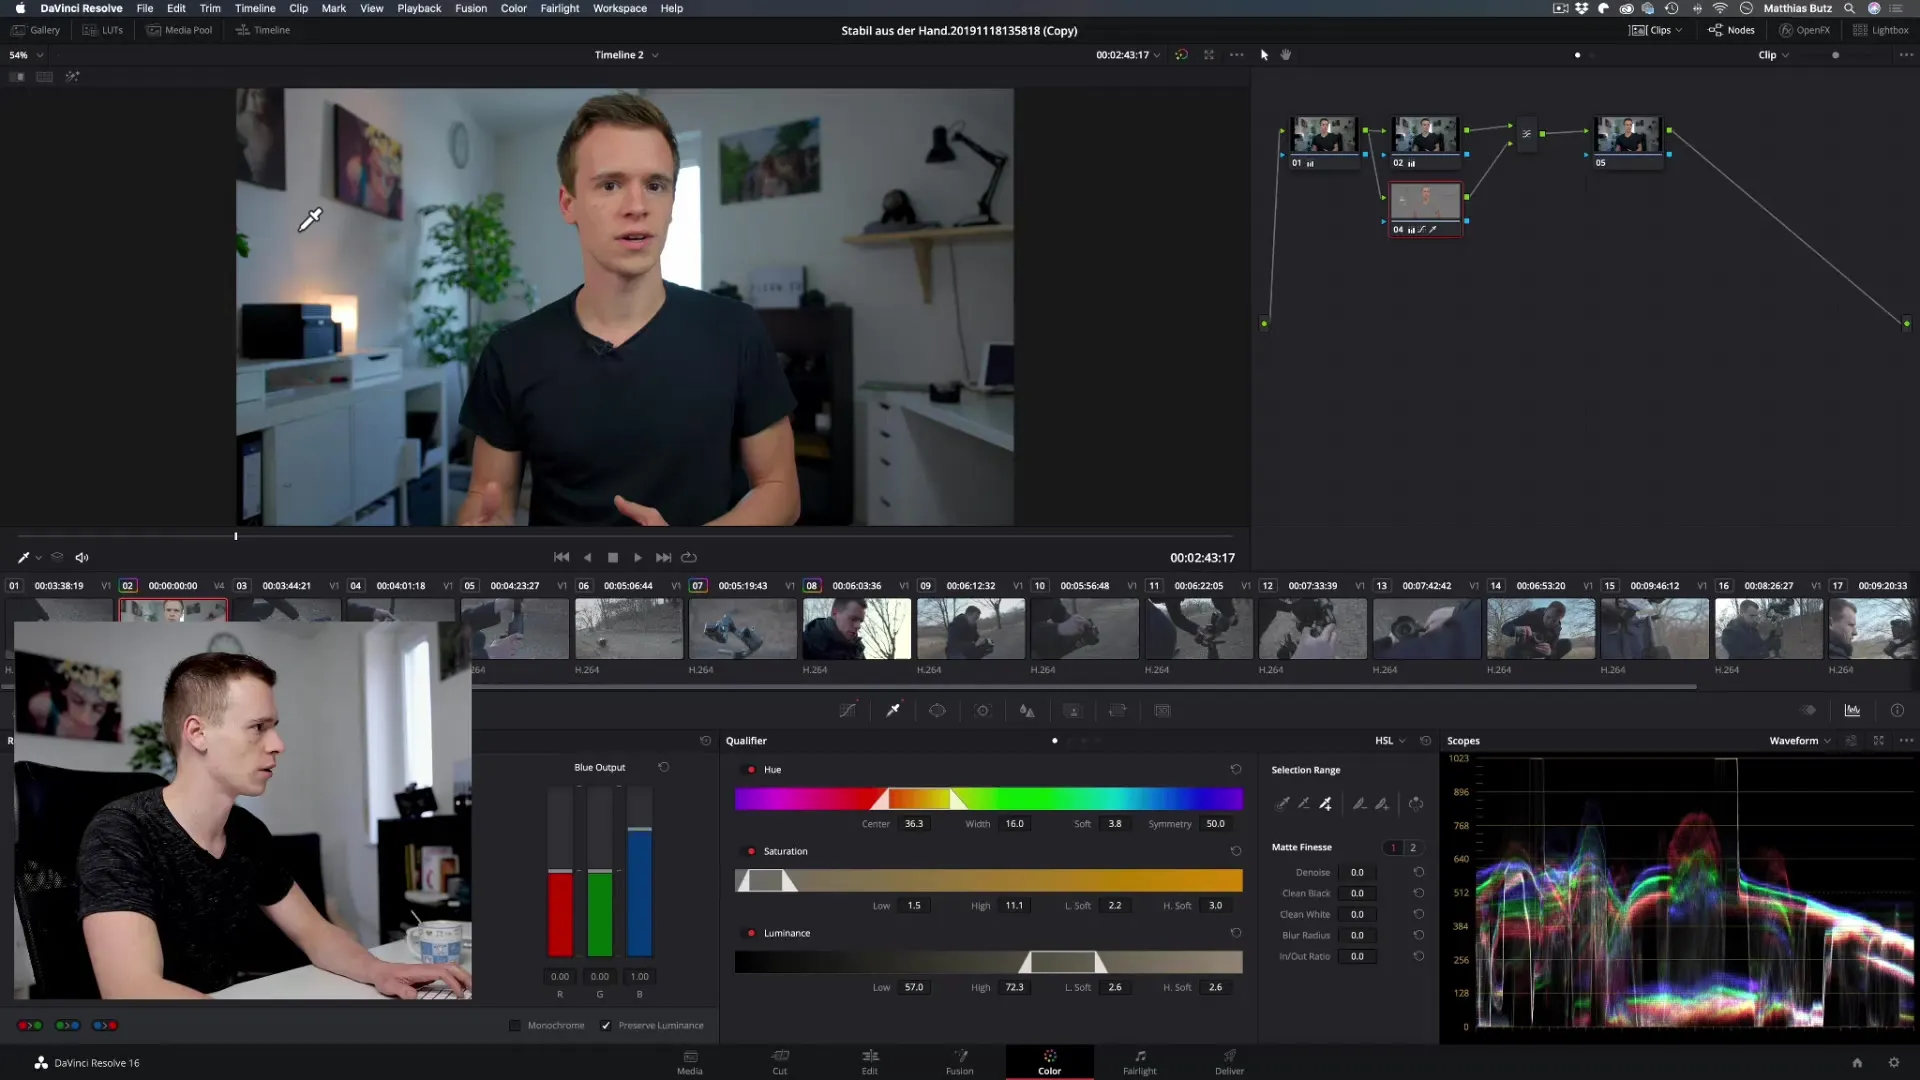
Activate the Qualifier on the Color Page. You’ll find it in the top menu below the “Nodes” tab. Click on the eyedropper icon and then on the color whose brightness or color range you want to select. To refine the selection, you can click and drag the eyedropper to select more or less of that color.
Step 4: Adjust Selection
Once the color range is selected, you can make further adjustments. Add or remove points using the tools in the Qualifier area. Make sure not to select too many unwanted color ranges – use the undo function (Command + Z) if needed to cancel changes.
Step 5: Use Hue, Saturation, and Luminance Sliders
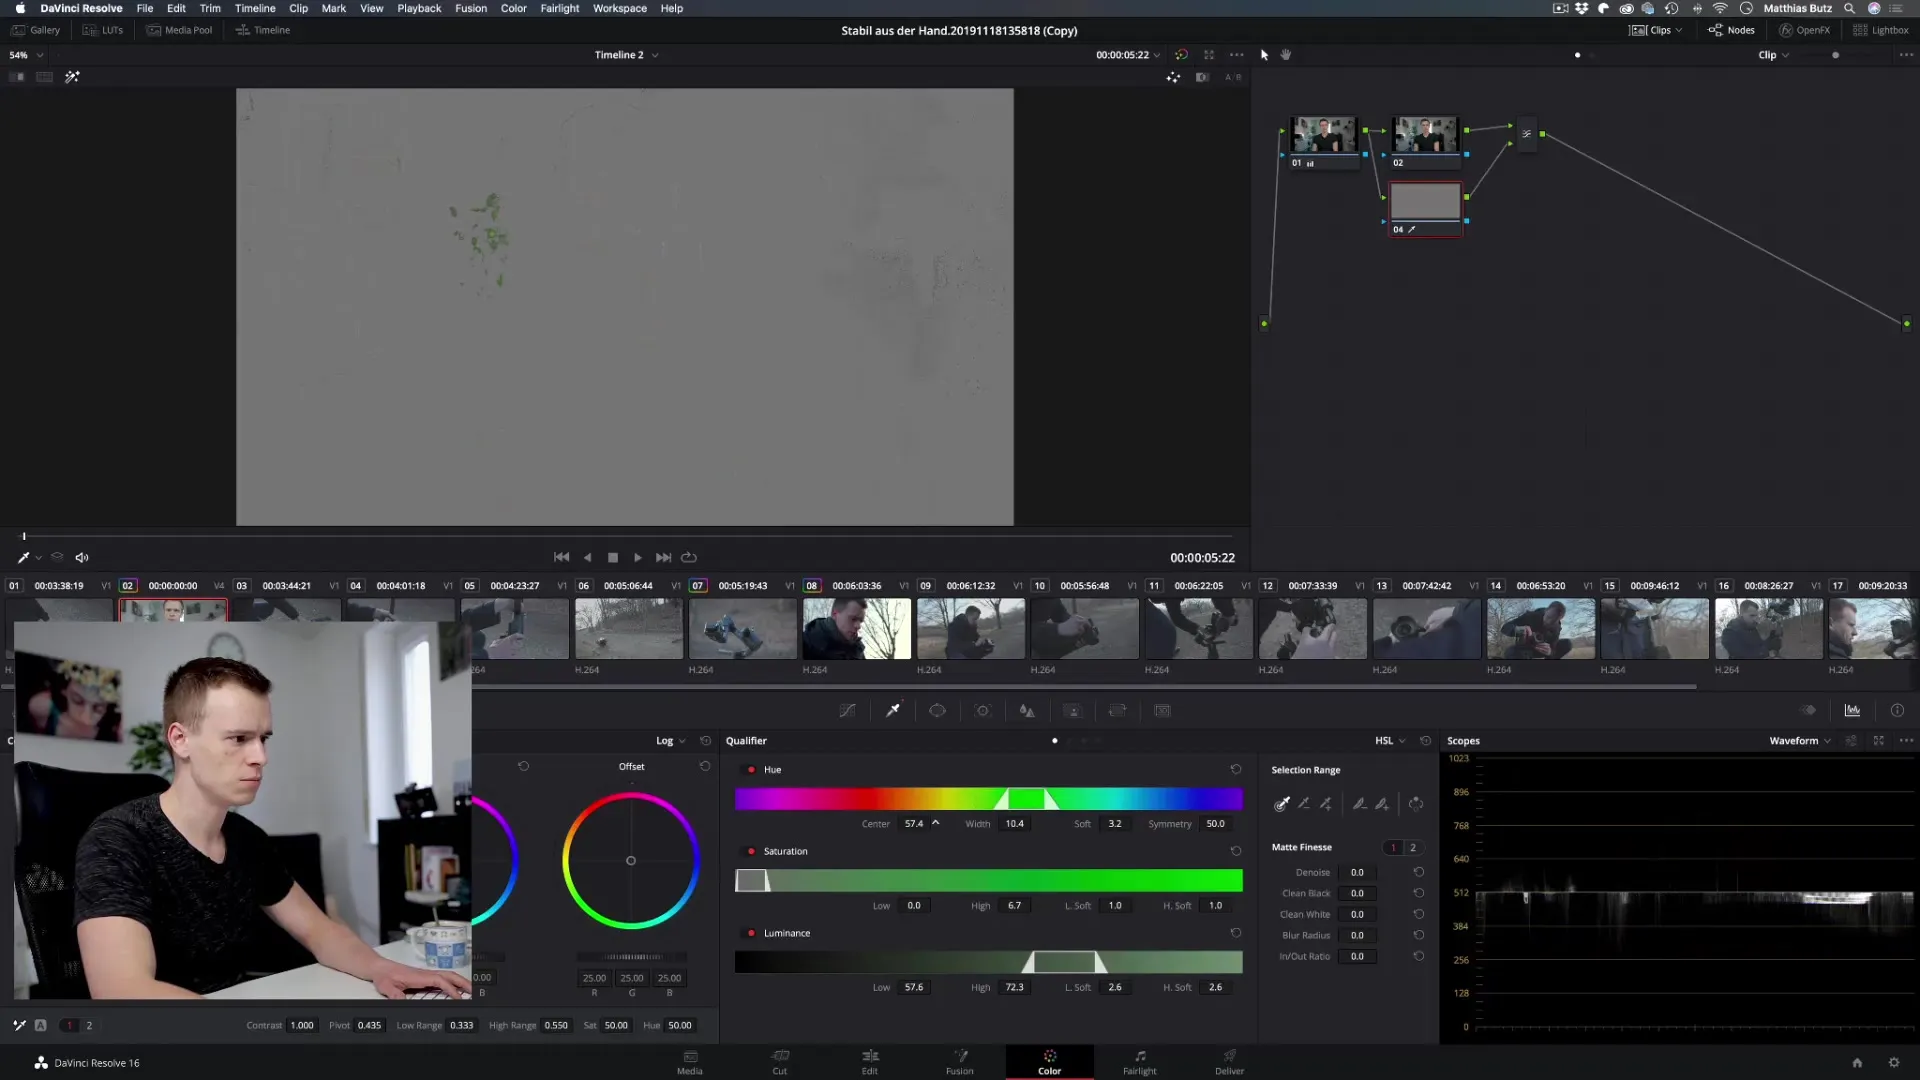
You can now use the sliders for hue, saturation, and luminance to further refine the selection. Move the hue slider left or right to fine-tune the selected area, and use the width slider to enlarge or reduce the selection.
Step 6: Soften Transitions
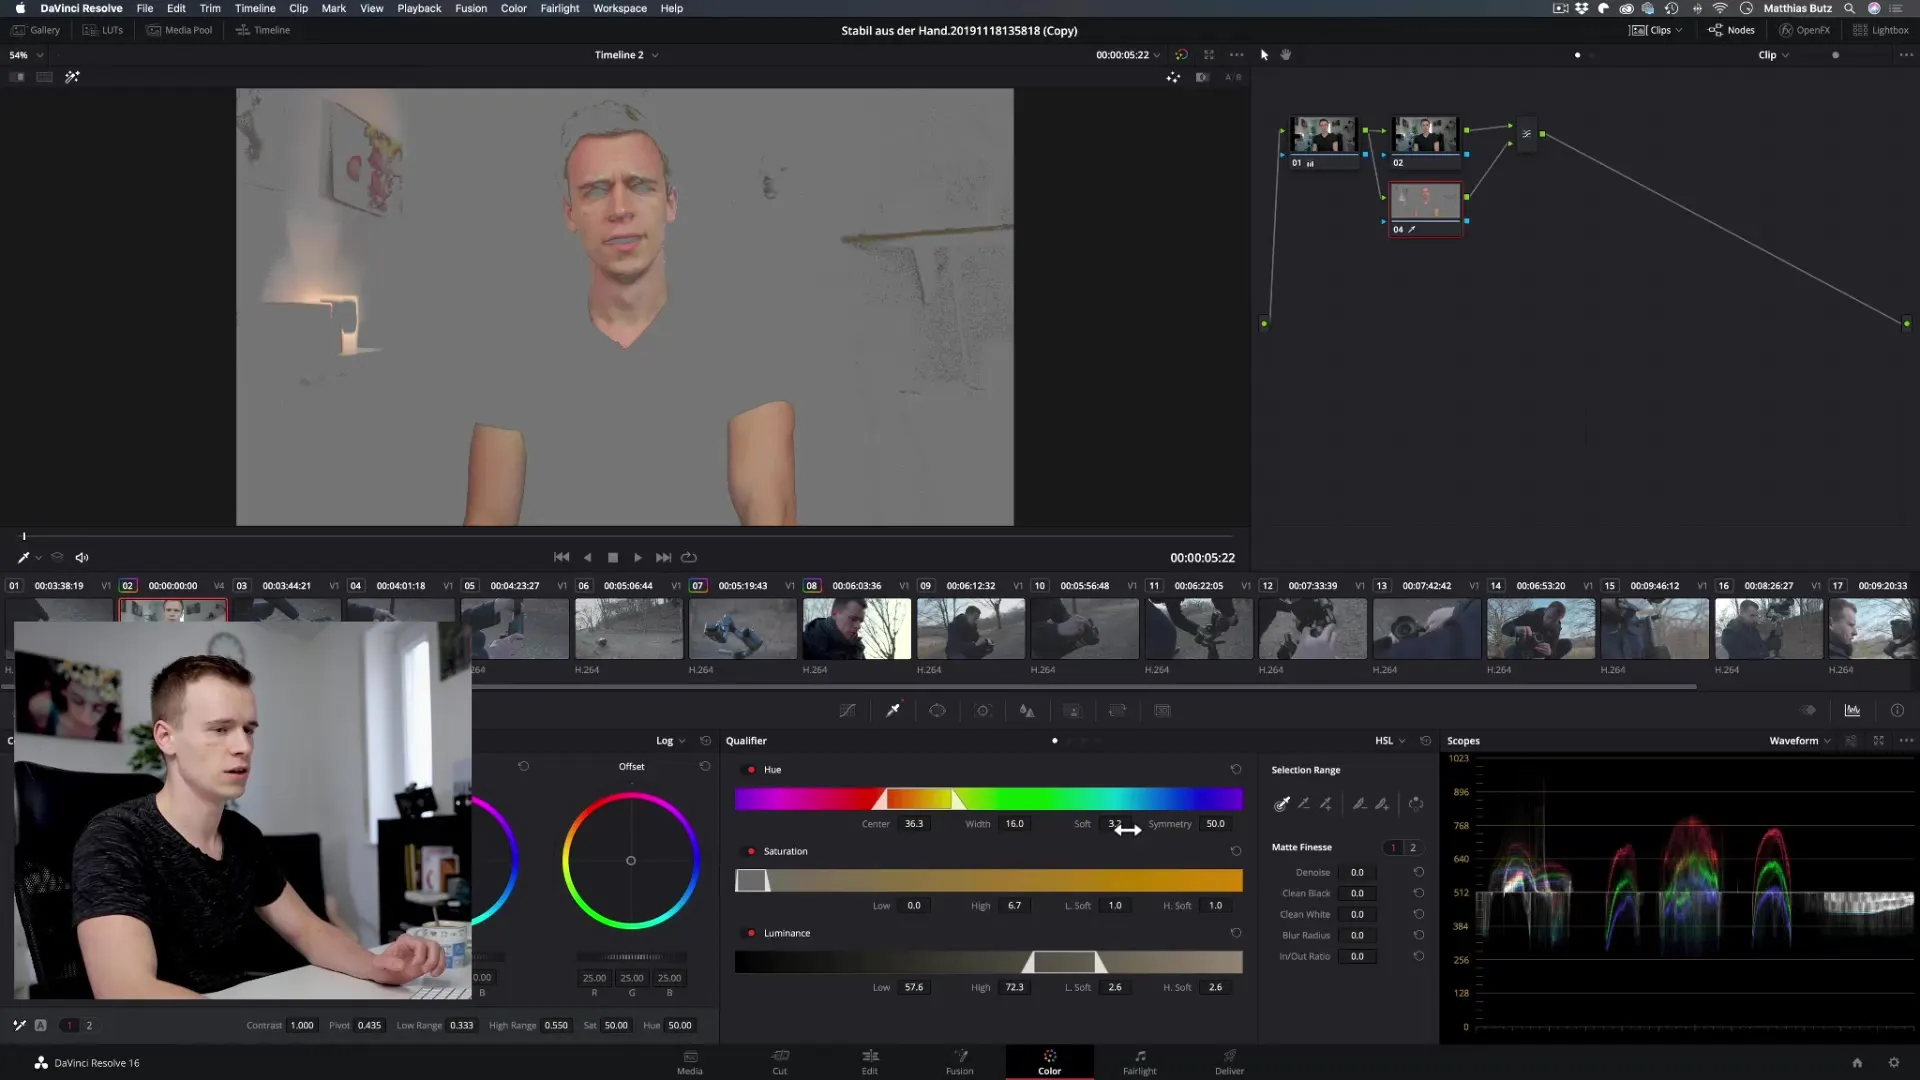
To avoid harsh edges, activate the soft slider. This ensures that the transitions between the selected and unselected areas are smooth. Experiment with the settings to see how the edges of the selection change.
Step 7: Make Adjustments in the Selected Area
Deactivate the mask view and make adjustments in the main image. For example, you can use the curves to darken or lighten the selected area. Make sure the changes are only applied to the selected area, resulting in a professional and nuanced look.
Step 8: Make Further Adjustments to Underlying Layers
If you are satisfied with the color range, go to the underlying layer. Also make adjustments here to the color temperature or contrast. This will give you the desired look without having to edit the mask again.
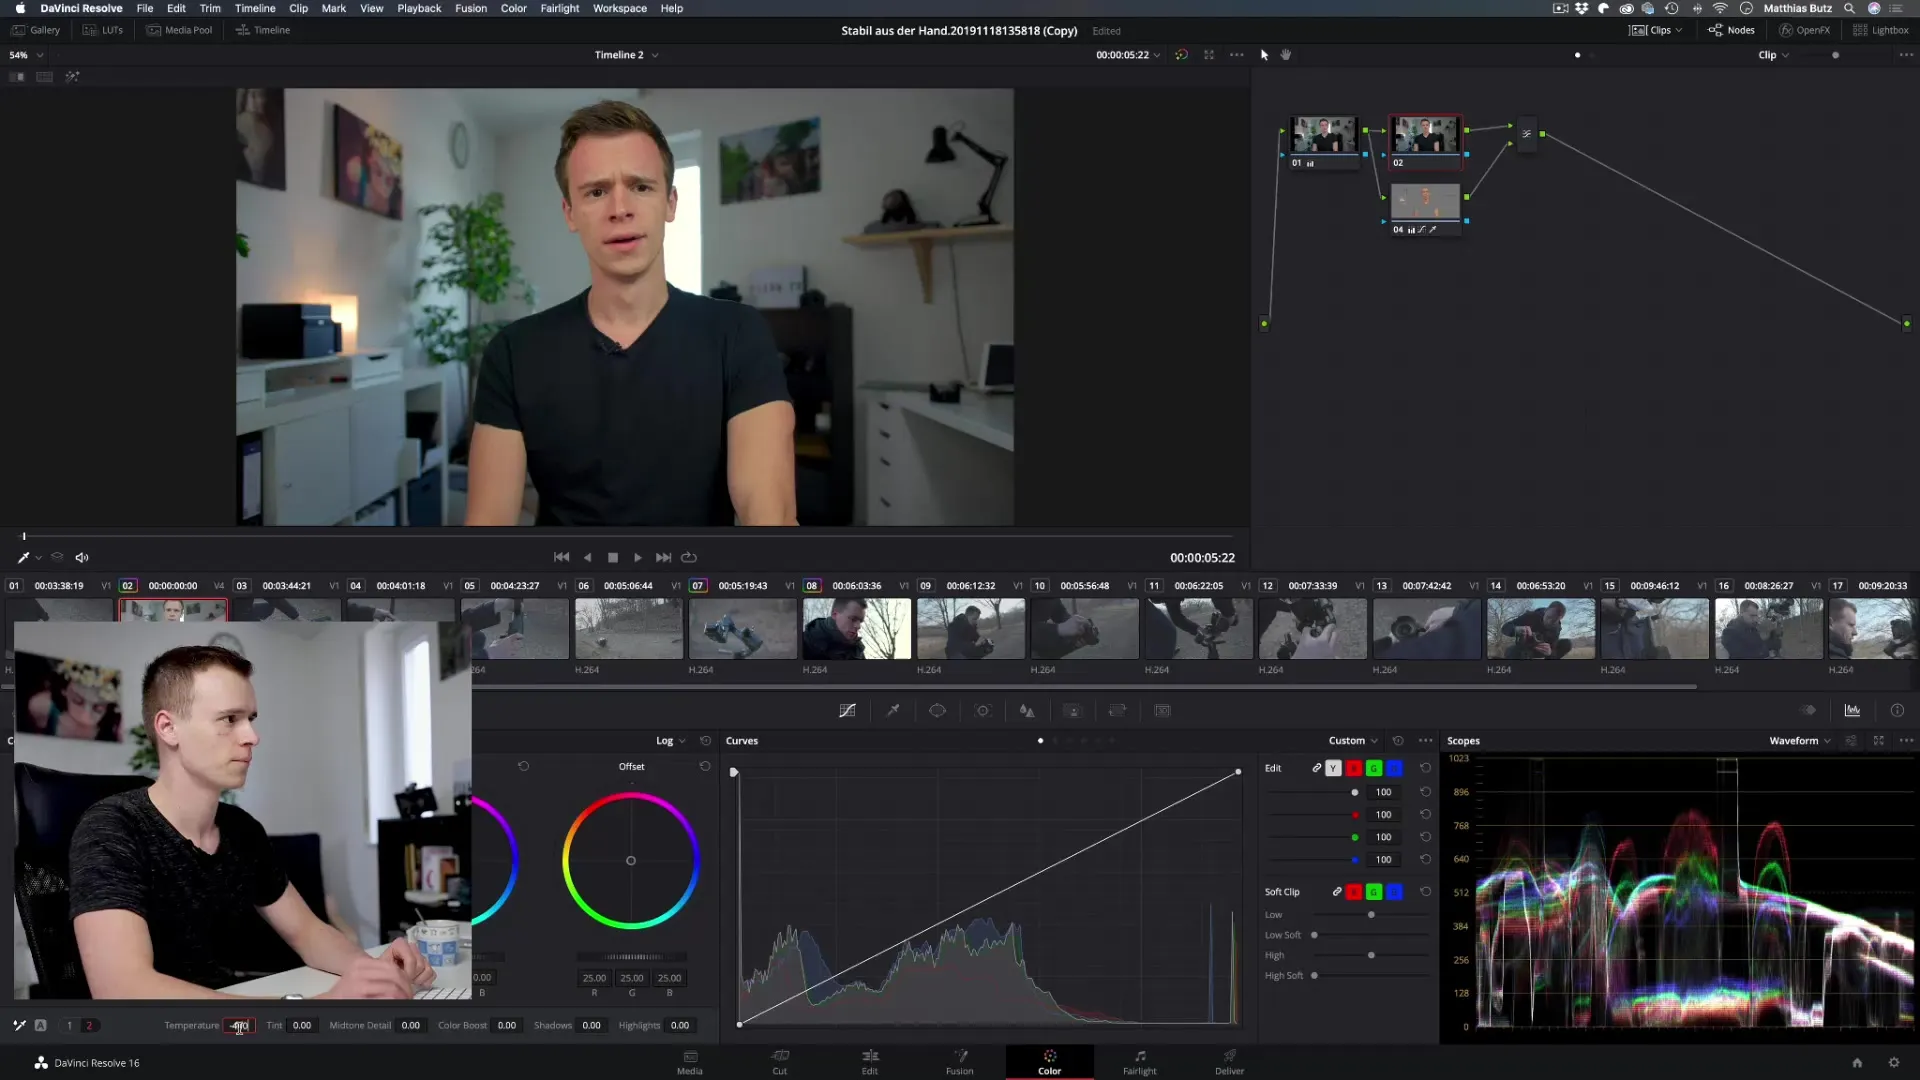
Step 9: Expand or Reduce Color Selection
If you want to include more areas in the selection, you can use the eyedropper to select additional colors or remove certain color ranges. Be cautious not to unintentionally change large areas of color.
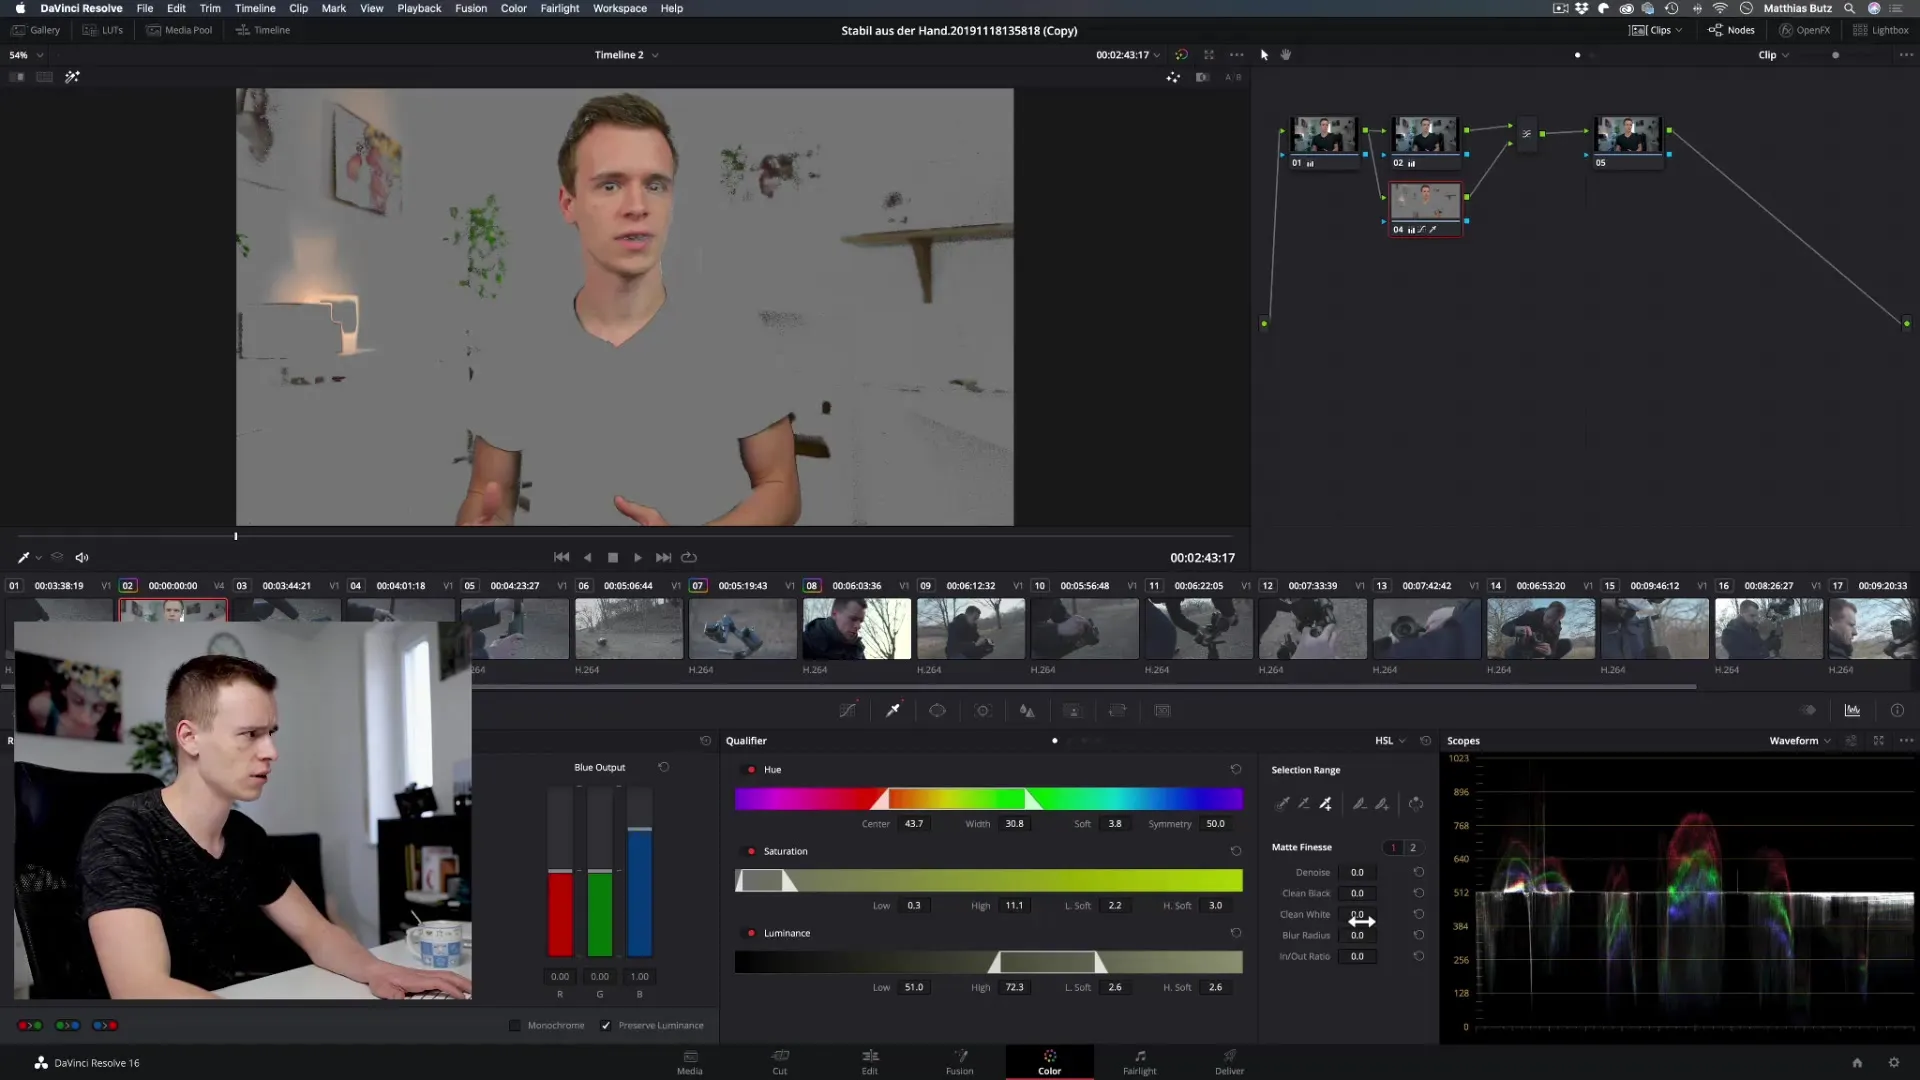
Step 10: Improve Noise Reduction and Transitions
Use the “Denoise” slider to minimize noise in the selected color areas. This will be especially useful if your background appears busy. Adjust the values to reduce visual noise to a minimum and achieve harmonious transitions.
Summary – DaVinci Resolve: Qualifier/Eyedropper – Targeted Color Selection
In this guide, you have learned how to efficiently use the Qualifier to select and edit specific color ranges in DaVinci Resolve. Through simple steps, from creating a new node to making precise adjustments to the selected areas, you can effectively manage your color corrections. The more experience you gain with the Qualifier, the more impressive your work will look.
Frequently Asked Questions
How can I reset the selection in the Qualifier?Just click on the “Undo” function or exit the Qualifier to discard all changes.
Can I also save the selection?Not directly. But you can save the nodes and reuse them later.
What to do if I don’t capture the entire tint of my object?Adjust the hue and width sliders to optimize the selection.
Can I create multiple color selections in a single node?Yes, use different eyedroppers and sliders for different colors within the same node.
What can I do to give the color adjustments a more natural appearance?Use the soft slider to avoid harsh edges, and make subtle adjustments to saturation.


