
Imagine you need a cover for your new video training by the end of the workday. In the past, you would have opened Photoshop and fought your way through layers and masks. Today, a photo, a few precise sentences, and a free Google account are enough. Google Nano Banana, which runs within the Gemini environment, creates images, texts, and scenes in astonishing quality. In this guide, I will show you step by step how to make the best use of the free version, where the paid Pro version actually makes a difference, and how to bring small images to a usable size with an upscaler.
The video is only loaded from YouTube when you play it – data (including your IP address) is then transmitted to YouTube/Google. More in the privacy policy
Key Takeaways
- The free version of Nano Banana already delivers very good results for covers, graphics, and creative scenes.
- The Pro version produces images with roughly double the resolution, often looks more realistic, and renders text more accurately and more creatively.
- With clear prompts that explicitly ask for "create an image," you avoid the most common mistakes.
- Small images can be significantly enlarged with free AI upscalers such as abscale.
- If a result doesn't fit, a follow-up prompt almost always helps. This also works in the free version.
Step-by-Step Guide
Step 1: Upload a Photo
Open Gemini in your browser and sign in with your Google account. The first time you use it, you have to agree to the terms of use, but that is a one-time thing. Then drag and drop your photo directly into the input field. Make sure your face is well lit and clearly recognizable. A clean source image makes it easier for the AI to cut out the subject later and ensures more coherent results.

Step 2: Choose Image Mode and Write the Prompt
Before you send it, you should make sure that Gemini really generates an image. If you write "create an image" in the prompt, this usually happens automatically. It is safer to explicitly select the image option in the input area. Then describe as specifically as possible what you want: environment, style, clothing, mood, and perspective. The more precise your prompt, the less you have to fix later.
Step 3: Check the Result and Download It
Once the image is finished, you first see it in the chat view. There is no zoom function there. To view the image in full size, use the download function. The downloaded file corresponds to the original size and is the basis for all further decisions. Look at the image in your file manager and carefully check details such as hair, hands, and the edges of the cutout, because that is exactly where AI weaknesses are most likely to show.

Step 4: Compare Resolution and Classify the Versions
In the file manager, the difference between the versions becomes clear. The image from the free version has a resolution of 960 x 1088 pixels. The Pro image is about twice as large. In addition, in the free version you can't always tell immediately which model was just used. So it is possible that you only get Nano Banana and not the somewhat stronger Pro variant. When downloading the Pro version, you also need to bring a bit more patience, presumably because upscaling is already happening there. For everyday use, the rule is: if you need many images or high resolutions, the Pro subscription is worthwhile. For occasional projects, the free version is often entirely sufficient.

Step 5: Upscale Small Images with AI
Especially if the image is intended for a large advertisement or a print, you need more pixels. AI upscalers are suitable for this. In the video, abscale is recommended, a free tool that, according to the preview, gets astonishingly good results out of blurry images. Operation is simple: you upload the image, choose the desired factor, such as four or five times, and let it calculate. The duration depends on your graphics card and your processor. After upscaling, the quality is comparable to the Pro variant, so you do very well with a combination of the free version and an upscaler.

Step 6: Integrate Text into the Image
Gemini can also place text directly into an image. To do this, you phrase the prompt so that it asks for a movie poster with a creative title, for example: "Please use this image as a movie poster with a creative title." In the Pro version, the text in the test not only turned out error-free but was also creatively worked into the background. The free version also delivered an appealing result but occasionally contained spelling mistakes. Therefore, always check texts carefully before you use them.

Step 7: Removing Text Again
Sometimes you need the image without lettering, for example if you want to add the title yourself later with a text tool. To do this, simply add the note "without text" to your prompt. In the example, the AI reliably removed the lettering, and you don't have to start Photoshop. This saves a lot of time, especially with cover images.

Step 8: Inserting People into New Scenes
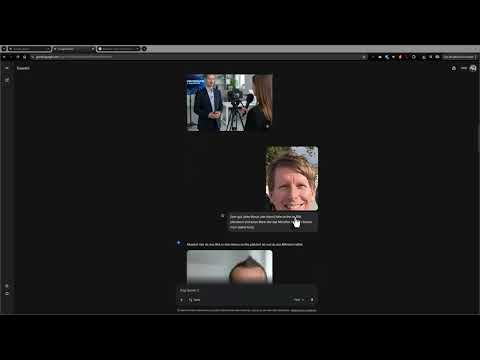
An exciting application is inserting people into other scenes. In the video, a trainer was supposed to appear in an interview setting. At first, the AI inserted the wrong person because the instruction was too imprecise. Only when the prompt was made more precise and the camera and microphone were left out did the result look coherent. Switching to a futuristic environment also worked, including a matching hairstyle. Therefore, always specify exactly who should go where and what may be visible in the image.

Step 9: Explicitly Requesting an Image
A typical mistake occurs when you don't clearly state that you want an image. In the video, Gemini created only text instead of a graphic. The solution is simple: phrase your request with the addition "create as image" or select the image option beforehand. This way you avoid mix-ups. The example with the invitation card shows that this precision is especially important for graphics with text.

Step 10: Correcting Errors with Follow-up Prompts
Even good prompts don't always deliver the perfect result. In the invitation card example, the time was missing, for instance, and an unwanted piece of text remained in one place. Instead of starting over, you simply send another prompt afterwards, for example: "Please only one nine as a balloon at the very top." In the free version, this often works on the second or third attempt. So deliberately plan for a few rounds and stay patient.

Step 11: Experimenting with Google AI Studio
Google AI Studio is also a good option for experiments. There you will find ready-made templates with which you can quickly alter photos. In the test, a single portrait produced images set in different decades, from the seventies to the two-thousands. The resemblance wasn't perfect, but recognizable. AI Studio is excellently suited for exploring possibilities before you work specifically on a project.

Summary – Creating Free Images with Google Nano Banana: The Complete Guide
Google Nano Banana is a powerful tool for anyone who needs high-quality images quickly and without prior knowledge. The free version is convincing for graphics, covers, and scenes, while the Pro version leads above all in resolution, realism, and error-free text. With clear prompts, targeted follow-ups, and a free upscaler like abscale, you get results that can be used directly for many purposes. Nevertheless, check every image critically, especially for text and details.
FAQ
Do I need a paid subscription to create good images with Nano Banana?No, the free version already delivers very good results. The Pro subscription is mainly worthwhile for higher resolution and frequent use.
Why do I only get text instead of an image?Often the prompt lacks an explicit reference to an image. Therefore, phrase it as "create as image" or select the image option before sending.
How can I generate an image without text?Add the note "without text" to your prompt. The AI will then remove the lettering so that you can add it yourself later.
How do I enlarge a low-resolution image?Use an AI upscaler like abscale. You upload the image, choose a factor such as four or five, and let it calculate.
What do I do if the result doesn't fit?Simply send a clarifying follow-up prompt. Often small corrections are enough to achieve the desired result.

