Your course is finished, and you finally want to offer it to learners on Udemy? Then you've come to the right place. This guide walks you through the entire upload process, from signing up as an instructor to submitting for review. You'll learn how to set the title, category, and course structure so that Udemy customers can find your course more easily. I'll also show you what to pay attention to regarding price, course messages, and landing page.
The video is only loaded from YouTube when you play it – data (including your IP address) is then transmitted to YouTube/Google. More in the privacy policy
Key Takeaways
Key Takeaways
- To upload a course, you first need an instructor account on udemy.com.
- A course is created via "New Course"; then you choose "Course" as the option.
- Keywords in the title and in the course description help you get found by customers.
- You create course content in the curriculum by creating sections and lessons and uploading videos.
- The landing page with course image, promo video, description, and price determines whether prospects click "Buy".
- Course messages must not call for sales or reviews.
- After submitting for review, it usually takes 24 to 48 hours for your course to go online.
Step-by-Step Guide
1. Create an Instructor Account
First, go to udemy.com. In the upper right corner you'll find the link "Become an Instructor". Click on it and create your account. The process is straightforward. Once your account exists, you switch to the area for course creators via "Instructor".

2. Start a New Course
In the instructor area, click "New Course" at the top right. You'll be redirected and have to choose between two options: a course or a practice test. For a complete course, select "Course" and then click "Continue".

3. Formulate the Course Title with Keywords
Now you enter the title of your course. A little strategy is worthwhile here, because customers search for specific terms. Therefore, use as many relevant keywords as possible. An example would be "Make Money from Home" combined with a meaningful phrase such as "Start Your Online Business". Make sure the title still remains understandable. Then click "Continue" again.
4. Select a Category
Next, you set the category. In the example in the video, "Business" would be fitting. However, Udemy offers many other categories. Choose the one that describes your content most accurately, because it determines in which area your target audience searches for your course.

5. Define a Topic for Businesses
Afterwards, you can select a topic that is relevant for businesses. This step is important if you want to participate in Udemy Business. There, courses are passed on to companies whose employees use the content. You can select your topic directly from the list or search for it. If your topic is not particularly popular, that is not an exclusion criterion, but you should check whether a suitable topic exists.

6. Specify the Time Commitment for Course Creation
In the next window, you state how much time you want to invest in creating the course this week. There is no wrong answer. Simply choose the option that feels best to you. Then click "Create Course".
7. Open the Curriculum
After creating it, you are in the course area. Open the item "Curriculum" in the left navigation. Here you manage all the content of your course.

8. Create Sections and Lessons
In the curriculum, you distinguish between chapters and lessons. You can recognize chapters by the gray area, lessons by the white one. First create a chapter, for example "Introduction" or "Basics", by selecting "Add Section". Then, within the section, you create a lesson via "Add Lesson" and give it a meaningful name.

9. Moving Lessons
If a lesson has ended up in the wrong chapter, you don't have to create it again. Simply drag it with the mouse to the desired position, for example into the "Introduction" section. Release it there, and it will be placed in its new location.

10. Uploading Videos
To provide content, click on "Content" on the right next to the desired lesson and then on "Video". Then select the video file from your computer. The video will be inserted into the lesson automatically.

11. Completing Course Information
On the left side you will find several items that you should work through one after another. Start with "Target Audience". Here you describe what learning goals participants will achieve, what prerequisites they should bring, and who the course is aimed at.

12. Checking the Course Structure and Following the Tips
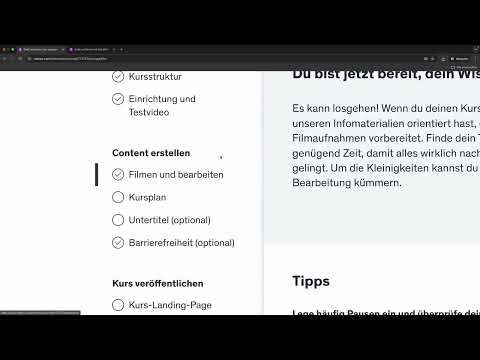
In the "Course Structure" section, Udemy gives you helpful tips. As soon as you have completed an item, a checkmark appears. These tips are not mandatory, but they serve to help your course be better structured. Read them carefully, because they show you what customers pay attention to.

13. Adding Subtitles (Optional)
You can add subtitles to your course. However, this step is optional. If you want to do it, you will find the function in the course area. This also allows you to reach learners who want to understand the content better in another language or who have hearing difficulties.

14. Filling Out the Course Landing Page
The landing page is the most important area for your sales. First, enter a course title and a subtitle. The course description should be detailed, at least 200 words. Describe what content is taught, what language is used, and what level is required. Also choose the appropriate category and a central keyword that describes the entire course.

15. Uploading the Course Image and Promo Video
Upload an appealing course image that serves as a promotional photo. In addition, you can record or upload a promo video that introduces your course. Once you have entered all the information, click "Save" at the top right. This stores the information.

16. Setting the Price
In the Price section, you can select an amount. The instructor in the video generally chooses the highest possible price, in the example 199.99. This is a personal decision that you should make based on your target audience and the scope of your course. Confirm your selection with "Save".

17. Creating Course Messages
Under "Course Messages" you can set up automatic messages for participants. For example, write a welcome message and a congratulatory message for when someone has completed the course. Make sure these messages remain factual. You may neither sell products nor ask for reviews in them. Such content is not allowed according to Udemy's guidelines.

18. Submitting the Course for Review
When all steps are completed, click "Submit for Review" at the bottom. Your course will then be checked by Udemy. The review usually takes 24 to 48 hours, sometimes it is even faster. As soon as the course is approved, you can begin promoting it.

Summary ??? Uploading a Udemy Course: Step-by-Step Guide for Instructors
You now have a clear overview of the entire process. You set up your instructor account, create a course with a suitable title and category, and build sections, lessons, and videos in the course plan. Afterwards, you add the target audience, course description, course image, promo video, and price. With the course messages and the submission for review, you complete the upload. For all entries, pay attention to keywords and understandable language, because both determine whether your course will be found.
FAQ
How long does the review of my course take?The review usually takes 24 to 48 hours, sometimes a little less.
Which course type can I select?You can choose between a course and a practice test. For a complete course, select the "Course" option.
May I promote reviews in course messages?No, course messages may neither ask for reviews nor sell products.
Do I have to add subtitles?Subtitles are optional. You can also submit your course without subtitles.

