
A click on the phone number is often the most valuable signal on a website, because the visitor is then about to get in touch. Nevertheless, this click usually remains invisible in Google Analytics. This is exactly what you change with phone number tracking.
The video is only loaded from YouTube when you play it – data (including your IP address) is then transmitted to YouTube/Google. More in the privacy policy
In this guide, you set up step by step that every click on a phone number is recorded as an event in Google Analytics. You will work with Google Tag Manager, the tag and trigger logic, and the Tag Assistant. You will also learn how to read out the click text of a phone number and use it as a trigger. Since Universal Analytics is still used in the video, I will show you the procedure in this version. However, the principle can be transferred to events in Google Analytics 4.
Key Takeaways
- A phone number click can be measured via triggers and tags if the phone number is stored as a link with the "tel:" protocol.
- You first need a test click so that you can find out the exact click text of the number.
- A trigger that only responds to this click text prevents other clicks from distorting the analysis.
- Event category, action, and label determine how you later analyze the clicks in Google Analytics.
- The preview and the Tag Assistant show you whether the tag is actually fired before you publish.
Step 1: Prepare the phone number as a link
Before you even start with the tracking, you need to check whether the phone number is correctly embedded on your page. On the example page, there is a phone number below the call-to-action "call now". A click on it opens the window for connecting to the phone on the desktop, and on a smartphone the number is dialed directly. This is exactly the behavior you need for your tracking.
For the number to work as a link, you link it with the prefix "tel:", followed by the number without spaces. The link is then automatically recognized as a clickable phone number.


Step 2: Check the variables for link clicks
In Google Tag Manager, open the "Variables" section. There you will find the configuration of the built-in variables. For phone number tracking, you need to make sure that the variables for link clicks are activated. To do this, check the boxes for "Click Text", "Click Classes" and the other link variables. Without these variables, you cannot read out the click text later.

Step 3: Create a trigger for all clicks
Now switch to "Triggers" and create a new trigger. It is best to name this trigger "All Clicks" so that you know later what it is for. Choose "Clicks" as the trigger type and the option "All Elements" there. Leave the setting at "All Clicks". This trigger is initially just an aid, because it allows you to capture every click on the page and find out the click text of the phone number.


Step 4: Create a helper tag for Universal Analytics
The next step is to create a tag that sends all clicks to Universal Analytics. To do this, go to "Tags", click on "New" and select the type "Universal Analytics". As the tracking type, choose "Page View", since this tag is only for testing purposes. Assign the corresponding property to your Google Analytics account and link the tag to the "All Clicks" trigger.


Step 5: Start the preview and determine the click text
Now start the preview mode. The Tag Assistant shows you that the Universal Analytics tag is fired on every page view. In the Universal Analytics real-time report, you can also see that your session is being recorded.


Now click on the phone number on the page. A link click event appears in the Tag Assistant. Switch to the variables there and look for the "Click Text" entry. Compare it with the click text of another link, and you will see that it differs significantly. Simply click on the number once more to make sure you've picked the right entry. The top entry is usually the relevant one.

Then copy the click text without the quotation marks at the beginning and end. After that, close the Tag Assistant.

Step 6: Create a specific trigger for the phone number
The "All Clicks" trigger has served its purpose. You can delete it or simply leave it in place. Now create a new trigger that only responds to the phone number. Name it, for example, "Phone Number Click".
In the trigger, select the type "Clicks", then "Just Links" and "Some Clicks". Instead of a click class, you now select the click text. Set the condition to "Click Text contains" and paste in the text you copied earlier. If you have also noted the click class, you can add it as an additional condition with a plus. Save the trigger.


Step 7: Configure the tag for the event
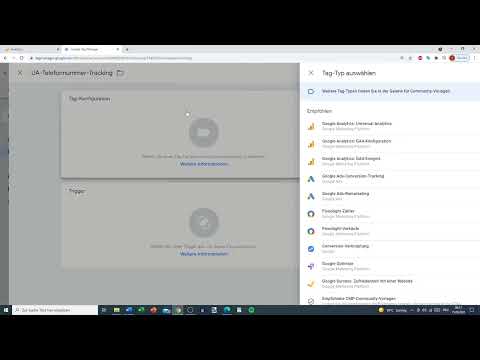
Now comes the tag that actually measures the phone number. Create a new tag of the type "Universal Analytics". For "Track Type", this time you select "Event" and not "Page View".
As the category, enter for example "Phone Number". The action is "Click". For the label, it is worth using a variable so that you can later recognize on which page the number was clicked. For this, select the variable "Page Path", i.e. the exact path of the page. This way you can see in Google Analytics whether the click took place on the home page or on the contact page.


Connect the tag to your Google Analytics account and attach it to the "Phone Number Click" trigger you just created. Then save the tag.

Step 8: Test the tracking
Start the preview again and load the sample page. You will notice that the page view tag is fired, but the phone number tag is not, as long as you haven't clicked on the number. This is intentional.
Now click on the phone number. The tag is fired and an event named "Phone Number Click" should appear in the Universal Analytics real-time report.


Then switch to the contact page in the same tab and click on the number there as well. After a short loading time, you will see both clicks in the event overview. Under the label, you can see that one click came from the home page (slash) and one from the contact page.

Step 9: Refine the action afterwards
The video reveals a small weakness: The action is only called "Click". This is not very meaningful for analyses, because there are also other clicks. Therefore, change the action to "Phone Number Click". This makes it immediately clear in Universal Analytics what type of event it is.
Make sure that you click on the phone number again after making the change. Only then will the new name appear in the Tag Assistant and in the report. This is exactly what the preview mode is for: You can spot and correct errors before the tracking goes live.
Summary ??? Setting up phone number tracking in Google Analytics: step by step
With this guide, you track every click on a phone number as an event in Google Analytics. You prepare the number as a tel link, activate the necessary variables, and determine the click text using a helper trigger. Then you create a targeted trigger and an event tag with category, action, and label. Preview mode and the real-time report help you verify the result. Keep in mind: A call where someone just copies the number by hand is not tracked. The tracking measures only the click.
FAQ
Why isn't it enough to simply write the number as text on the page?Without a link with "tel:", there is no click that Google Tag Manager can detect, and the visitor can only type the number in manually.
Why do I need the "All Clicks" trigger at all?It serves only to find out the exact click text of the phone number. After that, it is no longer needed and can be deleted.
How do I know if the tracking is working?Start preview mode, click on the phone number, and check in the Tag Assistant whether the phone number tag is fired. The event should then appear in the real-time report.
What is the benefit of the label with the Page Path?You can see in Google Analytics on which page the number was clicked, which is especially helpful if you have multiple contact points.
Why should I rename the action?A name like "Click" is too general. With "Phone Number Click," it is immediately clear in the reports what it is about.


