
LinkedIn is the right platform if you want to specifically reach professionals and decision-makers from certain industries, companies or career levels. At the same time, LinkedIn ads are noticeably more expensive compared to other networks. This makes a clean setup all the more important, in which you define from the start whom you want to reach, what you will spend on it and what goal the campaign pursues.
The video is only loaded from YouTube when you play it – data (including your IP address) is then transmitted to YouTube/Google. More in the privacy policy
In this guide, I walk you through the entire process in the LinkedIn Campaign Manager: from getting started through audience selection to uploading your ad. A campaign for a B2B wholesale company that distributes clothing serves as the example. However, you can apply the steps directly to your own offering.
Key Takeaways
The most important points at a glance:
- You get started via the Advertising section in your LinkedIn account, where you create the campaign.
- Website visits are a good objective to start with, because you then get targeted clicks to your landing page.
- You can narrow down the audience using attributes, companies, demographics and interests, and refine it with exclusions.
- The logic between the criteria differs: within a category, an OR applies, between categories an AND.
- Make sure your offering fits the target audience. Consumer products such as dog supplies do not belong on the B2B platform.
- Plan your budget carefully, because clicks on LinkedIn are expensive. A cost cap per click helps you control costs.
Step-by-Step Guide
Step 1: Find access to the Campaign Manager
The first step takes you to the advertising section. Log in to your LinkedIn account, which should already be set up. At the top right you will find access to the Marketing or Advertising section. Click there to get to the Campaign Manager.

Next, you open the page that is assigned to your company. For ads, you only need this company page. At the bottom of the page you will find the option to run ads.

Step 2: Create a new campaign
Once you have chosen the option for ads, you start with the button for creating a campaign. This begins the actual setup process. LinkedIn offers you various campaign objectives here, for example brand awareness, website visits or engagement. To get started, I recommend the Website visits objective, because it sends interested people directly to your website. Select this objective and confirm with Next.


Step 3: Choose the beta version or the classic campaign
Now you decide whether you want to use the extended beta version or the classic campaign creation. The beta version is the better choice for most beginners, as it works with the current interface and presents the settings clearly. The classic version is more cumbersome, but it pays off in the long run if you want to understand all the details. For your start, the beta version is ideal.

Step 4: Create a campaign group
Every campaign belongs to a campaign group. Select a new campaign group and make sure it is active. The group later lets you clearly manage which campaigns belong together and how they are evaluated jointly. Then confirm the settings with Next.

Step 5: Set the profile language of the target audience
In the next section, you define the target audience. First, pay attention to the profile language. This refers to the language stored in the users' profile settings, not the language they use in their profile text. If you want to reach German-speaking professionals, choose German. Multilingual profiles are not excluded by this; they simply count via their stored profile language.

Step 6: Choose the Audience Source
LinkedIn offers you several ways to build an audience. You can upload your own list of contacts, such as customer data, or use a lookalike audience, meaning users who are similar to your existing contacts. Alternatively, you can work with attributes. This option is especially helpful if you don't have your own list, since LinkedIn derives the criteria directly from profiles. For this guide, you choose attributes.


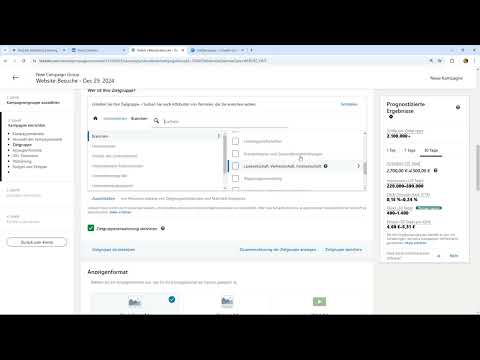
Step 7: Narrow Down the Audience by Industry and Companies
With attributes, you define who you want to reach. For example, you can target only people from the marketing industry or focus on wholesale. For our example, you choose the wholesale industry, since it is a B2B offering. The selection has to fit your business model, otherwise you waste budget.
In addition, you can target individual companies, for example employees of a specific corporation. Another option is companies that follow your company page, or companies from certain categories. As an example, you can select the Fortune 1000 companies, meaning the largest companies in the USA. Especially for B2B campaigns, such filters are very useful.


Step 8: Add Demographic Characteristics and Interests
In the next step, you can narrow down the audience by demographic characteristics. For example, set an age range, in the example 25 to 45 years. Other criteria are education and work experience. You can also select traits and interests, such as topics like marketing, the environment, or renewable energy. What matters here: only choose interests that actually fit your offering. An ad for dogs aimed at end consumers makes little sense on LinkedIn, because the users there are mainly career-oriented.

Step 9: Exclude Audiences and Understand the Logic
You can also refine your audience through exclusions. If, for example, you don't want to reach people from the oil industry, you exclude that industry. Pay attention to the logic when making your selection: within a category, your selections are linked with OR. Between categories, however, AND applies, so a person has to meet both conditions. An example: you want to reach career starters who work in a certain industry. Then both criteria have to apply.


Step 10: Select the Ad Format
Now you choose the format of your ad. LinkedIn offers you, among others, a video ad, a document, a message, a carousel, spotlight ads, event ads, or a conversation. For getting started, the classic single-image ad is suitable, because it is quick to create and easy to test. Later, you can try other formats and compare the results with each other.


Step 11: Set Tracking and Placement
Next, you enter your tracking so that you can later trace which clicks and conversions come from the campaign. After that, you define the placement. By default, the ad is displayed on LinkedIn itself. In addition, you can activate the LinkedIn Audience Network, meaning partner sites that belong to LinkedIn. The difference is usually small, but you should decide on this option deliberately.

Step 12: Set Budget and Duration
Now comes the part that costs the most. Set your daily budget, in the example 20 euros per day. LinkedIn often suggests significantly higher amounts, such as 150 euros. Keep in mind that LinkedIn ads are comparatively expensive. So it's better to start with a small budget and observe the results. You also set a start and an end date so that the campaign doesn't keep running unnoticed.


Step 13: Determine the Goal and Bidding Strategy
In the next step, you decide what you want to optimize for. Since we are aiming for website visits, you choose clicks to the landing page rather than pure impressions. For the bidding strategy, you can choose maximum reach with your entire budget. Alternatively, you set a cost cap, for example 2 euros per click. This option makes sense if you want to strictly control costs. For the first test, however, you can also leave it out.


Step 14: Create the Ad and Check the Preview
After saving the campaign, you land on the ad. Here you either select a post that you have uploaded earlier, or you create new content. Upload your graphic or your text and add the details. Before you activate the campaign, always look at the preview. This way you spot layout errors before they go live.


Summary ??? Setting Up LinkedIn Ads: Create a Campaign Step by Step
You have now learned all the building blocks to set up a LinkedIn campaign properly. You start in the advertising area of your company page, choose a suitable goal, and define the target audience using profile language, attributes, companies, demographics, and interests. Pay attention to the AND and OR logic and use exclusions to avoid wasted reach. Next, you choose the ad format, set up tracking and placement, set the budget, duration, and bidding strategy, and finally check the preview. Start with a manageable budget, observe the results, and adjust the target audience and ad step by step.
FAQ
How do I find the advertising area on LinkedIn?At the top right of your account you will find access to the Marketing or advertising area, through which you open the Campaign Manager.
Which campaign goal is suitable for getting started?Website visits are suitable for getting started, because they get you targeted clicks to your landing page.
What is the difference between the beta version and the classic campaign?The beta version is clearer and is usually the better choice for beginners; the classic variant offers more fine-tuning but is more cumbersome.
What does profile language mean for the target audience?The profile language is the language stored in the user's LinkedIn profile, not the language used in the profile text.
How can I narrow down my target audience?You can filter by attributes such as industry, companies, company categories, demographics, and interests, and exclude individual groups.
How does the logic between the target audience criteria work?Within a category, selections are linked with OR, while between categories AND applies, so all categories must match.
Why shouldn't I activate the Audience Network automatically?The Audience Network displays ads on partner sites, the difference is usually small, so you should decide on this option consciously.
How high should my budget be at the beginning?Start with a manageable daily budget, for example 20 euros, since LinkedIn ads are comparatively expensive, and observe the results.
What is a cost cap per click?With a cost cap, you set the maximum amount you want to pay per click in order to control costs better.
Why are consumer products unsuitable for LinkedIn?LinkedIn is a professional platform; offers for end consumers such as dog products hardly reach suitable users there and cause wasted reach.

