Digital music production may seem challenging at first, but it offers a variety of tools to help you realize your creative visions. In this guide, you will focus on two essential areas of FL Studio: the Mixer and the Browser. These two tools are crucial for mixing music and managing your samples and instruments. Let’s dive right in and find out how you can get the most out of these features.
Key Takeaways
- The Mixer acts as a virtual mixing console where you can manage instruments and samples.
- Up to 10 effects can be assigned to each channel in the Mixer.
- The Browser allows for easy management of samples and instruments.
Mixer: The Digital Mixing Console
The Mixer is the heart of your music production in FL Studio and is located on the right side of the screen. Here, you can assign all the instruments and samples you are using to a channel, which helps you mix them better.
The Mixer is divided into two main areas: the main area with the channels and the FX Panel for effects. Here’s an overview of using the Mixer:
Step 1: Open the Mixer
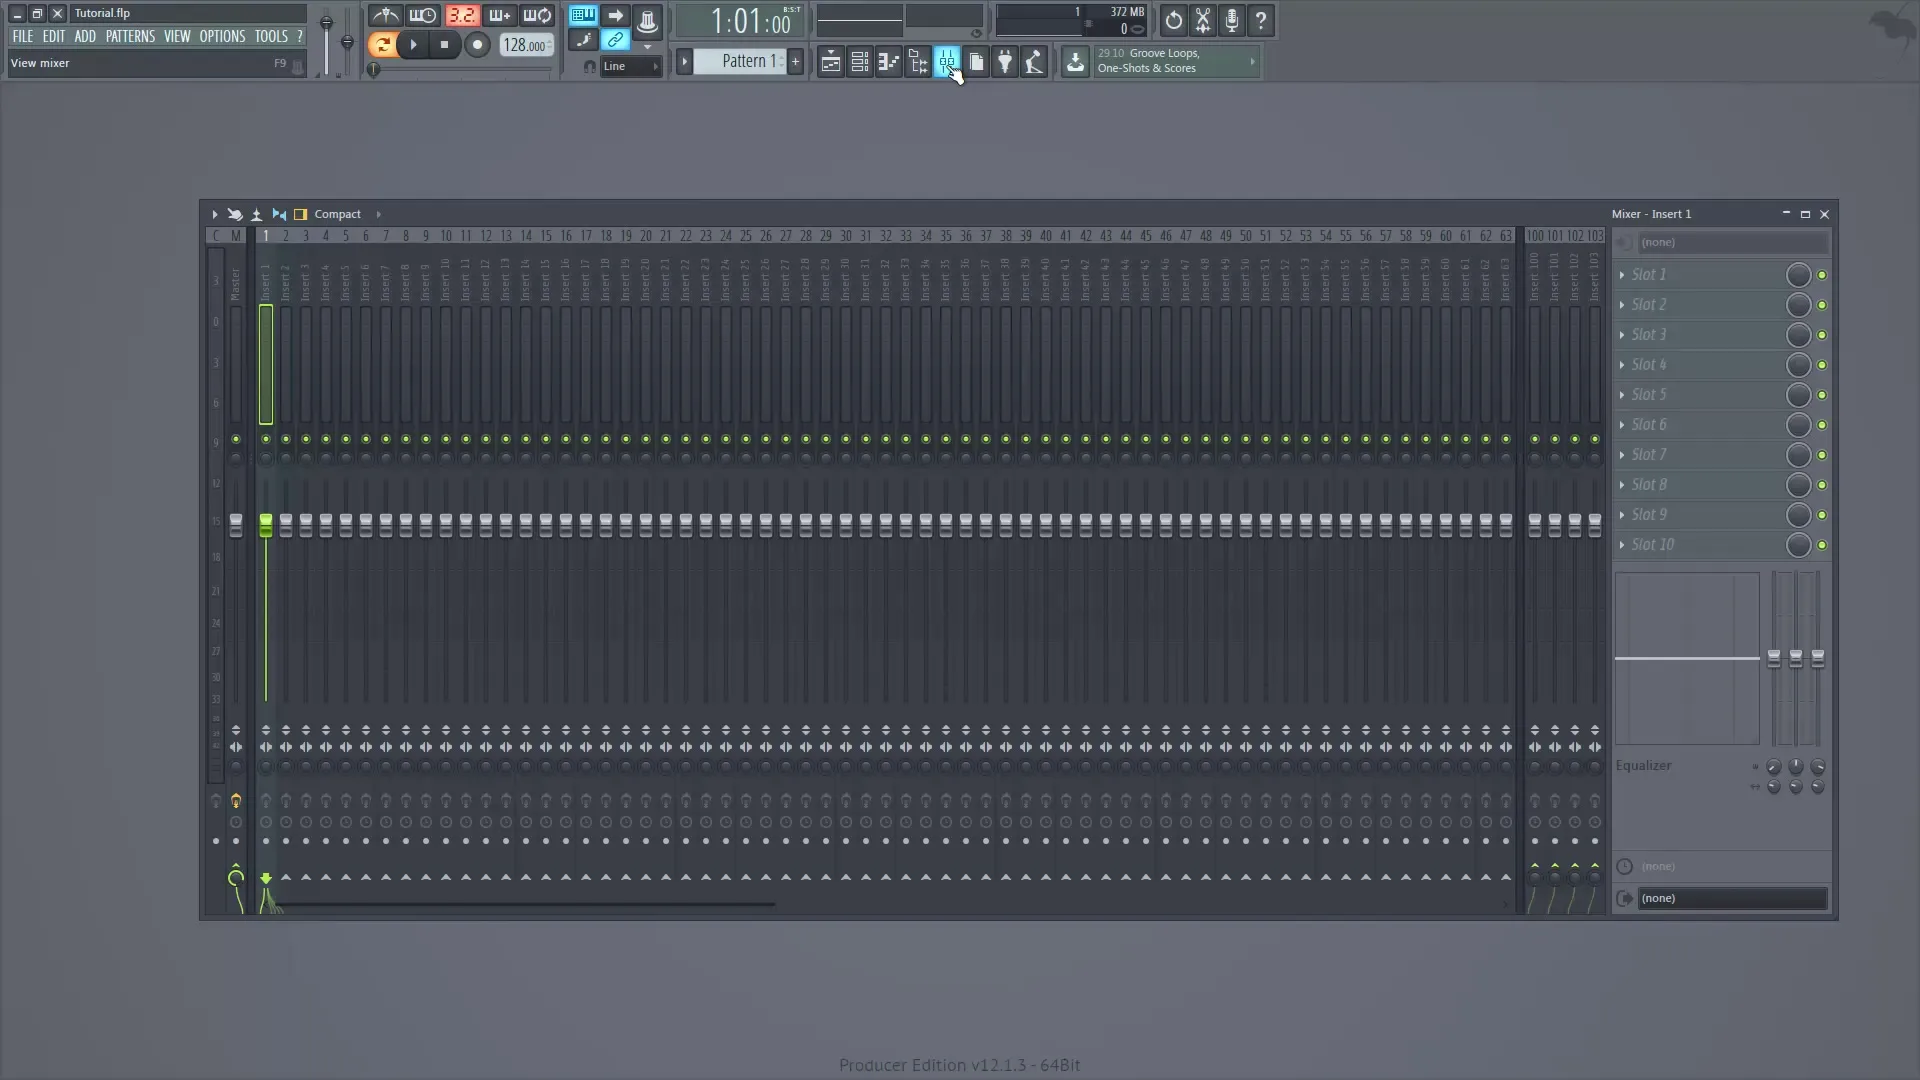
To open the Mixer, use the shortcut you defined in your setup. You should now see a layout displaying many channels on the left side as well as a master channel.

Step 2: Name and Color Channels
The individual channels are numbered from 1 to over 100. To change the name of a channel, right-click on the channel and select “Rename.” For example, you could use Channel 1 for your kick. You can also assign a color to mark different groups of instruments.
Step 3: Adjust Volume and Balance
Each channel has a volume display and a knob for the balance between the left and right speakers. Make sure to adjust the volume fader so that the balance between left and right is correct.
Step 4: Link Channels
You can link multiple channels together. This means that you can, for example, combine all drum channels (1 to 4) into a master channel (e.g., Channel 5). Remove the link from the main master to avoid double output of the signal.
Step 5: Adjust Volume of Multiple Channels Simultaneously
Hold down the CTRL key while clicking on the channels to select multiple adjacent channels. Drag the fader to change the volume of all selected channels simultaneously. If you want to select channels that are not next to each other, hold down both CTRL and Shift keys.
Step 6: Add Effects in the FX Panel
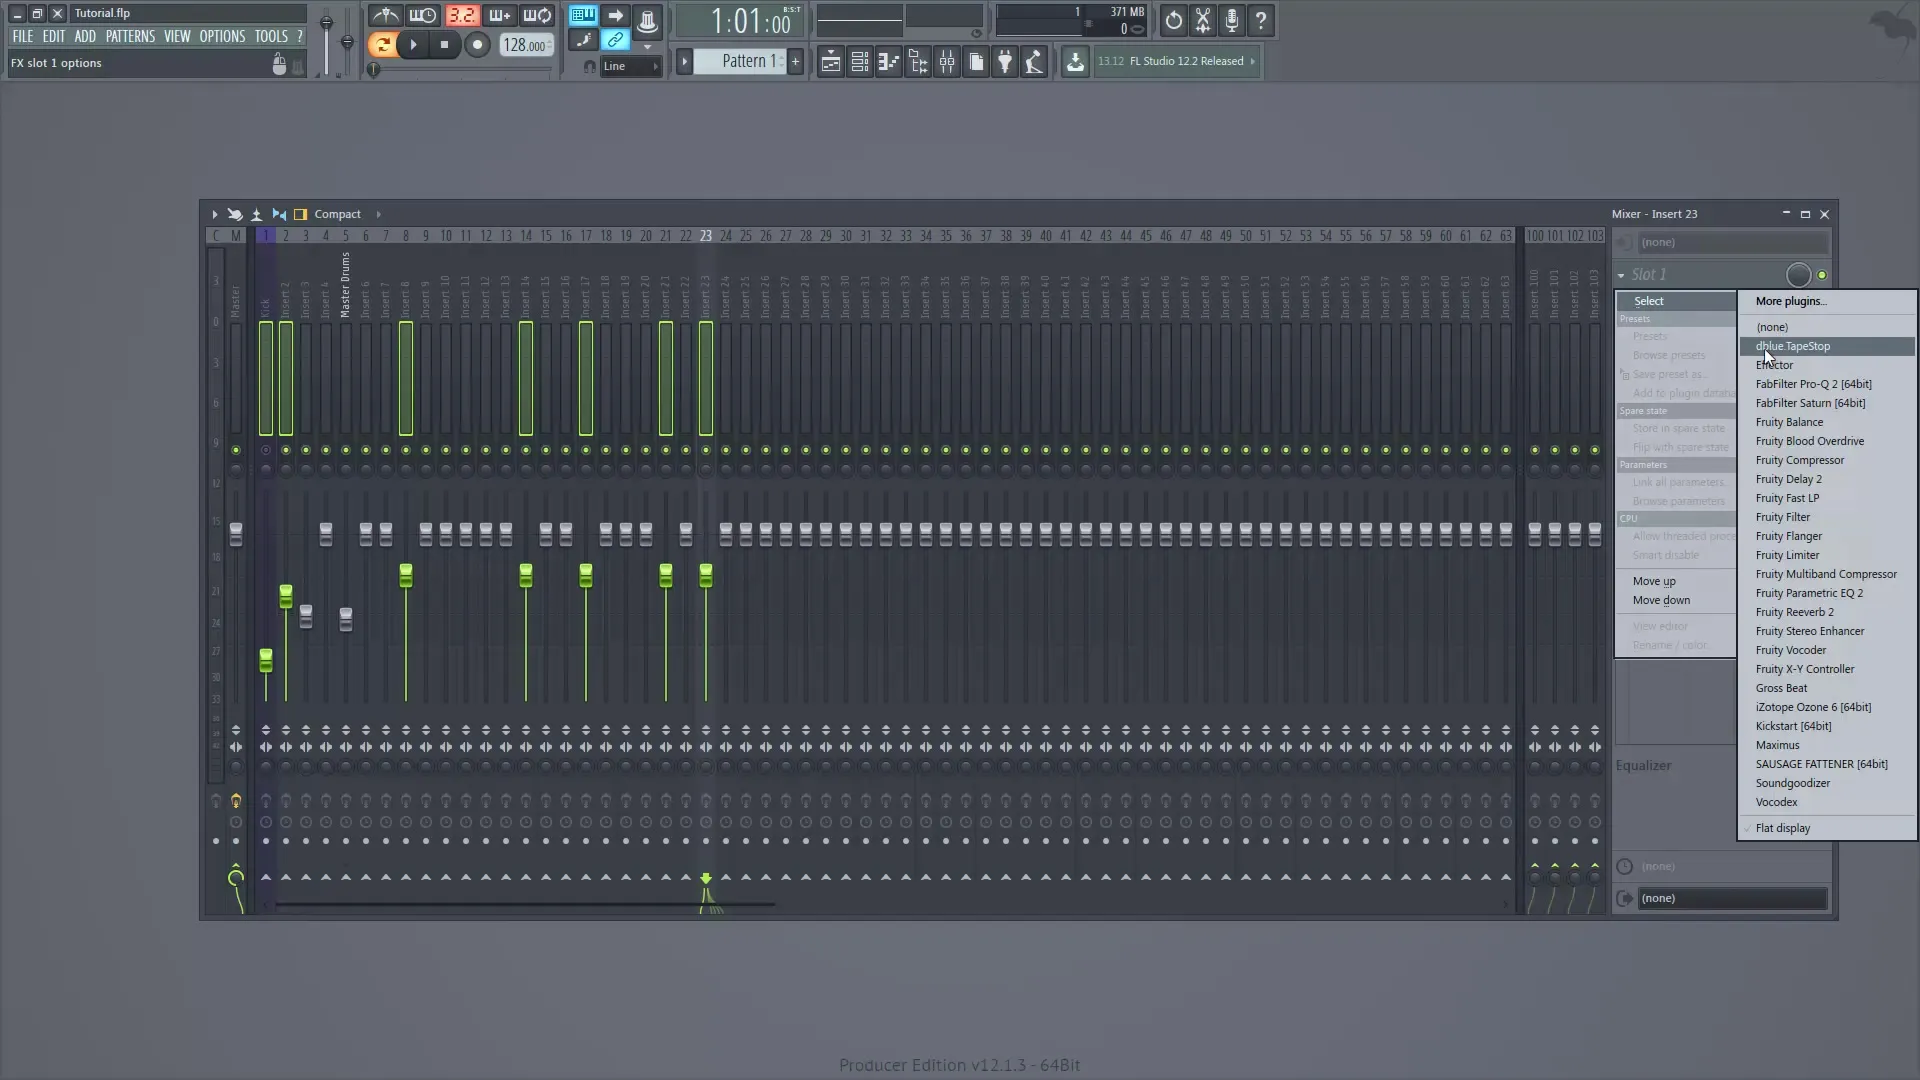
In the FX Panel, you can add up to 10 effects per channel. Simply click on the desired slot and select the effect you want. To disable an effect, you can use the small button on the side.
Step 7: Make EQ Settings
Each channel has a built-in EQ that allows you to manually adjust the frequencies. This is particularly useful for optimizing the tonal qualities of your individual instruments.
Browser: The Sample Library
The Browser is where you can manage all your samples, instruments, and plugins. It is located on the left side of the screen and can easily be toggled on and off. Here are important steps for using the Browser:
Step 8: Open the Browser and Add Folders
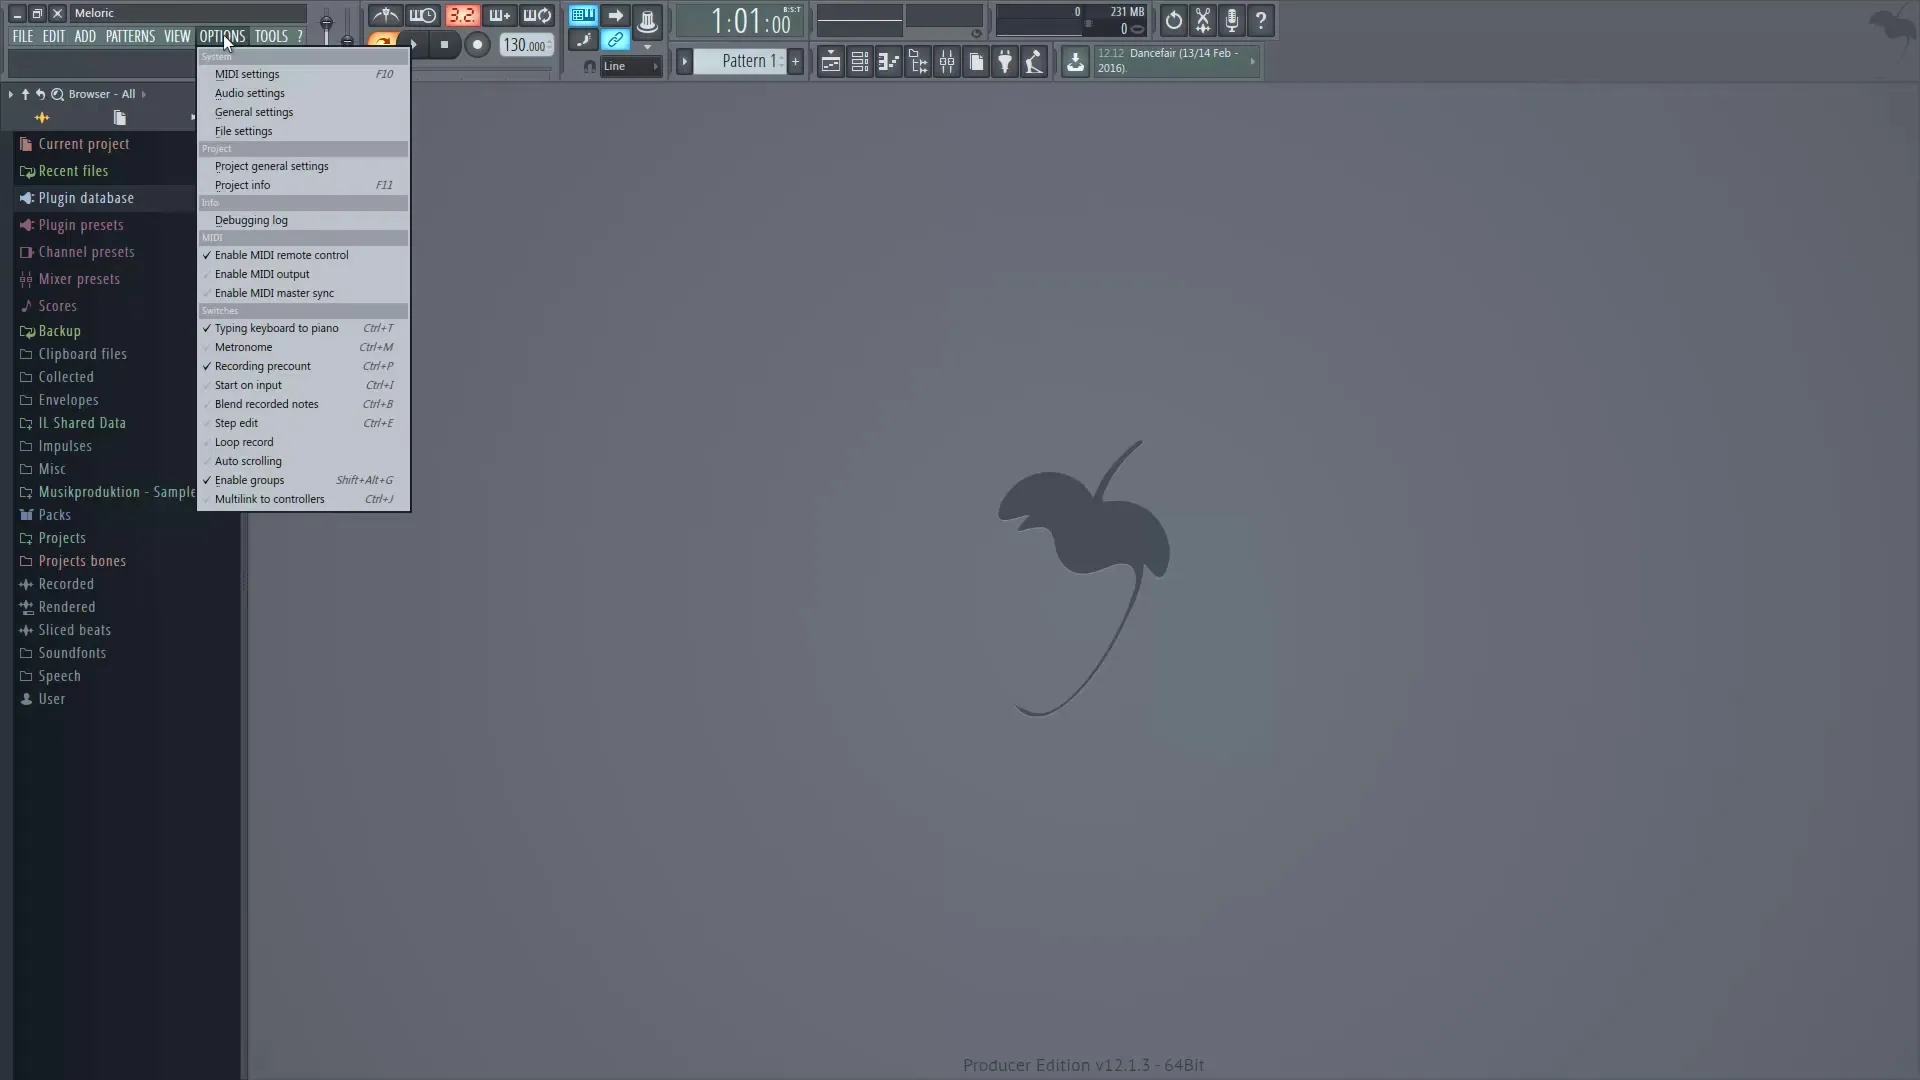
Click on the shortcut to the Browser to open it. To add a sample library, go to “Options” and then to “File settings.” Here, you can select and add your desired folders.
Step 9: Browse Samples
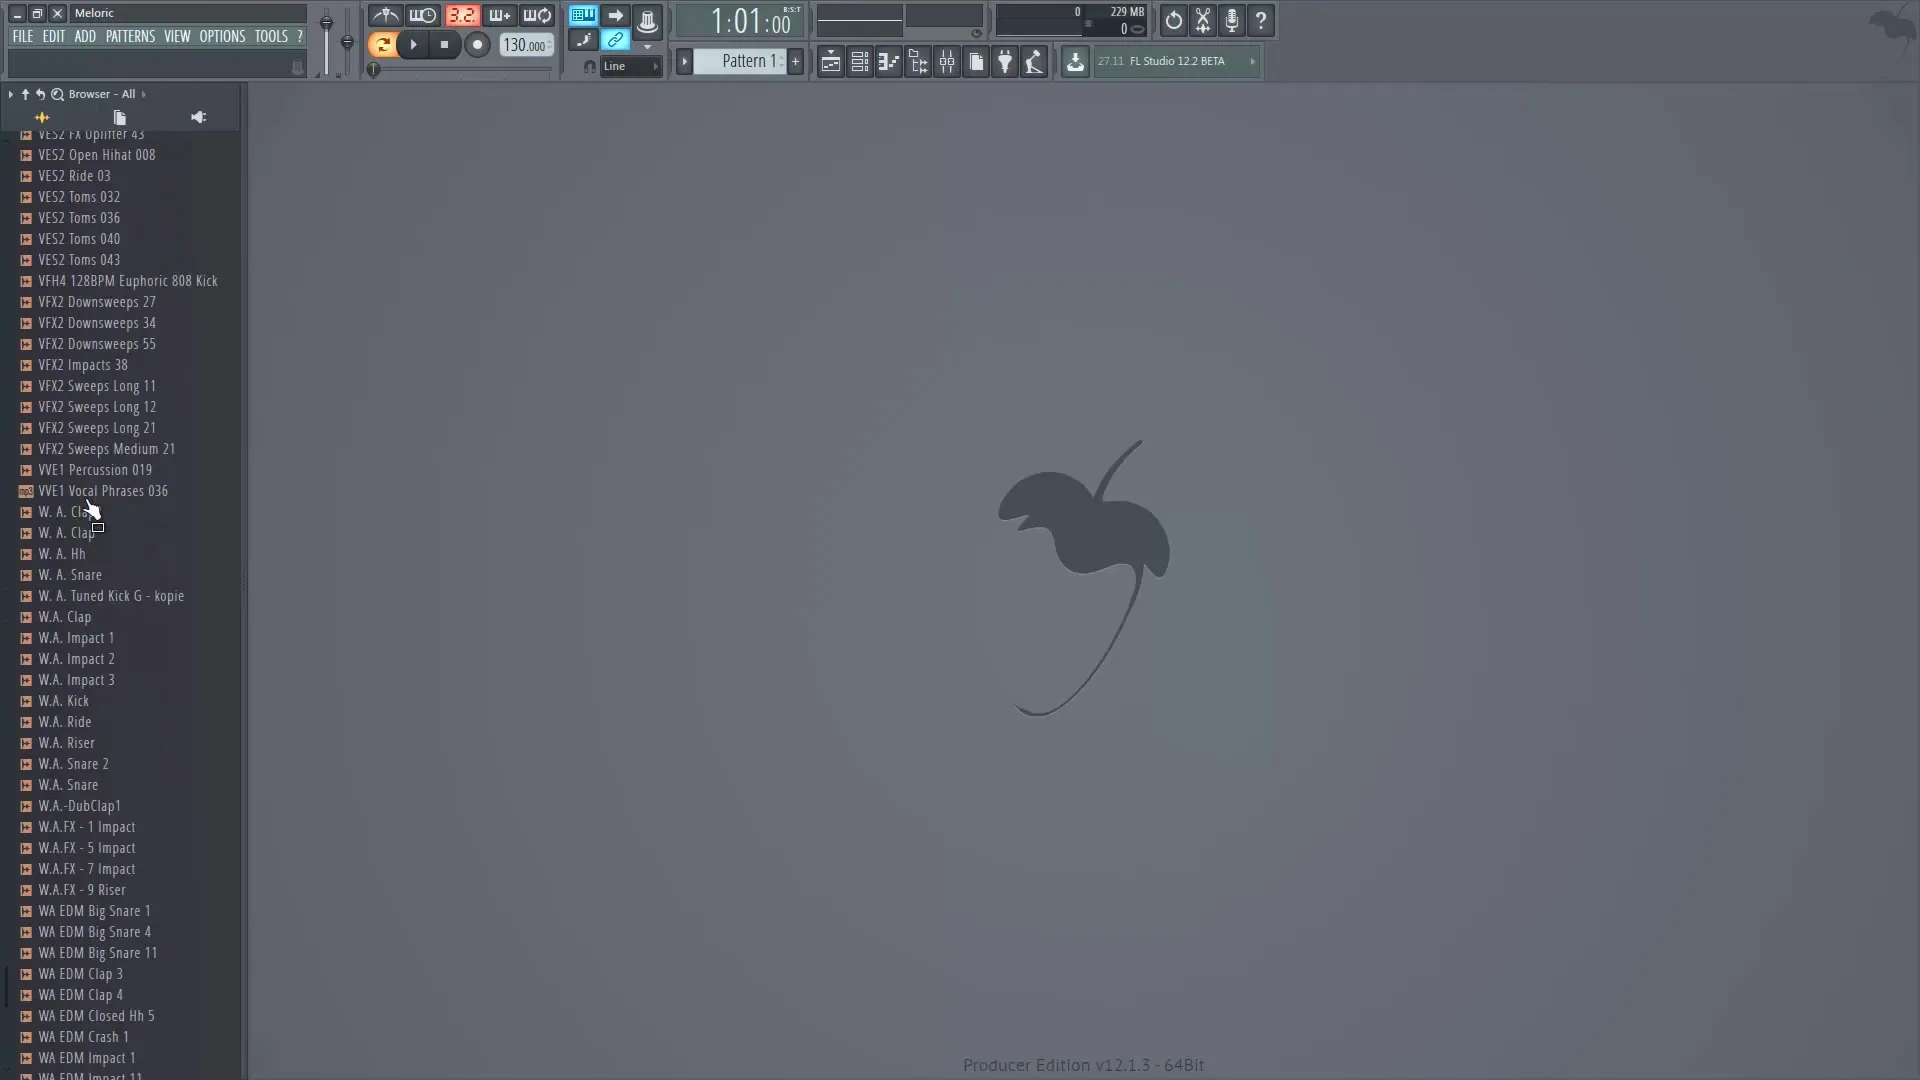
Once you have added a folder, you can see all samples in that folder within the Browser. Simply drag the desired samples into your project.
Step 10: See Current Project Elements
In the Browser, you can also see all instruments and effects used so far. Through the “Current Project” section, you can get an overview of all generators, effects, and already created patterns.
Step 11: Use the Plugin Database
In the Plugin Database, you can view and manage all installed plugins. Here, you will also get information about available instruments and effects.
Summary – Mixer and Browser in FL Studio: A Comprehensive Guide
In summary, we have covered the basic functions of the Mixer and Browser in FL Studio. You have learned how to name different channels, add effects, and effectively manage your samples. Both areas are crucial to achieving professional sound quality in your music projects.
Frequently Asked Questions
What role does the Mixer play in FL Studio?The Mixer is the virtual mixing console through which you can mix all instruments and samples.
How many effects can I assign to a channel in the Mixer?Up to 10 effects can be assigned per channel in the Mixer.
How do I add a sample library in the Browser?Go to “Options” and then to “File settings” to add your folders.
Can I adjust multiple channels' volume simultaneously?Yes, by holding down the CTRL key, you can select and adjust multiple channels at the same time.
Where can I find the Plugin Database?The Plugin Database can be found in the Browser under Plugins.
