The Bézier-masking is a powerful tool in MAGIX VEGAS Pro 16. It allows you to cut out precise areas of a clip or place effects accurately. In this guide, you will learn step by step how to effectively use Bézier masking to achieve impressive results in your videos. Let’s dive right into working with this practical feature.
Main insights
- Bézier masking allows precise interfaces in videos.
- You can use and save multiple masks simultaneously.
- Adjustments to the mask are possible at any time.
Step-by-step guide
To use the Bézier masking, follow these simple steps:
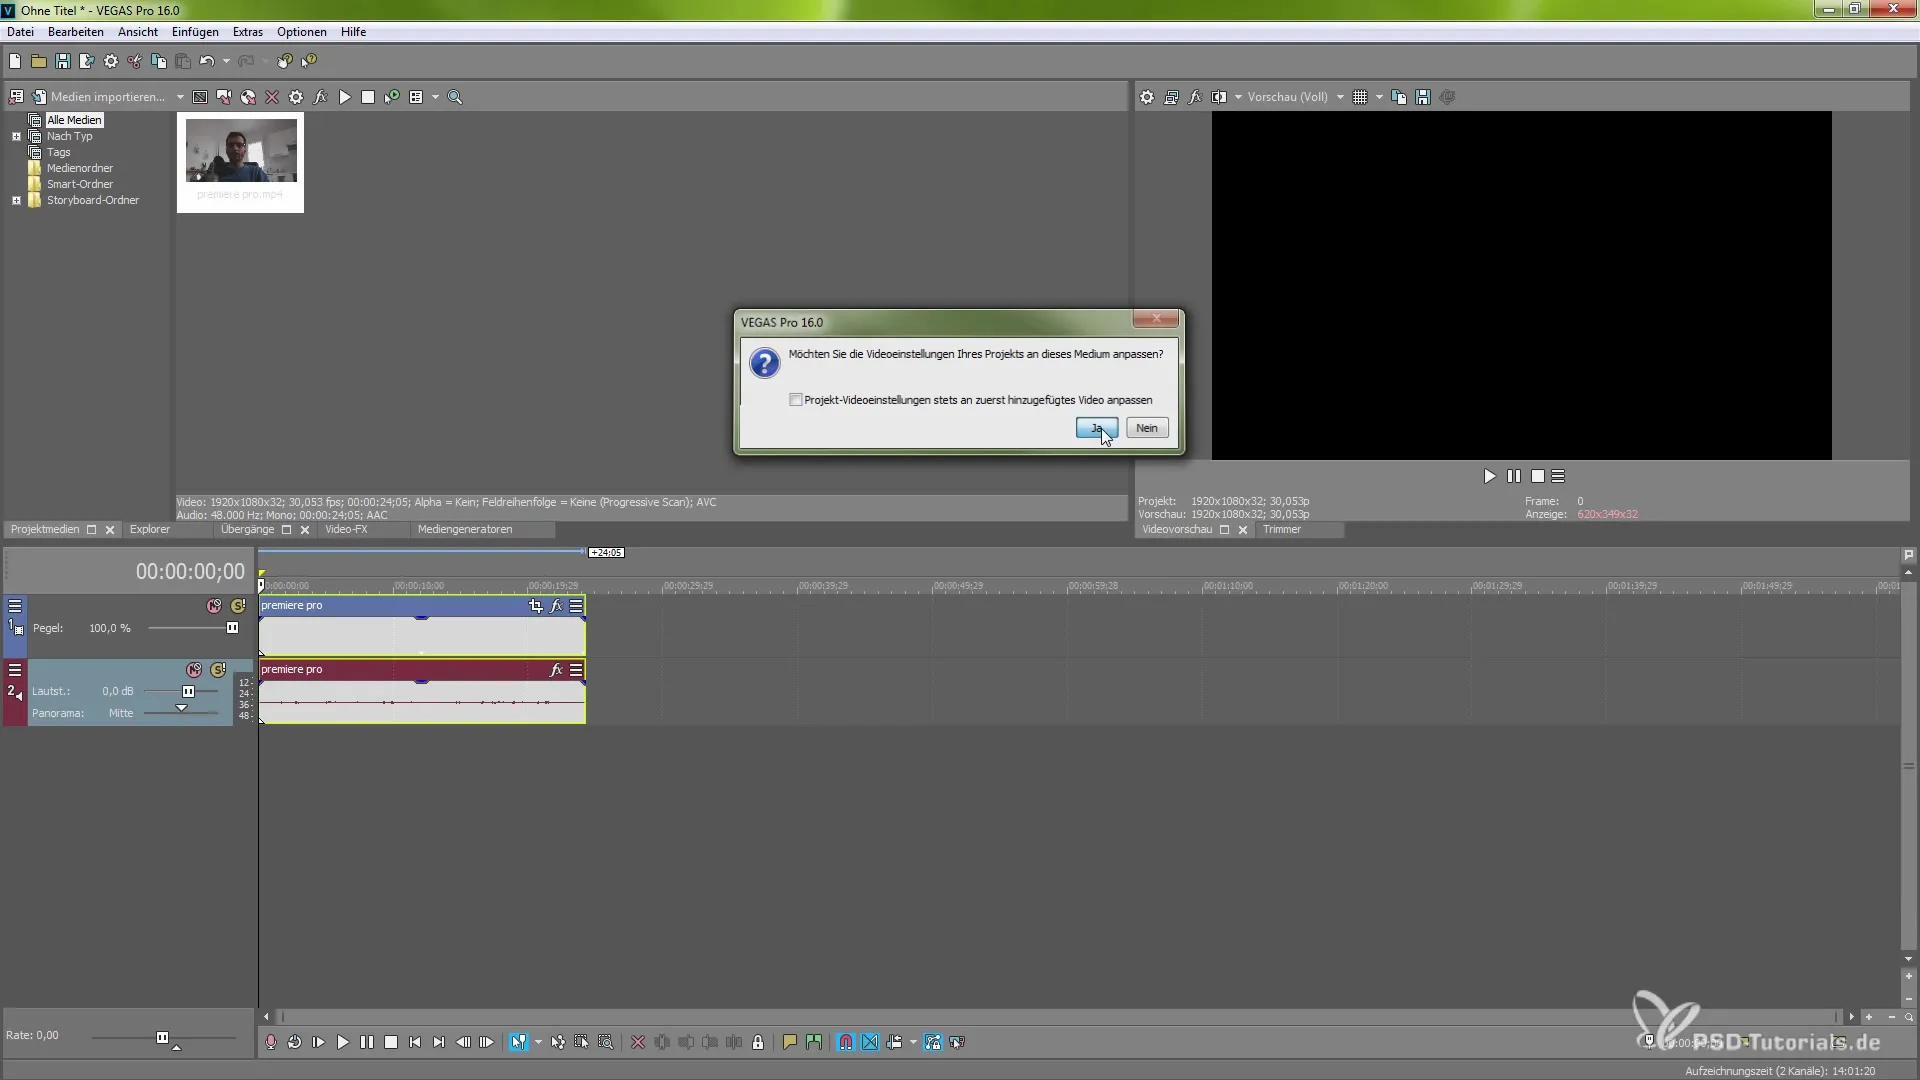
First, you need the clip you want to edit. Once you have opened the video, drag it into the VEGAS Pro timeline. Confirm the adjustment to the clip to work smoothly. In this step, you also need a background or an element that should be visible behind your clip. This can be a simple blue sky or another image.
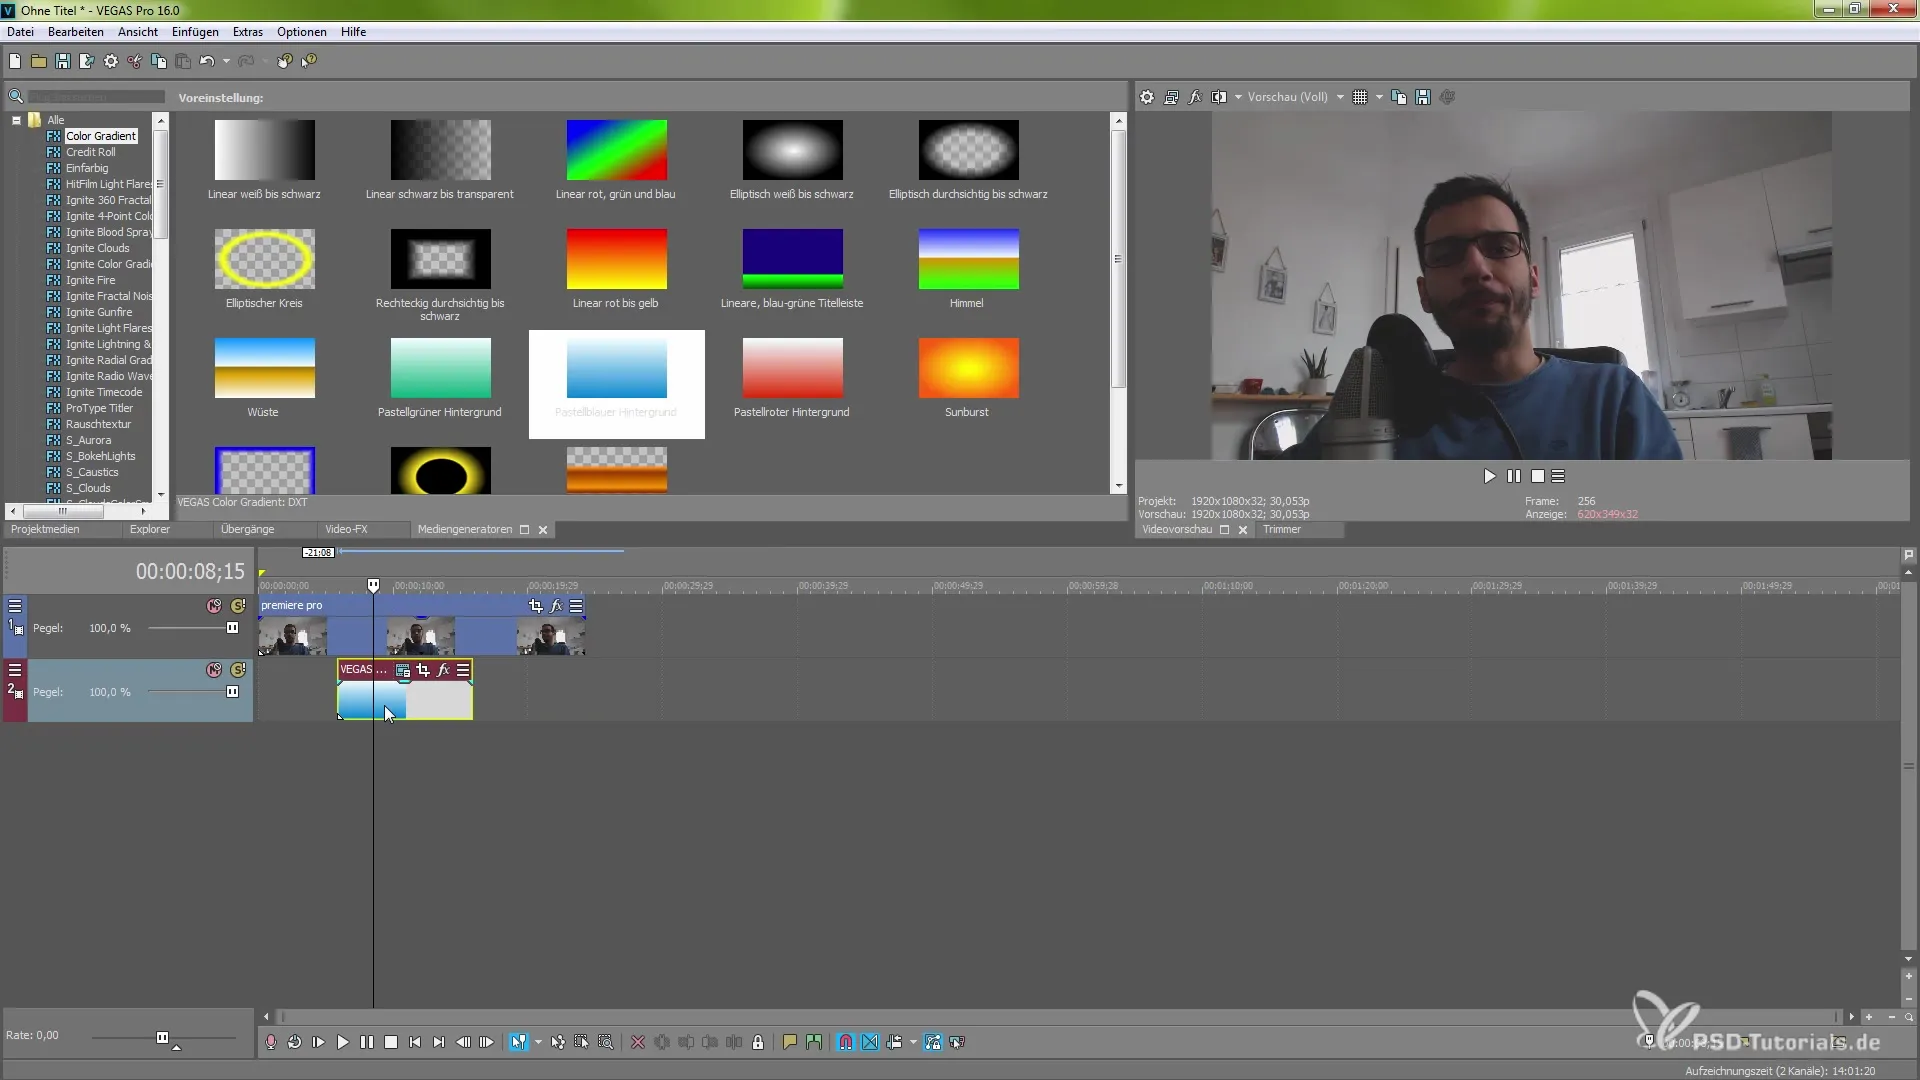
Now you need to create a new video track and place the background in this track. You will notice that the two tracks are initially separated and nothing happens when you overlap them. But that will soon change, because you will use Bézier masking to mask and cut out areas of your clip.
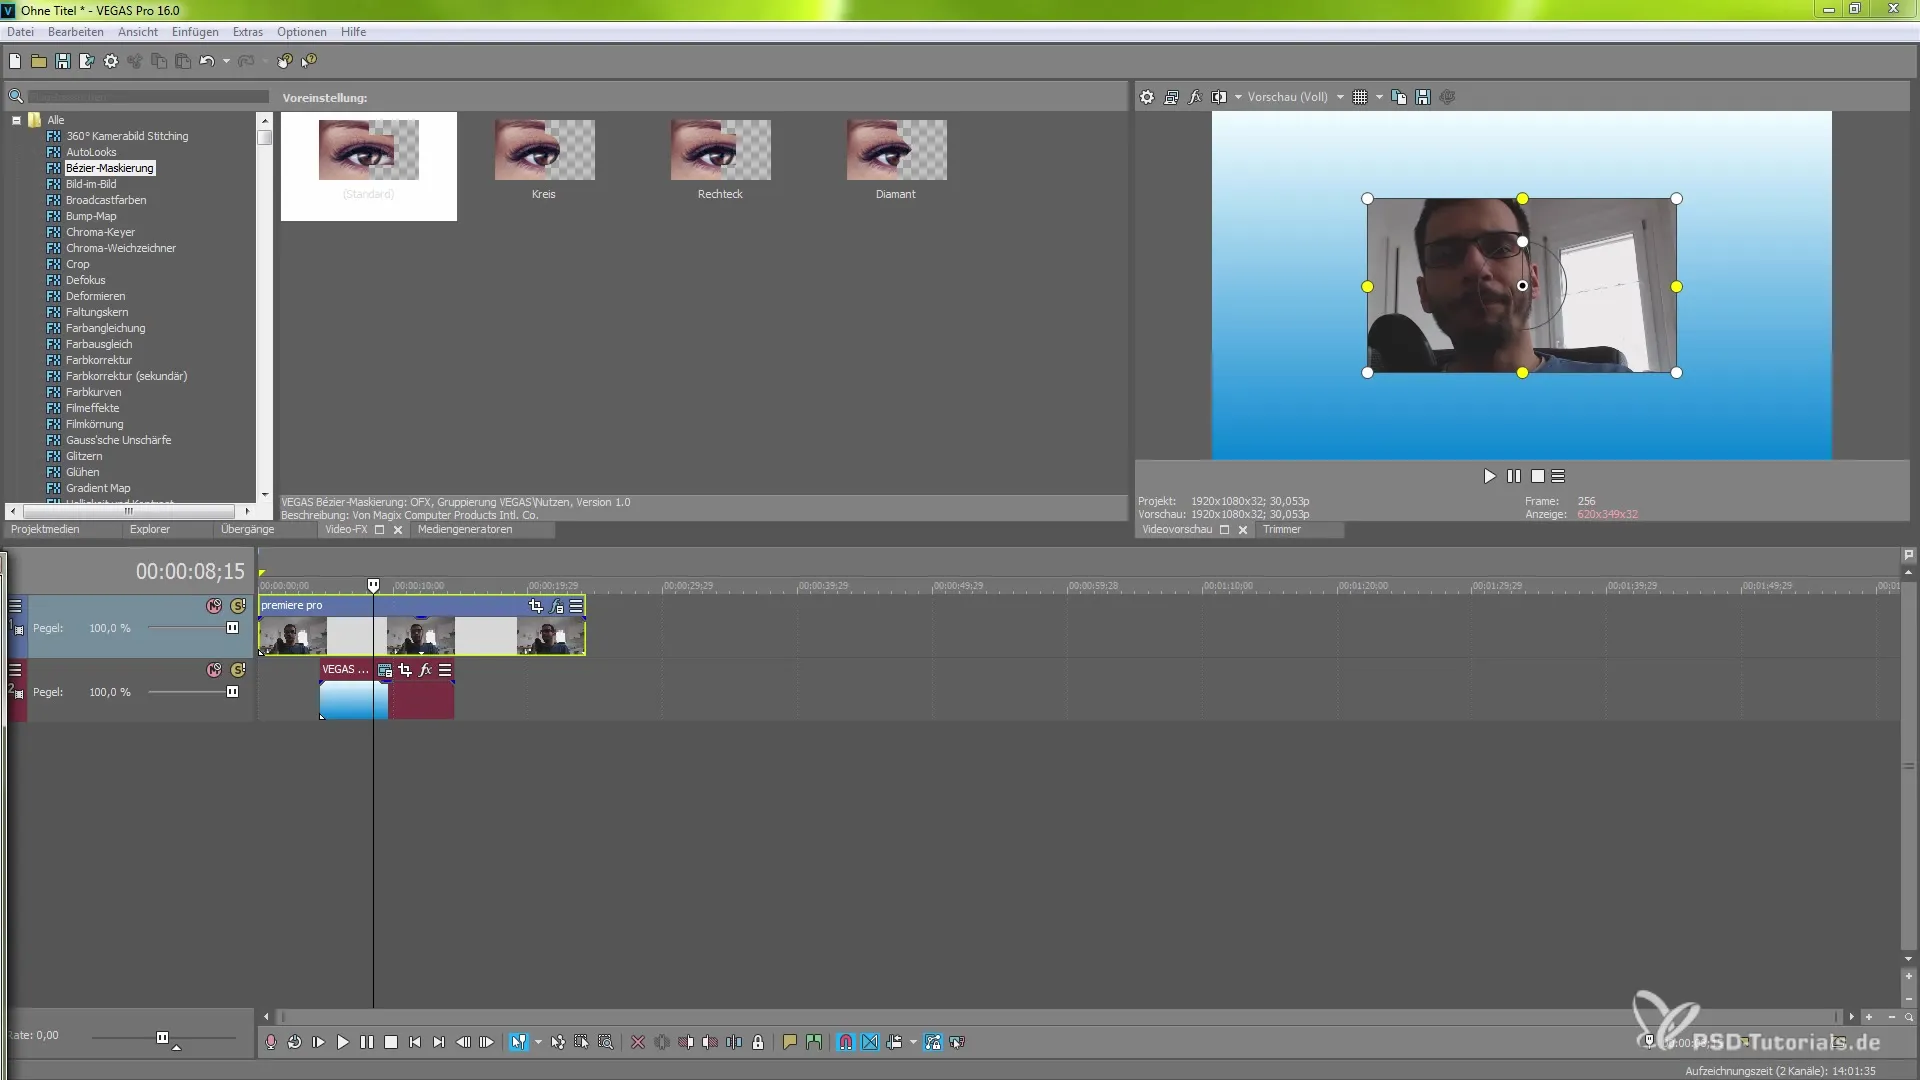
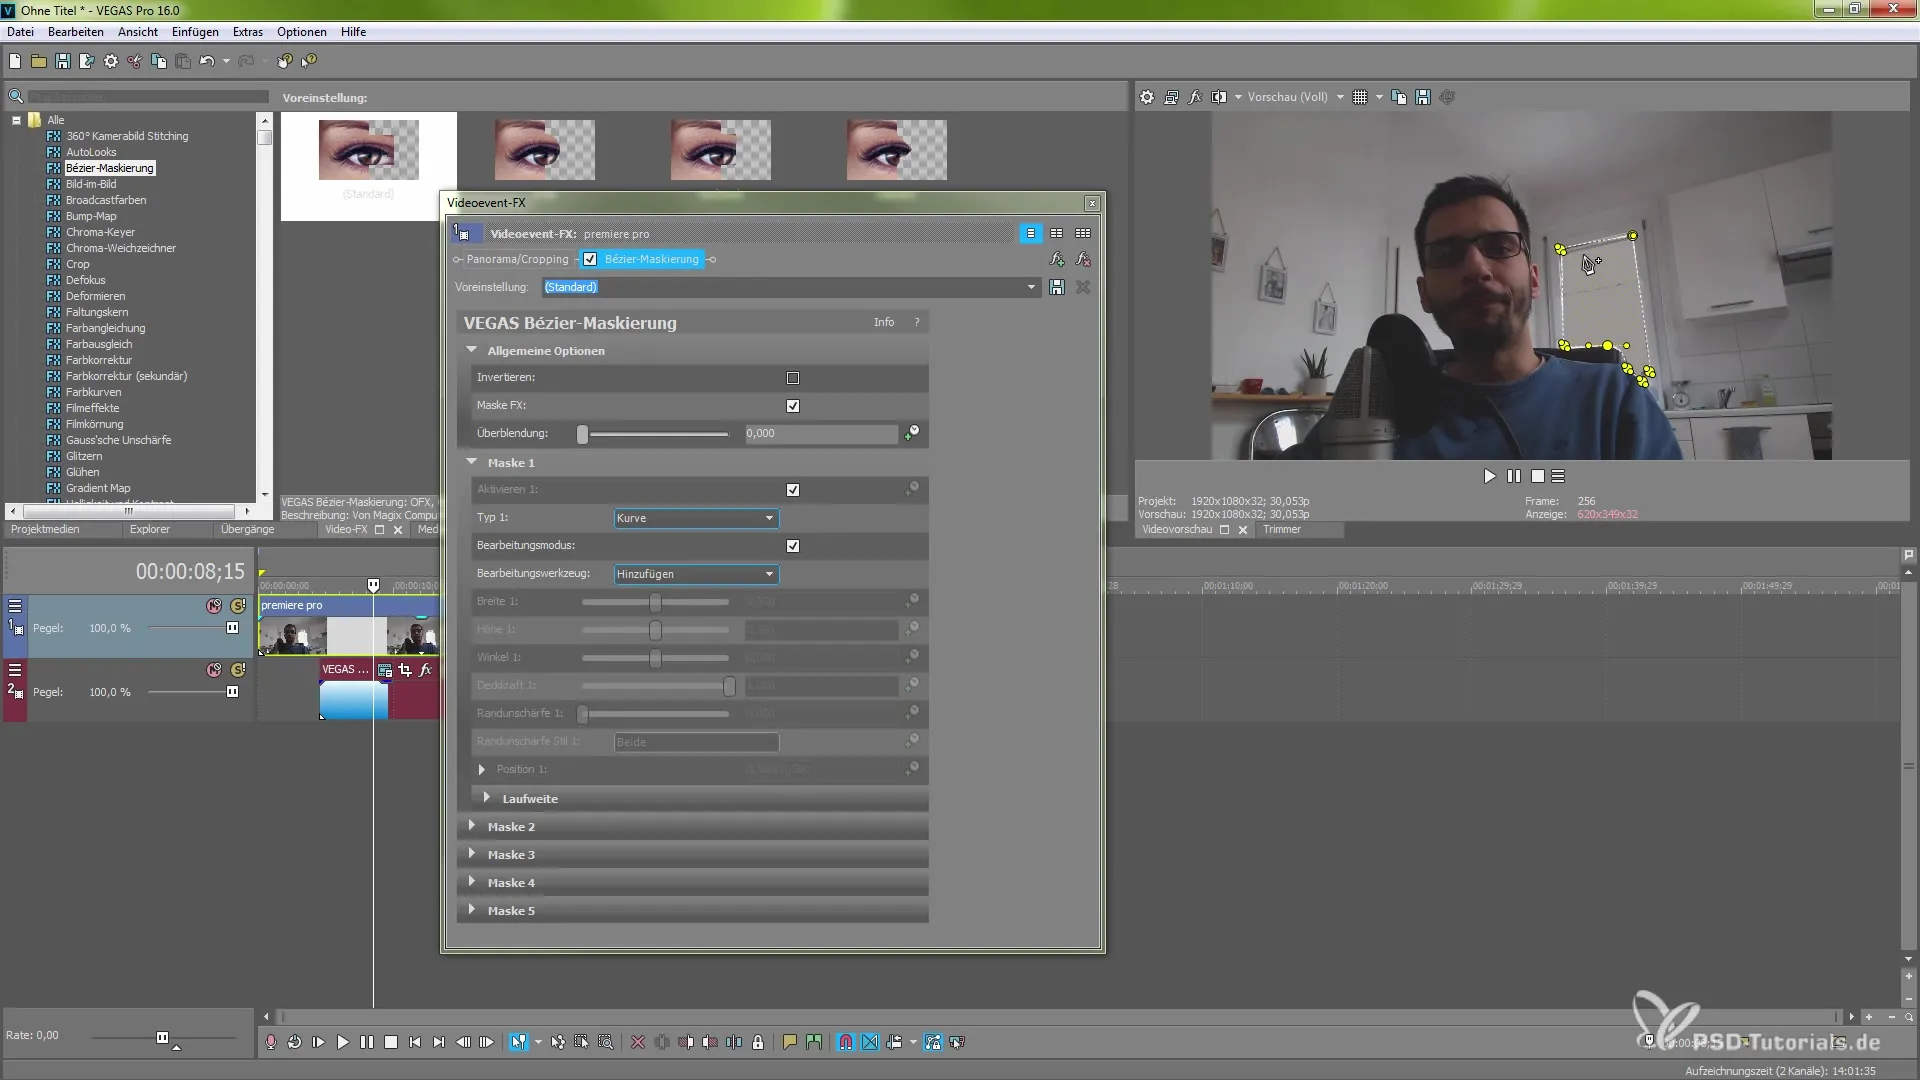
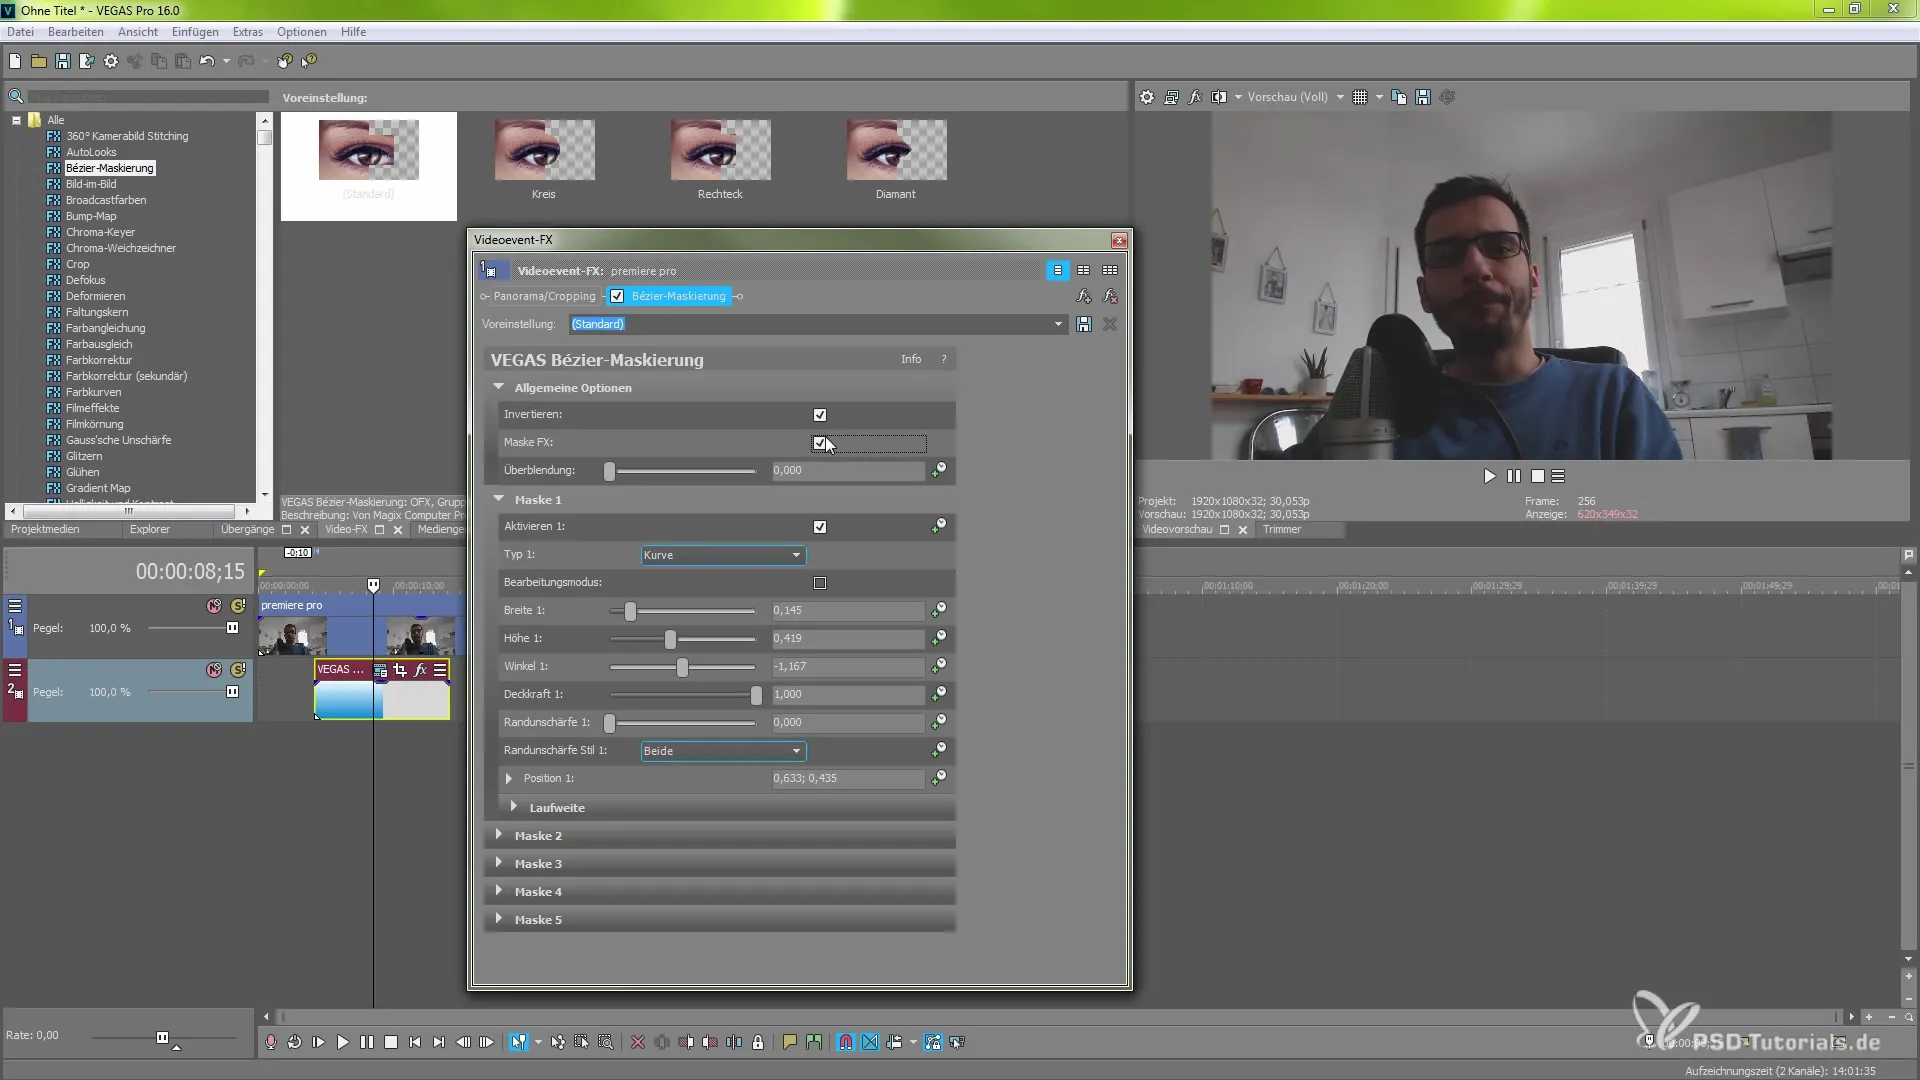
Now go to the Video FX and select the Bézier masking. Apply this to the selected track. The FX area will immediately open where you can work on your mask. It offers you nearly unlimited flexibility to select your desired areas. However, before you start, activate the "Mask FX" option so you can have a clear overview of the transparent areas of your video.
With the mask, you activate the editing mode. Here you can start making your masking to cut out specific parts. This does not mean that the result is perfect - it is primarily about demonstrating the function, so be creative and experiment. You are adding a visual component that makes your videos more lively.
Now is the time to invert the mask so that the cut-out area becomes visible. To do this, turn off the editing mode and deactivate the Mask FX. This way, you can see the area behind your clip that you just uncovered. At this stage, you might already observe some interesting results, even if they might not be perfectly fine-tuned yet.
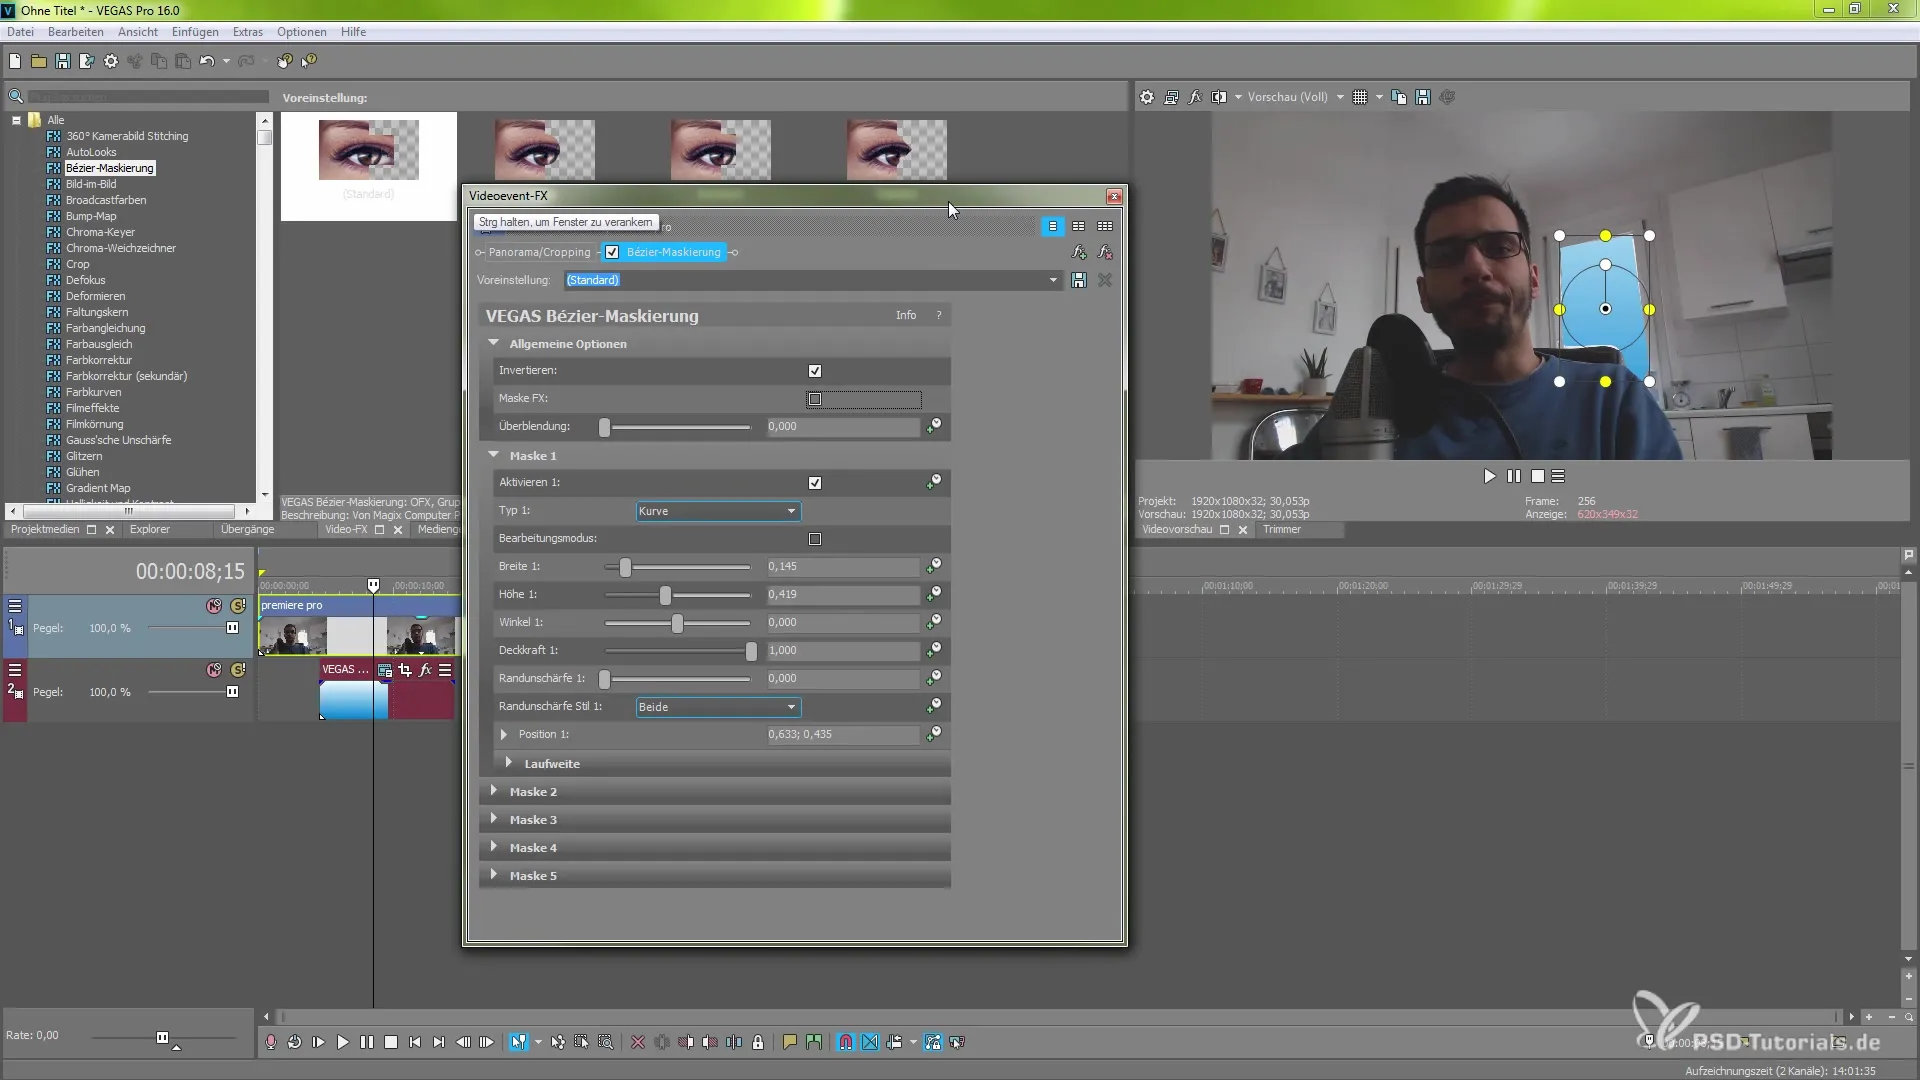
If you are satisfied with the current result, you should know that you can make adjustments to the mask at any time. You have the option to change the size and shape of the mask to perfectly fit your clip. This flexibility makes Bézier masking particularly powerful, as you always have control over the appearance of your clip.
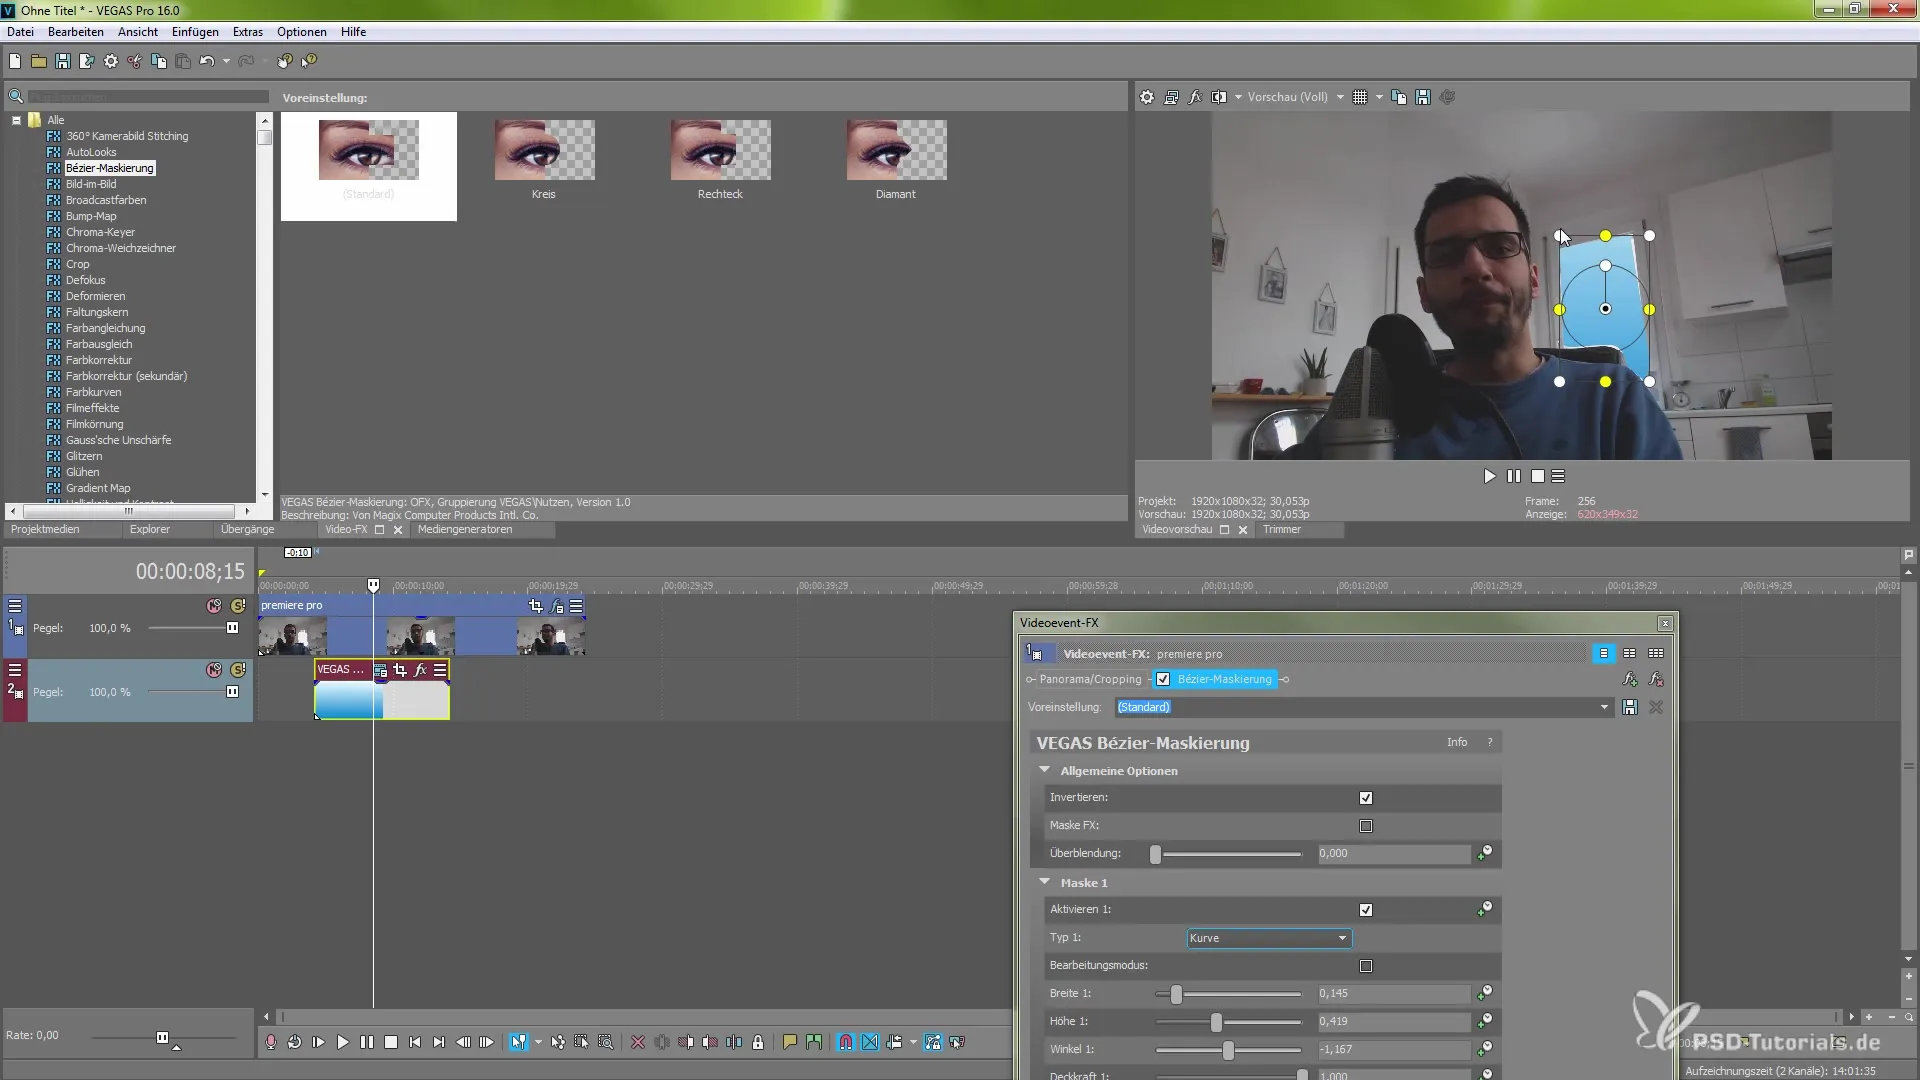
To get the full benefit from Bézier masking, you can also use multiple masks at the same time. Click the small button to activate a second mask. This way, you can edit and creatively design different areas of your clip. This option allows you to intuitively handle complex compositions.
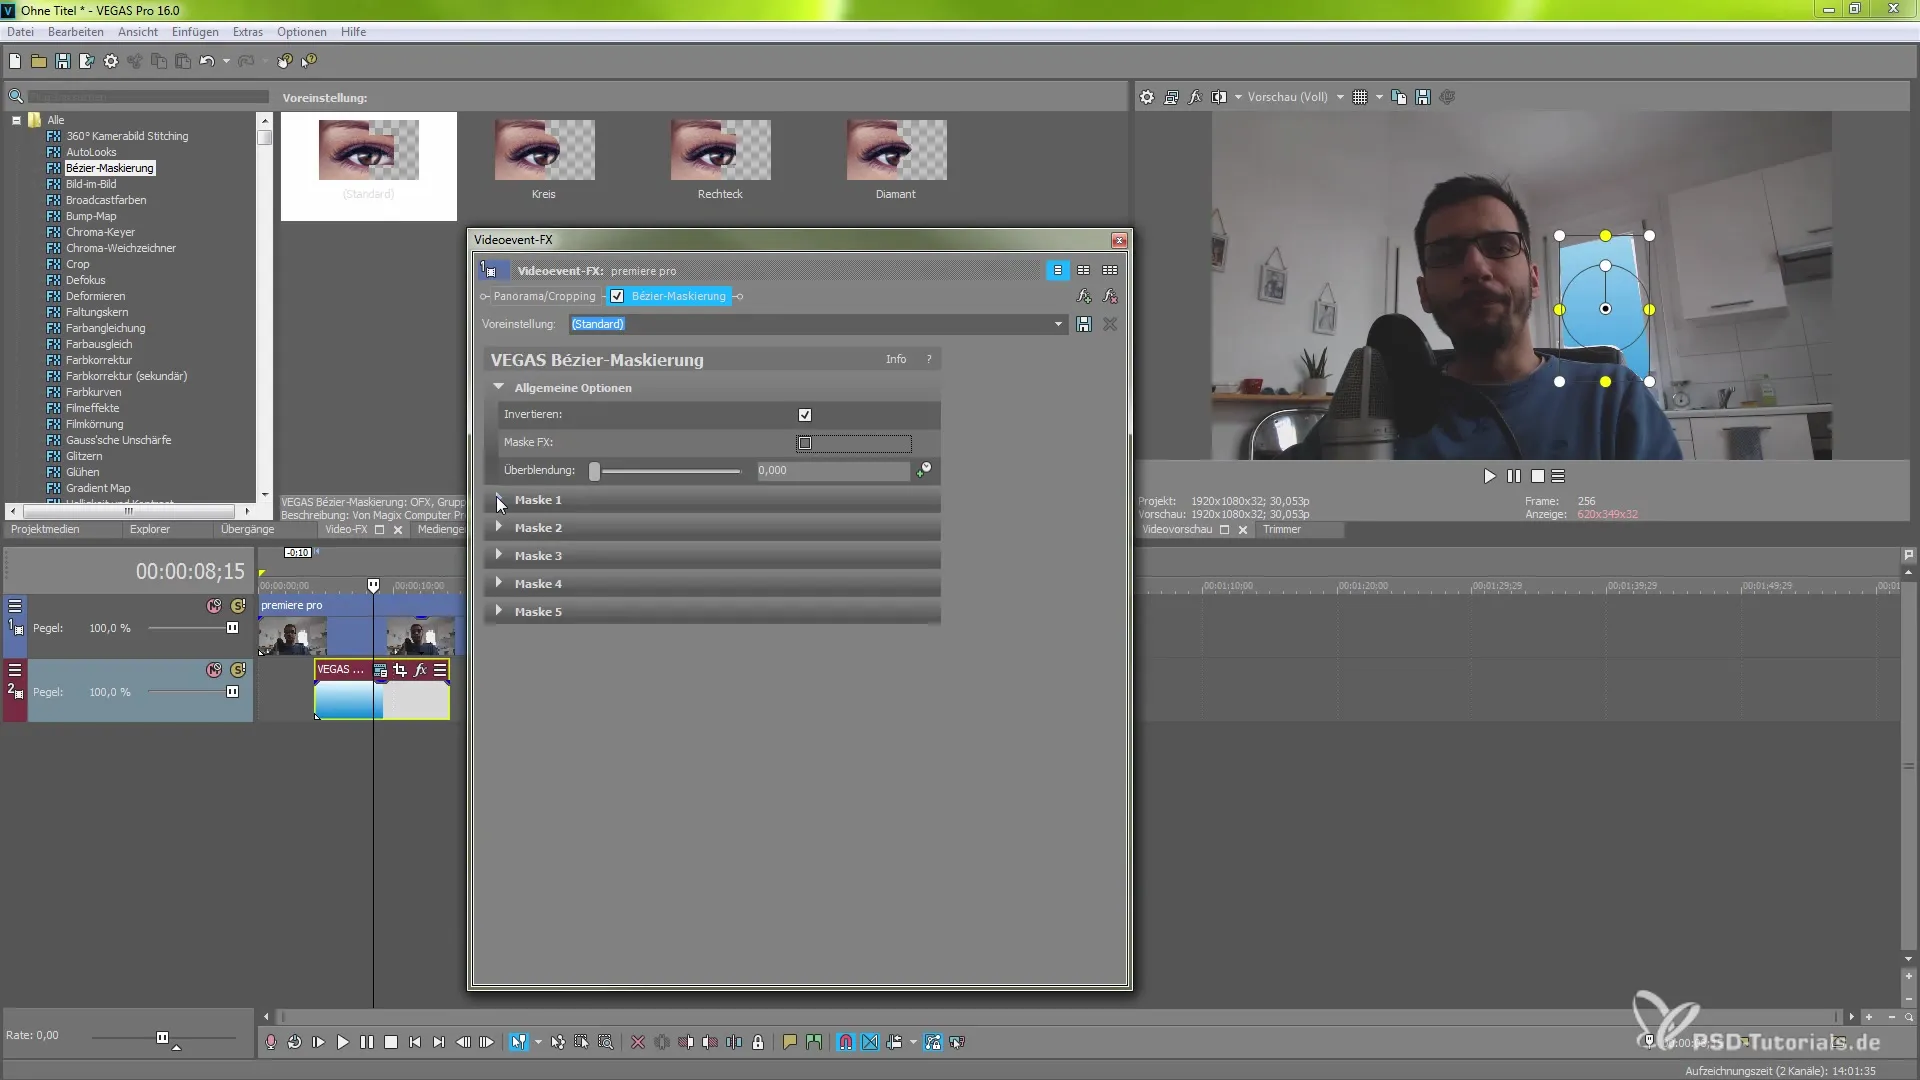
Your masks can have up to five iterations. You can continue to make adjustments through the mask FX. Once you have created a mask, you can save it to use later. This saves time if you regularly perform similar masking processes.
By the end of this guide, you have learned how to effectively use Bézier masking in MAGIX VEGAS Pro 16. You can now work creatively and make your videos diverse. Experiment with different masks and continuously improve your skills.
Summary – Bézier Masking in MAGIX VEGAS Pro 16
You have now learned all the necessary steps to use Bézier masking in MAGIX VEGAS Pro 16. With the right tools and some creativity, you can achieve impressive effects in your videos.
Frequently asked questions
How do I activate the Bézier masking?To activate Bézier masking, go to "Video FX" and select it.
Can I use multiple masks at the same time?Yes, you can use and activate up to five masks simultaneously.
How do I save a mask for later use?You can save a mask by adjusting the settings you want and saving the preset.


