The High Dynamic Range (HDR ) filter in Capture One Pro 20 has been significantly improved and offers you a wide range of new adjustment options. If you are editing an image with high contrast ranges, you can use the HDR filter not only to efficiently readjust light and shadow, but also to optimize the overall image. This guide shows you in detail how to get the best out of the revised HDR filter.
Key findings
- The sliders for highlights and shadows are now centered and start at zero.
- New sliders for white and black provide more precise contrast adjustments.
- Adjusting the new sliders maintains image contrast and improves image quality.
Step-by-step guide
Step 1: Open the HDR filter
Start Capture One Pro 20 and select an image you want to edit. Navigate to the exposure area where you will find the HDR filter. Expand the filter to display the new sliders.
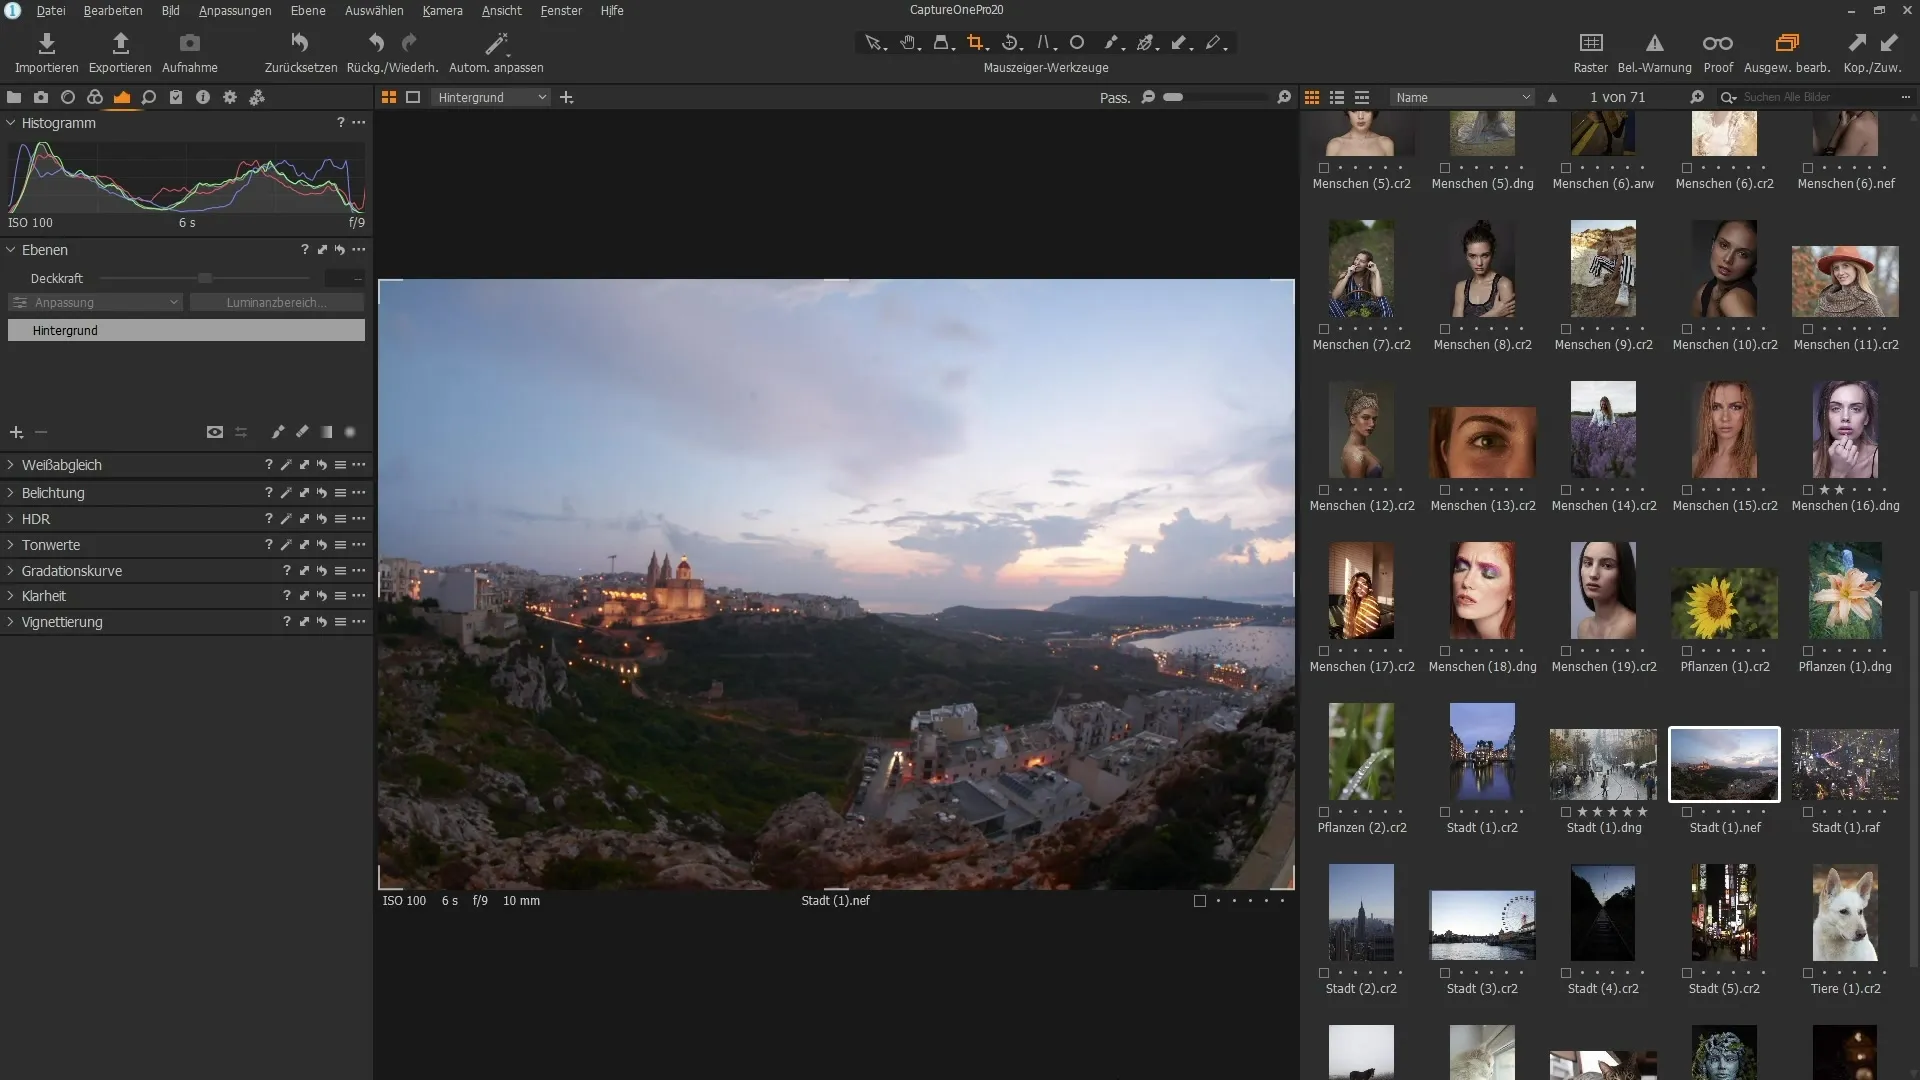
Step 2: Understanding the new sliders
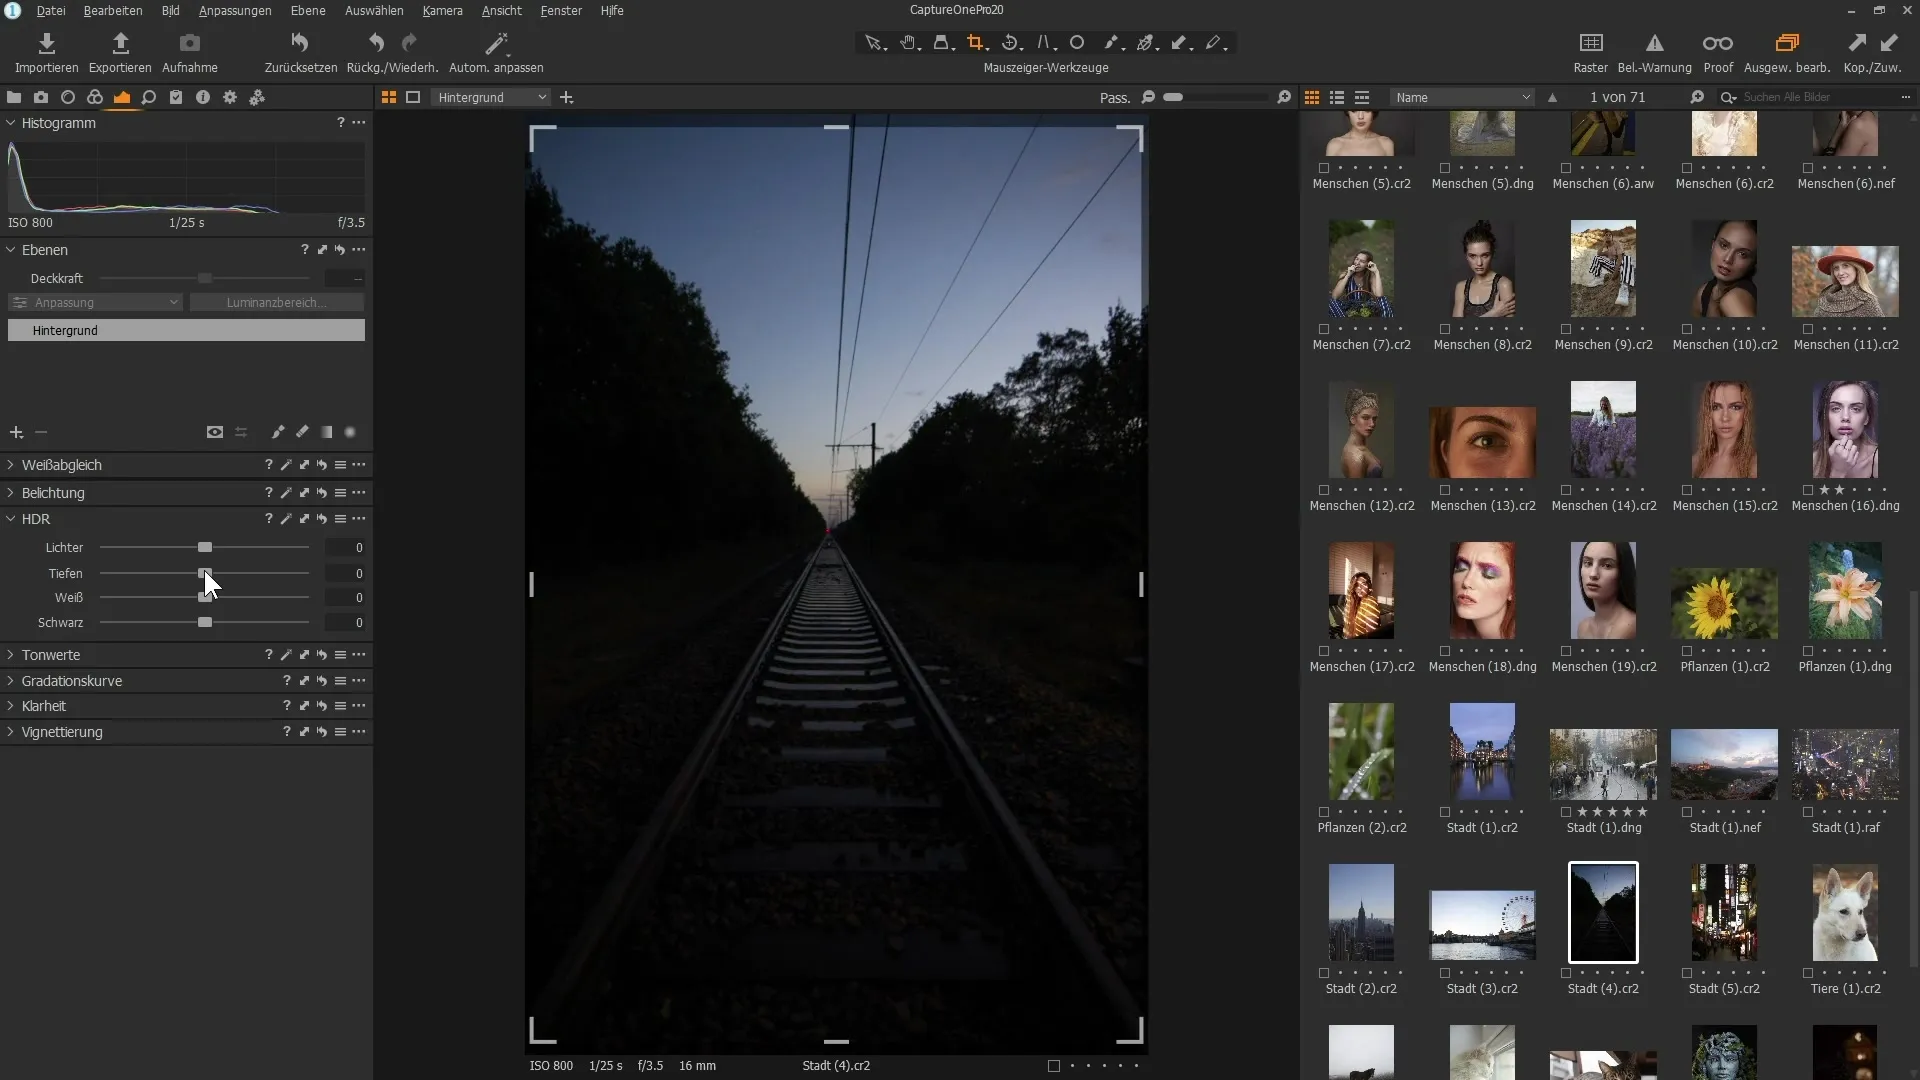
With the revised sliders for highlights and shadows, you now have more freedom. Note that the sliders are now centered, which means you can make adjustments both up and down. In previous versions, the sliders started on the left and limited your options.
Step 3: Adjusting the lights
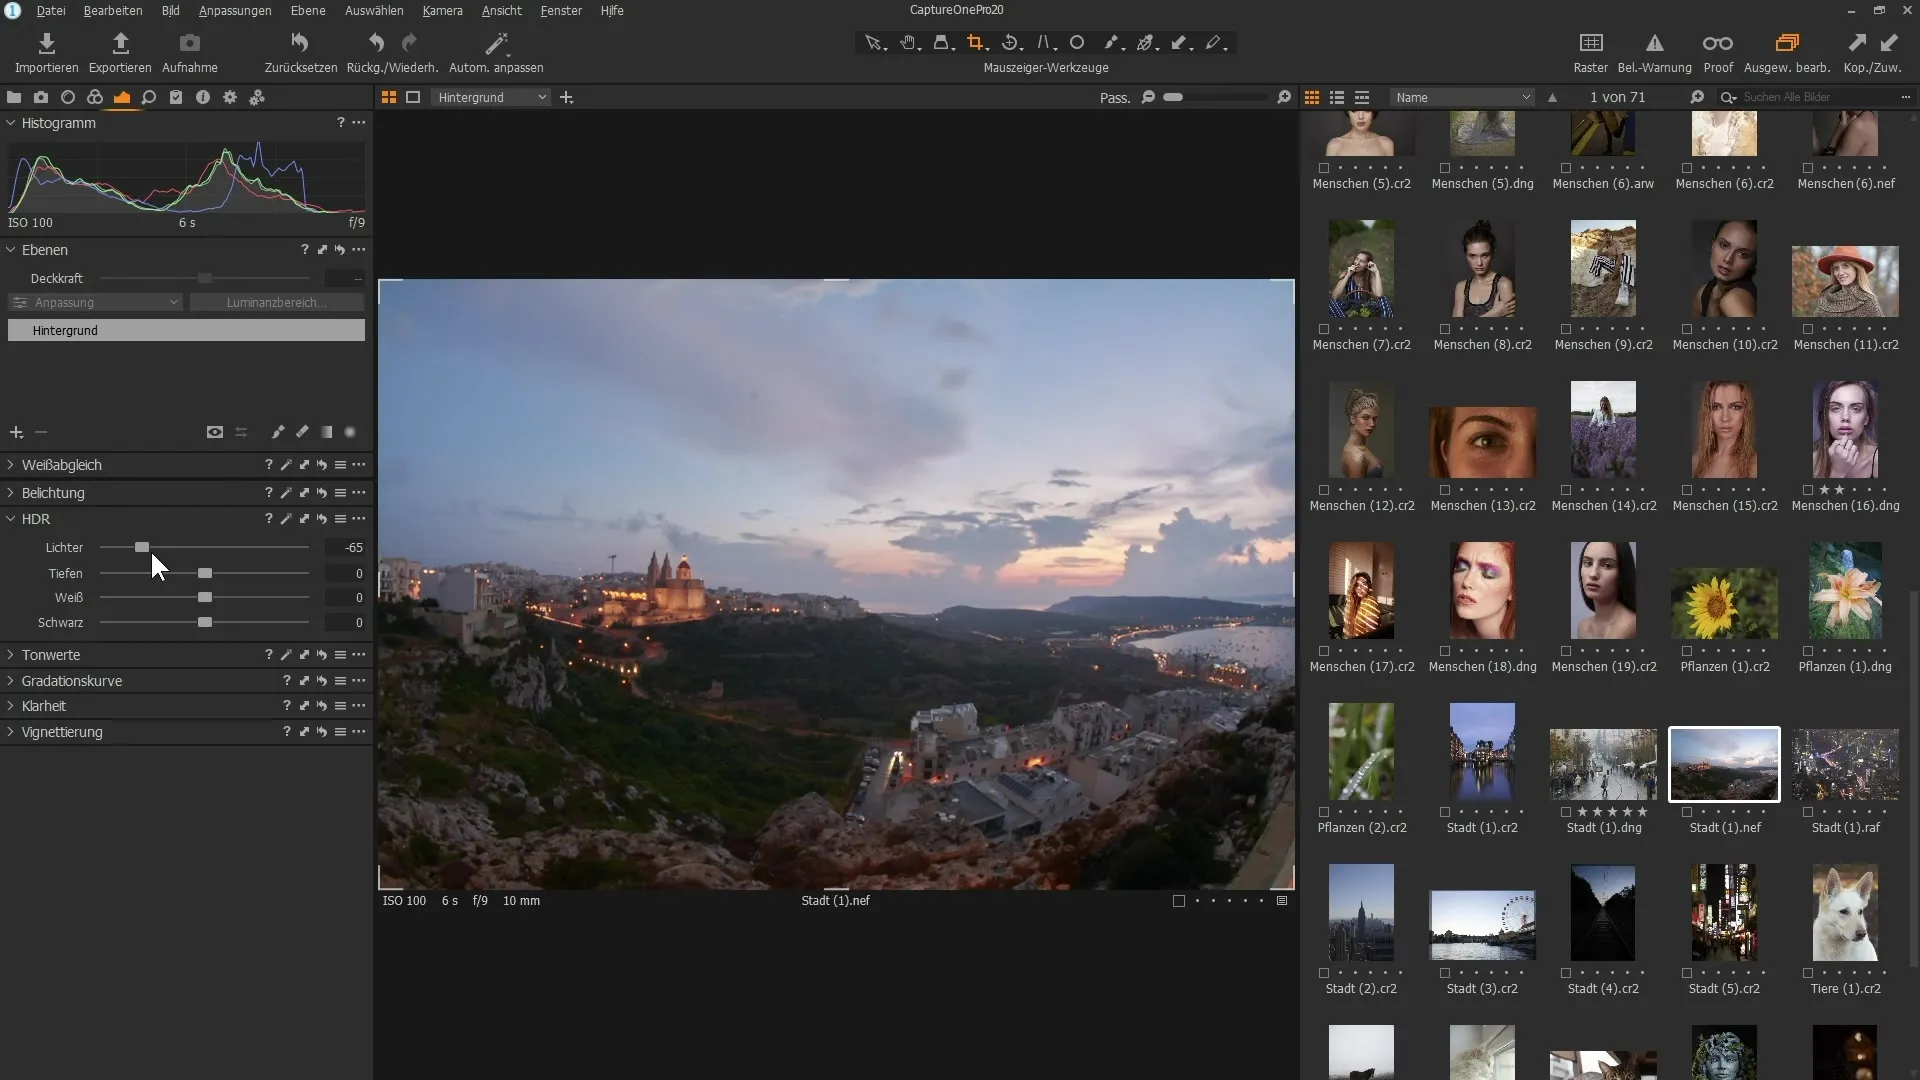
Moving the highlights slider to the left allows you to darken overexposed areas and bring back detail. However, you also have the option to brighten the highlights by moving the slider to the right, which allows you to actively shape the look of the image.
Step 4: Adjusting the depths
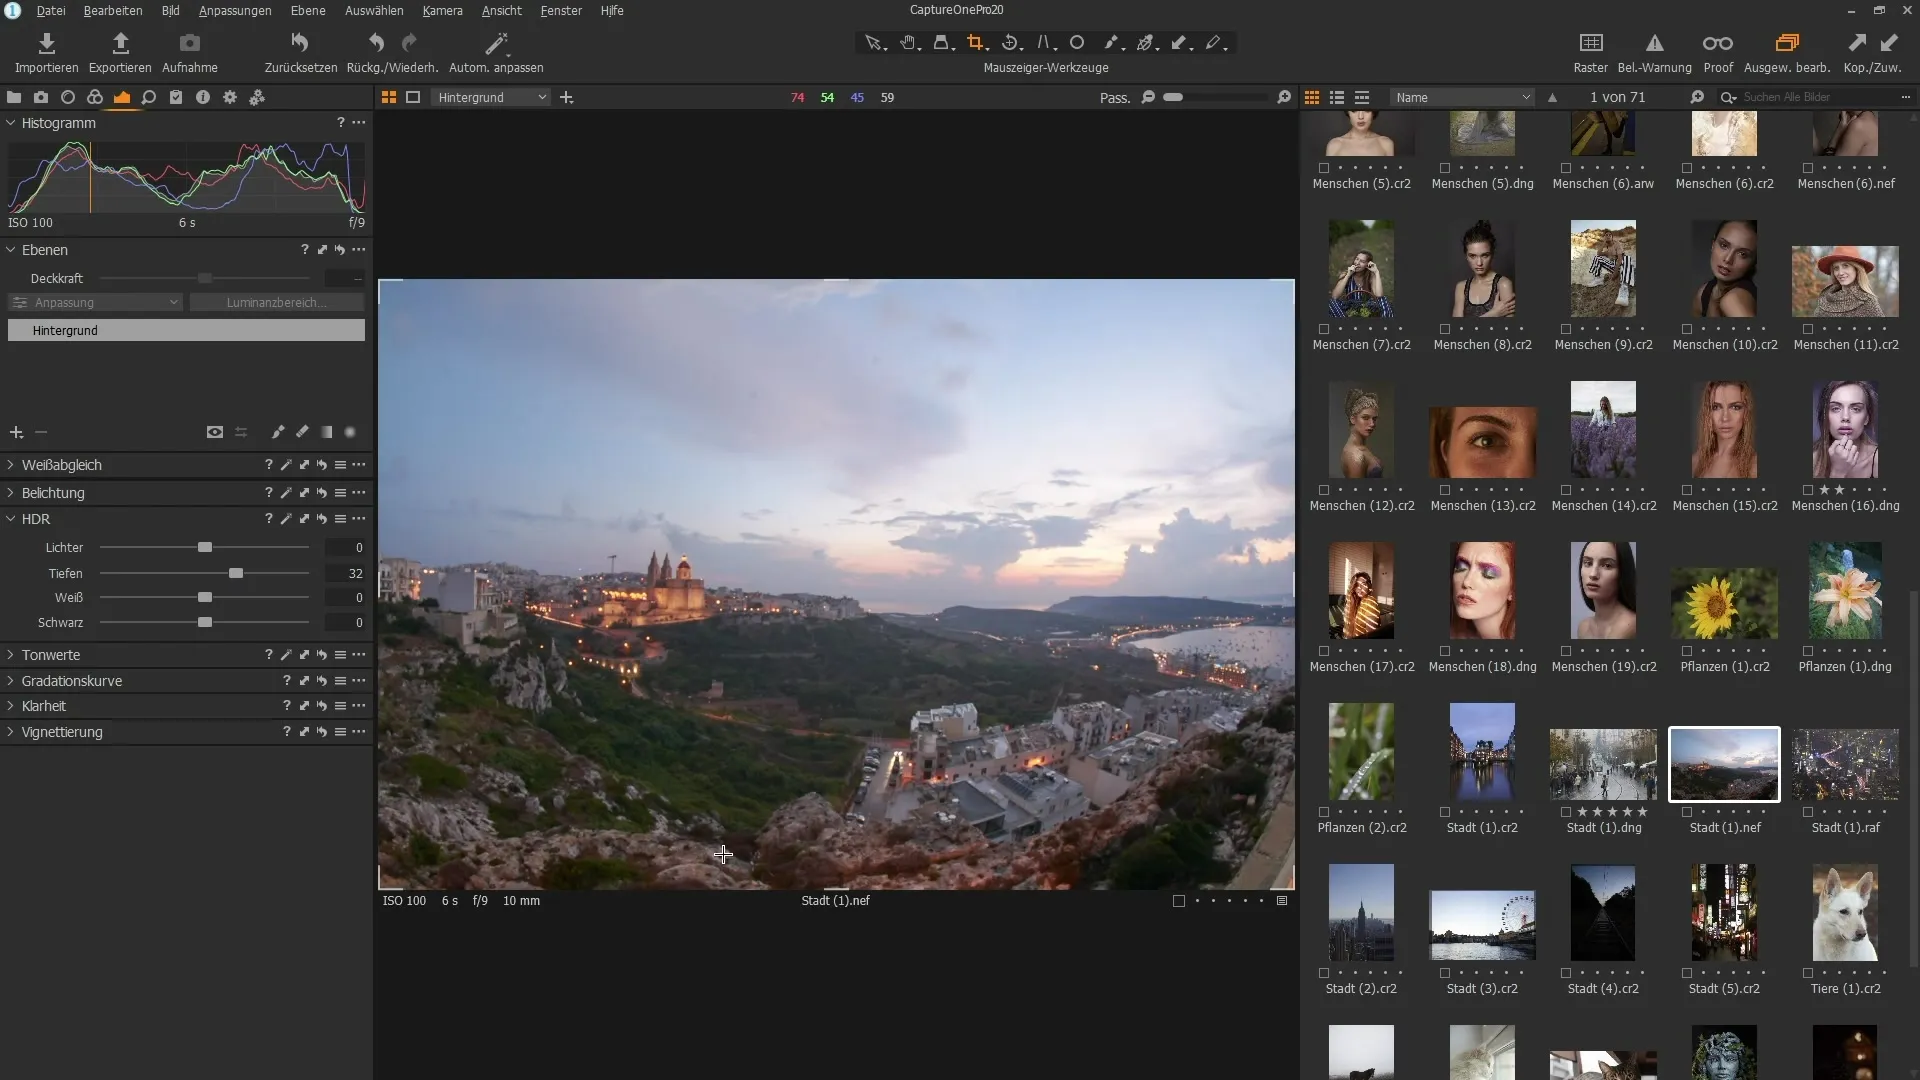
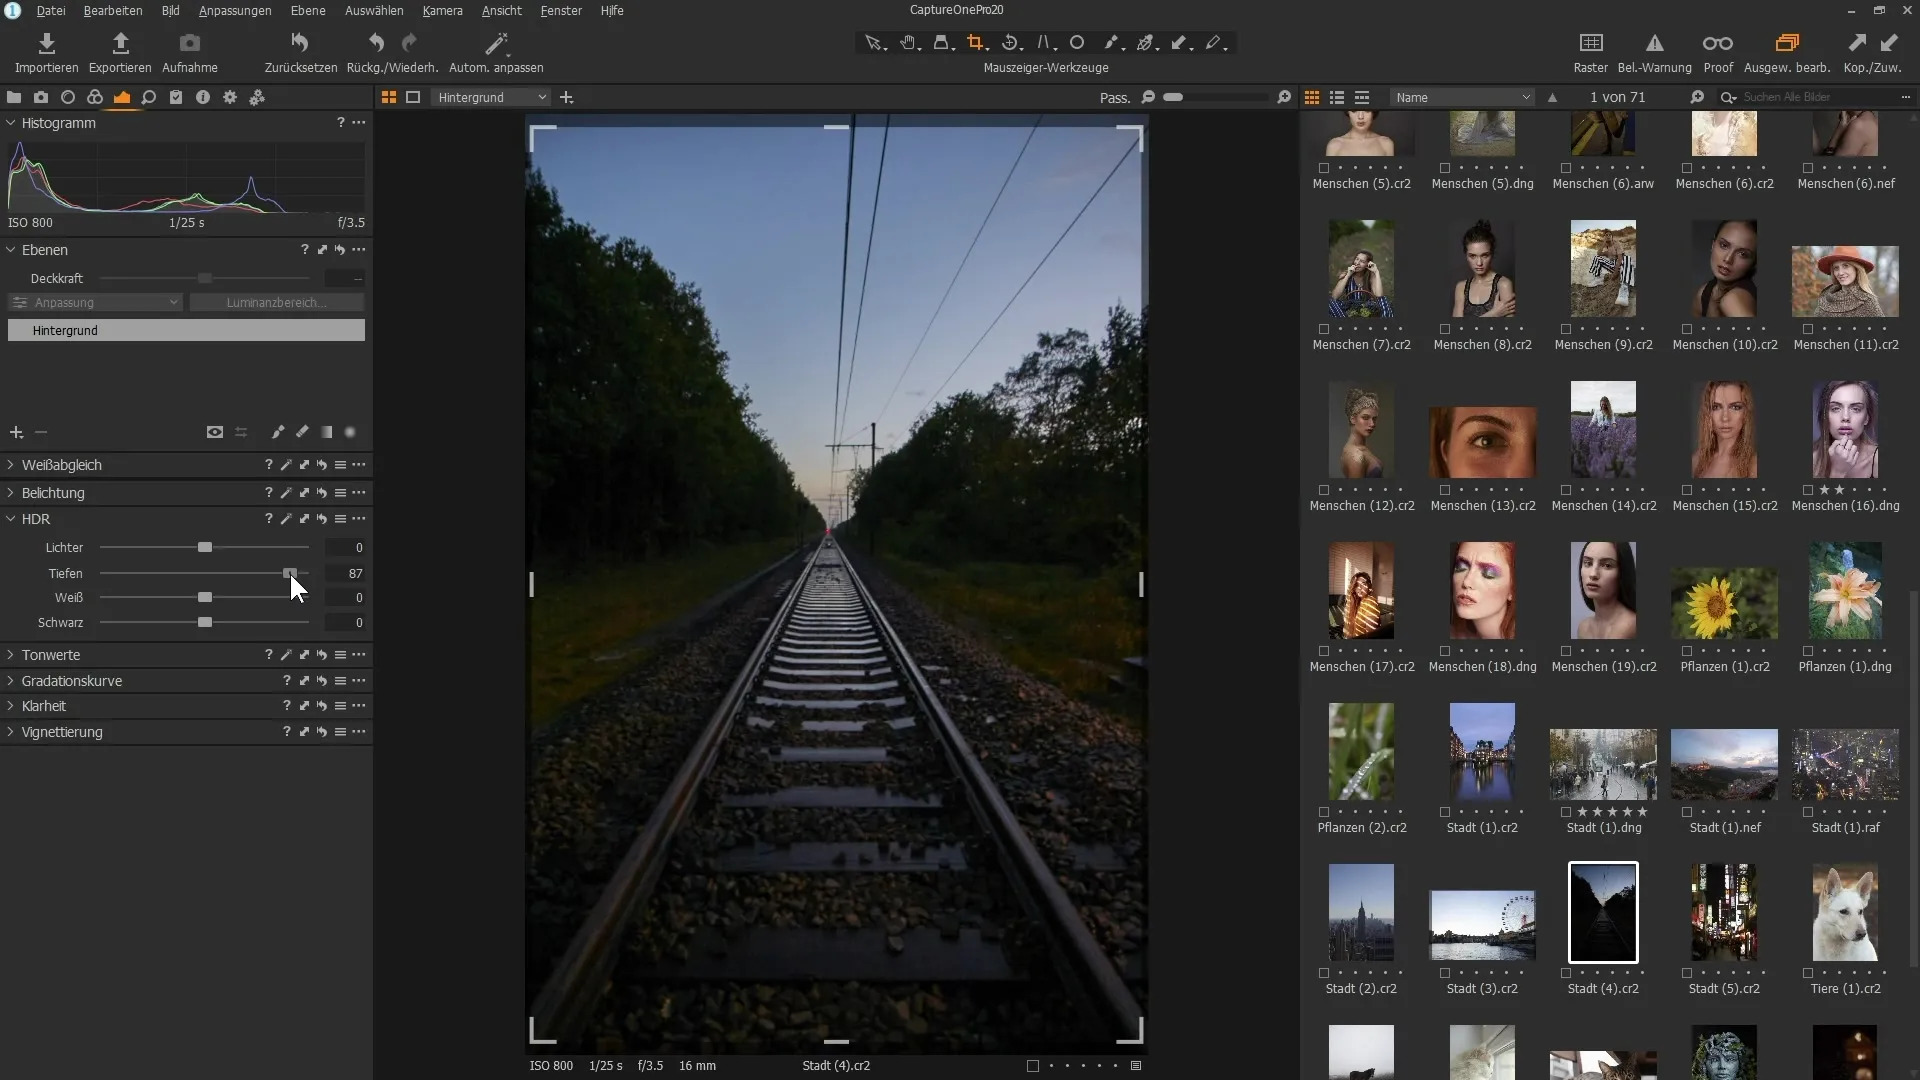
The slider for the depths works in a similar way. If you move it to the right, you can bring back details from underexposed areas. A slight move to the left, on the other hand, can help to further darken already dark areas in order to increase the contrast.
Step 5: Using the new white and black sliders
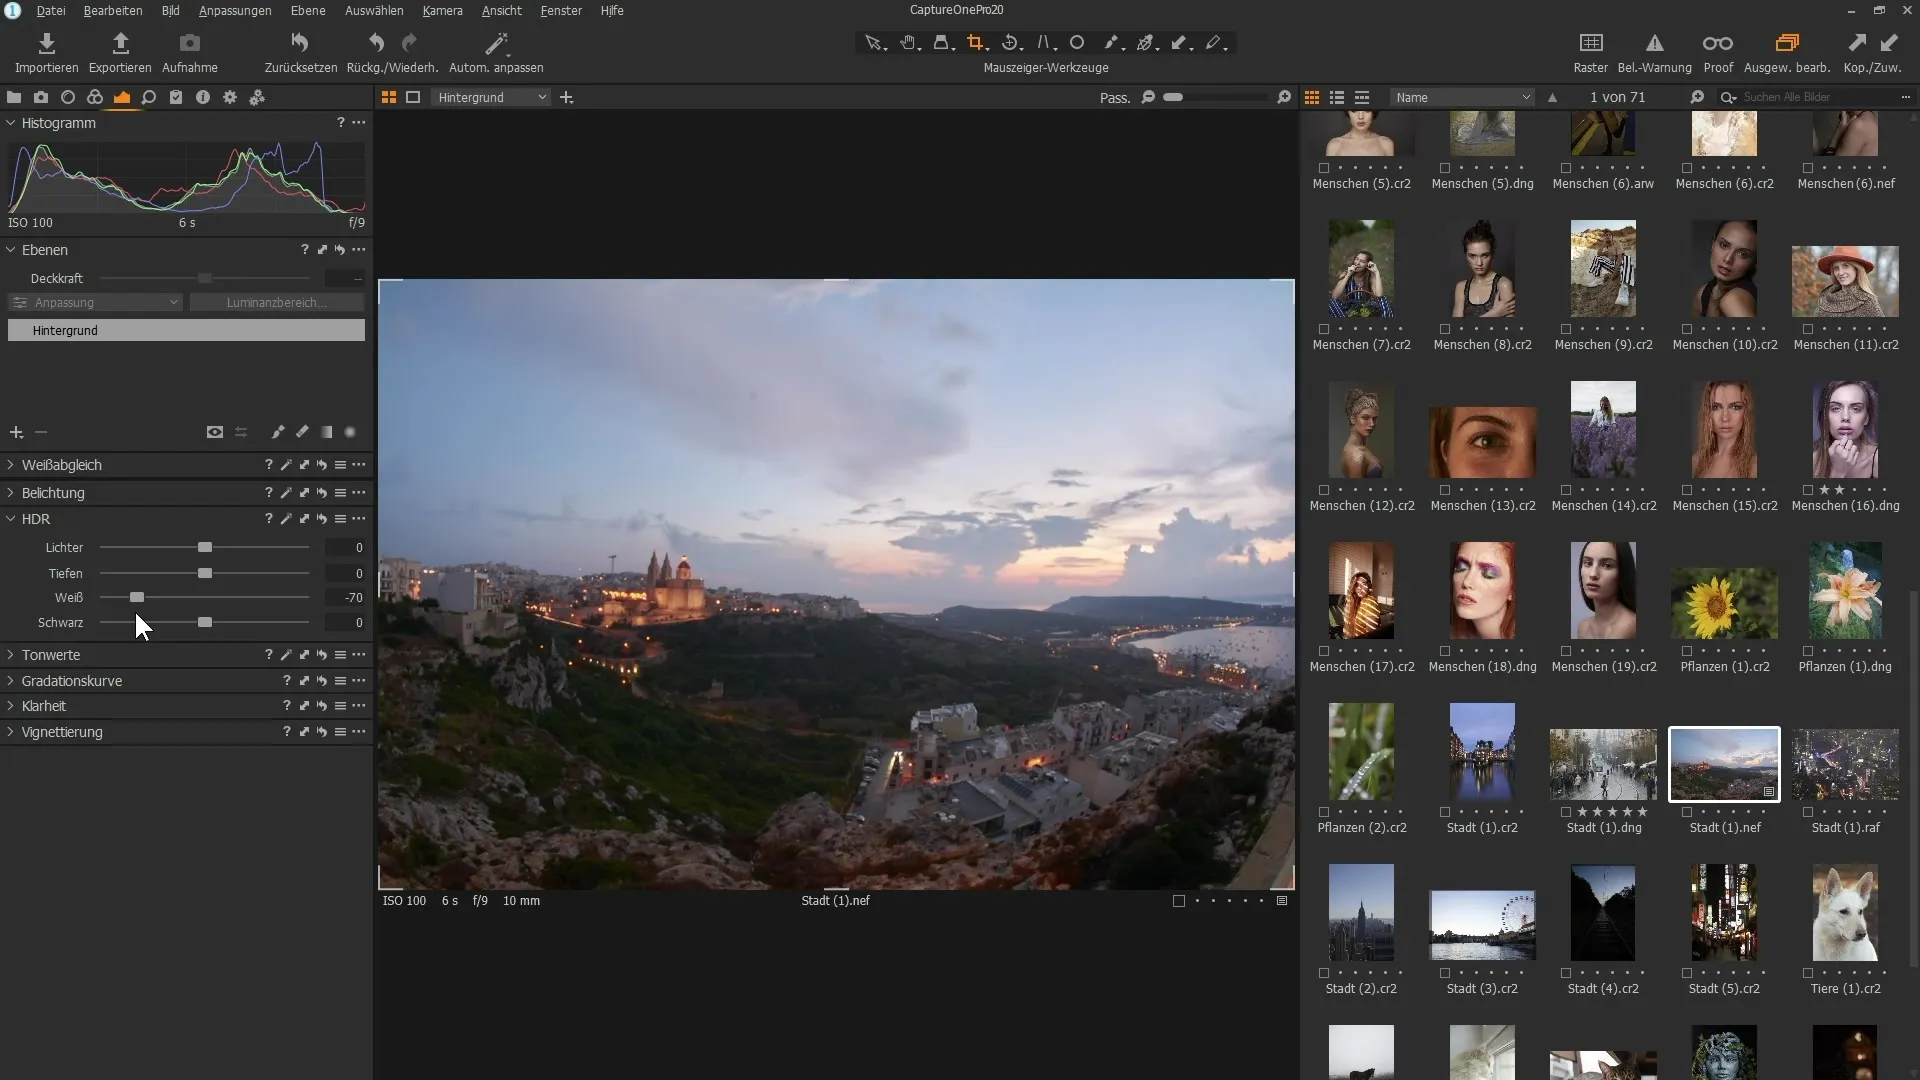
The new White and Black sliders give you additional control over the contrast setting. Moving the White slider to the left will darken the light areas, while the Black slider allows you to slightly lighten the dark areas without making the image look flat.
Step 6: Evaluate the results in the histogram
Observe what happens to the extreme values when you make your adjustments. A look at the histogram will give you an idea of how the tonal values are positioned in the image. You will notice that the adjustments with the new sliders have a clearer influence on the overall contrast than the previous sliders.
Step 7: Fine-tuning with the classic sliders
Go into difficult parts of the image to bring back details. You can use the classic sliders for highlights and shadows to further optimize the overall image. Precise application of these adjustments usually results in an overall more natural look.
Step 8: Final fine-tuning
Finally, experiment with the white and black sliders to ensure that the image not only looks good but also remains natural. Make sure there are no unnatural color changes or heavy noise.
Summary - Effective adjustments with the revised HDR filter in Capture One Pro 20
The revisions to the HDR filter in Capture One Pro 20 offer you more versatile and precise adjustment options for your images. With new controls for highlights, shadows, whites and blacks, you have control over image contrast and can efficiently restore details. These improvements not only allow for more creative editing, but also a higher quality end result.
Frequently asked questions
How does the HDR filter work in Capture One Pro 20?The HDR filter allows you to precisely adjust light and shadow areas and bring back details.
What are the new features of the HDR filter?The new white and black sliders offer improved control over the contrast and tonal values in the image.
How can I improve image contrast without compromising image quality?Use the new White and Black sliders to adjust contrast more subtly.


