
A good icon doesn't have to be complicated. Behind many simple brand marks are just a few simple shapes that are cleanly combined, aligned, and colored. This is exactly the principle I'll show you using the example of a brand icon for a coffee shop: you build a coffee cup exclusively from a rectangle and an ellipse. You hardly need any prior knowledge, just Affinity Vector and a little patience when aligning.
The video is only loaded from YouTube when you play it – data (including your IP address) is then transmitted to YouTube/Google. More in the privacy policy
Key Takeaways
- An icon often emerges from simple basic shapes that you combine with one another.
- Via the input fields and the Properties panel, you set size and position exactly.
- The Shift key helps you keep proportions, and the alignment functions bring objects into position precisely.
- With the Corner tool you round off edges, and afterwards you color all parts uniformly.
Step-by-Step Guide
Shaping the Cup Body with the Rectangle
Select the Rectangle tool in the toolbar. If you hover the mouse over the icon, Affinity Vector shows you a tooltip with information and keyboard shortcuts. The Rectangle tool is on the letter U, and with this key you will later also switch back and forth between the shape tools. Then, holding down the left mouse button, drag a rectangle onto the canvas that is roughly the size of your cup.

If you would rather enter the dimensions directly, hold down Control and click on the canvas. You can then set the width and height. On the Mac, the Control key corresponds to the Command key.

The Shift key is now important. As long as you hold it down, the proportions are preserved, and a rectangle becomes a square. For a cup, however, you need a narrower, upright shape. That's why you drag without the Shift key when adjusting and then correct the dimensions in a targeted way afterwards.
You'll find the most precise method in the Properties panel on the right under the Transform section. There you can see rotation, shear, the X and Y position, as well as width and height. For the cup, enter, for example, 200 as the width and 250 as the height. This way you can readjust at any time without working with the mouse.

Now color the rectangle so you can see it better on the canvas. In the upper area of the interface you'll find the color selection. A strong blue works well as a placeholder; you'll set the final color later.

To move it, you use the shortcut V. With it you move the selected object across the canvas until it fits. The arrow keys are also suitable if you want to move it in small steps. Position the cup roughly in the center of the canvas.
The Opening with the Ellipse
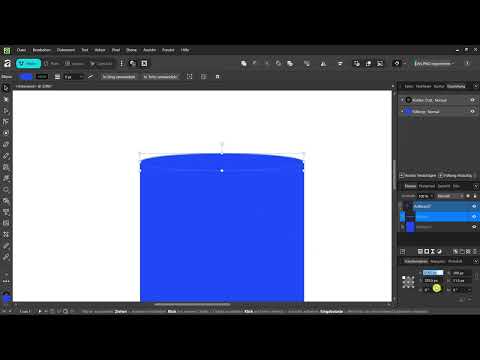
For the top opening of the cup you need an ellipse. You switch to the Ellipse tool by clicking on it in the toolbar or by pressing the U key several times. Draw the ellipse on the top edge of the rectangle. It should be flat and about the width of the cup.

For fine details, zooming helps you. Hold down Control and turn the mouse wheel to zoom in on the corners. This way you can place the ellipse exactly on the edge and adjust the height precisely. The result is a slight curvature that creates the cup.

So that the opening sits exactly in the center of the cup, you use the alignment function. Select the ellipse and use the alignment options shown in the context toolbar at the top. Alternatively, you can also enter the values for X and Y manually in the Properties panel.
An object can just as well be aligned with several others at the same time. To do this, hold down the Shift key while clicking both shapes, or drag a selection frame over them. If necessary, you select layers in the Layers panel, even if they overlap. Afterwards you align both horizontally or vertically. With this function you make sure that all elements fit together visually clean.

The Handle from a Second Rectangle
The handle is created from another, smaller rectangle. Draw it to the right of the mug so that it slightly overlaps it at the side. You should still experiment with its size and position at this point, because the handle largely determines how recognizable your cup is.

To make the rectangle look like a handle, we round off the corners. Select the rectangle and choose the Corner tool. This tool specifically modifies the corners of closed or geometric shapes. If you move the mouse over the corners, you can already see an initial rounding.

Now select both corners on the side that will later sit against the mug. Hold down the Shift key while doing so. Then drag inward with the left mouse button until the corners become a rounded shape. You can also edit just a single corner by clicking it and dragging it inward. Dragging outward, on the other hand, tends to produce unwanted points or shadows that are not needed for this icon.

Color and Finishing Touches
When all the parts are finished, select them all together. To do this, press Control and A. In the Layers panel you will then see that all objects are selected. Now you can change the color for the entire icon.

The color is chosen in the Color panel using the RGB sliders. The RGB color model is suitable for designs that will later appear on screen, such as on websites. A warm brown quickly looks like coffee. Move the values until you like the tone, and check whether the icon remains easy to read against the background.

Finally, you can check the corner settings. When you use the Corner tool, you will see various options in the context toolbar, such as rounded corners, concave corners, or straight-cut corners. These settings can be adjusted at any time afterward, so you can refine the handle precisely.

Summary – Building a Brand Icon from Basic Shapes in Affinity Vector
You have now created a coffee cup that consists only of a rectangle, an ellipse, and another rectangle with rounded corners. Along the way, you learned to size shapes precisely using input fields and the Properties panel, to control proportions with the Shift key, and to position objects using the alignment functions. You then used the Corner tool and colored the entire icon uniformly. In a real project, you would of course refine the result further, but the principle remains the same: combine basic shapes, align them, and match their colors. In the next lesson, the Pen Tool for organic shapes is added.
FAQ
Do I have to use the dimensions 200 and 250 exactly?No, these values serve only as a guideline. What matters is that the mug looks narrower than it is tall and that the proportions fit the handle.
Why shouldn't I hold down the Shift key while drawing?With the Shift key held down, proportions are preserved and a rectangle becomes a square. For the cup, however, you need a narrower shape, so you correct the size without this key.
Can I still change the corners later?Yes, the corner settings remain editable as long as you do not convert the shape. You can adjust the rounding at any time in the Corner tool or in the options.
Is this icon already a finished logo?No, it is a basic shape that you use as a starting point. For a real brand mark, you should still refine the proportions, colors, and details deliberately.


