
Imagine you need your own logo or icon, but can't find anything suitable. This is exactly where the Pen tool comes into play. It is the most versatile tool in vector design because it lets you control every shape precisely, from straight lines to soft curves. In this tutorial you will learn the basics: placing anchor points, pulling curves, building closed shapes, and using this knowledge to design a stylized coffee bean. You don't need any prior knowledge, just a vector program and a bit of patience while experimenting.
The video is only loaded from YouTube when you play it – data (including your IP address) is then transmitted to YouTube/Google. More in the privacy policy
Key Takeaways
- The Pen tool places anchor points that are connected to each other by lines or curves.
- A simple click creates a straight line, while a click with the mouse button held down creates a curve.
- The direction in which you drag determines the shape and course of the curve.
- A shape is closed by returning to the starting point.
- For a clean icon, you work with fills and strokes separately and adjust stroke weight and corners in the properties.
Step-by-Step Guide
1. Activating the Pen Tool
By default, the Pen tool is assigned to the P key. You can also find the tool in the toolbar, relatively near the top. If you don't remember the functions right away, it's worth taking a look at the small help feature integrated into the tool. It explains the basic principles step by step.

2. Placing Anchor Points and Connecting Lines
The basic principle couldn't be simpler: you click anywhere in the document, and the first anchor point is created. An anchor point is the support point to which your shape will later be attached. Don't hold the mouse button down here, just click once briefly.

If you then place a second point, the software automatically connects both anchor points with a straight line. Here too, you don't need to hold anything down. Each additional click extends the path by another segment.

3. Creating Curves with the Mouse Button Held Down
The real key to organic shapes lies in dragging. If you place an anchor point while holding down the left mouse button, you get control handles with which you shape the curve. So you decide for yourself how the line runs.
A fixed rule applies here: if you drag the handle toward the bottom right, the curve bulges toward the top left, i.e. as a mirror image. If you drag toward the bottom left, the corresponding opposite curve arises toward the top right. The flatter you drag the handle, the gentler the curvature becomes. The more sharply you drag, the tighter it gets. It's best to try this out on three points in a row, and you'll quickly get a feel for the behavior.
4. Building Closed Shapes
When you work with straight lines, you can construct simple figures such as a triangle. Place three points that do not lie on a single straight line, and return to the first point at the end. As soon as the path is closed at the starting point, a complete shape is created that you can fill. The triangle test also shows you how quickly you can build your own geometries with the Pen tool.
With the same method, you can also design free-form shapes. Place points at irregular intervals, pull curves at some places, and leave other places angular. It is precisely this mixture that makes a design lively and is well suited for color splashes or decorative elements.
5. Drawing the Basic Shape of the Coffee Bean
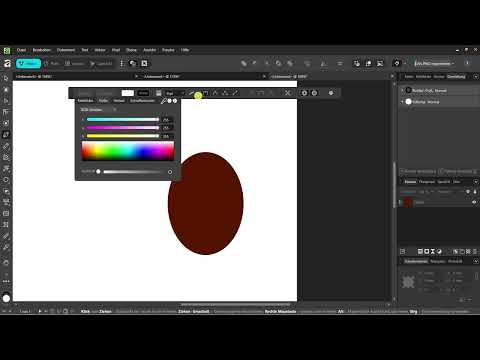
For the coffee bean, you don't need the Pen tool at first, but a simple ellipse. Select the Ellipse tool and drag out a narrow, slightly oval shape. Choose a suitable coffee brown from the color palette as the color. A slightly lighter brown will later bring more depth to the icon.

Remove the outline of the ellipse so that only the fill remains visible. This way, you already have the basic shape of your bean. At this point, however, it still looks empty because the distinctive element is missing: the curved center groove.

6. Drawing the Center Crease with the Pen Tool
For the crease, you switch back to the Pen tool. Choose white as the color, because the crease should stand out from the brown background. In the Properties panel you will see several modes for the Pen tool: Pen mode, Smart mode, Polygon mode, and Line mode. Smart mode automatically creates smooth transitions, while Polygon mode creates more angular paths. For this tutorial, Pen mode is completely sufficient, because it gives you full control over the curve path.
Set the first point at the top of the bean. Then go to the middle of the bean, hold down the left mouse button and drag slightly to the left so that a curved line is created. At the end, you set the last point at the bottom of the bean. This creates the typical S-shaped crease.

7. Setting Fill and Stroke Separately
The crease should not be a filled area, but just a line. Therefore, remove the fill of the crease and keep only the white stroke. This looks significantly cleaner than a filled shape with a shadow area. The bean itself remains without a stroke, while the crease consists only of its outline. Precisely this separation makes the icon clear and professional.

8. Adjusting Stroke Width and Corners in the Properties
Using the Properties window, you can refine the line afterwards. Set the stroke width until the crease is clearly visible but does not look too dominant. You can also determine the corner shape, such as rounded corners, if you want softer transitions. For the coffee bean, a moderate stroke width with rounded ends is usually enough.

In the Properties panel you will also find additional options for fine-tuning. You don't need them for this example, but as soon as you want to dive deeper, it is worth experimenting with them deliberately.

Summary – Pen Tool in Vector Design: Creating a Coffee Bean Icon Step by Step
You have gotten to know the Pen tool as a central tool in vector design. With simple clicks you set anchor points and connect them into straight lines. By holding down the mouse button you shape curves, whose path you control via the drag direction. With this you build closed shapes, free designs, and finally a stylized coffee bean icon. Along the way, you learned to use fill and stroke separately and to adjust stroke width and corners deliberately. With these basics, you can now design your own logos and icons.
FAQ
How do I activate the Pen tool quickly?You press the P key or select the tool in the toolbar.
How do I create a straight line with the Pen tool?You click once on the starting point and then on the next point, without holding down the mouse button.
How do I create a curve?You set an anchor point, hold down the left mouse button, and drag the control handle in the desired direction.
Why is my curve mirrored upward?The control handle always acts in the opposite direction, so the curve is correspondingly arched on the opposite side.
How do I close a shape?You return to the first anchor point with the Pen tool, and a closed shape is created.
Which Pen tool mode should I use at the beginning?Pen mode is ideal because it lets you control the curve path best.
Why do I remove the fill for the crease of the coffee bean?A pure stroke line looks cleaner and makes the icon look clearer and more professional.
Where do I adjust stroke width and corners?You will find these settings in the Properties panel as soon as the line is selected.


