
If you want to design your own shapes in Affinity Designer, you can't get around paths. With the Pen tool and the Node tool, you build lines, curves, and closed areas exactly the way you need them. In this guide, you'll learn step by step how both tools work together, how to place and move anchor points, control curves, and combine paths using shape operations.
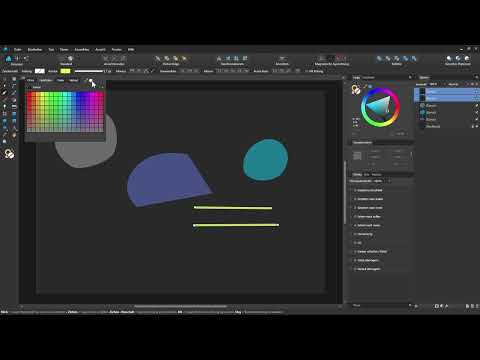
The video is only loaded from YouTube when you play it – data (including your IP address) is then transmitted to YouTube/Google. More in the privacy policy
Key Takeaways
The Pen tool creates paths by placing anchor points. A simple click creates a corner, while clicking and dragging at the same time creates a curve.
You edit existing paths with the Node tool. To do this, hold down the Control key while the Pen tool is active, and you temporarily switch to the Node tool without interrupting your drawing.
With the Alt key, you move the curve handles of an anchor point independently of each other. Without Alt, they stay in sync.
The four modes of the Pen tool (Pen, Smart, Polygon, and Line) determine whether curves are created or whether you are guaranteed straight lines.
Via the context toolbar, you convert anchor points between Corner, Smooth, and Sharp, and add or remove anchor points as needed.
The shape operations Subtract, Add, Intersect, Divide, and Combine link paths into new shapes. The order in the Layers panel determines the result.
Step-by-Step Guide
Step 1: Finding the Two Tools
Before you get started, you should know where the tools are located. You can reach the Pen tool via the corresponding icon in the toolbar or with the P key. The Node tool is activated with the A key. Both tools belong together: the Pen tool builds the path, and the Node tool reshapes it afterward.

Step 2: Placing the First Anchor Points
Select the Pen tool. The mouse pointer changes accordingly. If you click once in the image, you place the first anchor point, but no layer is created yet. Only with the second click is a curve layer created, because a path line now runs between the two anchor points. With further clicks, you continue the path.
Step 3: Closing the Path
To close a path, click the first anchor point again. When you hover over it, a small circle appears next to the mouse pointer, signaling that the path will be closed. After the click, the shape is finished.
Step 4: Readjusting with the Node Tool Without Switching
While the Pen tool is active, hold down the Control key. This switches you to the Node tool while the Pen tool remains active in the background. You can then click an anchor point and drag it to the desired position. If you drag a selection frame with the Control key held down, you select several anchor points at once and move them together.
Step 5: Defining Fill and Stroke
Your path initially has neither a fill nor a stroke. You can recognize this by the white areas with the diagonal red line. To color it, click on the fill and choose a color. If you also want an outline, activate the stroke and set the color and weight. In the upper context toolbar, you can also set whether the stroke grows outward. When moving anchor points, the fill is retained. If you want to remove a stroke, simply deselect the corresponding option again.

Step 6: Creating Curves Directly While Drawing
Corners can also be turned into curves. With the Pen tool, click on an anchor point, hold down the left mouse button, and drag. Two small curve handles appear, with which you control the curvature. You can further modify these handles with the Node tool via the Control key. If you drag one handle, the opposite handle moves in sync, so the curve stays smooth. You can also make a handle longer or shorter.
Step 7: Moving Curve Handles Independently of Each Other
If you want to control one curve handle independently of the other, hold down the Alt key in addition to the Control key while you click and drag the handle. After that, the connection is released. If you hold only the Control key, you also move a single handle independently. To synchronize the handles again, click the anchor point, hold down the left mouse button, and drag it in the desired direction. This creates a new curve whose handles respond together again.
Step 8: Drawing curved paths in one go
You don't have to place corners first and convert them later. Select the Pen Tool, click on an empty spot outside the existing path, hold down the mouse button, and pull the curve handles directly out of the first anchor point. Then click at another spot, drag again, and create a curved path in this way. A stroke is often created automatically as well, which you can remove again in the settings at the top if needed.
Step 9: Using Smart Mode
You will find Smart Mode in the context toolbar. In the default mode, Pen Mode, you have to drag the mouse to create curves. In Smart Mode, on the other hand, a simple click is enough, and Affinity Designer calculates the curves automatically. So if you click several times in a row in the image, curved lines are created without dragging. Afterwards, you can adjust these curves again by holding down the Ctrl key and using the Node Tool, move them, or give them a fill.
Step 10: Removing and converting anchor points
If you have placed too many anchor points, hold down the Ctrl key, click the superfluous point, and press the Delete key. Note that this also changes the course of the adjacent curve. You will therefore usually have to readjust the shape.
You change the type of an anchor point via the context toolbar. Select a point with the Node Tool and click "Convert to Smooth" in the "Convert" section. This turns a corner into a curve that you can adjust further. If you want a corner again, conversely, select "Convert to Sharp".

Step 11: Drawing angular shapes with certainty using Polygon Mode
Polygon Mode is a helpful tool if you want to be sure that no unwanted curves are created. Activate it in the context toolbar. Then you click and drag to place the next anchor point, and click again until you close the path. In this mode as well, you can convert individual corners into curves with the Node Tool at any time. You delete an unwanted path by dragging it onto the trash can icon in the Layers panel.
Step 12: Creating individual lines with Line Mode
In Line Mode, you create only a single line at a time. You click, drag, and release, and the line is done. If you start drawing again, another, separate line is created automatically. In the Layers panel you then see several curve layers, which you can select individually and give a stroke. You will need Line Mode less often than Pen Mode, which usually proves better in everyday use.
Step 13: Deliberately controlling open and closed paths
An open path is created when you don't return to the starting point. However, you can close it afterwards. To do this, select both end points at the same time with the Node Tool and click "Close Curve" in the context toolbar. Conversely, with a single anchor point selected, you choose the "Break Curve" option. At first, nothing happens visually. But when you move the point, you see that the path is now cut open, as if you had cut it with a sharp knife.
Step 14: Punching a hole into a shape with Subtract
If you want to insert a hole or a window into a closed path, first draw a second path over the desired spot. This automatically lies above the original. Now select both layers. To do this, select the upper path and hold down the Ctrl key while you click the lower one. In the toolbar you will then find the "Subtract" command. Make sure that the punching path is at the top in the Layers panel, otherwise the result will be different. After the click, the hole is cut into the path. The anchor points now belong to the overall path, and you can edit the hole further with the Node Tool.
Step 15: Merging paths with Add
The reverse works in the same way. Draw a path that overlaps with the shape and lies above it. Select both layers and click "Add" instead of "Subtract". Both paths are then merged with each other and form a common shape. The anchor points can be adjusted further as usual.
Step 16: Understanding Intersect and Divide
With the "Intersect" and "Divide" commands, you work with overlapping shapes. To do this, draw two circles with the Shape Tool that partially overlap, and color one of them differently. Select both and click "Intersect". Only the area where the shapes overlap remains. The two circles disappear. Undo this step again with "Undo".
Select the two shapes again and click "Divide". Visually, nothing happens at first. In the Layers panel, however, you can see three paths: the left area, the overlapping middle area, and the right area. Each of these areas can now be separated and edited individually.

Step 17: Merge Multiple Paths with Combine
If several paths are on different layers, you can merge them into a single curve layer. Select all the layers concerned, click "Combine" in the top toolbar, and the path is immediately on one layer. Note that afterwards it will only have one shared fill. You can adjust this at any time in the context toolbar.
Summary ??? Drawing Paths in Affinity Designer: Mastering the Pen and Node Tools
You have now learned how the Pen Tool and the Node Tool work together. The Pen Tool places anchor points, and the Node Tool reshapes them. With the Control key you switch flexibly between the two tools, and with the Alt key you detach curve handles from each other. The Pen, Smart, Polygon, and Line modes give you control over how curves are created. The shape operations Subtract, Add, Intersect, Divide, and Combine allow you to build complex shapes from simple paths. The best way to practice is to put together your own motifs from circles, lines, and curves.
FAQ
How do I switch from the Pen Tool to the Node Tool without ending the drawing?Hold down the Control key. You will then work briefly with the Node Tool while the Pen Tool remains active in the background.
How do I move one curve handle independently of the other?While dragging the handle, hold down the Alt key in addition to the Control key. The second handle will then no longer move along with it.
What is the difference between Subtract and Add?Subtract punches the upper shape out of the lower one. Add merges both shapes into one shared shape.
How do I remove an anchor point without losing the shape entirely?Hold down the Control key, click the anchor point, and press the Delete key. Afterwards you usually have to readjust the adjacent curves.


