

Affinity Designer 2.0 comes with several tools that noticeably make everyday work easier. Some of them replace laborious workarounds, others open up entirely new creative possibilities. In this tutorial, you will get to know the most important new features: the Shape Builder, duplicating effects, the Knife tool, the non-destructive Warp tool, the file preview when creating a new document, dragging out multiple frames, and the Style Picker.
The video is only loaded from YouTube when you play it – data (including your IP address) is then transmitted to YouTube/Google. More in the privacy policy
You don't need any prior knowledge of version 1.x for this. The steps are structured so that you can follow them directly in your own document.
Key Takeaways
The Shape Builder combines, subtracts, or intersects shapes with a click. You first select the objects and then specify the desired action.
Layer effects can be duplicated as often as you like. This way you build up multiple outlines or color layers without creating each effect from scratch.
The Knife tool creates precise cuts. With the stabilizer, clean, even lines are produced.
The Warp tool works non-destructively. Distortions can be adjusted at any time afterwards.
The preview in the "New File" dialog shows you the page orientation and formats before you create a document.
By holding down the Alt key and using the arrow keys, you duplicate objects at even intervals.
The Style Picker transfers effects, outlines, and colors to other objects.
Step-by-Step Guide
The Shape Builder: Combining Objects into One Shape
Imagine you want to design a cloud. You place several circles or ellipses next to each other and then select them all. Next, choose the Shape Builder tool in the toolbar at the top. Make sure you actually click on it, because only then are the options available to you.
In the Shape Builder, you specify what should happen. If you want to merge objects into a single shape, you choose the plus symbol. Then you drag with the mouse button held down over the objects that should grow together. As soon as you let go, the individual circles have become a continuous cloud shape.

A practical tip: If the result doesn't look as expected, first check whether the plus symbol is active. Many people forget this, and then apparently nothing happens.
Cutting Out Shapes with the Shape Builder
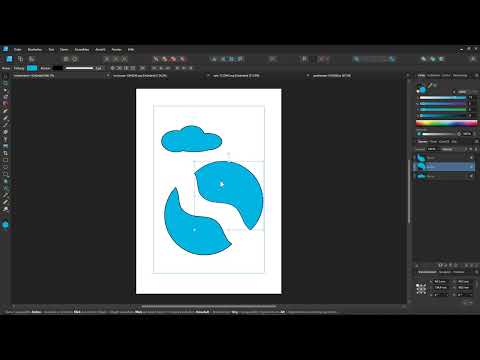
The Shape Builder can also do the opposite. You can cut a shape out of another, in other words subtract. To do this, you first create a planet. Hold down the Shift key while doing so so that the circle is even. Then you add a rectangle in a different color and place it over the planet.
With the V key, you activate the Move tool. Then hold down Shift and Alt and drag the rectangle to duplicate it. You distribute the copies so that a stripe pattern is created.

Now select all objects and open the Shape Builder again. This time you choose the Subtract action. This removes the marked areas from the objects. The result is a striped planet reminiscent of a logo.
Applying the Shape Builder to Existing Graphics
The Shape Builder also works on imported images that already contain shapes. If you already have clouds in an image, you select one of them while holding down the Shift key. Then you activate the Shape Builder and set the option to Combine.
Make sure to really activate the plus symbol before you perform the action. If you forget it, the object remains unchanged. Once the mode is correct, the selected cloud parts are combined into a single shape.

Duplicating Layer Effects
One of the strongest new features concerns effects. You can now duplicate layer effects as often as you like. To do this, select the cloud and open the layer effects via the effects symbol in the Layers panel. Choose an outline, for example, set the color to black, and enlarge the outline outward. This creates a comic-style border.

Now comes the real advantage. Click the plus icon next to the effect to create a copy. At first it looks as if nothing has happened, but the copy is already underneath. Change its color to yellow and reduce the radius slightly. Just like that, you have two outlines, a black one on the outside and a yellow one on the inside.

You can repeat this process as often as you like. For example, add a blue outline and make it slightly smaller. Then you get three colored rings.
The order of the effects can also be changed. If you want to stack the yellow outline higher up, simply move it in the list of layer effects. This way you decide for yourself which outline lies above the other.
The Knife Tool for Precise Cuts
The Knife Tool is another highlight. To try it, open a graphic with a flat motif, for example a style. Hold down the Control key and scroll with the mouse wheel to zoom in closer to the motif.
Select the object and activate the Knife Tool. Then drag a cut across the motif. Next, select the separated part and move it with the Move Tool. Now you have two separate elements that you can edit independently of each other.

Creating Fine Lines with the Stabilizer
The Stabilizer comes into play for smooth, fine cuts. You can find it in the Knife Tool options in the top bar. When you activate it, the cutting line follows your mouse pointer like an elastic band. This smooths out movements, and you get clean edges even if your hand is not completely steady.
In the options you also set the length of the cuts. Should they be short or rather long? Choose the appropriate value. For a long cut, set the length correspondingly higher.

A practical tip concerns value input. You don't have to click exactly on the small arrow icon every time. Simply hold down the mouse button and drag left or right to change the value. This is faster and feels more natural.
Using the Warp Tool Non-Destructively
In the past, a distortion was usually final. With Affinity Designer 2.0, you can undo distortions at any time or adjust them afterwards. To do this, select your motif. In the menu you will find the Warp Tool with the options Grid, Arc, or Fisheye.
If you distort a single layer, the effect applies only to that one layer. If you want to distort the entire figure, select all relevant objects and group them with Control and G. Then apply the distortion to the group.

You can also add more points to control the distortion more finely. For example, if you only want to distort a hand, place additional points at the appropriate spots and drag them in the desired direction.

The big advantage shows after you finish. Simply click outside the distortion to continue working. If you want to change something later, a double-click on the icon of the distorted group is enough. The distortion can then be edited again.

Creating New Documents with a Preview
A lot has also changed when creating a new document. In the menu, choose File and then New. The dialog now shows you a preview of the selected format, for example A4. You can see right away whether the document will be created in portrait or landscape format.

Change the values for width and height, and the preview adjusts immediately. This way you can see in advance what your document will look like. If you need a format regularly, you can also save it as a template.
Pulling Out and Arranging Multiple Frames
Duplicating shapes with the arrow keys is also practical. First, draw a rectangle with an outline. Then hold down the Alt key and press the right arrow key. A copy is created at the same distance. With the down arrow key, you create more copies in a vertical row.

Do not release the left mouse button too early. If you keep the Alt key held down, the spacing between the rectangles changes. With the Alt key held down and moving to the right, the spacing adjusts in width. This way you quickly get an evenly arranged row of shapes.

Transferring Styles with the Style Picker
The Style Picker is the last tool in this overview. It copies effects, outlines, and colors from one object to another. Select the Style Picker and click on the object whose style you want to adopt. Then click on the cloud that should receive this style.

This saves you from manually recreating outlines and gradients. It is especially helpful when you need a consistent appearance for several elements.
Summary ??? Practical Use of the New Features in Affinity Designer 2.0
Affinity Designer 2.0 extends the program with tools that above all improve the workflow. The Shape Builder combines, subtracts, and cuts shapes with just a few clicks. Layer effects can be duplicated as often as you like, which makes colored outlines and layers quickly possible. The Knife tool with stabilizer delivers clean cuts, and the Warp tool stays flexible thanks to its non-destructive way of working. The preview when creating new documents, duplicating with arrow keys, and the Style Picker round off the package. It is best to try out the features on a project of your own, and you will quickly notice where they save you time in everyday work.
FAQ
Which new feature is easiest for beginners to learn?The Style Picker is quickly understood. You click on the source object and then on the target object, and the style is adopted.
Do I always have to call up the Shape Builder via the tool icon?Yes, you should click the tool in the upper area so that the options are available. Then you select the desired action, such as Add or Subtract.
Why does nothing seem to happen after using the Shape Builder?Often the wrong action is active. Check whether you have selected the plus icon for adding before you select the objects and perform the action.
Can I use a layer effect multiple times?Yes, with the plus icon next to the effect you create as many copies as you like. You can adjust each copy separately in color, size, and order.
What does non-destructive mean for the Warp tool?The warp remains editable. You can open and adjust it at any time with a double-click, instead of applying it permanently.
How do I prevent messy cuts with the Knife tool?Activate the stabilizer in the tool options. It smooths your movements and ensures even edges.
Why should I create the group before warping?If you warp only one layer, it affects only that layer. With a group, the warp affects all contained objects at the same time.
Can I change values in the program more quickly?Yes, hold down the mouse button over the numerical value and drag to the left or right. This is faster than clicking on small arrows.
