
Imagine you place a logo in a layout and have to estimate every time where exactly the top edge lies. With grids and guides, you can do this precisely and quickly. In this basics tutorial by video trainer Marco Kolditz, you learn how to show rulers, set guides, configure grids, and adjust magnetic alignment so that objects snap exactly where you want them. Using a 100 × 100 mm document as an example, the trainer shows you every step.
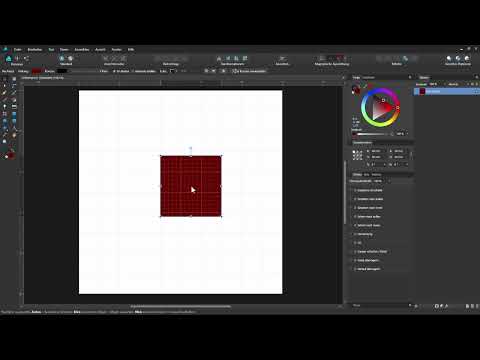
The video is only loaded from YouTube when you play it – data (including your IP address) is then transmitted to YouTube/Google. More in the privacy policy
Key Takeaways
- Rulers (Ctrl+R or View > Show Rulers) are the foundation for all guides.
- You drag guides out of the ruler by clicking and dragging, and then position them exactly using the "Configure Guides" dialog box.
- Magnetic alignment with the options "Snap to Guides", "Snap to Grid", "Snap to Page Edges" and "Snap to Object Bounds" ensures that objects snap into place automatically.
- A grid with a suitable spacing, for example 10 mm, helps you arrange objects evenly.
- The option "Snap to Visible Objects Only" is a common source of errors. Check it if objects behave unexpectedly.
Showing Rulers as a Starting Point
Before you can work with guides, you need visible rulers. To do this, press Ctrl+R or choose Show Rulers in the View menu. Scales then appear at the top and left edges of your document. You can immediately see that the zero point is in the corner and the scale ends at 100 mm, which matches your 100 × 100 mm document.

Dragging Guides Out of the Ruler
As soon as the rulers are visible, you can drag guides directly into the image. To do this, click on a ruler, hold down the left mouse button, and drag the line into the document. Release the mouse button, and the guide stays at that spot. This method is ideal when you need quick orientation, for example to roughly align objects with one another.
Aligning Objects to Guides
Guides are especially useful when you align objects to them. For example, draw a square or a rectangle and then move it around the document. Without further settings, you can only estimate the position roughly. For precise alignment, activate magnetic alignment: click the magnet icon in the top bar, open the arrow icon next to it, and activate the option Snap to Guides. When the object now approaches a guide, it snaps into place automatically. This way, for example, the top edge sits exactly on the line.
Removing Guides Again
If you no longer need a guide, you can delete it quickly. Click the line, hold down the left mouse button, and drag it outside the document. It disappears immediately. Alternatively, you can remove all guides at once via the dialog box that you will get to know in the next step.
Placing Guides Exactly via the Dialog Box
If you want to set a guide to the exact millimeter, choose Configure Guides in the View menu. In the dialog box, on the left side you see all existing horizontal and vertical guides with their position in millimeters. In the example, one line is at 29.1 mm from the top. Double-click the entry, enter the desired value, such as 30 mm, and confirm with Enter. The line moves exactly to this position, and you can then align your objects to it again.

Adding New Guides via the Icons
In the same dialog box, you can also create new guides. After removing all lines using the corresponding button, icons for horizontal and vertical guides are available to you. A click on one of these icons creates a new line, which is automatically placed in the center of the document. Here too, you can enter a precise value at any time by double-clicking, for example 30 mm again.

Dividing a Document into Quarters with Percentage Guides
A particularly quick trick is using percentages. In the dialog box, activate the unit Percent. A newly created guide then lands at 50% of the document. To divide the document into quarters, enter the value 25% for one line, 50% for a second, and 75% for a third. This creates four equally sized areas, and you can place objects deliberately in each quarter. The method works just as well for vertical guides.
Showing and configuring a grid
In addition to guides, Affinity Designer offers a grid that makes it easier for you to work with even spacing. First remove the test rectangle, then choose the entry Configure Grid and Axes in the View menu and enable the option to show the grid. In the example, the spacing is already set to 10 mm, so the document is divided into ten by ten squares with an edge length of 10 mm each. You can change the spacing at any time, for example to 20 mm. The grid adjusts immediately.

Adjusting grid subdivision and visibility
With the subdivision, you determine how finely the grid is divided within each square. A value of 5 divides each square into five smaller fields both horizontally and vertically. With a white background, however, the lines quickly appear too light. Darken the grid lines a bit via the color settings, and also adjust the color of the subdivision lines. This way the grid stays clearly visible while you work, without overpowering the layout. For more advanced settings, there are additional options, which are not covered in depth in the basic training, however.
Snapping to the grid
So that objects orient themselves to the grid, you enable the option Snap to Grid in the snapping menu. From that moment on, objects snap to the grid lines, even while you are drawing them out. If you create a square with the Rectangle tool, it starts at a grid intersection and ends precisely on another line. When moving with the Move tool, too, the object orients itself to the lines. If you want to deliberately place an object between two lines, you briefly disable snapping again.

If you hide the grid, snapping remains active nonetheless, unless you turn it off. This is useful if you want to continue editing the layout without distracting lines.

Snapping to page edges
The option Snap to Page Edges ensures that objects snap to the margins of the document. If you move a square into the upper right corner, for example, it jumps to the edge and sits exactly there. This function is usually very helpful. If it does not work for you, check whether the item is enabled in the snapping settings. If you disable it, the square can be moved freely without snapping. This can make sense if you do not want to work precisely.
Snapping to object bounds
Existing objects can also serve as an alignment aid. To do this, enable the option Snap to Object Bounds. If you draw an orange rectangle and move a second object to its edge, the new object aligns exactly to that edge. If you move it toward the center, it even snaps to the center of the object. A red guide line shows you which alignment is currently taking effect. If you disable the option, you move objects freely again, which is helpful, for example, when layering several elements on top of each other.
Snapping only to visible objects
The last setting is a common source of errors. The option Snap Only to Visible Objects is enabled by default and makes sense. It causes objects to orient themselves only to edges that are shown in the Layers panel. If you hide a rectangle, another object no longer snaps to it. If the option is disabled, snapping to hidden objects can still occur. At first glance, this looks like a bug. So if an object behaves strangely when you move it, check this setting first.
Summary – Using grids and guides correctly in Affinity Designer
Grids and guides in Affinity Designer are far more than a visual gimmick. With the rulers shown, you quickly pull guides into the document and set them to the millimeter via the dialog box. Percentage input helps you divide a document evenly. The grid provides you with a uniform framework to which objects align. Snapping with its options for guides, grid, page edges, and object bounds is crucial. You decide for yourself which snapping options you need. If you encounter unexpected behavior, pay particular attention to the option "Snap Only to Visible Objects".
FAQ
How do I show the rulers in Affinity Designer?Press Ctrl+R or choose the entry Show Rulers in the View menu.
How do I place a guide exactly at a specific value?Open View > Configure Guides, double-click the desired line, enter the value, and confirm with Enter.
How do I quickly remove a guide?Click the line, hold down the left mouse button, and drag it outside the document.
How do I divide a document into four equal parts?Set guides at 25%, 50%, and 75% by switching the unit to percent and entering the values in the dialog box.
How do I enable a grid?Choose View > Configure Grid and Axes and enable the option to show the grid.
How do I align objects to the grid?Enable the option Snap to Grid in the snapping menu.
Why does an object snap to a hidden edge?The option Snap Only to Visible Objects is disabled. Enable it again so that only visible objects serve as an alignment aid.


