
Maybe a colleague sends you a Photoshop file, you want to drag a photo straight from Explorer into your layout, or you are continuing work on a document you started yesterday. Situations like these are part of everyday life, and in Affinity Designer they can be solved in just a few steps. In this tutorial I will show you how to open files in different formats, how to place images and objects into an existing document, and what you should pay attention to when importing Photoshop files.
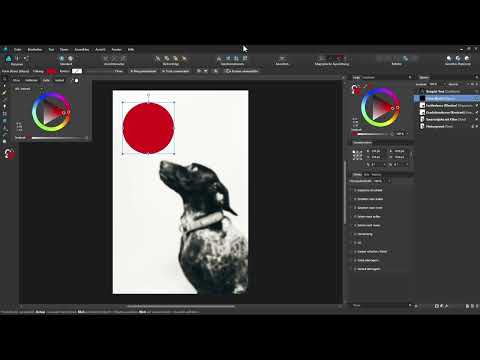
The video is only loaded from YouTube when you play it – data (including your IP address) is then transmitted to YouTube/Google. More in the privacy policy
Key Takeaways
- You open a file with the Open File command, and you bring it into an existing document with Place File or via drag & drop.
- The menu option Open Recent saves you from searching your hard drive.
- When importing Photoshop files, adjustment layers and text often remain editable, but filters such as Blur do not.
- You can edit embedded documents, and objects from Illustrator can be selectively imported as a new document.
Step-by-Step Guide
1. Load a file via "Open File"
The classic way is through the File menu and the Open File command. The familiar dialog box of your operating system appears, in which you search directly on your hard drive for the desired file. If you select it and click Open, it is loaded into Affinity Designer.

2. Recognize supported file formats
In the dialog box, at the bottom right, you will find a menu that lists all formats that Affinity Designer can open. These include its own formats, i.e. Affinity Designer documents and Affinity Photo documents, but also JPEG, PDF, Adobe Illustrator, Photoshop and GIF. This way you don't have to worry about whether a file type works in principle.

3. Open a photo as a background layer
If you open a photo in JPEG format, for example, Affinity Designer creates it as a background layer. By default, this is locked, which you can recognize by the small lock icon in the Layers panel. As long as the lock is active, you cannot move the image. This makes sense because the original image cannot be shifted accidentally.

4. Control the protection in the preferences
If the automatic lock gets in your way, open the settings via Edit and switch to the User Interface section. There you will find the option "Automatically protect background layer on import". If you deactivate it, imported images will no longer be locked in the future. For an image that is already locked, a single click is enough: select the layer and click the lock icon to remove the lock.

5. Close a document and answer the save prompt
Above the workspace, a bar with the file name appears. There you will find a small X with which you close the document. If you have made changes to it, Affinity Designer asks whether you want to save. Decide deliberately, because without saving your changes will be lost.
6. Open an Affinity Designer file
Now you open a file in Affinity Designer's native format via Open File, in the example a smiley. After opening, you see the vector shape, i.e. the face, as a separate layer in the Layers panel. Vector objects remain fully editable.

7. Place a file into an existing document
If you want to use a file in an open document, choose Place File. After selecting a photo and clicking Open, you set the image into the document with another click. Often the image is too large. In that case, you zoom out, scale it down and move it to the desired position. In the Layers panel, the placed file appears with a thumbnail and file name.
8. Replace or remove a placed image
You can recognize a placed image layer in the Layers panel by the addition "Image" in parentheses. If this layer is active, you will find the Replace Image button in the context toolbar at the top. With it you select a different image without having to rebuild the position and layer. If you want to delete a layer completely, select it and press the Delete key.

9. Placing multiple files at once
In the Place File dialog, you can select multiple files at once. If you drag a frame over the desired files while holding down the left mouse button, they will all be selected. Alternatively, click the first file and hold down the Ctrl key while you click additional files or deselect them. After clicking Open, all the images land in the document, and you can select and position them together in the Layers panel.

10. Opening files via drag & drop from Explorer
You don't always have to bother with the dialog. Select the desired files in Windows Explorer and simply drag them into the Affinity Designer program window. Each file is opened as its own document and gets its own tab at the top of the window. You can close them again using the X on the respective tab.

11. Closing individual files
A function like "Close All" currently does not exist in Affinity Designer. If you have many documents open, you have to close each tab individually using the X. So factor that in right away for extensive projects.

12. Using recently used files
If you need to continue working on a document that you worked on recently, open the File menu and choose Open Recent. The most recently used files are listed there, and a click on an entry loads it immediately. If you want to clear the list, click Clear at the bottom.

13. Opening a Photoshop file
Photoshop files can also be opened directly. To do so, choose Open File, select the PSD file, and confirm with Open. The document appears with its layers in the Layers panel. With the small checkmarks in front of the layers, you can hide and show individual layers, for example to view the background layer with the original image. We will cover layer editing in more detail in a later video.

14. Understanding the limits with filters
Here lies an important difference from Photoshop. If a blur filter was applied in the Photoshop file, Affinity Designer takes over the blur as a pixel layer. You can no longer adjust or undo the filter afterwards in Affinity Designer. So plan on correcting filters in the original file again if needed.

15. Continuing to use adjustment layers
The situation is different with adjustment layers, for example with the curves or the color balance. These remain editable in Affinity Designer. A double-click on the layer's preview opens the settings, and you can change contrast or color cast to your liking. Shape layers such as an ellipse also retain their properties, so you can continue to adjust the shape or fill color.

16. Keeping text from Photoshop editable
Whether text from Photoshop is imported as graphic text or as editable text is something you determine in the settings. Under Edit, Preferences, in the General section, you will find the option that imports Photoshop text as text instead of as a bitmap. If you enable it, you can continue to overwrite text after opening. Without this option, the text is imported as a graphic.

17. Bringing an object over from another Affinity document
If you want to bring an object from another Affinity Designer document into your current document, simply drag it in with the mouse. You will notice that the frame of the source document is also imported, even if only the small smiley was located there. This is because the document is placed as an embedded document.
18. Editing an embedded document
You can edit an embedded document directly within the document. Select it and click Edit Document in the context toolbar. You enter the embedded document, make changes, such as squashing the smiley, and then return to the main document. The change is visible there.
19. Defining the Crop Area with an Artboard
If you want only the smiley to be visible and not the entire document, choose the Artboard tool. Then, in the context toolbar under Size, set the selection as the basis and click Add Artboard. This crops the embedded document to the dimensions of the object, and you can handle it more easily in the main document.
20. Placing an Illustrator File as a New Document
For individual objects from an Adobe Illustrator file, I recommend a different method. Drag the file into Affinity Designer, but do not hold it within the existing document; hold it at the top in the area of the document tabs. Then confirm with OK, and the file opens as its own document. There, select the desired object, copy it with Ctrl + C and paste it into your target document with Ctrl + V. This way you take over exactly the object you need, and the selection frame fits right away.

21. Creating an Object as a New Document from the Clipboard
Finally, a tip for formats that do not fit your object. In the document, select the desired object and copy it to the clipboard with Ctrl + C. Then go to File and choose New from Clipboard. Affinity Designer creates a document in exactly the size of the object. If it has a transparent background and you want white, go to File and then Document Setup and deactivate the transparent background under Color.
Summary ??? Affinity Designer: Opening and Placing Files Step by Step
You have seen that Affinity Designer offers many ways to open and place files. The Open File dialog is suitable for getting started, while drag & drop and the list of recently used files are faster for frequent work. When placing, you can insert images and files in a targeted way, replace them, or edit them as embedded documents. Photoshop files can also be opened, although you can no longer adjust filters, but adjustment layers and text are preserved in many cases. With the methods for Illustrator objects and the New from Clipboard function, you are well prepared for most import situations.
FAQ
How do I open a file in Affinity Designer?Via the File menu and the Open File command, you select your file in the dialog box and confirm with Open.
How do I place an image in an existing document?Use the Place File command, select the image, and then click in the document to place it.
Why can't I move my background image?The background layer is protected by default during import. With the layer selected, click the lock icon to remove the lock.
Can I adjust a blur from a Photoshop file afterwards?Usually not. The blur is imported as a pixel layer. Adjustment layers such as Curves or Color Balance, however, remain editable.
Can I close all open files at once?No, in Affinity Designer you have to close each document individually via the X in the tab.


