
Affinity Designer Tutorial - Basics

- Affinity Designer tutorial: jump in or switch and get to know the graphic design software.
- Introduction: Find your way around the interface quickly and know the important default settings.
- Colors: How to create color fields and work with areas, contours and gradients.
- Layers: Everything you need to know about the layer principle, blending modes, effects and masks.
- Tools: Here's how it works - functionality and use of drawing pencils, vector brushes and co.
- Adjustment layers and pixel persona: How to use the features to enhance your graphic designs.
- Point by point: Affinity Designer basics in just under 7 hours by Marco Kolditz
Master the vectors! Get this basic tutorial now to create your own graphics and illustrations in Affinity Designer.
44 Videos, 419 minutes
Intro to the video training
This is what you can expect in the video training "Affinity Designer Tutorial - Basics"
1 minYou can expect a video tutorial on the basics of "Affinity Designer".
Introduction
Affinity Designer Tutorial - Basics: 1.1 | What is Affinity Designer?
5 minIn this video, trainer Marco Kolditz explains what kind of program Affinity Designer is and how it differs from Affinity Photo, for example.
Affinity Designer Tutorial - Basics: 1.2 | Preferences
23 minBefore working with Affinity Designer, trainer Marco Kolditz recommends important and useful presets in this video that make working with the program more comfortable.
Affinity Designer Tutorial - Basics: 1.3 | User Interface
18 minGet to know the Affinity Designer user interface in this video and let trainer Marco Kolditz explain how you can customize the user interface to suit your individual needs.
Affinity Designer Tutorial - Basics: 1.4 | Personas
8 minAffinity Designer offers different workspaces for different purposes. Watch this video to learn about the exact differences between the individual "personas" in Affinity Designer.
Affinity Designer Tutorial - Basics: 1.5 | Set up document
9 minAffinity Designer is particularly suitable for creating and designing documents such as flyers, business cards, posters and more. It is therefore important to know how to create a new working document with the correct dimensions and units. In this video, you will learn how to set up a new document.
Affinity Designer Tutorial - Basics: 1.6 | Open files
16 minTo be able to work with an existing document or place images within a document, you should of course know how to open and import different files in different file formats in Affinity Designer.
Affinity Designer Tutorial - Basics: 1.7 | Setting up Artboards
13 minArtboards make it easier to work with multiple documents within one document in Affinity Designer. Watch this video to learn how to set up artboards and customize them according to your needs.
Affinity Designer Tutorial - Basics: 1.8 | Grids and Guides
13 minIn this video, video trainer Marco Kolditz explains how grids and guides support you in your work in Affinity Designer and how to set them up in a meaningful and targeted way.
Affinity Designer Tutorial - Basics: 1.9 | Navigating through a document
10 minIf you are designing a complex document with Affinity Designer, it is important to know how to navigate quickly and efficiently through an open document. In this video, trainer Marco Kolditz reveals a few tricks to help you find your way around documents quickly.
Affinity Designer Tutorial - Basics: 1.10 | Save or export document
16 minAfter successfully setting up or completing a document, it is of course advisable to save the document or export it to various file formats. In this video, you will learn how to save documents in different ways in Affinity Designer.
Working with colors
Affinity Designer Tutorial - Basics: 2.1 | RGB vs. CMYK
9 minAffinity Designer allows you to work with different color formats. In this video you will learn the difference between the popular color formats RGB and CMYK and in which cases you can use the respective color format most effectively.
Affinity Designer Tutorial - Basics: 2.2 | Colors and swatches
15 minWorking with colors in Affinity Designer is essential for designing illustrations, shapes and documents in general. In this video you will learn how to mix, select and save colors and import saved color palettes.
Affinity Designer Tutorial - Basics: 2.3 | Surfaces, contours and gradients
16 minAffinity Designer allows you to work with surfaces, contours and gradients and customize them according to your needs. In this video you will learn how to use areas, contours and gradients in Affinity Designer.
Working with layers
Affinity Designer Tutorial - Basics: 3.1 | What are layers?
6 minAs in Affinity Photo, working with layers in Affinity Designer is fundamentally important and the basis for organized and structured work. In this video, video trainer Marco Kolditz explains exactly what these "layers" are.
Affinity Designer Tutorial - Basics: 3.2 | Organizing Layers
18 minIn this video, video trainer Marco Kolditz explains how to create different types of layers in Affinity Designer, use them sensibly, name them and structure them properly.
Affinity Designer Tutorial - Basics: 3.3 | Layer Blend Modes
15 minLayers can not only be moved and thus changed in their order, but also mixed together. Watch this video to find out what "layer blending modes" are and how to use them effectively.
Affinity Designer Tutorial - Basics: 3.4 | Layer Masks
10 minYou can use layer masks to hide unwanted areas of a layer and show desired parts. In this video, video trainer Marco Kolditz explains various ways of working with masks in Affinity Designer.
Affinity Designer Tutorial - Basics: 3.5 | Layer Effects
15 minLayer effects allow you to apply different effects to the layers you have created. Watch this video to find out which effects are available in Affinity Designer and how to use them effectively.
Tools
Affinity Designer Tutorial - Basics: 4.1 | Move tool
12 minContrary to its name, the Move tool is not only suitable for moving objects in Affinity Designer. Learn from video trainer Marco Kolditz what other functions this helpful tool offers.
Affinity Designer Tutorial - Basics: 4.2 | Artboard tool
4 minYou can use the artboard tool to create additional documents or so-called "artboards" within an open document. In this video, you will learn how to create and work with artboards using this tool.
Affinity Designer Tutorial - Basics: 4.3 | Pen and Node Tool
14 minAffinity Designer is a program that is particularly suitable for working with vector-based objects and paths. You can use the pen tool and the node tool to create paths. Learn how to use these tools in this video.
Affinity Designer Tutorial - Basics: 4.4 | Corner tool
5 minThe corner tool is a very useful and powerful tool in Affinity Designer for adjusting and rounding the corners of vector-based objects. Learn how to use this tool in this video.
Affinity Designer Tutorial - Basics: 4.5 | Pencil Tool and Vector Brushes
12 minUse the pencil tool and the vector brush to create freehand paths in Affinity Designer. In this video, you will learn how to use these two tools.
Affinity Designer Tutorial - Basics: 4.6 | Fill and Transparency Tool
10 minObjects can be filled with colors, gradients and images in different ways in Affinity Designer. Watch this video to learn how to use the fill and transparency tools to edit object fills and outlines.
Affinity Designer Tutorial - Basics: 4.7 | Vector Crop Tool
4 minIndividual layers can be cropped not only with the help of layer masks - this can also be done intuitively, quickly and precisely with the vector cropping tool. In this video, you will learn how to use this tool.
Affinity Designer Tutorial - Basics: 4.8 | Shape Tools
10 minAffinity Designer offers a variety of ready-made shape tools that allow you to quickly create vector objects such as rectangles, circles, stars, speech bubbles, hearts and diagrams. Get to know some of these shapes and their special functions in this video.
Affinity Designer Tutorial - Basics: 4.9 | Graphic Text and Frame Text Tool
15 minAffinity Designer offers very powerful tools for placing text - be it individual words or extensive continuous text within a frame text. Learn how to use the graphic text and frame text tools in this video.
adaptation levels
Affinity Designer Tutorial - Basics: 5.1 | Tone Correction
9 minThe "Tone correction" adjustment layer can be used to adjust an image or entire document in a targeted and convincing way. Learn how to use this adjustment layer in this video.
Affinity Designer Tutorial - Basics: 5.2 | HSL and luminosity
4 minThe "HSL" and "Luminosity" adjustment layers can be used to intuitively adjust the saturation of photos or vector-based objects. Learn how to use these two adjustment layers in this video.
Affinity Designer Tutorial - Basics: 5.3 | Recoloring and Lens Filters
4 minUsing the two adjustment layers "Recolor" and "Lens filter", the color impression of photos or vector-based objects can be changed very quickly. This allows you to play creatively with different color effects in Affinity Designer. Get to know the two adjustment layers in this video.
Affinity Designer Tutorial - Basics: 5.4 | Black & White
7 minA black and white adjustment layer can be used to convert colored photos or objects into black and white variants. This adjustment layer allows a targeted and completely individual black and white conversion using various sliders.
Affinity Designer Tutorial - Basics: 5.5 | Shadow Lights
5 minSometimes embedded images in documents appear too dark or too light, sometimes details in the shadows and highlights are no longer easily recognizable - learn in this video how to bring out details from too dark or too light areas of photos in the best possible way.
Affinity Designer Tutorial - Basics: 5.6 | Gradation Curves
9 minSimilar to tonal value correction, the contrast of photos or vector-based objects can be influenced using gradation curves. However, the gradation curve adjustment layer offers the option of proceeding in a more targeted and careful manner and even fundamentally changing the color impression of layers.
Affinity Designer Tutorial - Basics: 5.7 | Gradient Conversion
4 minWith the help of a gradient conversion adjustment layer, an image can be colored specifically and individually with selected colors. Learn how to use a gradient conversion in this video.
Affinity Designer Tutorial - Basics: 5.8 | Selective Color Correction
5 minWith the help of selective color correction, you can selectively influence the colors of a document or an embedded photo and thus achieve different color impressions.
Affinity Designer Tutorial - Basics: 5.9 | Color Balance
4 minWith the help of a color balance adjustment layer, you can selectively color shadow, mid-tone and highlight areas of photos or entire documents and thus create new color looks.
Pixel-Persona
Affinity Designer Tutorial - Basics: 6.1 | Selection Tools
9 minWith the help of various selection tools in Affinity Designer, you can select specific areas of a pixel-based layer and manipulate these areas or, for example, lift them onto a separate layer. Get to know the selection tools available via the pixel persona in this video.
Affinity Designer Tutorial - Basics: 6.2 | Pixel Tool
6 minUse the Pixel tool in Affinity Designer's Pixel Persona to create pixel-based graphics - pixel by pixel. In this video, you will learn how to prepare a document for working with the pixel tool and how to use this tool.
Affinity Designer Tutorial - Basics: 6.3 | Paint Brush Tool
7 minUse the pixel-based paint brush tool to paint on pixel layers with different brushes available in Affinity Designer. Learn how to use the Pixel Persona paint brush in this video.
Affinity Designer Tutorial - Basics: 6.4 | Dodge and Burn Tool
8 minSometimes the highlights and shadows of a photo embedded in an Affinity Designer document are not too contrasty or vivid. You can use the Pixel Persona's dodge and re-expose tool to brighten highlights or darken shadows in a photo, making it look much more vivid.
Affinity Designer Tutorial - Basics: 6.5 | Blur Tool
4 minThe blur tool in Affinity Designer's Pixel Persona allows you to "blur" or "smudge" pixels in a photo. In this way, you can achieve a painterly look so that an image appears "as if painted". Learn how to use this tool in this video.
Affinity Designer Tutorial - Basics: 6.6 | Blur and Sharpen Tool
4 minAfter you have created a document in Affinity Designer and embellished it with numerous photos, you may notice that some images appear too blurred in important areas. You can use the Sharpen tool in Affinity Designer's Pixel Persona to sharpen specific areas of a photo and the Blur tool to blur them.
Updates
New features in Affinity Designer 2.0
10 minIn this video, the new features of Affinity Designer 2.0 are presented. Among others:
1. shape designer
2. duplicate effects multiple times
3. knife tool
4. non-destructive deformation tool
5. file => new with preview of all possible formats
6. draw multiple frames
7. style pipette
You might also like

Full power, more inspirations, maximum WOW effect!

Live your layout now!

More style, more power, more templates!
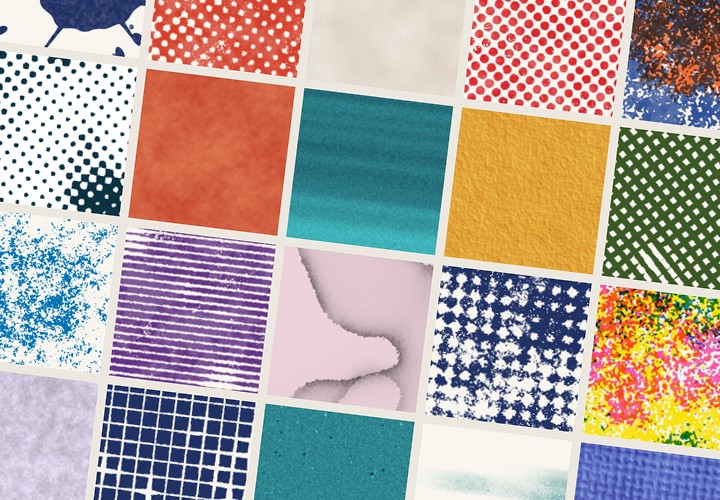
20 sets in 4K (4096 × 4096 px, 300 DPI) as JPG plus Photoshop patterns, calibrated to the fill method
Comment now „Affinity Designer Tutorial - Basics“