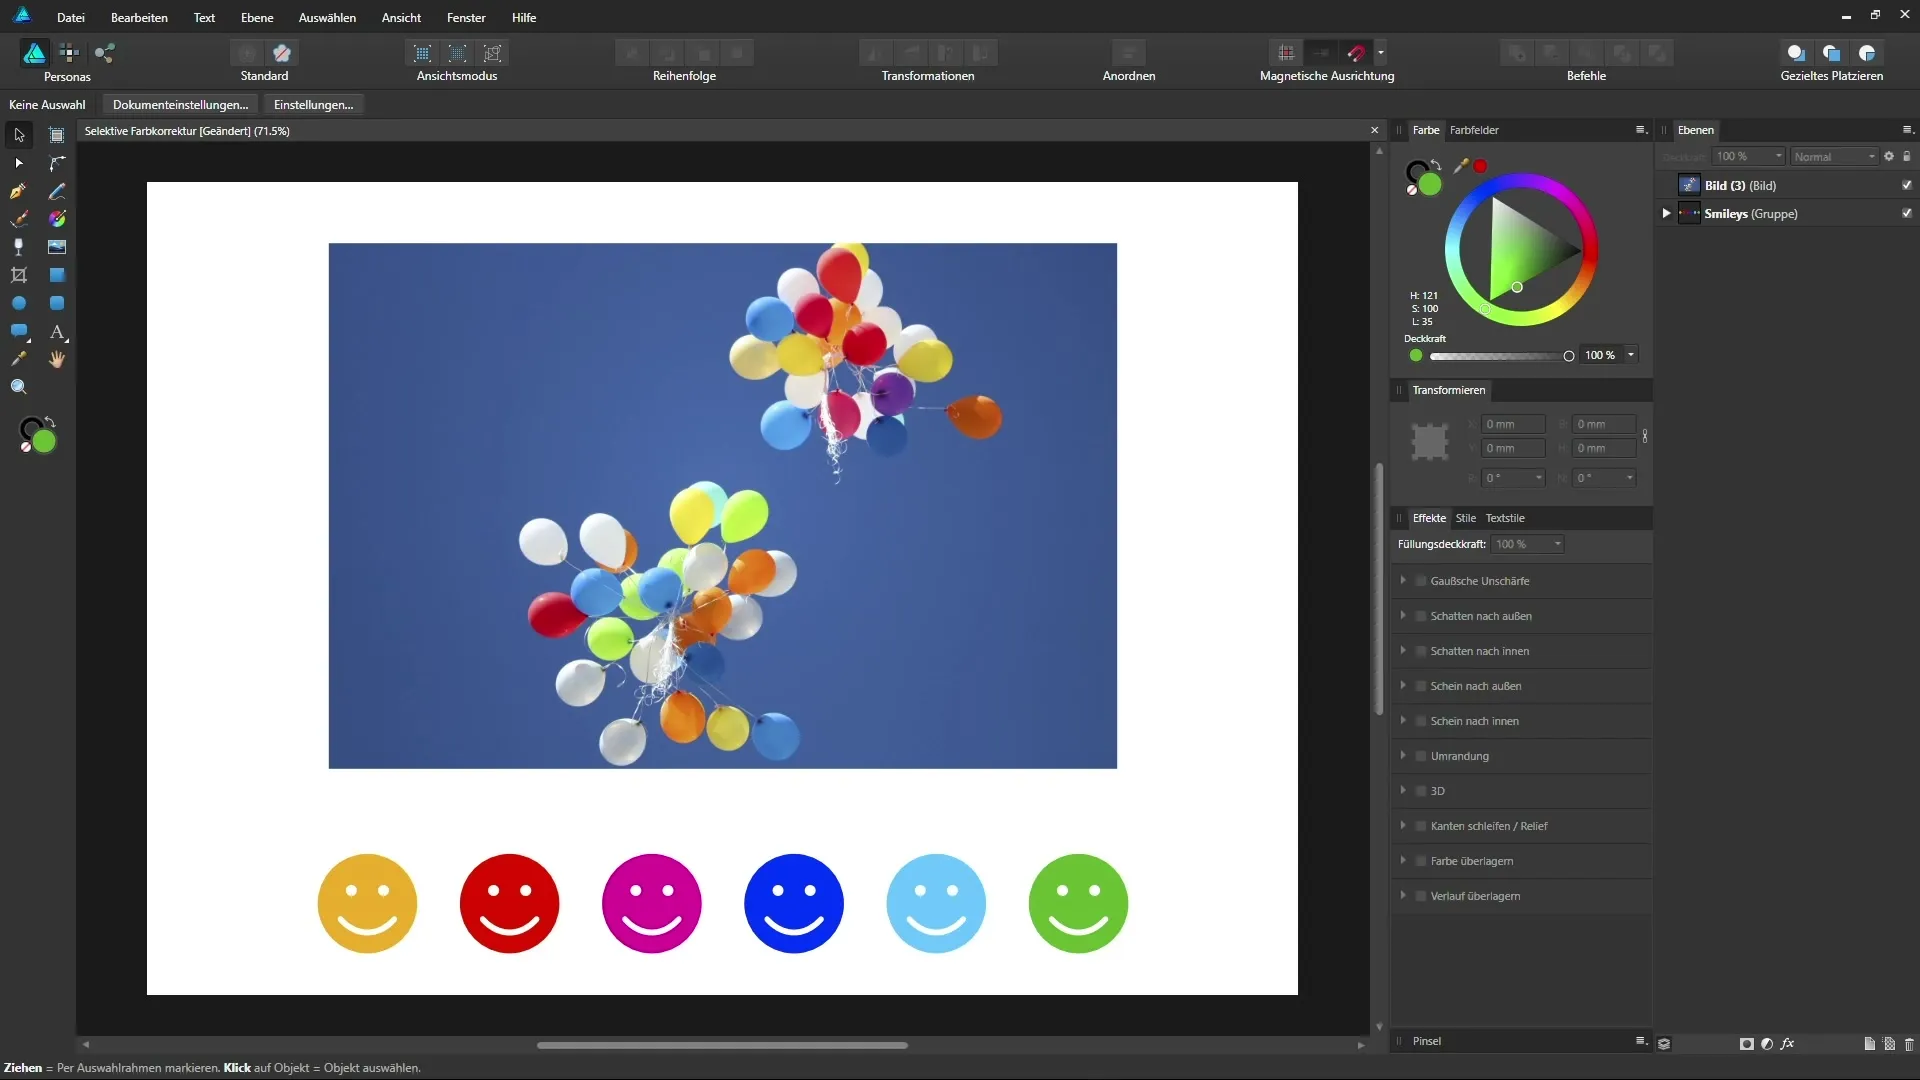
Colors mean a lot in visual communication. They can create or enhance moods and impressions. With the selective color correction in Affinity Designer, you have the ability to specifically influence the colors of a document or an embedded photo. This feature opens up the possibility for you to achieve creative and individual color effects that go beyond simple adjustments.
Key Insights
- The selective color correction allows you to specifically change certain colors in your image.
- The panel offers various sliders for hues such as red, yellow, green, and blue.
- Experiment with the sliders to get a feel for the effects and their impact on your image.
Step-by-Step Guide
Open Document and Add Color Correction Layer
Start by opening a document that contains either an image or vector objects. In this example, we will use a colorful photo with underlying vector objects, such as colorful smileys. To apply selective color correction, you need to create an adjustment layer. In the layers palette, you will find the option to add a new adjustment layer. Click on the top option and select selective color correction.

Select Color Palette
Once the adjustment layer is added, a menu with various color options will open. Here, you can specifically select the colors you want to adjust. The options include reds, yellows, greens, blues, and various neutrals and blacks. Unfortunately, you cannot precisely identify which specific hues are affected, but this can be balanced by experimenting.
Adjust Reds
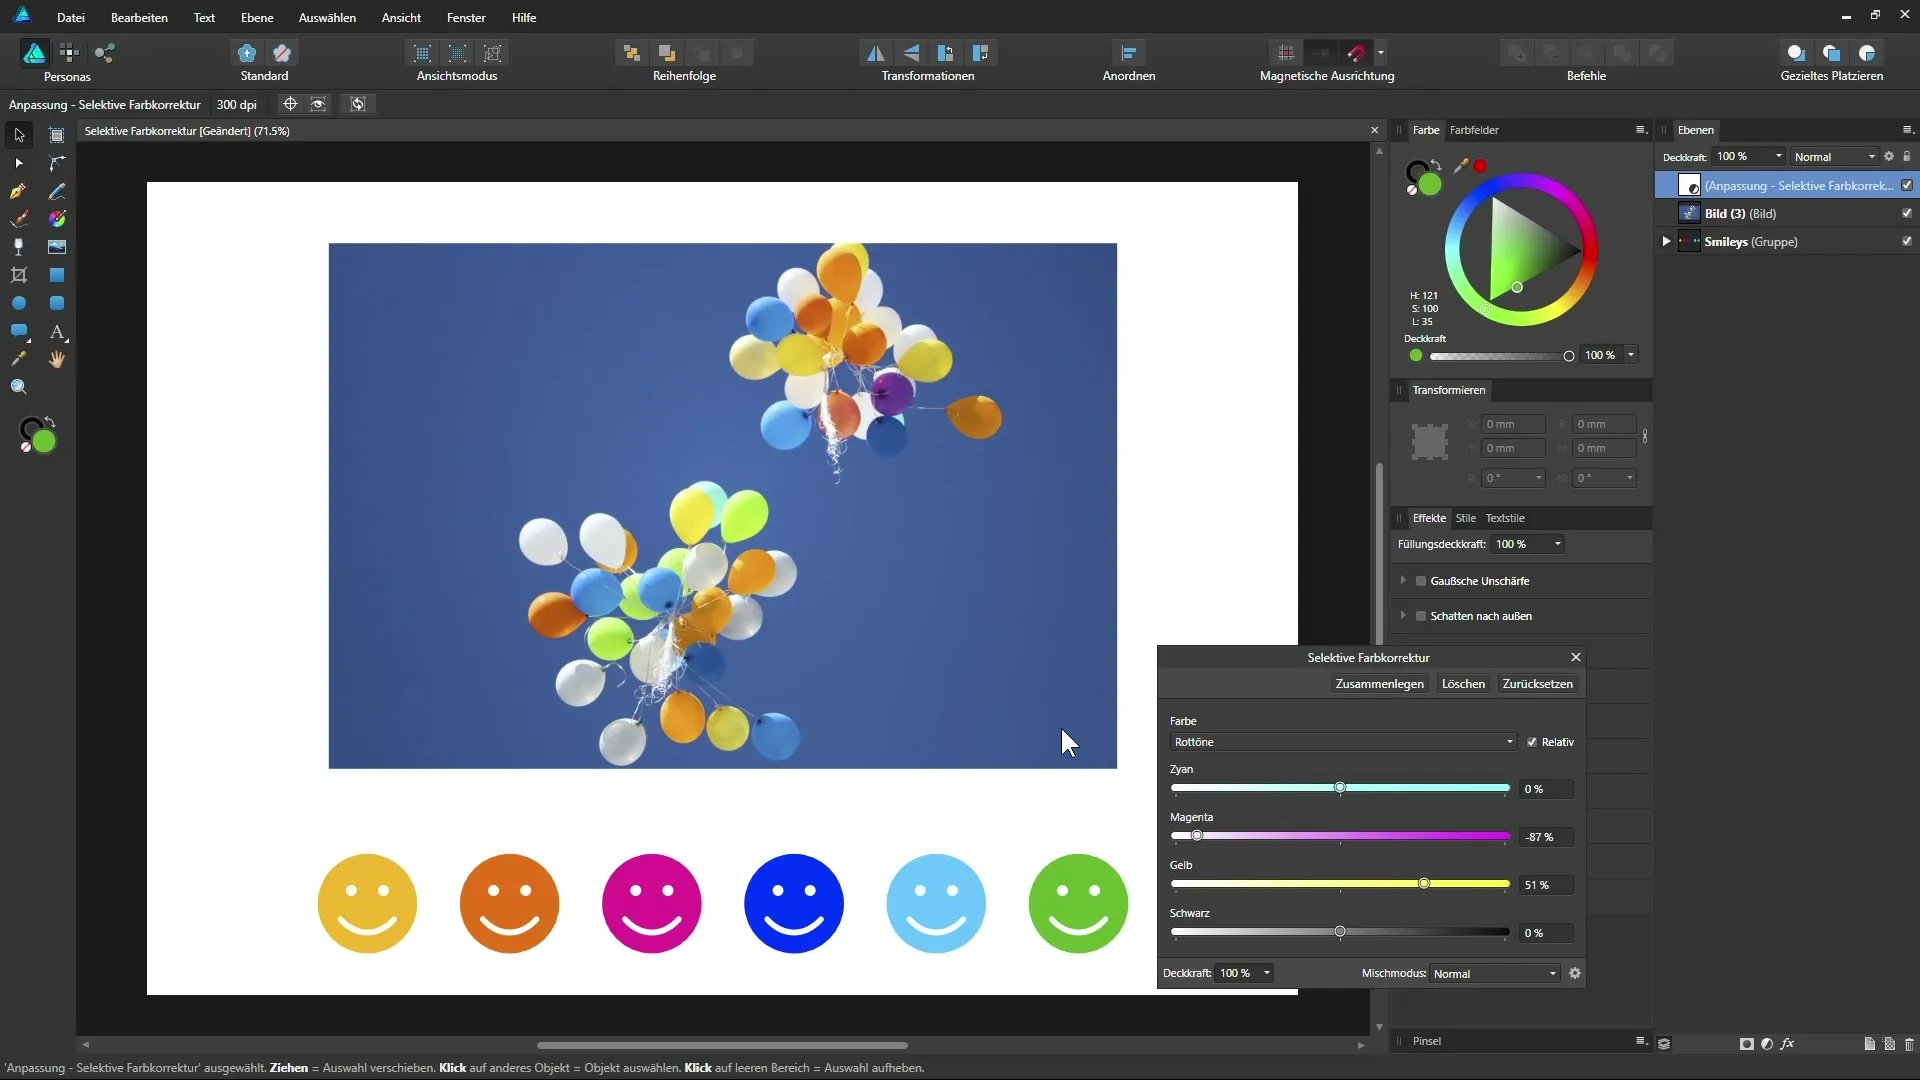
Now select the reds to influence specific elements in your image. You can move the sliders for Cyan, Magenta, and Yellow left or right and observe the effects on the image. Start by moving the sliders in both directions to get a feel for adjusting the colors. Experiment with the Magenta slider to create or tone down more intense reds. In our example, the red balloons can be intensified by raising the Magenta slider.
Adjust Yellows
After you’ve edited the reds, move on to the yellows. Here, you can work with the yellow slider to adjust brightness and warmth in the yellow areas of your image. This step is especially effective for highlighting the lighting and color nuances. Notice how increasing the yellow affects the yellow lights in your image.

Adjust Greens
Now switch to the greens. Pay attention to how your green smiley or green balloons change as you experiment with the sliders. You can try adjusting the greens towards a more vibrant, lively green or in a paler direction. It can be helpful to also look at the values for Cyan and Magenta to achieve the desired effect.
Adjust Blues
Next, go to the blues and check the adjustment options for the sky or other blue elements in your image. Adjusting the blue slider can dramatically change the atmosphere of your photo. Again, move the sliders and observe the results live.
Adjust Neutrals
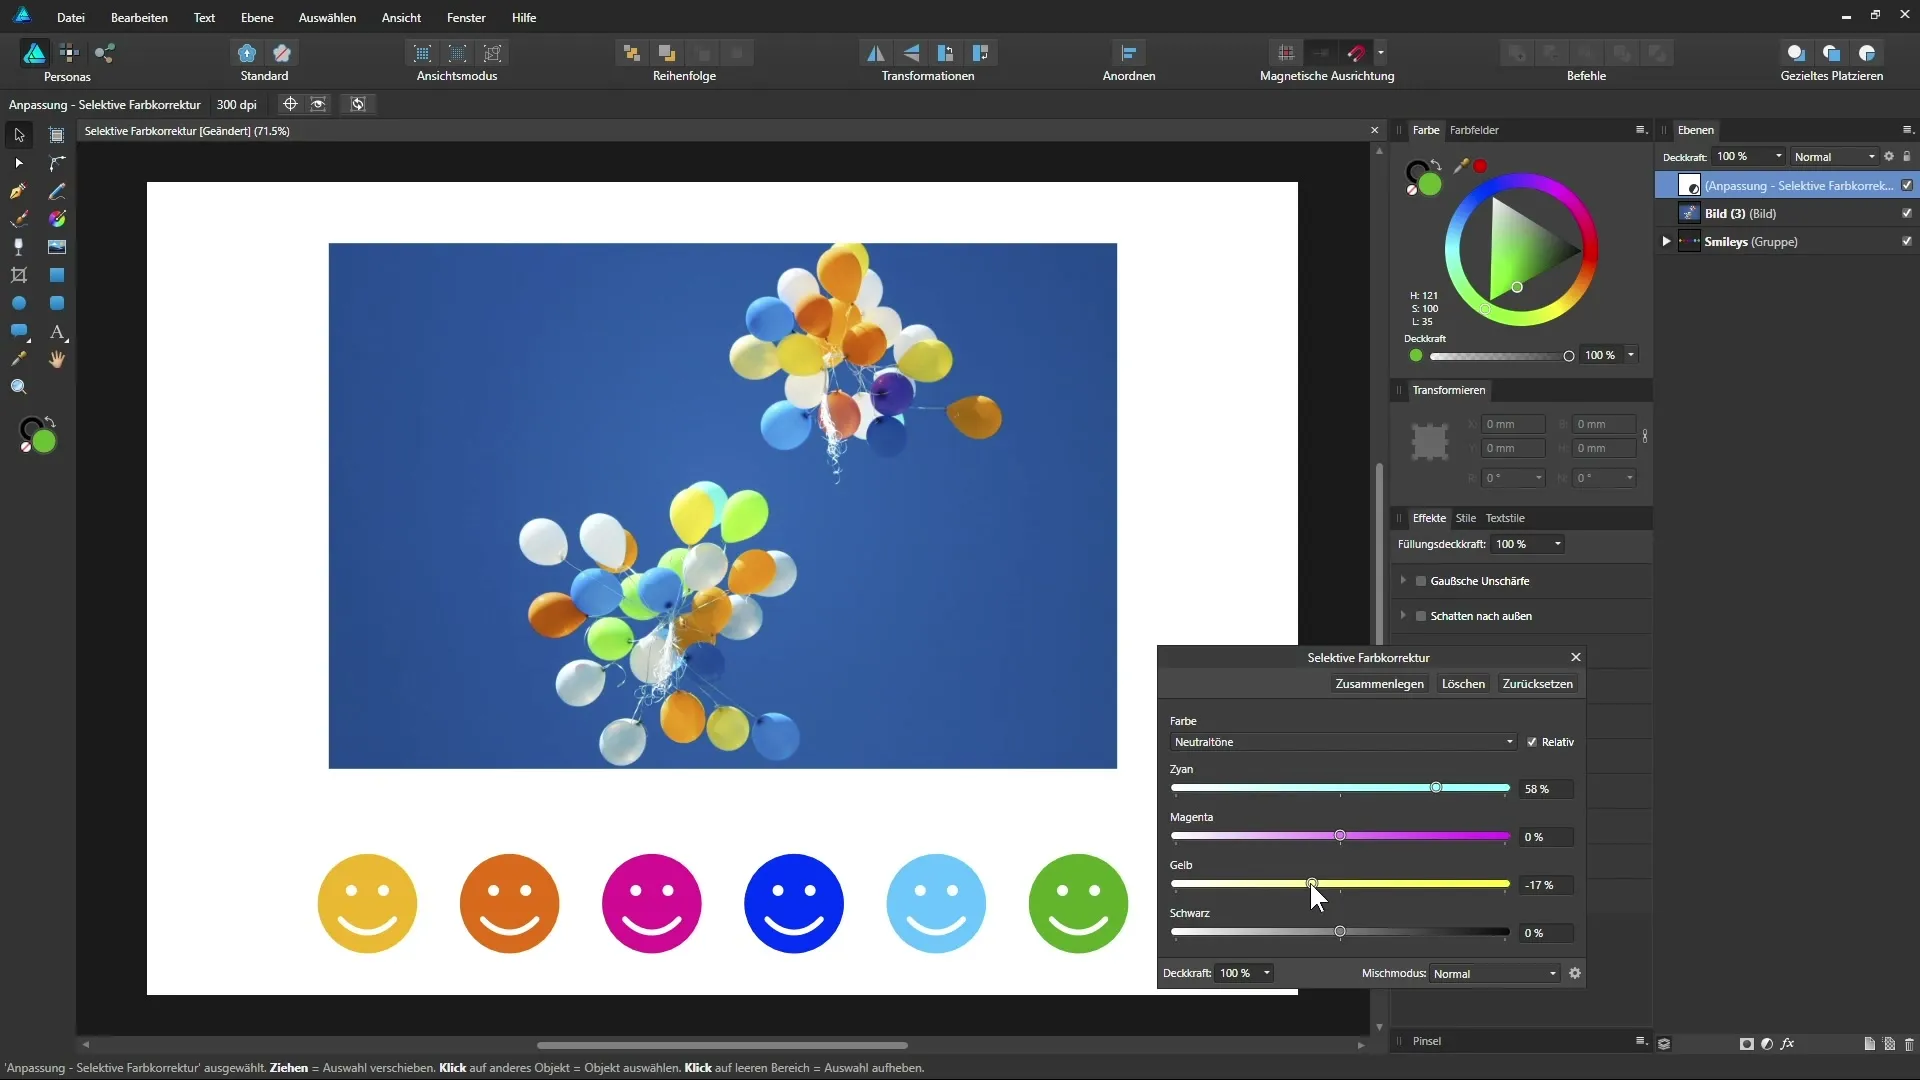
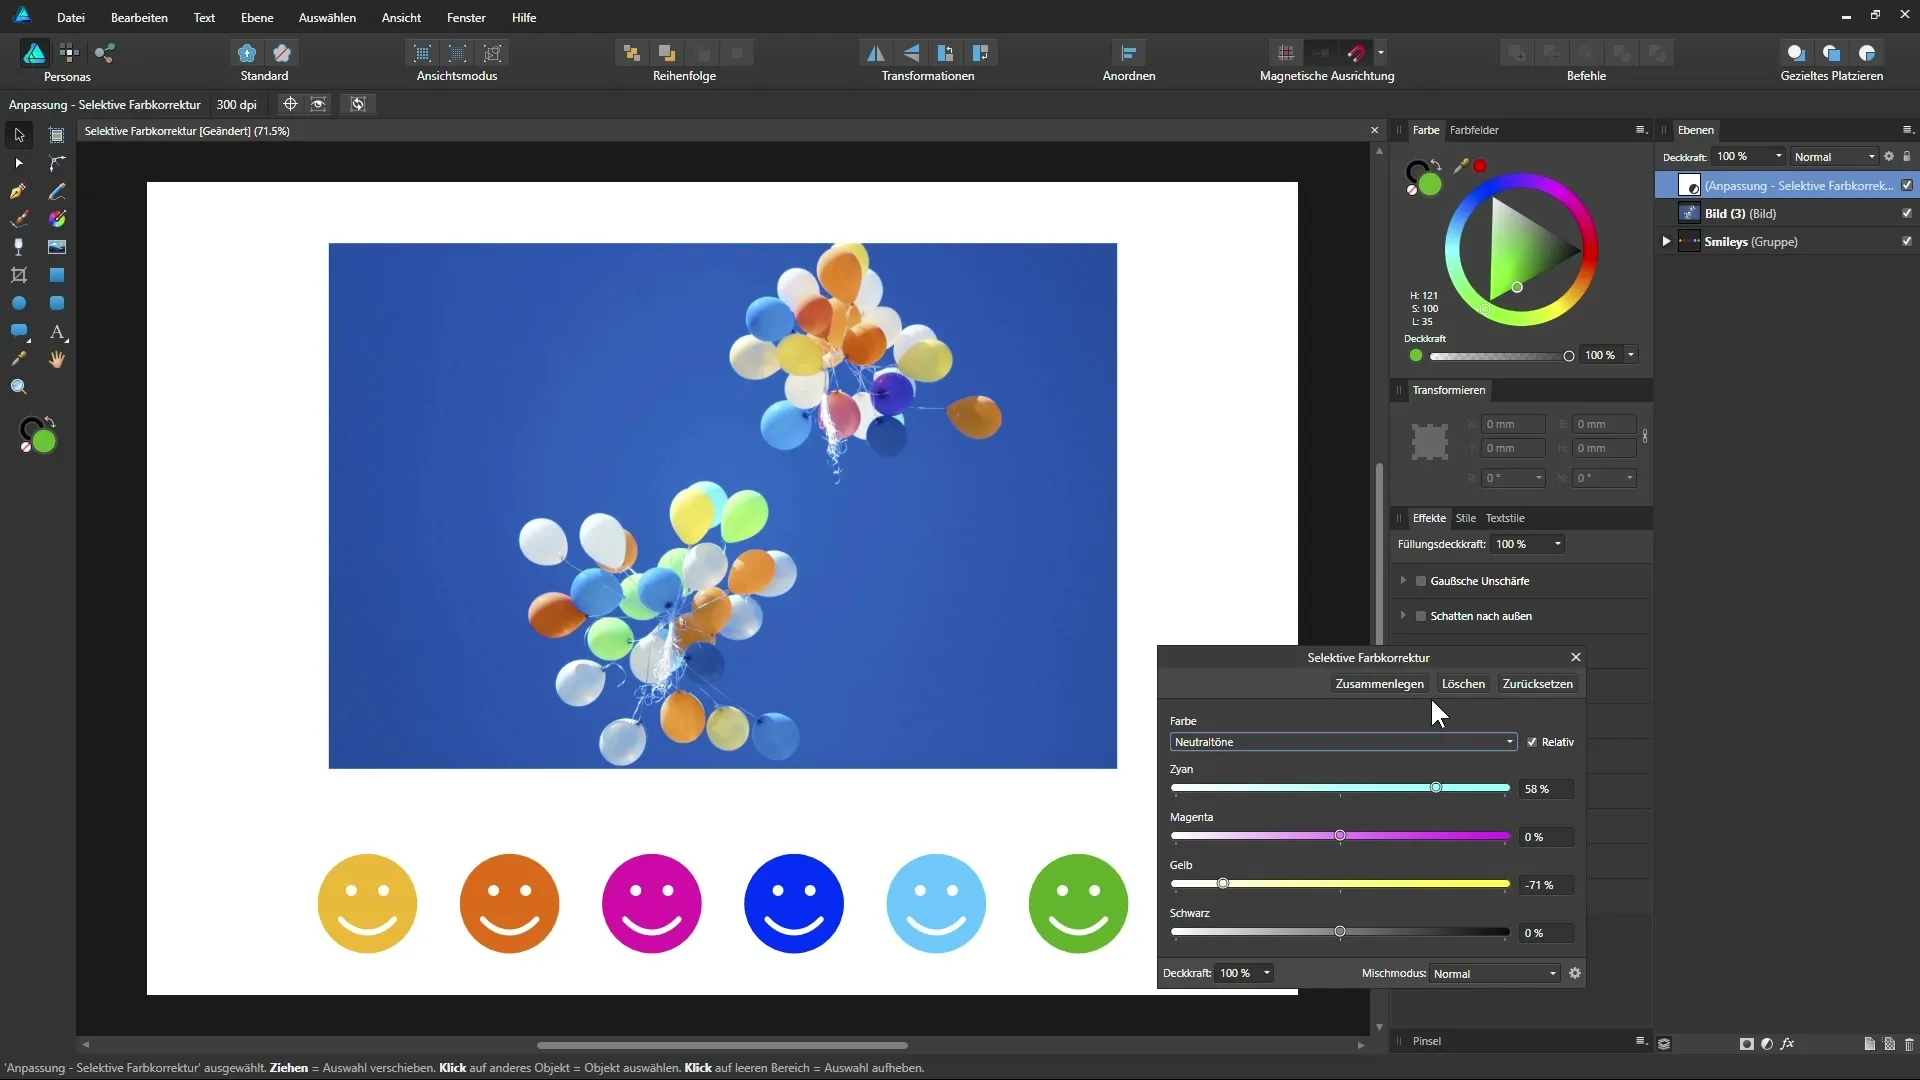
If you want to give your image a basic color change without emphasizing specific colors too much, you can select the neutrals. By adding Cyan and reducing Yellow, you can give your image a cooler or warmer character, depending on your preference.

Final Review
Once you’ve made all the desired adjustments, it’s time to look at the final result. Compare the original image with the edited image to see the effects of selective color correction. You will find that you can achieve significant changes in the color interplay through this technique.

Summary – Guide to Selective Color Correction in Affinity Designer
Through selective color correction, you have the ability to influence specific colors in your image and thus achieve various mood effects. You now have insight into the operation and possibilities of this feature as well as the individual steps to achieve the best possible results.
Frequently Asked Questions
How can I activate selective color correction in Affinity Designer?To activate selective color correction, add an adjustment layer and select the corresponding color channel.
Can I influence all colors in the image?You can selectively show or hide colors but cannot precisely target specific hues.
How do I best experiment with the sliders?Move the sliders left and right and observe the changes that occur in the image. Get used to the reactions of the colors.
How can I undo changes?Use the undo function in Affinity Designer to revert the most recent changes.
Which colors does the neutral tone adjustment affect?The neutral tone adjustment primarily affects gray tones and can be used to control the cooler or warmer tone of your image.


