Editing images is often a challenge, especially when it comes to highlighting details in areas that are too dark or too bright. In this tutorial, I will show you how to effectively use the adjustment layer “Shadows and Highlights” in Affinity Designer to improve the visibility of details in your images. Especially in documents, it is crucial to set the balance between light and dark correctly. Let's explore these techniques in detail.
Main insights
- Using the adjustment layer “Shadows and Highlights”.
- Differentiated processing of shadows and highlights.
- Ways to optimize details in photos without additional software.
Step-by-step guide
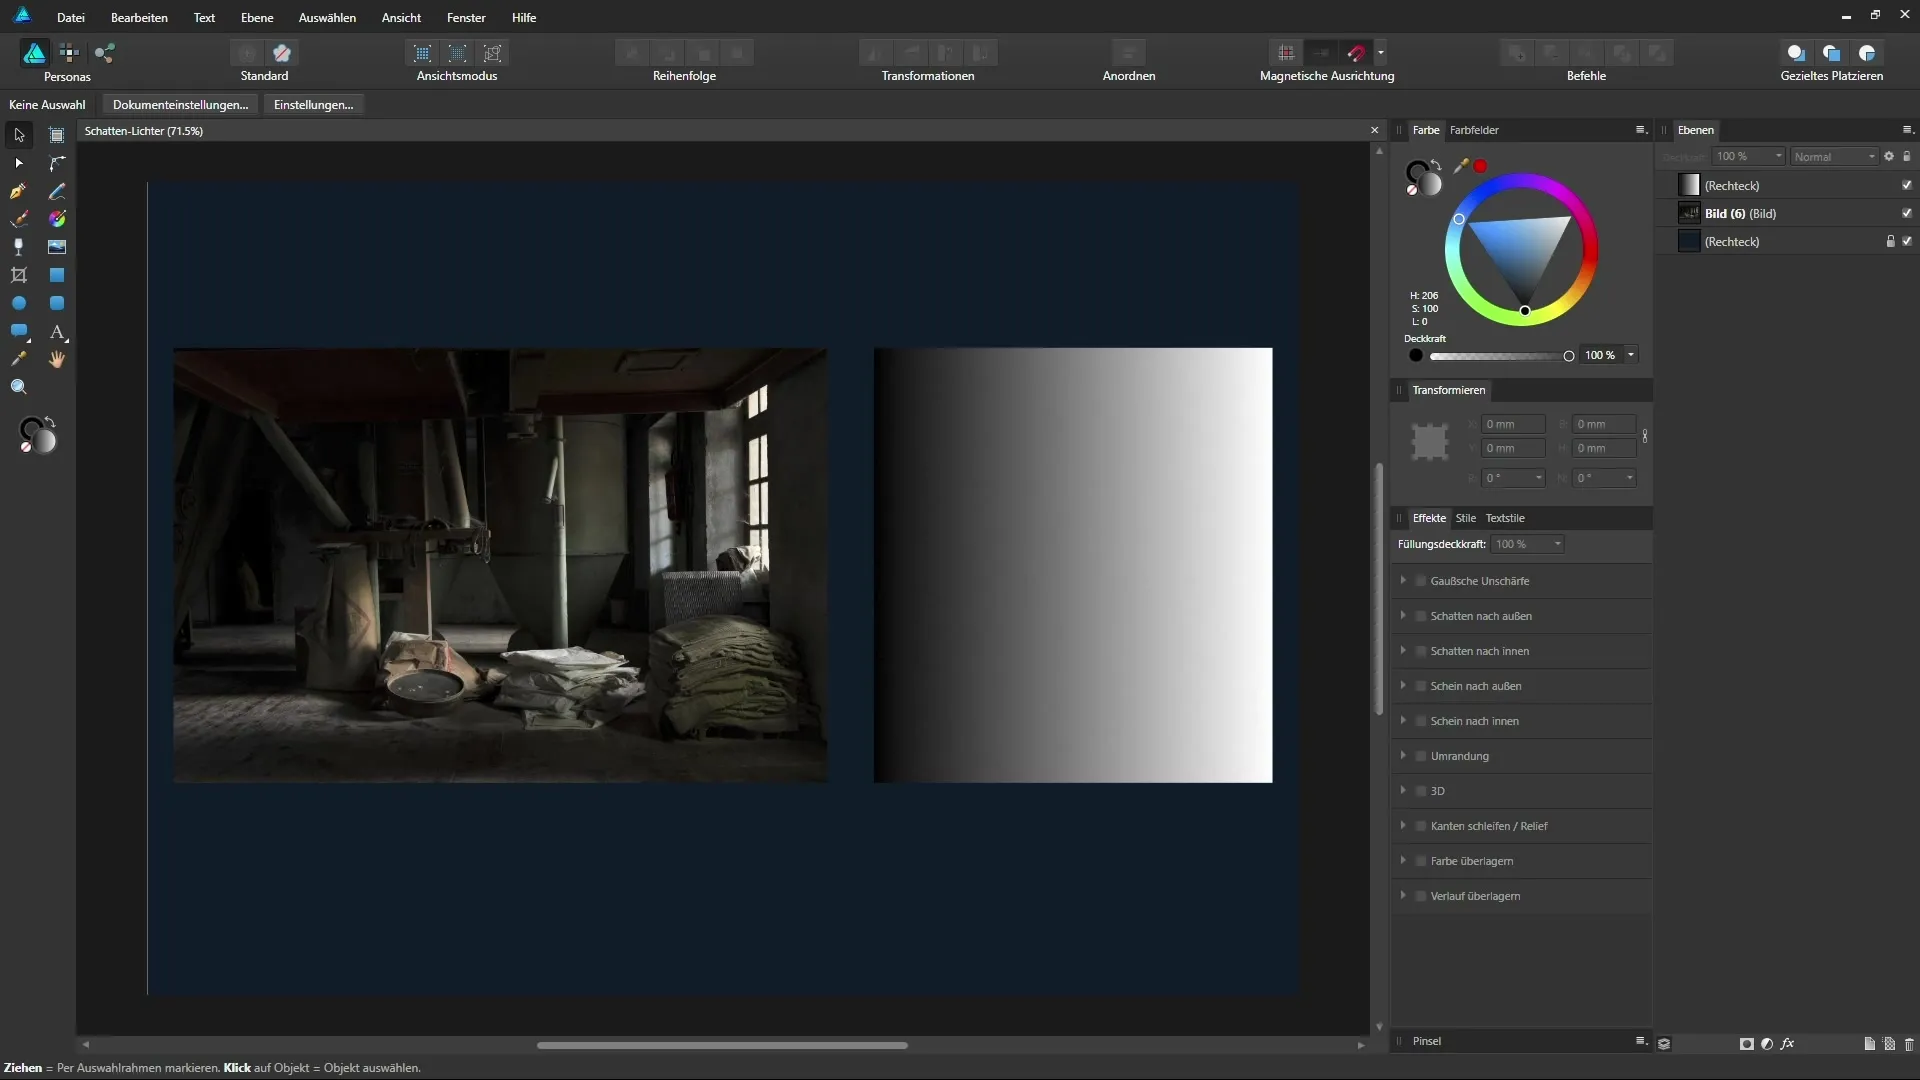
First, you need to add the adjustment layer “Shadows and Highlights” to your document. I have inserted an image into my document to show you how this process works.

Selecting the right layer
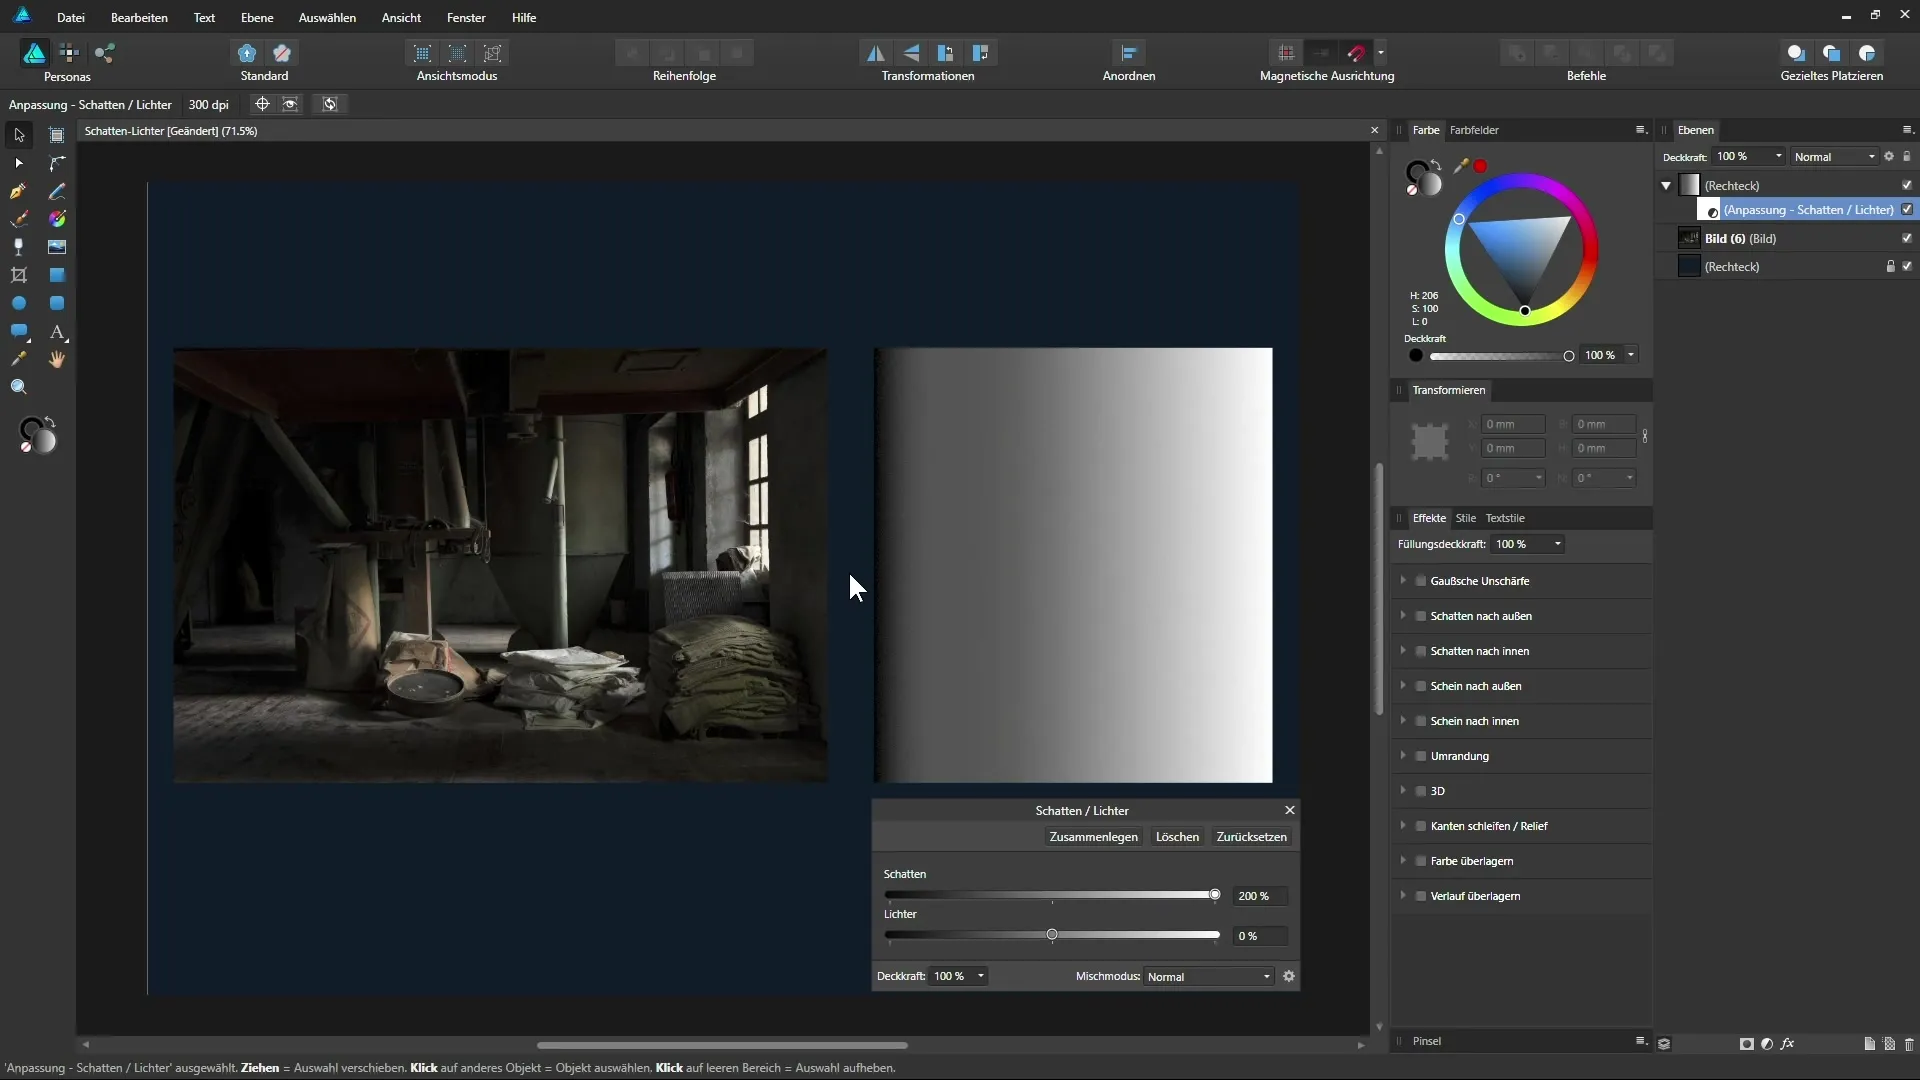
To make changes, first select the rectangle filled with a black-and-white gradient, and then go to the corresponding settings.
Before proceeding, make sure that the rectangular layer is active. This will make the subsequent adjustment setting a clipping mask, so all changes will only apply to this layer.
Adjusting the Shadows
Once you have selected the adjustment layer “Shadows and Highlights”, you can experiment with the shadow slider. Move this slider left or right to see the effects on the shaded areas of the image.
When you move the slider to the right, the shadow brightens, whereas it darkens when you move it back to the left. Note that this process primarily affects the dark image details while protecting extremely dark areas.

Adjusting the Highlights
Now it's time to edit the highlights. Move the highlights slider and pay attention to how the bright areas change. If you brighten the highlights too much, you can risk achieving white areas that would appear overexposed in a photo.
If these areas are too bright, move the slider left to reduce the brightness and bring back details in the bright areas. This is particularly helpful for improving contrasts and extracting information from the bright image areas.
Bringing out details from dark and bright areas
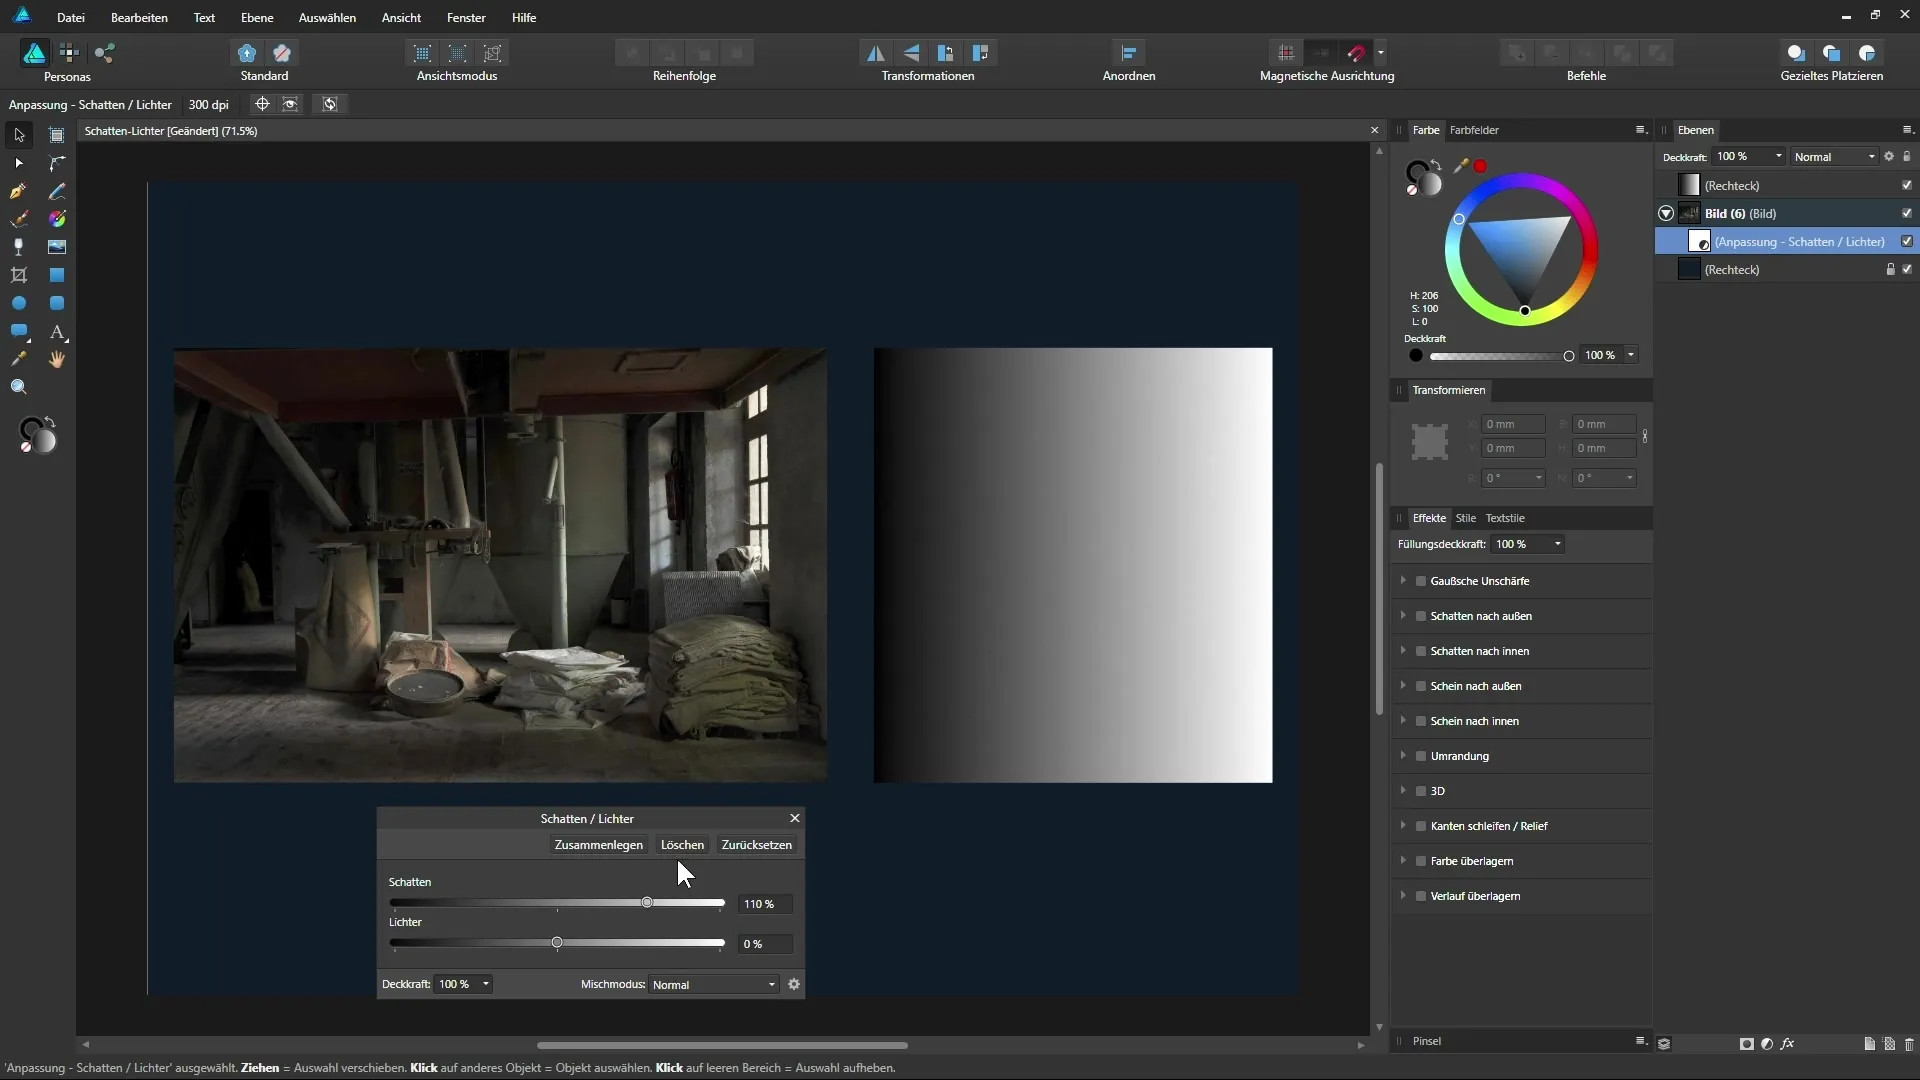
To get the most out of your images, drag the adjustment layer “Shadows and Highlights” directly to the bottom of the layers palette and return to the settings. Now you can bring out more details in the shaded areas.
By carefully moving the shadow slider forward, the entire image content is not affected, but rather only the dark areas will show more detail.

Keep in mind that the amount of details visible also depends on image quality. This heavily relies on how the photo was originally taken and whether there is sufficient information in the darker parts.
Correcting overexposed areas
If you have overexposed areas in your image, you can mitigate these using the highlights slider. A good method is to move the slider left to achieve a more natural appearance.
The goal is to balance the brightness of the overexposed spots while making details visible that would otherwise be lost.
By experimenting with both sliders, you can significantly improve the appearance of your image without needing additional image editing software. Affinity Designer provides you with all the tools you need to optimize your images.
Summary – Optimal adjustment of Shadows and Highlights in Affinity Designer
With the adjustment layer “Shadows and Highlights”, you can significantly enhance the visibility of details in your images. By working precisely with the sliders for shadows and highlights, you bring out the best in your photos and rescue lost details. You do not need additional image editing software to achieve convincing results.
Frequently Asked Questions
What is the function of the adjustment layer “Shadows and Highlights”?It allows you to highlight details in dark and bright image areas.
How can I prevent black areas from turning gray?Moving the shadow slider to the right protects dark areas.
What effects does editing the highlights have on an image?Overly white highlights lead to overexposure if not properly regulated.
Can I apply the adjustment layer to other images as well?Yes, the method works regardless of the specific content of the image.
Does Affinity Designer also support other adjustment layers?Yes, there are various adjustment layers that can achieve different effects.


