Are you facing the challenge of designing the colors of an image or graphic elements attractively and creatively? With the adjustment layer "Gradient Map" in Affinity Designer, you can do just that. It allows you to color images and vector graphics well-structured and individually with selected colors. In this guide, I will take you through the application of this function step by step.
Key insights
- The Gradient Map offers the ability to individually color tonal gradients.
- It can be used for photos and vector graphics to achieve a unique look.
- You can control the desired gradient down to the smallest detail by adjusting anchor points.
Step-by-Step Guide
To effectively use the Gradient Map, follow these steps:
Step 1: Preparing the Workspace
Before you start with the Gradient Map, make sure you have an appropriate project open. In my example, I have a rectangle as the background, over which there is a photo and a group with buttons. However, you can use any graphic you like.
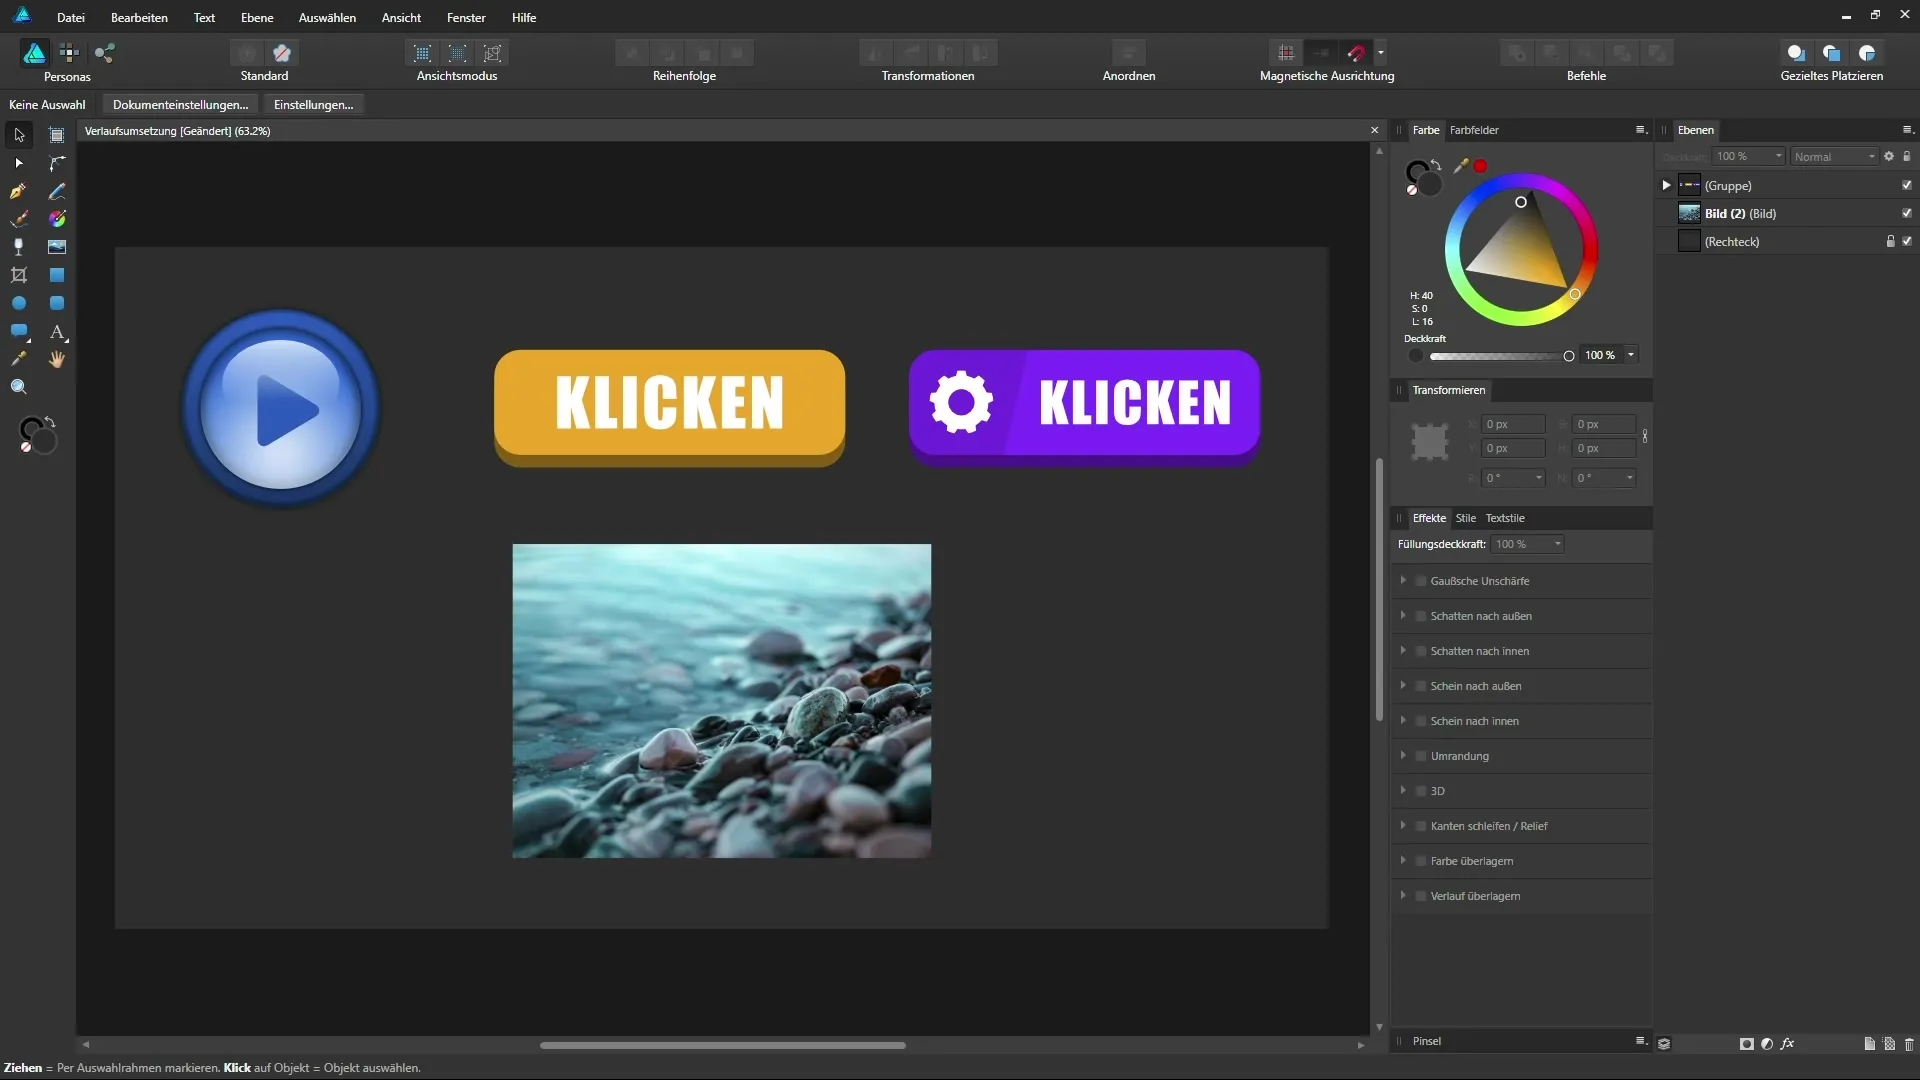
Step 2: Selecting the Elements
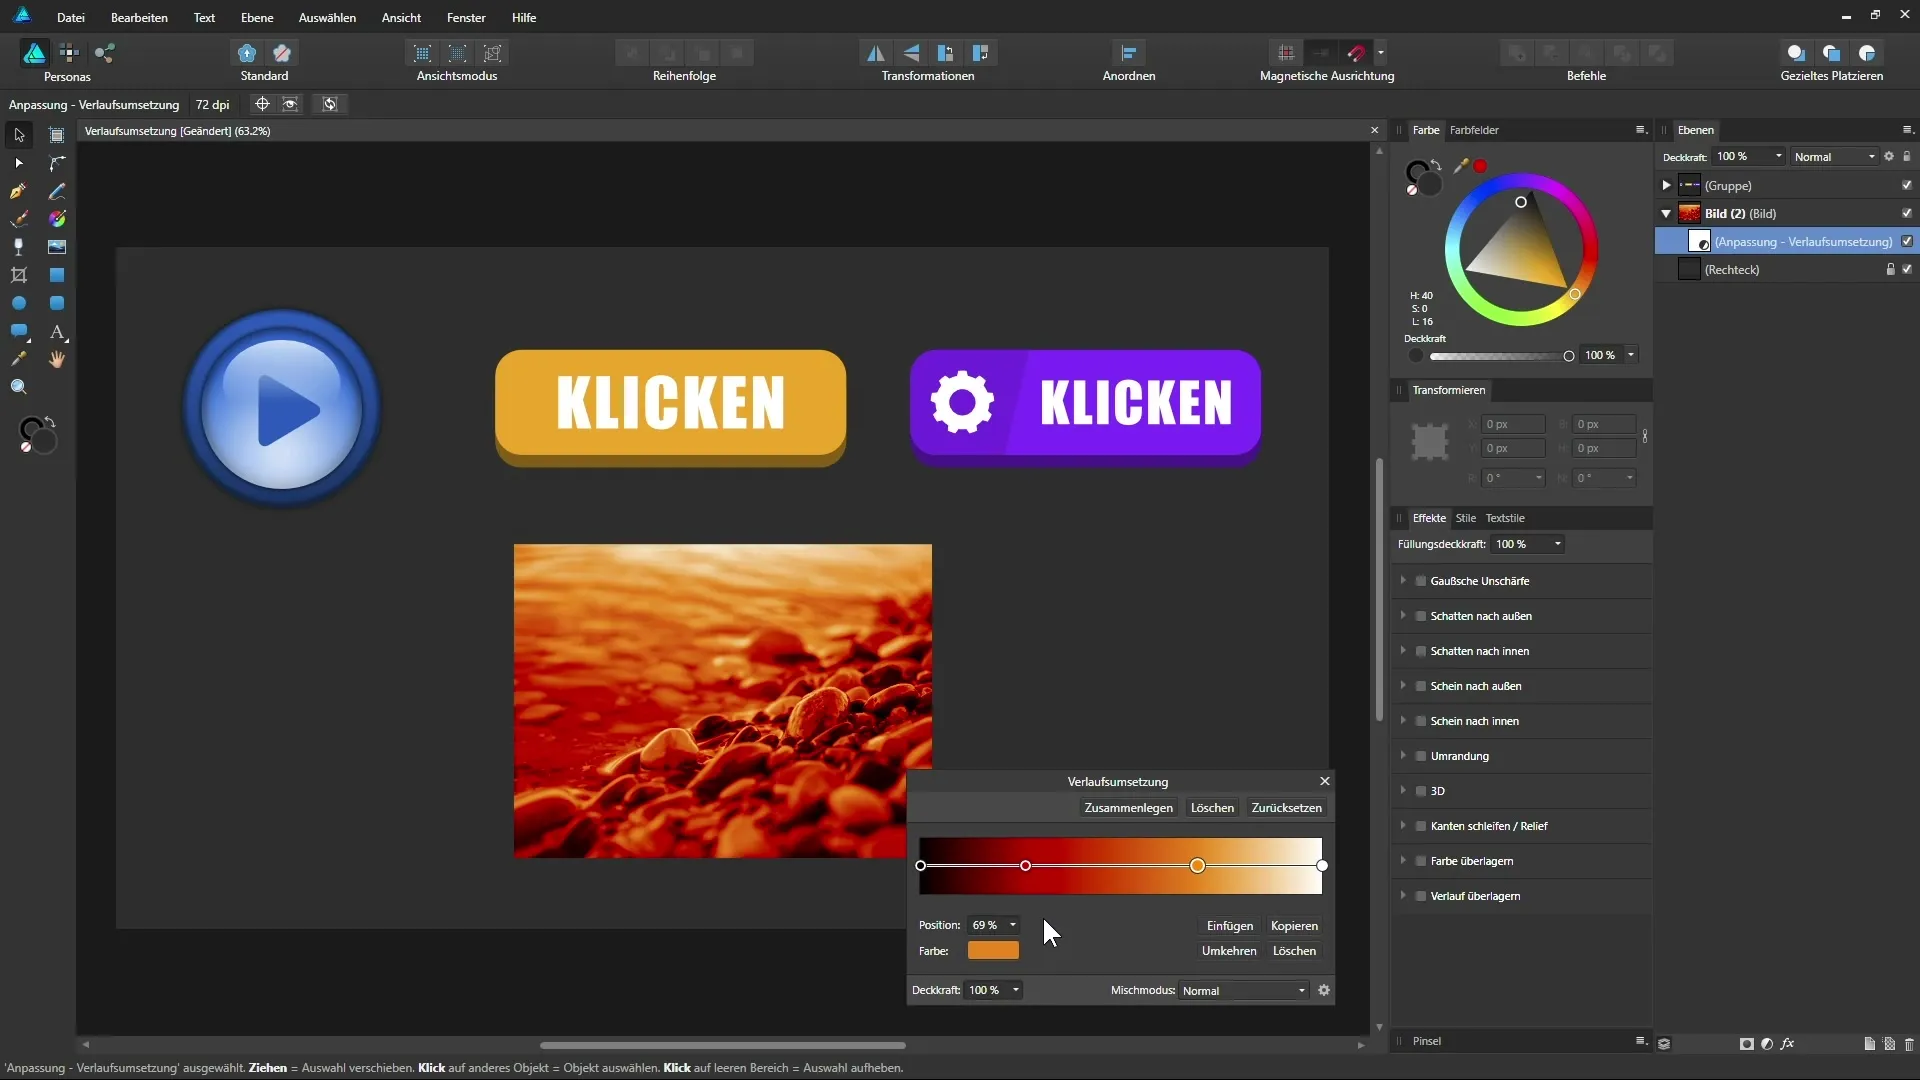
First, select the group or element that you want to influence. In my case, I chose the group with the buttons. Next, go to the adjustments and select "Gradient Map." This will apply the Gradient Map directly as a sub-layer or clipping mask.
Step 3: Adjusting the Gradient
Once the Gradient Map has been added, a default gradient appears. Now it's time to adjust this. By default, this gradient does not look particularly appealing, so start by moving the handles of the gradient. For example, you could remove the middle handle pointing to the green segment to create a simpler gradient.
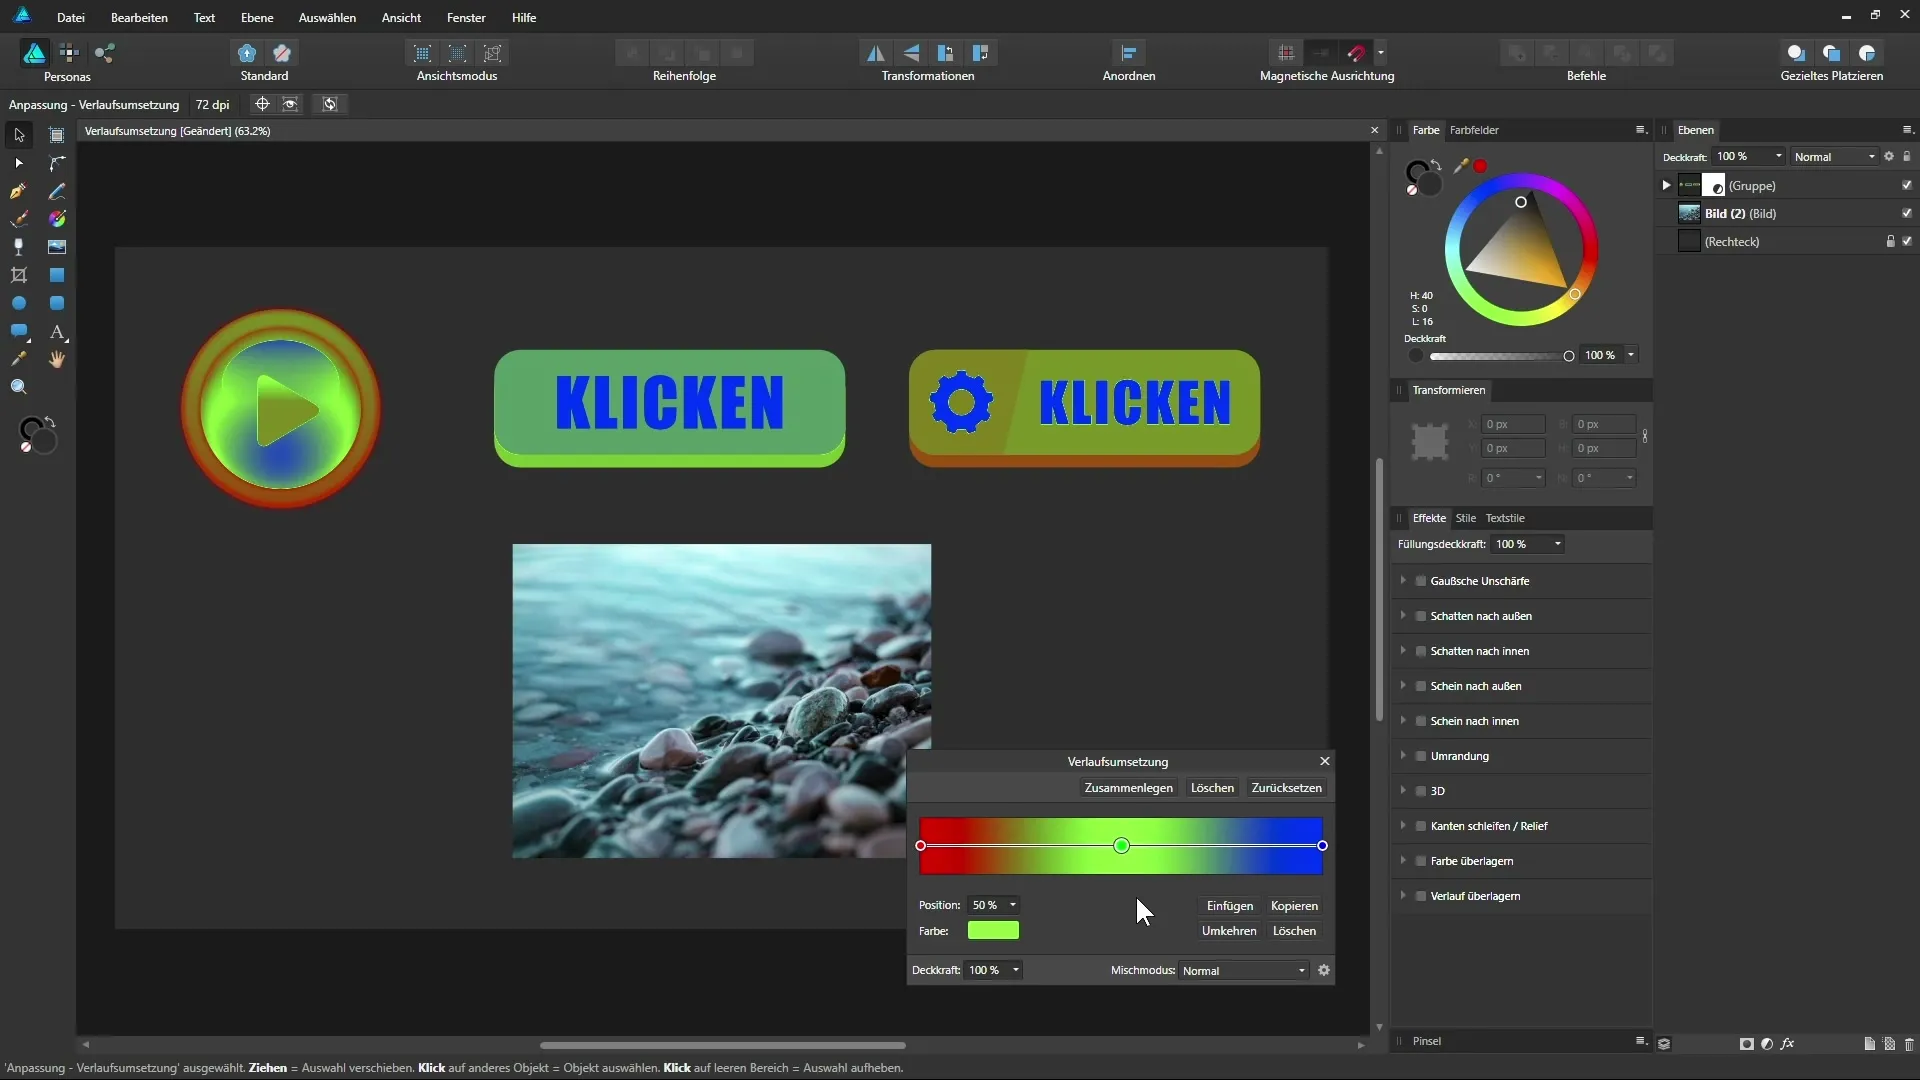
Step 4: Color Assignment
The next step involves assigning colors to the various tonal values. Consider which colors you want to use for your graphic. For example, a tonal gradient from black to white combined with the gradient might result in a pure black represented with red and a pure white represented with blue.
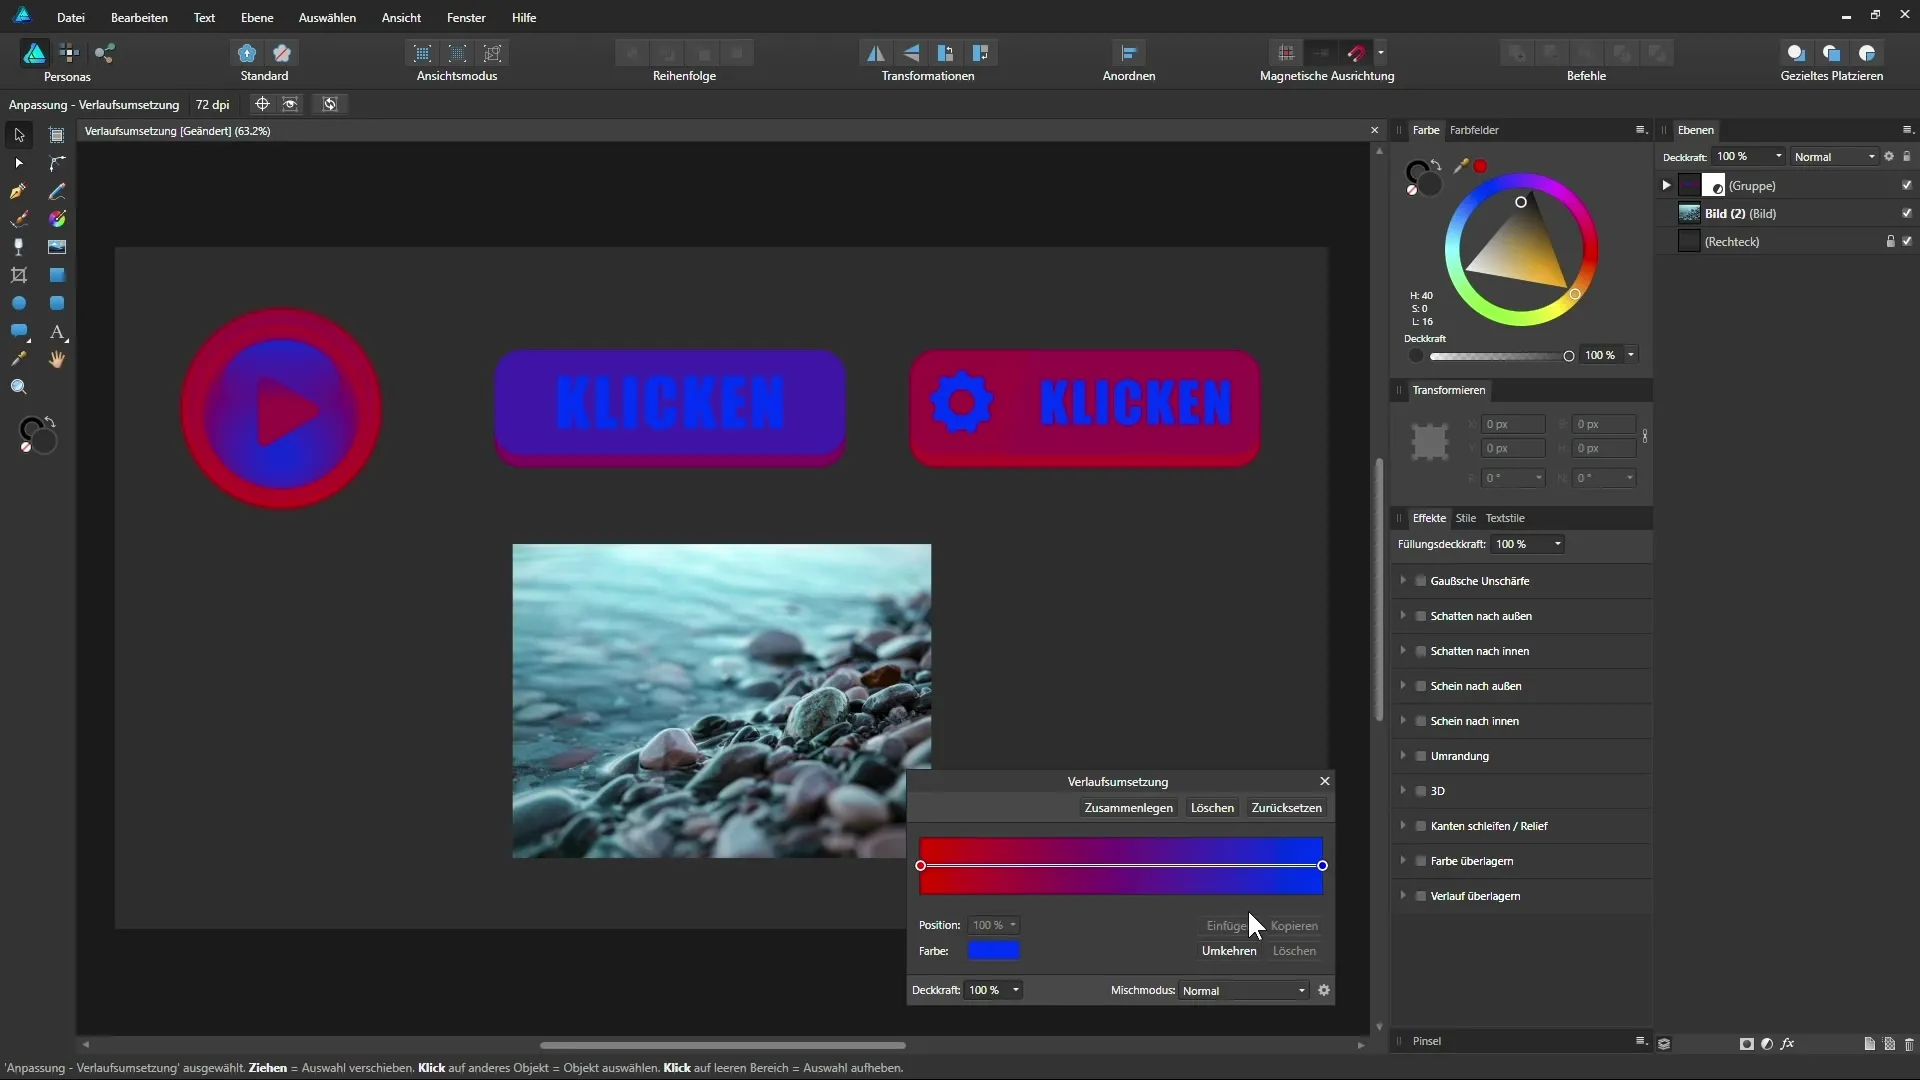
Step 5: Creating a Black-and-White Map
If you want to achieve a black-and-white map, simply set black for the darkest areas and white for the lightest areas. Click on the left handle and select black. Then go to the right handle and select white. This way, you can quickly create an appealing black-and-white image.
Step 6: Refining the Gradient
Now you can further adjust by adding additional anchor points and changing their positions. For example, you could add an anchor point for a warm orange to create an interesting color combination. Experiment with the positions of the anchor points to achieve the desired look.
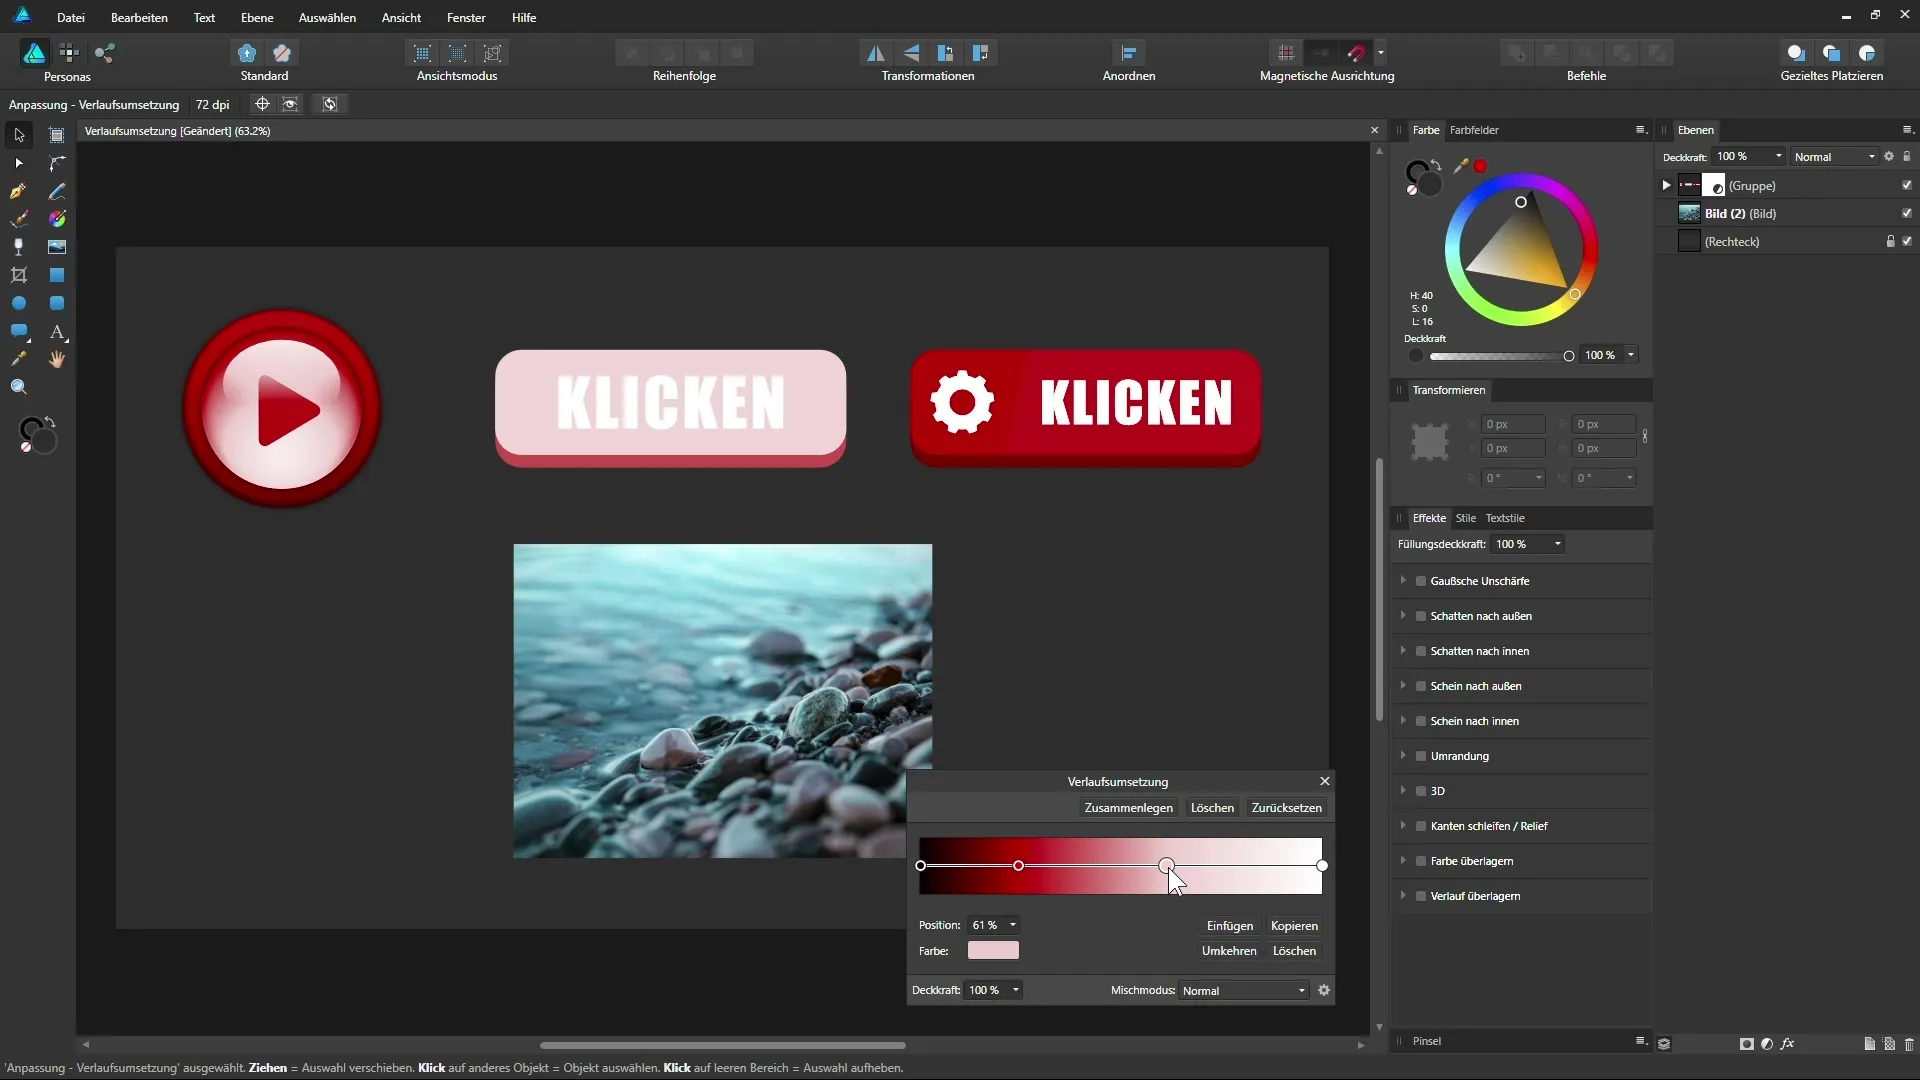
Step 7: Applying to Photos and Other Graphics
This technique works not only on buttons but also on photos. Use the designer tools in Affinity to modify the colors in your photos to your liking. You will see that the Gradient Map still only affects the group since it is applied as a clipping mask.
Step 8: Using on the Entire Document
You have the option to apply the adjustment layer to the entire document. This is particularly helpful when designing a flyer, for example, and you want to try out different color combinations. Play with the color scheme to see how the entire document looks with different colors.
Summary - Understanding Gradient Map in Affinity Designer
The Gradient Map is a flexible and creative tool in Affinity Designer, allowing you to easily change the colors of your graphics and photos. You have learned how to work with anchor points and influence the entire document to achieve the exact look you aim for.
FAQ
How do I select a group in Affinity Designer?You simply click on the group in the layers panel.
How can I adjust the colors of the gradient?Move the gradient handles and select the desired colors.
How can I apply the Gradient Map to a photo?Drag the adjustment layer to the image layer and drop it.
Can I apply the Gradient Map to an entire document?Yes, you can also apply the adjustment layer to other graphics in the project.


