
A photo often looks flat in a document, even though it actually has enough substance. The highlights are not bright enough, the shadows get lost, and the subject lacks spatial depth. This is exactly where the Dodge and Burn tool in the Pixel Persona of Affinity Designer comes in. With it, you selectively brighten highlights and darken shadows without destroying the original image.
The video is only loaded from YouTube when you play it – data (including your IP address) is then transmitted to YouTube/Google. More in the privacy policy
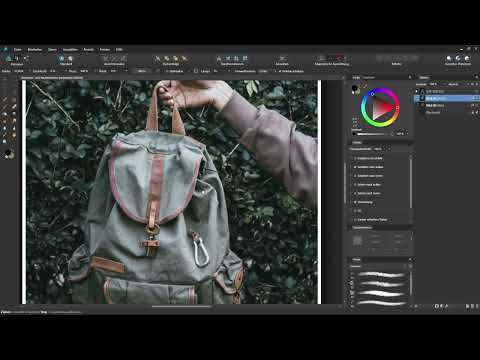
In this tutorial, I will show you step by step how to prepare an embedded photo, convert it into an editable pixel layer, and then use the brush to add light and shadow. Using a bag as an example, you will see how just a few brush strokes can make a clear difference.
Key Takeaways
- The Dodge and Burn tool works only on pixel layers. You therefore have to rasterize an image layer beforehand.
- With Dodge, you brighten highlights; with Burn, you darken shadows. The tonal range determines which area is edited.
- Low opacity, soft edges, and a fine brush tip allow you to work carefully and in several passes.
- The pressure sensitivity of your graphics tablet pen controls the brush size and makes the editing more natural.
- With the Alt key, you quickly switch between Dodge and Burn while working.
- A backup copy of the image layer and regular before-and-after comparisons help you check the result at any time.
Step-by-Step Guide
Step 1: Switch to the Pixel Persona
Before you can work with Dodge or Burn, switch to the Pixel Persona. You can recognize it by the icons at the top left in the Persona switcher. The Layers panel looks similar here to the one in the Draw Persona, but the tools are geared toward editing pixel data. To do this, select the Pixel icon in the Persona switcher, and the interface adapts.

Step 2: Create a Backup Copy of the Image Layer
Before you modify the photo, it is worth making a copy. To do this, select the image layer in the Layers panel and press Ctrl+J (Cmd+J on a Mac). The copy appears directly above it. The bracketed note after the layer name tells you that it is an image layer. If you want to insert a different photo later, you can replace the image via the context toolbar at the top. However, for editing with the Dodge tool, you need a pixel layer.
Step 3: Rasterize the Image Layer
For the Dodge and Burn tool to work on the photo, you must convert the image layer into a pixel layer. To do this, right-click the layer and choose "Rasterize". Affinity Designer asks you whether the layer effects should be applied. Confirm this if you want to keep, for example, the outline or the drop shadow. Afterwards, you can see in the brackets after the layer name that it is now a pixel layer. Then hide the layer underneath so that you keep your backup copy in view as a reference.

Step 4: Hide Distractions and Zoom into the Image
So that you can concentrate fully on the photo, hide distracting layers, such as the text layer. That way, only the image remains visible. Then zoom in closer to the spot you want to edit. Especially with fine structures such as wrinkles or seams, a higher zoom factor is helpful because you can then paint more precisely.

Step 5: Find the Dodge and Burn Tool
In the toolbar, the Dodge tool is hidden behind a shared icon with the Burn tool. You can call it up directly with the keyboard shortcut O. If you hold down the icon or switch via the context menu, you will see both tools. The Dodge tool brightens areas, the Burn tool darkens them. Both tools use the same basic settings, so it is worth taking a look at the context toolbar at the top.
Step 6: Set Opacity, Hardness, and Pressure Sensitivity
In the context toolbar, you set the brush size, opacity, and hardness. In the example, you reduce the opacity significantly so that you can work in several passes. An opacity of about ten percent is a good starting point. You leave the hardness at zero percent so that the edges stay soft and the effect blends inconspicuously into the image. If you use a graphics tablet pen, activate pressure sensitivity. Then the brush size changes depending on how hard you press. For narrow areas, a gentler pressure is sufficient.
Step 7: Select the Highlights Tonal Range
On the right side of the context toolbar, you select the tonal range you want to edit. The options are Shadows, Midtones, and Highlights. To begin with, the highlights are a good choice, meaning the areas of the image that are already bright. With the Dodge tool, you lighten these areas further and thus create bright spots that give the subject volume.
Step 8: Lighten the Highlights in the Image
Now look at the image and think about where the highlights are. On the bag, these are mainly the edges of the folds and the bright areas on its surface. Paint over these spots once with the Dodge tool. Even a single stroke with low opacity can noticeably lighten an area. If you are unsure, reduce the opacity even further. The effect builds up slowly when you paint over an area several times, and that is exactly what makes the editing controlled.
Step 9: Navigate and Adjust the Brush Size
When working on details, you often need to move the image window. To do this, hold down the spacebar and drag the image with the mouse. This only moves the view, not the layer. For areas of different widths, you adjust the brush size. This way, you edit fine folds with a narrow tip and larger areas with a wider brush. Repeat the process across all relevant areas of the photo until the highlights look more three-dimensional overall.

Step 10: Compare the Result with the Original
A before-and-after comparison shows you what has actually happened. To do this, briefly show the original layer again and then hide it once more. The differences often go almost unnoticed while painting, but they look clearly pronounced in a direct comparison. You should repeat this step regularly, because this way you avoid lightening too much.

Step 11: Darken the Shadows with the Burn Tool
Once the highlights are edited, the second part follows: the shadows. To do this, switch to the Burn tool. The context toolbar is structured similarly, but now you select Shadows or Midtones as the tonal range. For dark areas, Shadows usually work best. Paint carefully over the depths of the image, for example on the folds and lower edges of the bag. This creates a counterpart to the highlights, and the subject gains depth. The interplay of lightening and darkening is the basic principle of so-called dodge and burn. Affinity Designer also offers variants of this with separate layers, but these go beyond this basics tutorial.
Step 12: Switch Quickly Between Dodge and Burn
If you want to switch frequently between light and shadow while painting, a trick will help you. While the Dodge tool is active, hold down the Alt key. This instantly switches you to the Burn tool, and you can darken shadows. As soon as you release the Alt key, you are back at the Dodge tool and can continue working on the highlights. With this method, you work quickly and keep your flow while painting.

Summary – Three-Dimensional Photos with Dodge and Burn in Affinity Designer
You have learned how to make a photo look more three-dimensional in a targeted way in the Pixel Persona of Affinity Designer. You created a backup copy, rasterized the image layer, and lightened the highlights with the Dodge tool. Afterwards, you deepened the shadows with the Burn tool. With adjustable opacity, soft edges, pressure sensitivity, and the keyboard shortcut O, you keep control over every stroke. The before-and-after comparison shows you your progress at any time. Use this technique for product photos, portraits, or textures where you need more depth.
FAQ
Do I always have to rasterize the image layer before working with the Dodge tool?Yes, the Dodge and Burn tool only works on pixel layers. You convert an image layer into a pixel layer via right-click and "Rasterize".
Why should I create a copy of the image layer?The copy serves as a backup and reference. You can compare between the original and the edited version at any time and, if needed, return to the unedited photo.
What opacity makes sense for getting started?A value of about ten percent is well suited for the beginning. You then build up the effect with several careful strokes instead of editing too heavily in a single pass.
What does pressure sensitivity do with a graphics pen?It adjusts the brush size to the pressure of your pen. This allows you to edit fine details with light pressure and larger areas with firmer pressure.
When do I use the tonal ranges Highlights, Midtones, and Shadows?You edit highlights with the Dodge tool to lighten bright areas. You darken shadows with the Burn tool. Midtones are suited for transitions and finer gradations, depending on what effect you want to achieve.
How do I switch quickly between Dodge and Burn?While the Dodge tool is active, hold down the Alt key to switch to the Burn tool. When you release the key, you work with the Dodge tool again.
How do I navigate in the image without moving the layer?Hold down the spacebar and drag the image with the mouse. This only moves the view; the layer remains unchanged.


