
Layers are the foundation of every structured design in Affinity Designer. Once you have understood them, you can revise designs at any time without starting from scratch. This tutorial guides you step by step through the concept, shows you adjustment layers, shapes, text, and the order of layers, and explains why non-destructive working is so worthwhile.
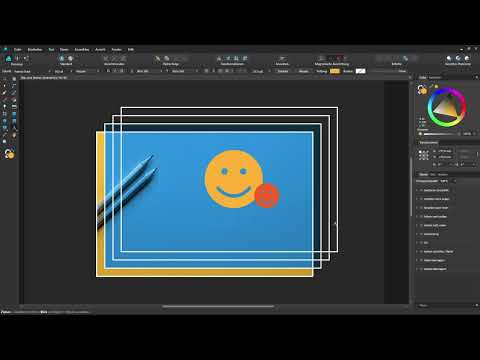
The video is only loaded from YouTube when you play it – data (including your IP address) is then transmitted to YouTube/Google. More in the privacy policy
Key Takeaways
Key Takeaways
- Layers work like transparent sheets stacked on top of each other. Each sheet can carry its own content.
- Adjustment layers change the layers beneath them without destroying their original data.
- The order of the layers determines what appears in front and what appears behind in the document, and it can be changed at any time.
- Text layers remain editable, so you can still adjust content even weeks later.
- Knowledge from Affinity Photo can be transferred directly to Affinity Designer.
Step-by-Step Guide
Step 1: Understanding the Principle of Layers
It is best to imagine layers as transparent sheets that you can stack on top of each other, as many as you like. Each sheet can be filled independently of the others, for example with a photo, a shape, or a text. You decide for yourself what ends up on which sheet. This way, your document stays organized, even if it contains many elements.

Step 2: Using a Photo as a Background
A photo that you place as the bottom layer is a good starting point. It serves, so to speak, as the background of your document and is displayed in the layer stack as a photo layer. From this image, you build up your design. If you do not like the color scheme, you do not have to re-import the photo. You change the effect via a layer that lies above it.

Step 3: Creating an Adjustment Layer for Recoloring
For many image corrections, you do not have to switch to a separate image editing program. Affinity Designer offers adjustment layers for this. For the color change, you use the "Recolor" adjustment layer and place it directly above the photo. The image then appears bluish, although the original file remains unchanged. The adjustment layer thus acts like a filter lying over the photo.
Step 4: Using the Adjustment Layer Non-Destructively
The real advantage becomes apparent when you edit the adjustment layer again. You can hide it at any time to see the original image, and show it again as soon as you want the effect back. In addition, the color can be changed afterwards via the layer's settings. Since the photo itself is not touched, every change remains reversible.

Step 5: Creating a Smiley on Its Own Layer
Now you add a shape to your document. You can draw a smiley with the shape tools or with paths. What matters is that you create it on a new layer. This way, it stays independent of the photo and the adjustment layer. Above the photo and the adjustment layer, the orange smiley sits at the top of the stack until you move it.
Step 6: Rearranging the Layer Stack
The order of the layers determines the display. If you want to place a second, smaller smiley next to the large one, you put it on its own layer. Whether it appears in front of or behind the large smiley is determined by dragging in the layer list. If you drag a layer below another, it slips behind it. If you drag it above, it appears in front. This way, you can correct the order at any time.
Step 7: Adding a Text Layer
Finally, you place a text layer at the very top above the image. Here you can enter a sample text such as "Hallo". The advantage: the text layer remains editable at any time. You can swap words, change the font, or move the text to another position without affecting the other layers.
Step 8: Revising the Document Later
A big plus of the layer concept becomes apparent when you open the document again later. If after some time you no longer like the blue, you simply open the adjustment layer and choose a reddish tone. This fundamentally changes the look of your document without affecting the smiley, text, or photo.

Step 9: Recognizing the Difference from Destructive Editing
Imagine you had carried out all the work steps directly on the photo. Then the color would be permanently burned in, and so would the smiley and the text. Any later change, such as a moved smiley, would require tedious corrections or would no longer be possible at all. This is exactly the problem you avoid with layers.
Step 10: Transferring Layer Logic Between Affinity Programs
If you have already worked with Affinity Photo, you will quickly find your way around Affinity Designer, because both programs follow the same concept. With competing products such as Adobe Photoshop and Adobe Illustrator, this is not necessarily the case, since the operation of the two programs differs fundamentally. Within the Affinity series, you therefore have the advantage that your knowledge can be transferred step by step to other programs.
Summary – Understanding Layers in Affinity Designer
Layers are the foundation for a clean and flexible way of working in Affinity Designer. You place content on separate sheets, change colors via adjustment layers, arrange the stack as you like, and re-edit text at any time. The result is a document that can be easily adjusted even months later. Use the concept consistently, and you will quickly notice how much time you save on later changes.
FAQ
What exactly is a layer in Affinity Designer?A layer is a transparent sheet on which you place content such as photos, shapes, or text, and which you can edit independently of other layers.
What does working non-destructively mean?Non-destructive means that changes such as color corrections are made via separate layers and the original image remains unchanged, so you can undo or adjust them at any time.
How do I change the order of layers?You drag the desired layer up or down in the layer list until it sits at the right position in the stack.
Can I still edit a text layer after creating it?Yes, text layers remain editable. You can change the content, the font, and the position at any time later.
Do I need knowledge of Affinity Photo to work with layers?No, prior knowledge is helpful but not necessary. However, those coming from Affinity Photo will find their way around especially quickly, as both programs use a very similar layer concept.


