
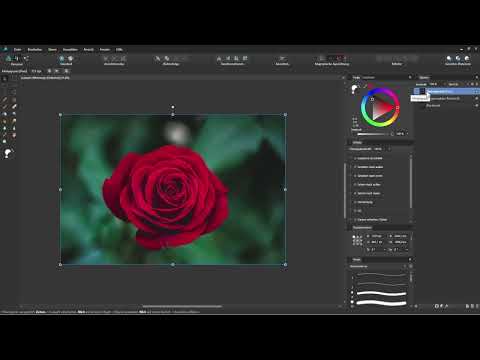
Imagine the rose in your photo is supposed to stand in front of a dark red background, and the green leaves behind it are supposed to disappear. This is exactly what you can achieve with the selection tools of the Pixel Persona in Affinity Designer. They mark areas of a pixel-based layer, which you can then move, copy, or process further as a mask. In this tutorial, you will get to know all the important tools, from the rectangle to the ellipse and the lasso to the selection brush, and learn how to refine your selection afterward.
The video is only loaded from YouTube when you play it – data (including your IP address) is then transmitted to YouTube/Google. More in the privacy policy
Key Takeaways
- Selection tools only work on pixel-based layers and are used in the Pixel Persona.
- The Rectangle, Ellipse, and Lasso tools are suitable for geometric or roughly outlined areas, the Selection Brush for complex contours with strong color contrast.
- With Ctrl+J (macOS: Cmd+J), a selection can be copied to its own layer, while the original is preserved.
- With Ctrl+D (macOS: Cmd+D), you deselect any selection.
- Using the mask icon, you create a non-destructive mask that you can edit further via "Refine Mask".
The Starting Point and Switching to the Pixel Persona
You start in the Draw Persona with a rounded rectangle into which a photo has been inserted as a sublayer or clipping mask. Select the photo and switch to the Pixel Persona at the top. The workspace changes, and an adapted toolbar appears on the left. The panels on the right side remain visible.
The rectangle underneath has a white outline and a dark red fill. Since the photo covers it completely, you can't see the fill at first. Move the photo aside, and it becomes visible. For testing, drag the photo all the way to the top in the layers panel. This way you can better judge the results later.

The Rectangular Marquee Tool
The toolbar contains several selection marquees, including the Rectangle, the Ellipse, and the Freehand or Lasso tool. Start with the Rectangular Marquee tool. Click on a spot in the photo, hold down the mouse button, and drag out a frame. Holding down the Shift key creates a perfect square.
After releasing, you can recognize the selection by the typical dashed marching ants line. This marked area can now be edited specifically.

Copying a Selection to Its Own Layer
To separate the marked area from the background, you need to keep the photo layer active. With the selection active, press Ctrl+J. The section is copied to a new layer. The original photo remains unchanged.
Then hide the original layer to check the result. You will then only see the selected section on its separate layer. On this layer, you can, for example, add an outline via the layer effects. To do so, choose the "Outline" effect and set the radius and color, such as white. How layer effects work in detail is covered in a separate video.
Deselecting Again
To remove the current selection, press Ctrl+D. The marching ants line disappears, and you can start with a new selection. Afterward, show the original photo again, if you had hidden it.
The Elliptical Marquee Tool
For round subjects, you choose the Elliptical Marquee tool. Click and drag to create an elliptical selection. If you also hold down the Shift key, an exact circle is created.
If you move the mouse pointer inside the selection after creating it, a cross-shaped move cursor appears. By clicking and dragging, you can position the selection precisely. Then you copy it to its own layer with Ctrl+J as usual. Afterward, delete this test layer again and restore the original photo.

The Lasso Tool with Anti-Aliasing
The Freehand Selection tool, often called the Lasso in everyday use, allows you to make selections without a fixed shape. Click, hold down the mouse button, and trace the contour of the blossom. At the top in the options bar, anti-aliasing is enabled by default. It smooths the edges of the selection and prevents unsightly jagged effects.
You can also transfer this selection to its own layer with Ctrl+J. Then you delete the test layer, show the original again, and continue with the next tool.
The Selection Brush
The Selection Brush is a particularly helpful tool for complex contours. It automatically follows hard contrasts and edges in the image. First select the photo layer and set a brush width at the top, for example 64 pixels.
The brush size can also be adjusted intuitively. Hold down the Alt key and move the mouse left or right while holding down the left and right mouse buttons. I recommend decreasing the width for fine areas and increasing it for large areas.
Painting a Selection and Excluding Areas
Click and drag the brush over the flower. The selection follows the contours, and a photo with strong color contrast is ideal for this. When you release the mouse button, you will see the selection. Inner areas are often not yet captured. Simply paint over them.
If you have selected too much, hold down the Alt key and paint over the affected area. This removes it from the selection again. Afterwards, as before, you can copy the selection to its own layer with Ctrl+J or, as shown in the next step, use it directly as a mask.
Creating a Mask
Instead of copying the selection, you can create a mask. Make sure that the selection is active and the photo layer is selected. Then click the mask icon at the bottom of the Layers panel. The mask automatically appears as a thumbnail next to the layer.
The advantage: the original image remains fully intact, and you can adjust the cutout at any time. With Ctrl+D you then deselect the selection and see the intermediate result.

Refining the Mask
The edges of the mask often still look jagged or show stair-step effects. Right-click the mask's thumbnail and choose "Refine Mask". In the Preview section you can display a background. A white background is often helpful here because it allows you to judge the edges much more clearly.
The "Smooth" slider softens hard transitions. Move it to the right and watch the result directly in the preview. With the "Extension" slider you pull the edge inward or expand it outward. In the example, I pulled the edge in slightly to make the contour cleaner. Then confirm with "Apply".

Note that Affinity Designer was not originally intended for image editing. For more extensive cutout techniques, it is therefore worth taking a training course on Affinity Photo, which covers such methods in much more detail.
Checking the Result and Changing the Background
Finally, the result is revealed. The flower stands isolated because the mask hides the background. Now select the rounded rectangle and change its fill, for example to white or black. The flower, cut out with the selection tool, appears above it.

Summary – Mastering Affinity Designer Selection Tools: Precisely Isolating Pixel Areas
The selection tools of the Pixel Persona offer you several ways to isolate image areas. Rectangle, Ellipse and Lasso are suitable for simple shapes, while the Selection Brush detects edges automatically. With Ctrl+J you copy selections to their own layers, and with Ctrl+D you deselect them again. The mask gives you the option to refine the cutout at any time without losing the original photo.
FAQ
How do I copy a selection to its own layer?With an active selection and the photo layer selected, press Ctrl+J (macOS: Cmd+J), and the marked area will be copied to a new layer.
How do I deselect a selection?Press Ctrl+D (macOS: Cmd+D), and the dashed marching ants line disappears and the selection is removed.
How do I create a perfect circle with the Ellipse tool?Hold down the Shift key while dragging out the selection, and an exact circle will be created.
What is antialiasing good for with the Lasso tool?It smooths the edges of the selection and prevents stair-step effects, making the cutout area look softer.
How do I decrease or increase the brush tip of the Selection Brush?Hold down the Alt key and move the mouse left or right while holding down the left and right mouse buttons.
How do I remove areas from a selection with the Selection Brush?Hold down the Alt key and paint over the areas that should no longer be selected.
How do I improve the edges of a mask?Right-click the mask's thumbnail, choose "Refine Mask", and use the "Smooth" slider as well as the "Extension" option.


