
Before you draw your first design in Affinity Designer, it's worth taking a look at the settings. There are numerous options waiting there that noticeably make your daily work easier, from automatically reopening your documents to assigning keyboard shortcuts. Marco Kolditz guides you through the most important areas of the settings dialog in this part of the basics series. He shows you which default values you can safely keep and where a deliberate adjustment makes sense. This guide summarizes his tips step by step.
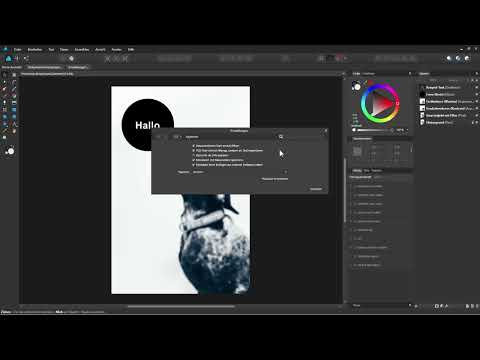
The video is only loaded from YouTube when you play it – data (including your IP address) is then transmitted to YouTube/Google. More in the privacy policy
Key Takeaways
- You can reach the program settings via Edit and Preferences.
- Documents are only opened automatically at startup if you have manually saved them at least once beforehand.
- The option "Import PSD text as text" determines whether text layers from Photoshop files remain editable.
- In the Performance section, you set the RAM, the disk warning, and the number of undo steps.
- With F1 for Undo and F2 for Redo, you work significantly faster than with the default shortcuts.
- With the keys X, D, and Alt+D, you can switch and set fill colors in a flash.
Step-by-Step Guide
Step 1: Check the program version
Before you change settings, you should know which version you are working with. Behavior and options can differ between versions. To do this, open the Help menu and select About. In the video, Marco is working with version 1.6.5.123. A click next to it hides the window again.

Step 2: Open the settings dialog
You can find the settings in the Edit menu under the Preferences entry. The dialog box is divided into several sections, including General, Color, Performance, User Interface, Tools, and Keyboard Shortcuts. You don't yet have to fully understand the function of each section; the basics follow in later lessons.

Step 3: Reopen documents at startup
In the General section, you will find the option "Reopen documents at startup". It is especially handy if you work on a project over several days. When you close the program, all documents that were last open are automatically reopened the next time you start it.
Step 4: Save a document manually
The automatic feature only works reliably if you have saved each document manually at least once. For example, place a circle in the document, choose File and Save As, and store the file on your hard drive. Only then does the restoration take effect at the next startup.

Step 5: Keep a known weak point in mind
At the time of recording, there is a problem: A new, not yet saved document is saved when closing, but is not opened automatically at the next startup. Marco suspects a bug in the current program version. Therefore, save new documents as early as possible via File and Save As.

Step 6: Import PSD text as text
Also in the General section, you will find the option "Import PSD text as text rather than as bitmap". It determines how text layers from Photoshop files are imported. If it is deactivated, the text ends up in the document as a pixel layer and can no longer be edited. If it is activated, the text layer remains editable.

Step 7: Check the result of the text import
Open a PSD file with the option activated and select the text layer with the Text tool. You can now type in new text. However, Marco advises against continuing to work on existing Photoshop documents permanently in Affinity Designer, as not all layers and properties are reliably carried over.

Step 8: Save thumbnails with documents
The option "Save thumbnails with documents" stores a preview version of the document along with it when saving. Preview images are thereby loaded faster. The file only becomes minimally larger, which according to Marco is not significant. Therefore, leave the option activated.

Step 9: Define Color Profiles
Switch to the Color section. For RGB documents, you can leave the profile as sRGB. For print, a CMYK profile such as Euroscale Coated v2 is suitable instead of the default setting US Web Coated. Be sure to coordinate your choice with your print shop. Other profiles such as ISO Coated v2 must first be installed separately. Full color management is an extensive topic and belongs in its own training.

Step 10: Enable Warnings for Color Profiles
If you don't want documents to be automatically converted to a different color space, disable the option for opened files. Instead, enable the warnings for when a document uses a different color space or has no profile. That way, you decide for yourself how to proceed.
Step 11: Set Memory Usage
In the Performance section, you determine how much memory Affinity Designer may use. With 64 GB of installed RAM, Marco has allocated around 55 GB. However, this amount is not occupied immediately at startup. You can usually leave the default values unchanged.
Step 12: Set a Warning for Low Disk Space
If you work with a small drive, you can set a minimum value for free storage space. If you fall below it, you will receive a warning. In the example, Marco chose 2 GB so that the program reminds you in time to clean up the hard drive.
Step 13: Set the Number of Undo Steps
The undo limit determines how many work steps you can reverse in succession. Marco has set 1024 steps. A higher value allows more corrections but puts a strain on the computer. At 1024, performance generally remains unproblematic.
Step 14: Work Non-Destructively
Marco prefers to work non-destructively. This way, changes to a document can still be easily adjusted or removed later. You can leave the remaining options in the Performance section as they are.
Step 15: Display the Interface in Dark Mode
In the Interface section, you determine the appearance of the program. Marco likes to work in dark mode because it puts less strain on the eyes and keeps the focus on the document. Alternatively, a light style is available. The choice is purely a matter of taste.
Step 16: Adjust Background and Artboard Gray Level
Using the gray level, you can make the background of the program interface lighter or darker. The background of artboards, a special document type, can also be set separately. Marco covers the artboards themselves in a separate video.
Step 17: Define Decimal Places for Units
Here you define how many decimal places are displayed for pixel, inch, or millimeter values. With the Reset button, you can restore the original values at any time.
Step 18: Specify Lines and Text Sizes in Points
By default, line widths and text sizes are specified in points regardless of the document unit. If you disable these options, they follow the units of measurement of your document. Marco leaves them enabled so that the values remain consistent.
Step 19: Enable Crosshair for the Brush
With the option "Always show crosshair for brush displays" enabled, you see the brush circle with a crosshair in its center when painting with the brush or vector brush. This makes precise placement easier. Marco leaves this setting enabled by default.

Step 20: Display Tool Icons in Monochrome
The icons in the toolbar and in the top bar can be displayed in color or monochrome. Marco turns the option on for his work with Affinity Photo, but in the video training it stays colorful. Decide for yourself which you like better.
Step 21: Understand Object Selection in the Move Tool
With the Move tool, you select individual objects by clicking them or dragging a selection frame. With the option "Select object if it intersects the selection frame," merely touching the object is enough. This option is disabled by default. Which behavior you prefer is up to you.

Step 22: Use the Mouse Wheel for Zooming
With the option enabled, you zoom into and out of the image with the mouse wheel. Without it, you only scroll up and down. Marco recommends enabling it because it makes working significantly more comfortable.
Step 23: Zoom Tool and Zooming by Dragging
The "Drag to zoom" option affects the Zoom Tool. Hold down the left mouse button and drag to the right or left to zoom. If you disable the option, you can instead enlarge an area with a selection frame. Marco leaves it enabled.

Step 24: Assign Undo and Redo to F1 and F2
By default, you undo steps with Ctrl and Z and redo them with Ctrl and Y. Marco finds this cumbersome. In the Edit menu, you can assign the F1 key to the Undo command. The warning sign in the list only means that F1 is currently assigned to Help. For the Redo command, you enter F2 accordingly.

Step 25: Swap Fill and Stroke with the X Key
In the Miscellaneous section, you can see the current fill and stroke color. With the X key, you quickly swap the two colors with each other. This makes it easy to test color combinations.
Step 26: Set Black and White with the D Key
With the D key, you reset fill and stroke to black and white. This is handy when you want to quickly return to a neutral starting point after colorful experiments.

Step 27: Select Neutral Gray with Alt and D
If you need a neutral gray, that is, exactly the tonal value between white and black, press the Alt and D keys with an object selected. The object then receives a fill of 50% gray.
Step 28: Save Key Assignments
Once you have customized all the shortcuts, you can back up the assignment as a file via Save. Later it can be loaded again, for example after a reinstallation or on another computer. Marco recommends working with the default shortcuts first and only making adjustments once you have more experience.
Step 29: Reset Default Settings
If you want to return to the factory settings, you will find in the Miscellaneous section the option to reset settings for fills, brushes, object styles, text styles, or general user defaults.
Summary ??? Affinity Designer: The Most Important Presets for Getting Started
With these settings, you set up Affinity Designer so that you can work comfortably from the start. Pay particular attention to manually saving your documents, the text import option for Photoshop files, and the F1 and F2 shortcuts for Undo and Redo. Adjust the interface, color profiles, and performance values to your computer and your way of working. Take your time with the settings, because every option you set correctly once saves you many small steps later.
FAQ
Do I have to save documents before closing them so that they open on restart?Yes, every document should be saved manually at least once via File and Save As. Only then does automatic recovery work reliably.
Why isn't my new document opened on restart even though I saved it?According to Marco Kolditz, this is a problem with the current program version. Therefore, save new documents manually as early as possible.
What does the option Import PSD text as text do?With this option, text layers from Photoshop files remain editable. If it is disabled, the texts are imported as pixel layers and can no longer be changed.
Which color profile should I choose for printing?A CMYK profile such as Euroscale Coated v2 is suitable for printing. However, you should always agree on the right choice with your print shop.
How do I change Undo to the F1 key?Open Edit and Settings, switch to the Keyboard Shortcuts section, select the Undo command, and press F1. You can ignore the warning sign if you don't use the Help key.


