
Before you begin the first design, you lay the foundation in Affinity Vector: the document. Format, resolution, color profile, and artboards will affect every single element later on. If you are sloppy here, you often have to start over completely with a print job or a social media post. In this tutorial, I show you step by step which settings make sense for a digital project like a mini brand kit for a modern coffee shop and why.
The video is only loaded from YouTube when you play it – data (including your IP address) is then transmitted to YouTube/Google. More in the privacy policy
Key Takeaways
You create a new document via File and New, on Windows with Ctrl+N. For digital projects such as social media and web, you choose the Web category, a suitable format, and 72 DPI. The sRGB color profile is right for screens; you only need CMYK for professional printing. With artboards enabled, you can manage multiple design surfaces in one document.
Step-by-Step Guide
Step 1: Open the New Document
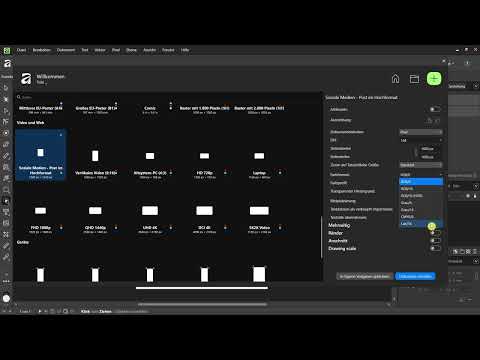
In the File menu, open the New command. On Windows, you can also do this faster with the keyboard shortcut Ctrl+N. A dialog box opens in which you set all the basic settings. If your window looks different and you only see a start screen, you are probably in the Home menu. In that case, click the Show more tab on the right so that the dialog box appears.

Step 2: Understand the Templates in the Dialog
On the left side of the dialog, you will find various categories such as Print, Web, Devices, Photo, Video, or Canvases. Each category comes with its own presets for page sizes and color profiles. Don't let the selection overwhelm you. For your project, you only need the categories that fit your output target.

Step 3: Choose the Right Web Template
Since a coffee shop brand kit is created primarily for social media and websites, you select the Web category. There you will find templates, for example for posts or screen formats. Choose a template as a starting point, because that way sensible basic settings are already in place.

Step 4: Set Width and Height
Perhaps you won't find exactly the format you need in the templates. That's not a problem. Simply choose a similar template and adjust the width and height manually on the right side of the dialog. For a square format, you set both values to 1080 pixels. You can ignore the orientation at the top for a square, since portrait and landscape are the same there. For rectangles, however, you should choose it deliberately.
Step 5: Set the Resolution in DPI Correctly
The DPI value determines the resolution of your document. The higher it is, the finer the display, but the file's storage requirements also increase. As a rule of thumb: 72 DPI for screens and 300 DPI for print. For your coffee shop design, 72 DPI is perfectly sufficient. The value 144 DPI, which Affinity sometimes presets, is also usable. The only important thing is that you don't go below 72. The unit remains pixels for this project.

Step 6: Choose the RGB Color Profile with sRGB
The color profile is one of the most common sources of error. In the dropdown menu under Format and Profile, for everything that is output digitally, you choose RGB with the sRGB profile. This applies to social media posts, websites, and all screen displays. Screens work with red, green, and blue as light colors, and sRGB is the standard for that. For today's project, you therefore stay with RGB.
Step 7: Understand the Difference from CMYK
CMYK is the color model for professional printing, with cyan, magenta, yellow, and black as printing inks. If you are designing a business card, a flyer, or a brochure for a print shop, you must choose CMYK. The reason is simple: a print shop cannot reproduce RGB colors exactly. A certain green that glows on the screen may not exist in the CMYK color space at that intensity. Affinity does convert the colors automatically, but the hue can deviate noticeably in the process. Therefore: always choose the color profile to match the output target before you get started.

Step 8: Activate Artboards
Artboards are independent design surfaces within a document. With them, you can, for example, design different social media formats side by side without creating a new file for each format. This is ideal for the Brand Kit, because over the course of the course you will manage the logo, color palette, font samples, and posts in one file. Activate the Artboards option at the top of the dialog.
Step 9: Create the Document and Save It as a Preset
Then click on Create Document. Affinity opens your new document, and the first artboard named Artboard 1 already appears at the top. If you frequently create projects with identical settings, you can save the configuration as a preset. Other options such as margins, bleed, or scaling are not necessary for this project, but you can set them up later if needed.

With that, your workspace is prepared. The next lesson is about the Personas in Affinity, which allow you to work efficiently.
Summary – Your First Document in Affinity Vector: Setting Up Format, DPI, Color Profile, and Artboards Correctly
A properly set up document saves you a lot of time later. For digital projects, set up the Web category with 72 DPI and the RGB sRGB color profile. For print, on the other hand, you choose CMYK and a resolution of at least 300 DPI. With Artboards activated, you keep all design surfaces in one file. These basics are the foundation for all further lessons in the Brand Kit course.
FAQ
Why shouldn't I use CMYK for social media?CMYK is intended for print. Screens display colors in the RGB model, so colors in CMYK often look paler or different on the monitor.
Is 72 DPI really enough for a digital project?Yes, for screens and the web, 72 DPI is sufficient as a rule of thumb. Higher values such as 144 DPI are also unproblematic, but they increase the file size.
Can I change the format afterwards?Yes, you can adjust the width and height later as well. For larger changes, however, you should check whether elements are scaled correctly.
What is the advantage of artboards over multiple files?Artboards bundle several design surfaces in one document. This way you keep track of the relationships between formats and don't have to constantly switch between files.
How do I find the document menu if I only see the start screen?Click on the Show more tab on the right. After that, the complete dialog box for creating a new document appears.


