
Imagine you are building an icon from several basic shapes and spend half your time jumping back and forth between Divide, Subtract, and Overlap. That is exactly what the Shape Builder is for. With it, you combine shapes directly on the object, without having to select a new Boolean tool each time. In this tutorial, you will learn how to call it up, how to work with the Plus and Minus modes, and how to apply all of this to an example: a cup with a handle.
The video is only loaded from YouTube when you play it – data (including your IP address) is then transmitted to YouTube/Google. More in the privacy policy
Key Takeaways
- With the shortcut S, you call up the Shape Builder as soon as several objects are selected.
- In Minus mode, you remove sections; in Plus mode, you join shapes into one connected object.
- The preview shows you in advance which lines are marked in red and will therefore be removed.
- The Shape Builder replaces many steps that you would otherwise carry out with Divide, Subtract, or Overlap.
- Be careful not to accidentally lose lines that still belong to another part.
Step-by-Step Guide
Step 1: Finding the Shape Builder
The Shape Builder corresponds to the Shape Builder in Illustrator. You will find it in the toolbar, and the quickest way to access it is via the shortcut S. You can recognize the tool by an icon with dashed lines in which a circle and a square overlap. The S key is therefore your most important companion when you want to work with this tool.

Step 2: Preparing Overlapping Basic Shapes
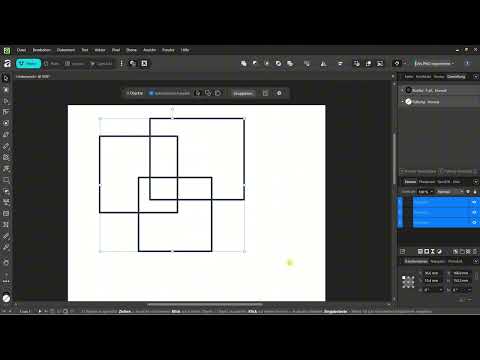
First, create a rectangle. For the exercise, a five-point outline with no fill is well suited, because the intersecting edges stay clearly visible. Then place a second rectangle over it so that the two overlap. A third rectangle creates further intersection points and makes the example clearer. Arrange the shapes so that all the overlaps are easy to see.

Step 3: Selecting Objects and Activating the Tool
Select all the objects you want to edit. You can use the Selection tool or the Move tool for this. Then press the S key, and the Shape Builder is activated. The advantage of this approach: you don't have to choose an action from the menu, but work directly on the shapes.

Step 4: Setting the Mode and Selection Method
In the tool options, you will find two actions. With the Plus icon, you combine parts; with the Minus icon, you remove them. In addition, various selection methods are available. To get started, I recommend freehand selection. It is the easiest to use and gives you the greatest freedom, because you can mark each area exactly the way you need.

Step 5: Removing Parts with Minus Mode
First, move the mouse over the shapes without clicking. You will then see that individual lines are marked in red. If the mouse pointer is in the middle of a rectangle, all the lines of that rectangle are highlighted. If you hold the mouse on a single line instead, only that line is shown in red. This is your preview: it shows you exactly what will disappear when you click.
If you click on the red-marked line, it is removed. When working in Minus mode, pay attention to which lines are still closed. If a shape is open at one point because a connection is missing, a line you no longer need may remain after removal. To solve such cases, it helps to first look at the object more closely and check the preview carefully.


Step 6: Combining Parts with Plus Mode
Now switch from Minus to Plus via the tool options. The red lines disappear, and hatched areas appear instead. These hatchings show you the parts that can be joined. Don't simply click on a single area, because nothing will happen at first. Hold down the left mouse button and drag across all the areas you want to combine. When you release the mouse button, the marked parts become one connected object.
This way, you can merge about three objects into one shape in just a few seconds. Afterwards, in Minus mode, you can remove the outer curves and get an angular, clean shape that is well suited for an icon.

Step 7: Practical example: cup
A good example is the cup from the last tutorial. There, you start with an oval as the basic shape, place a rectangle over it, and add an ellipse for the opening. Previously, you would have done each of these steps via Divide or Subtract. With the Shape Builder, you select the objects, press S, and choose Minus mode. Then you click on the middle line that is to be removed. The opening of the cup is created right away, without having to switch between different tools.

Step 8: Attaching and connecting the handle
For the handle, you add an ellipse and a small rectangle. Select the appropriate parts, press S, and make sure the mode is set to Minus so that you can remove superfluous lines at the connection point. Then you move the object to the right position, rotate it if necessary, and select the lower part of the cup together with the handle. Now switch to Plus and drag across both areas. The shapes merge into one object.
Proceed carefully in this step. If you remove a line after connecting, shared edges may also be lost. Therefore, check the result after each step before continuing.

Summary – Shape Builder in Affinity Vector: Combine shapes faster
The Shape Builder is a tool that saves you a lot of time whenever you want to join several shapes into one object or remove parts from them. With the shortcut S, you start directly from the selection, with Plus and Minus mode you determine the result, and with the preview you keep an overview at all times. For icons and logos, this is an enormous relief. It is best to practice with simple rectangles and ellipses before tackling more complex motifs. This way, you quickly develop a feeling for which lines belong together and where you need to be especially careful when removing.
FAQ
How do I activate the Shape Builder quickly?You select the objects and press the S key, and the tool opens directly.
What is the difference between Plus and Minus?In Minus mode, you remove marked lines and sub-areas; in Plus mode, you connect several parts into one coherent object.
Why do I see no change in Plus mode when I just click?You have to drag with the mouse button held down across all areas you want to combine, and they are only connected when you release.
What is the red marking for?It shows you in the preview which line or area will be removed when you click, so that you can avoid mistakes.
Which selection method should I use?For getting started, freehand selection is suitable, because it gives you the greatest control over the marked areas.
Can I also remove entire objects with the Shape Builder?Yes, if you move the mouse over the center of a rectangle, all lines of this shape are marked and you can remove them together.
What happens if I accidentally remove a shared line?Then an edge that belonged to another part may disappear. Check the result after each step and use the undo command if necessary.
Is the tool also suitable for icons?Yes, you can build your own shapes such as factories, cups, or handles and design icons with just a few clicks.


