Imagine a brochure with twenty headings that are all supposed to change from blue to brown. If you click on each individual heading and change the font, color and size by hand, you spend a lot of time on routine work, and in the end maybe not every spot is right anyway. This is exactly what text styles in Affinity Layout are for. With them, you define once how a heading looks and apply this template wherever you need it.
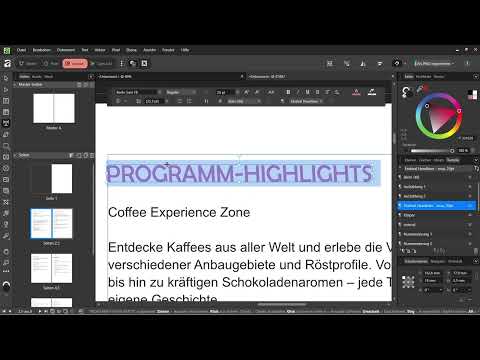
The video is only loaded from YouTube when you play it – data (including your IP address) is then transmitted to YouTube/Google. More in the privacy policy
In this tutorial, you will learn how to create paragraph styles and character styles, apply them to texts and edit them later. You will also learn how to update all affected text passages at the same time with a single change. The tutorial follows the video tutorial and the workflow you can also use in your own projects.
Key Takeaways
- Text styles ensure that your layout stays typographically consistent. If you change a style, all places where it has been applied are updated.
- A paragraph style always applies to an entire paragraph, for example a heading or body text.
- A character style affects only selected characters or individual words within a paragraph and overrides the paragraph style there.
- Create styles early, before you develop a project further. Typically, you need styles for headings, body text, subheadings and footnotes.
Step-by-Step Guide
Step 1: Open the Text Styles Panel
Before you create styles, you need the right panel. You can find it via the Text menu, then Text Styles. The panel appears to the right of the layers, where you can call it up again at any time. There you can see the existing paragraph and character styles and create new ones.

Step 2: Design a Heading as a Template
A paragraph style adopts the formatting of an entire paragraph. You therefore first design a heading the way it should look later: large type, bold, in your desired color. For short texts such as headings, artistic text is suitable, whereas for longer body text you use a frame text. You do not have to make the template perfect at first, because you can adjust the style at any time later.
Step 3: Define the Properties of the Template
Now select the entire text of your heading. In the Text Styles panel, Affinity then shows that the current style is still set to Normal. This is the starting point. Now set the desired values: for example 20 pt as the font size, the font Berlin Sans Serif and a strong color. In the video, a pink is chosen so that the difference can be clearly seen later. In practice, you will of course choose the color of your corporate design.
Step 4: Adjust Fine Details in the Character Panel
Next to the Text Styles panel is the Character panel. There you can control details that are awkward to reach in the upper area of the interface. For example, you can specify that the text always appears in capital letters or that it receives a slant. You can also adjust spacing at line breaks. In the video, a slight negative slant is applied to give the heading a dynamic effect. These settings are later saved as part of the style.

Step 5: Create a New Paragraph Style
Now you turn your template into a reusable style. To do this, click the plus icon for paragraph styles at the bottom left of the Text Styles panel. The icon is marked with a P for paragraph. Then assign a meaningful name, for example Festival Headlines. It is also worthwhile to note the size directly in the name, for instance with "20 pt". That way you immediately know later what is behind the style. As the basis, you choose Normal. This fits in most cases because you are not inheriting from an already modified style. Confirm with OK.
Step 6: Apply the Style to Other Headings
The new style now appears in the panel. To apply it to another heading, you select that heading and click the style once in the panel. A double-click is not necessary here, and the style is applied immediately. In this way, the second heading also gets the same font size, typeface and color as the first.
Step 7: Check the Result and Assign Styles Selectively
After applying it, you should check the result. This shows that all properties have been adopted: the slant, the color, the size and the capitalization. Now apply the style to other headings as well, for example an exhibitor heading. You do not have to switch to the panel every time. Alternatively, you can also select the style in the dropdown at the top of the toolbar. This way you recolor many headings with just two clicks.

Step 8: Editing an Existing Style
The great advantage of styles becomes apparent when you want to change something later. You don't have to open each heading individually. Right-click the style in the panel and choose Edit. In the dialog window, you can then adjust the desired values. This approach is much more efficient than editing each item individually.

Step 9: Applying Changes to All Affected Places
Suppose you initially set the font size to 20 points and now want to use 30 points. In addition, the color should no longer be pink, but yellow. Adjust the values in the dialog and confirm with OK. Affinity automatically applies the change to all text passages that use this style. You can see this both in the exhibitor heading and in the headings at the top of the layout. This is exactly where the strength of the system lies: a single change takes effect throughout the entire document.

Step 10: Planning a Typography System in Advance
The real benefit arises when you don't create the styles afterwards, but already before designing. Therefore, create styles for headings, body text, subheadings, footnotes, and other text elements early on. As with master pages, the same applies: the preparatory work saves a lot of time later, because you can edit large amounts of text quickly and consistently.

Step 11: Creating a Character Style for Individual Words
While a paragraph style always covers the entire paragraph, a character style affects only selected characters or words. In the Text Styles panel, you will find the character style next to the paragraph style. The icon bears a plus and an A. Use it to create a new style, for example with the name Text Style Example, and define a color. In this way, you can specifically highlight individual terms without adjusting the entire paragraph.
Step 12: Applying the Character Style to Individual Words
Select the desired word in your body text and apply the character style. The text then changes color, while the rest of the paragraph remains with the paragraph style. If you subsequently change the paragraph style, the selected word keeps its color. This is because this word already has its own character style, which takes precedence.

Step 13: Understanding the Interplay of Paragraph and Character Styles
This mechanism is the most important point when working with text styles. The paragraph style defines the basic formatting, and the character style overrides it selectively. If you no longer need a character style, you can remove it again. To do so, select the word and reset the formatting, or delete the character style in the panel. Both bring the word back to the state of the surrounding paragraph.

Summary – Paragraph and Character Styles in Affinity Layout: Building a Consistent Typography System
Text styles are the foundation for a consistent and flexible layout. You define once how headings, body text, and highlights should look, and apply these templates wherever they are needed. Paragraph styles control entire paragraphs, character styles individual words or characters. When you change a style, all affected places update automatically. It is therefore best to create your styles right at the start of a project, so you save yourself time-consuming corrections later.
FAQ
What is the difference between a paragraph style and a character style?A paragraph style formats an entire paragraph, such as a heading or body text, while a character style changes only selected characters or individual words within a paragraph.
How do I apply a text style to a heading?Select the heading and click once on the desired style in the Text Styles panel. A double-click is not required.
How do I change an existing style for all text passages at the same time?Right-click the style in the panel, choose Edit, adjust the values, and confirm with OK. The change is automatically applied to all places that use this style.
Why does a word with a character style keep its color when I change the paragraph style?The character style overrides the formatting of the paragraph style at that spot. That is why the word remains unchanged, even if the paragraph style changes.
Where do I find the Text Styles panel?You open it via the Text menu and the Text Styles entry. It appears to the right of the layers.
What happens if I change the base for the new style?You usually choose Normal as the base. This way, the new style does not inherit unwanted properties from an already modified style.


